Topic: Designing and testing the GW-OSI-RAM1
Date: 2017 MAY 03
Quick Links
- Tindie Store Listing for bare boards, kits, assembled, etc.
- Mouser Project Page for those wishing to buy their own parts
- osiweb.org Forum Build Thread
- 32K Prototype Build
- 32K -> 64K Prototype Expansion
- 560Z Build, including 12-bit RAM
Introduction
Reliable, dense, low-power RAM is often a problem with Ohio Scientific systems: many original OSI RAM boards are fairly low density and/or power hungry. More modern boards using 6116 static RAMs do exist, but are uncommon and very desirable, since they eliminate many issues with older OSI RAM boards. Indeed, the main motivation behind cloning the OSI 495 protoboard was to have a protoboard on which to build a better RAM board!
The situation is worse with the 560Z Processor Lab, as it requires 12-bit RAM for PDP-8 operation. The only OSI board that provides 12-bit RAM is the OSI 420, an early board using 2102 static RAMs. 2102s are both power hungry and hard to find, and the 420 board is limisted to 4K. With two prototype RAM boards built, I wanted to lay out a proper PC board to make building RAM boards less time consuming for both myself and other OSI hackers. Building on the 32K prototype (later expanded to 64K) and the 12-bit prototype built specifically for the 560Z Processor Lab project, I came up with a set of goals and features for a universal OSI RAM board.
Design Goals and Features
In my mind, a universal RAM board needed the following:
- Fully static operation
- No expensive/hard-to-get components (8T26 buffers, et c.)
- 8- and 12-bit support
- Support for inverted and non-inverted data bus
- Optional bank switching
- Possible ROM support
- Ability to be mapped around existing RAM, ROM, and I/O
The original RAM prototype met many of these goals, using 62256 32K x 8 SRAMs which could be enabled in 4K increments on any 4K boundary in address space. The prototype built for the 560Z project went further, replacing 8T26 buffers with common 74LS240 buffers, and adding a lamp register for diagnostic pruposes. Bank switching/memory management support was still missing, but the prototype circuits had been designed in such a way to allow easy memory management with little modification.
Layout and Testing
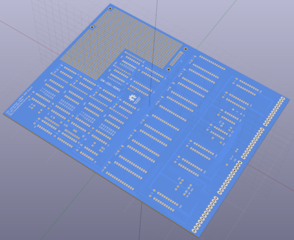
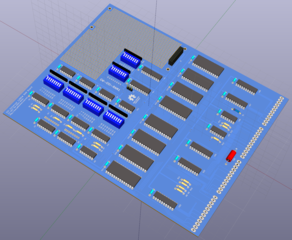
The board was laid out in KiCad, a completely free and open source CAD package. KiCad has a 3D rendering mode, so before production boards were actually ordered, it was possible to get an idea as to what the prototype would look like:
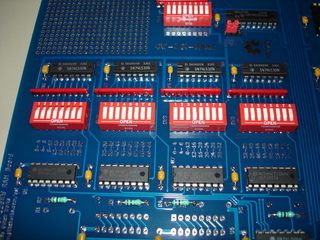
I was at first dismissive of KiCad’s 3D rendering features, but it was actually very helpful in final design checks and getting a feel for how the layout was progressing. Plus, it was something to show other hobbyists! The GW-OSI-RAM1 was laid out to be run with a board house that has very good pricing on large boards, but uses an awful inkjet/v-jet silkscreen process. As such, all text and symbols were done as copper/solder mask relief. Here’s a shot of the segment select switch legends:
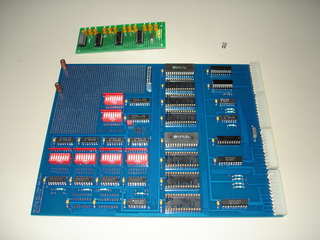
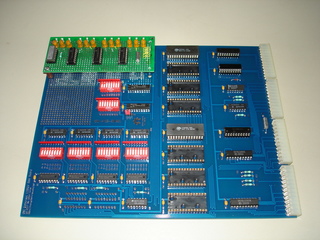
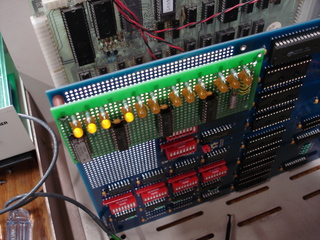
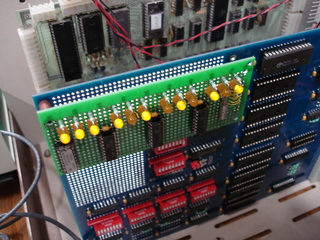
The 560Z specific RAM prototype included a lamp register for debug purposes. This was omitted from the main GW-OSI-RAM1 board in favor for a large prototype area and mezzanine connector. Breaking the lamp register out as a mezzanine board allows for octal or hex grouping of the LEDs with only one (large and expensive!) base board. Having the lamp register on a separate board also allows it to be mounted remotely with a ribbon cable, such as on a front panel. The mezzanine connector and standoffs were placed on 0.1” centers to allow mezzanine boards to be built from standard perfboard. Address decode is provided on the GW-OSI-RAM1. If a lamp register is not desired, the prototype area can be used with the mezzanine connector without the need to bring up the data bus from elsewhere on the board. Here’s the prototype run board with and without a perfboard mezzanine installed:
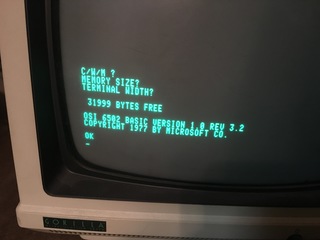
Initial debugging was done with my OSI Challenger 3. Unfortunately, I was set to leave on a business trip the day that the prototype boards arrived. As luck would have it, I was visiting a friend who had a Challenger 2P up and running. We installed the GW-OSI-RAM1 in his 2P with a single 32K SRAM installed, with all but the first 4K segment enabled (the 2P has 4K on the CPU board). As seen in the screenshot below, this raised the RAM available to the user in BASIC to nearly a full 32K. Success!
Prototyping a Mezzanine Board
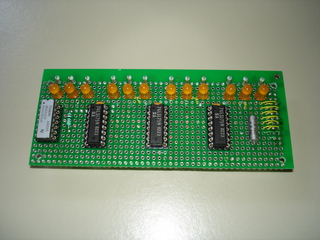
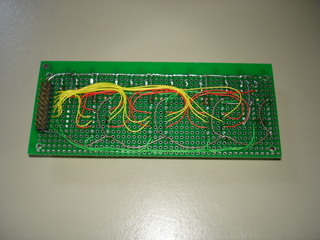
With the basic RAM board proved out, I needed to build a mezzanine to test the address decode functionality. Since the connector and mounting holes are on 0.1” centers, it’s possible to cut down a piece of protoboard and build a mezzanine board. My first prototype is just a lamp register with the LEDs in octal grouping:
Wire colors follow the same general code as other builds:
- Yellow is data bus
- Green is control signalling
- Red is latch output to lamps
- Gray is ground
The mezzanine board was first tested on the main OSI bus in my Challenger 3, under control of the 6502. The following images show 0x00 and 0x55 loaded into the lamp register. The high four bits are floating on the OSI bus and display random values.
Testing with the 560Z and IM6100
A 12-bit RAM board isn’t very useful if not tested to work with 12-bit systems, so it was time to test with my reproduction 560Z board. I loaded values into the lamp register from the OSI 560Z driver, which is discussed in the 560Z writeup. This worked fine:
The next test was to actually run some PDP-8 code in the RAM present on the GW-OSI-RAM1. I used the short program I’d written earlier that does an up-count and displays it on the lamp register. At full speed, activity is only visible on the higest bits of the lamp register. Issuing a R0100 command in the OSI driver slow-clocks the IM6100, producing a slow, visible up-count. Here’s a quick video of the up-count using the GW-OSI-RAM1 for both lamp register and 12-bit RAM:
If you’re interested in purchasing a GW-OSI-RAM1 Universal RAM board, parts kit, or assembled/tested unit, they are now available on our Tindie store. The GW-OSI-RAM1 can be ordered as a bare board, board with parts kit, or fully assembled and tested.
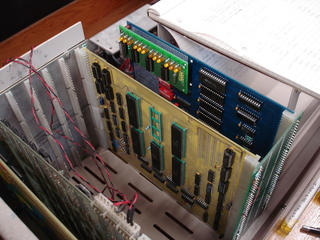
RAM boards replaced
