Topic: Getting the Intel SDK-80 running
Date: 2019 MAR 03
This project has been on my shelf for a while: it’s an Intel MCS-80 System Design Kit, or SDK-80. This is Intel’s official rapid prototyping SBC for the MCS-80 family, which is centered around the Intel 8080. The simple ROM monitor, expandable system RAM, and onboard user prototype area seems to have made it a popular choice in the educational sector, too. It is the predecessor to Intel’s very popular SDK-85 for the Intel 8085. This particular SDK-80 had been modified extensively by its previous owner, to include not only hardware changes but alteration and expansion of the ROM monitor. Unfortunately, on initial checkout it did not work, and got shelved for repair at a later date.
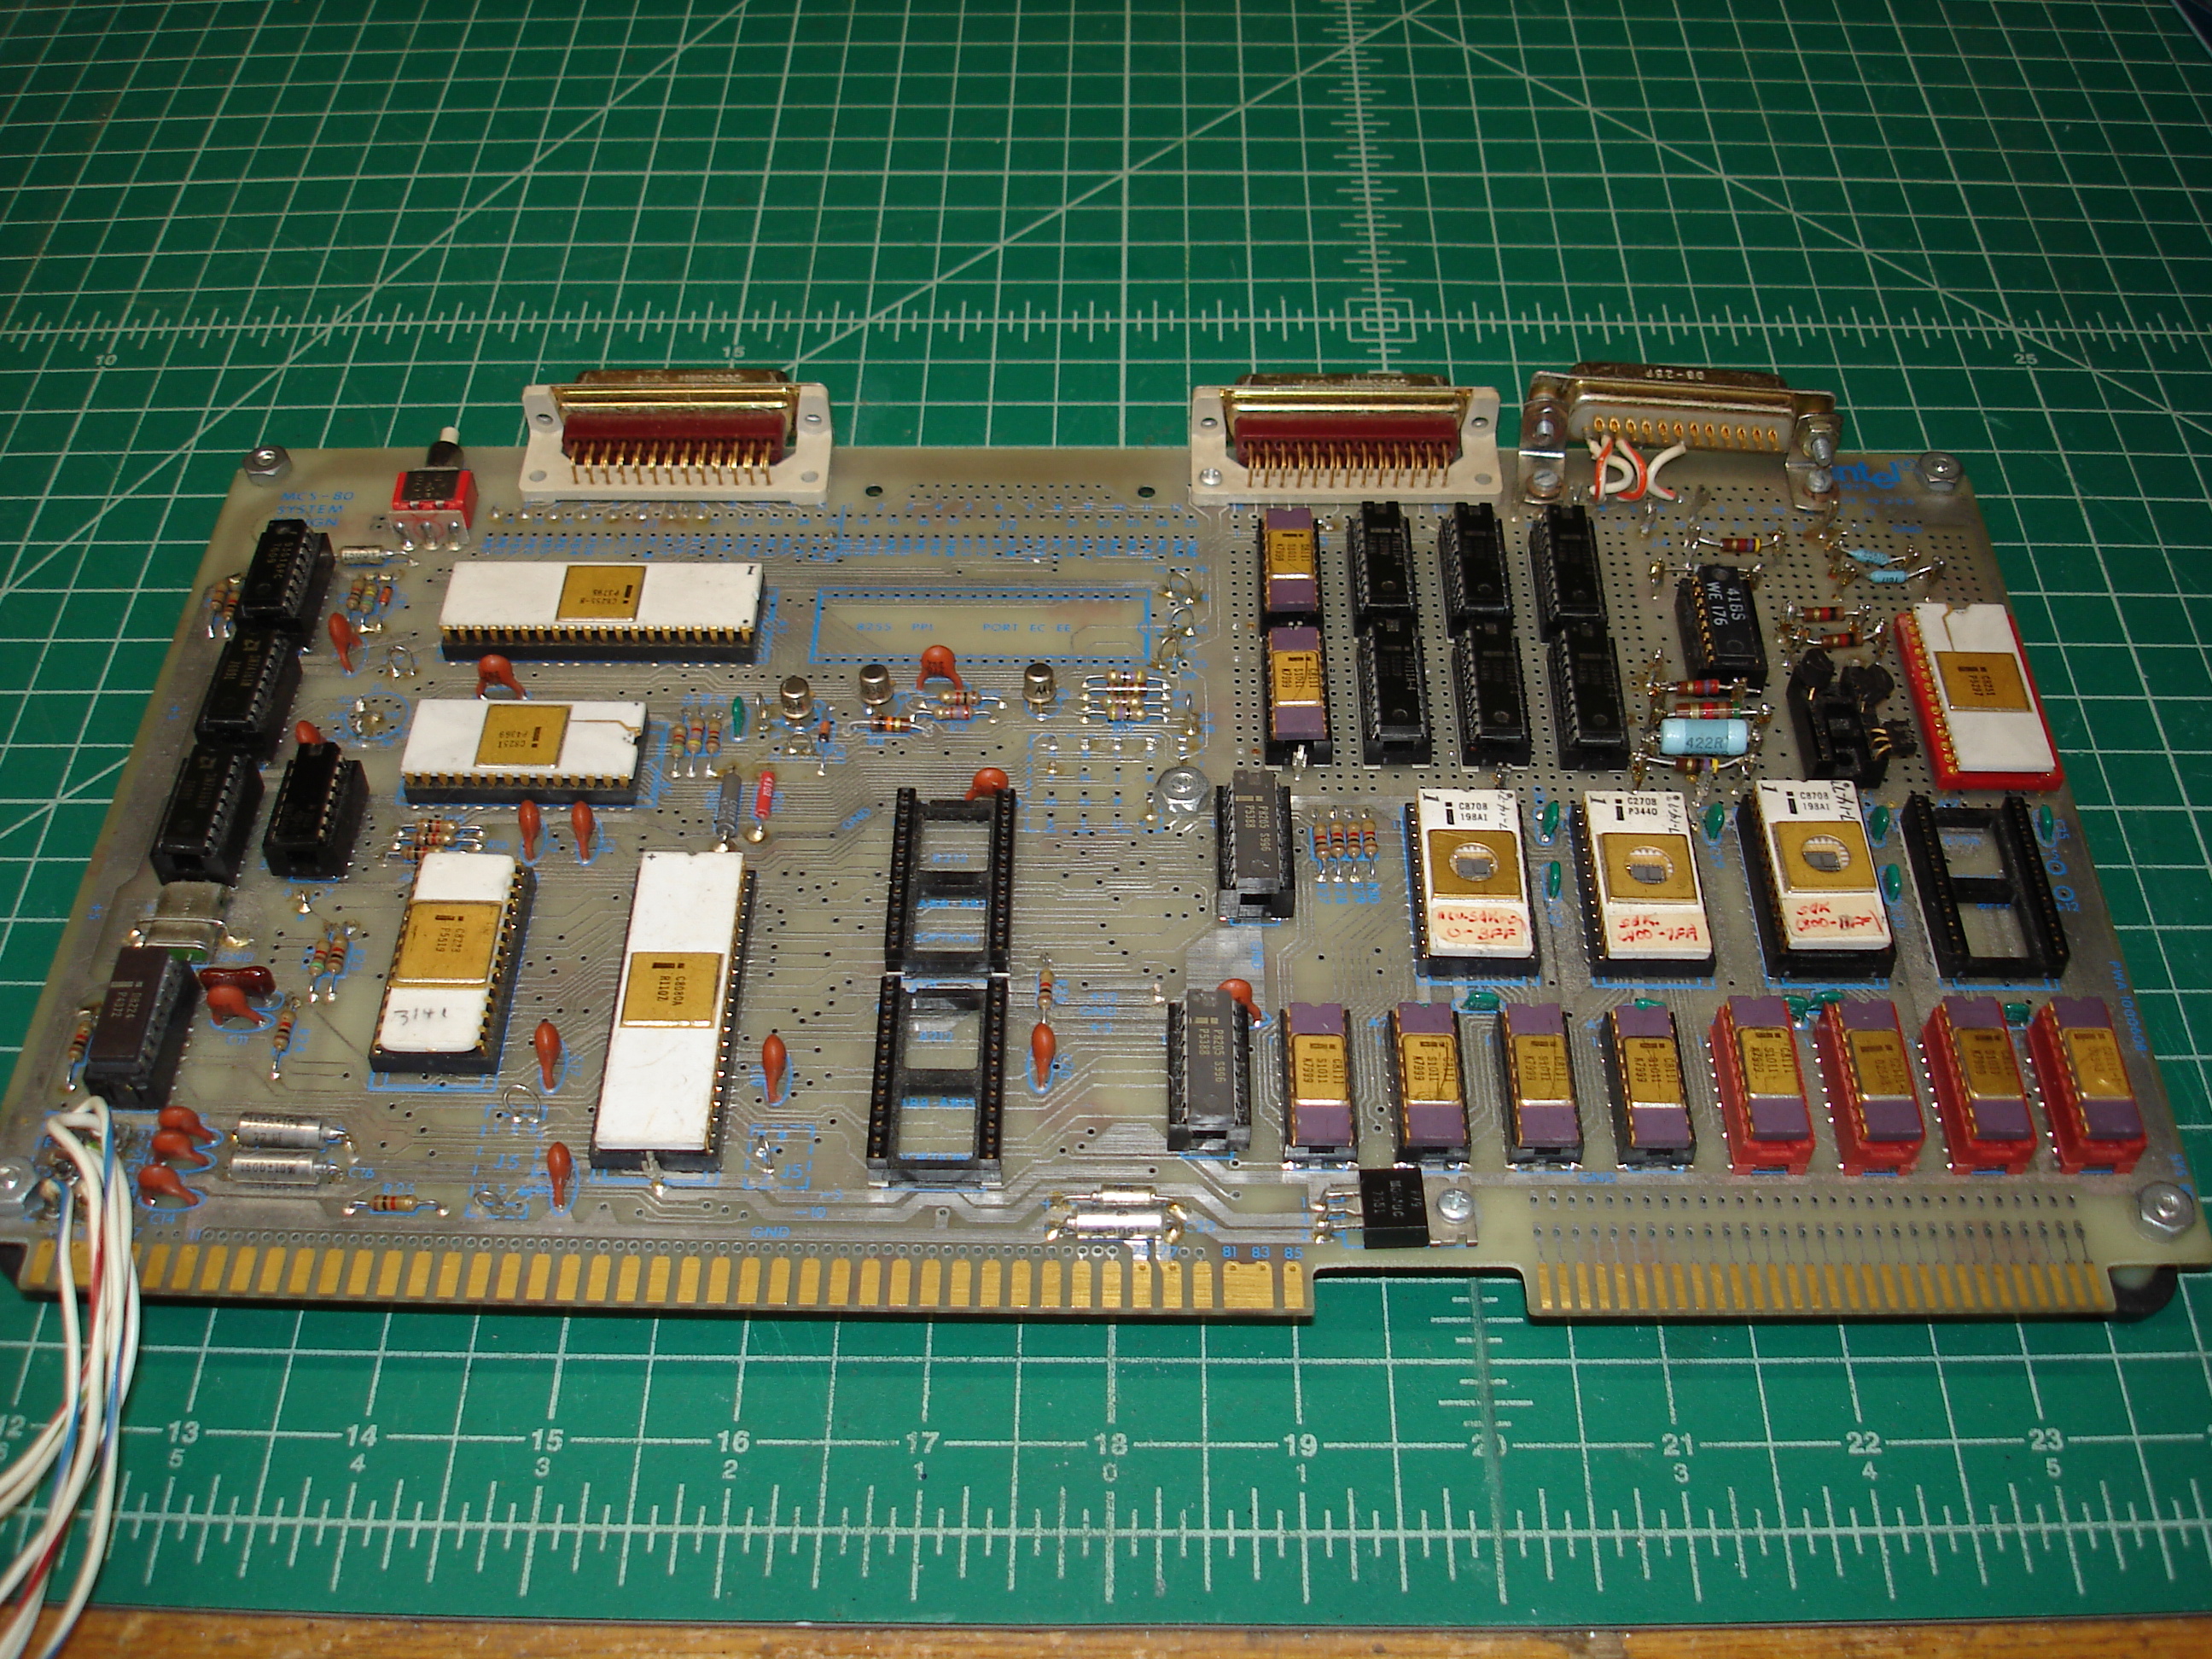
The above picture shows the SDK-80 as I received it. This included:
- Base MCS-80 circuitry, minus the 8212 address buffers
- Full 1K of RAM in system RAM area
- 3K of ROM in 2708 EPROMs
The prototype area contained:
- Additional 1K of RAM in Intel 2111/8111 SRAMs
- Additional Intel 8251 USART
- Discrete RS-232 level shifting for second USART
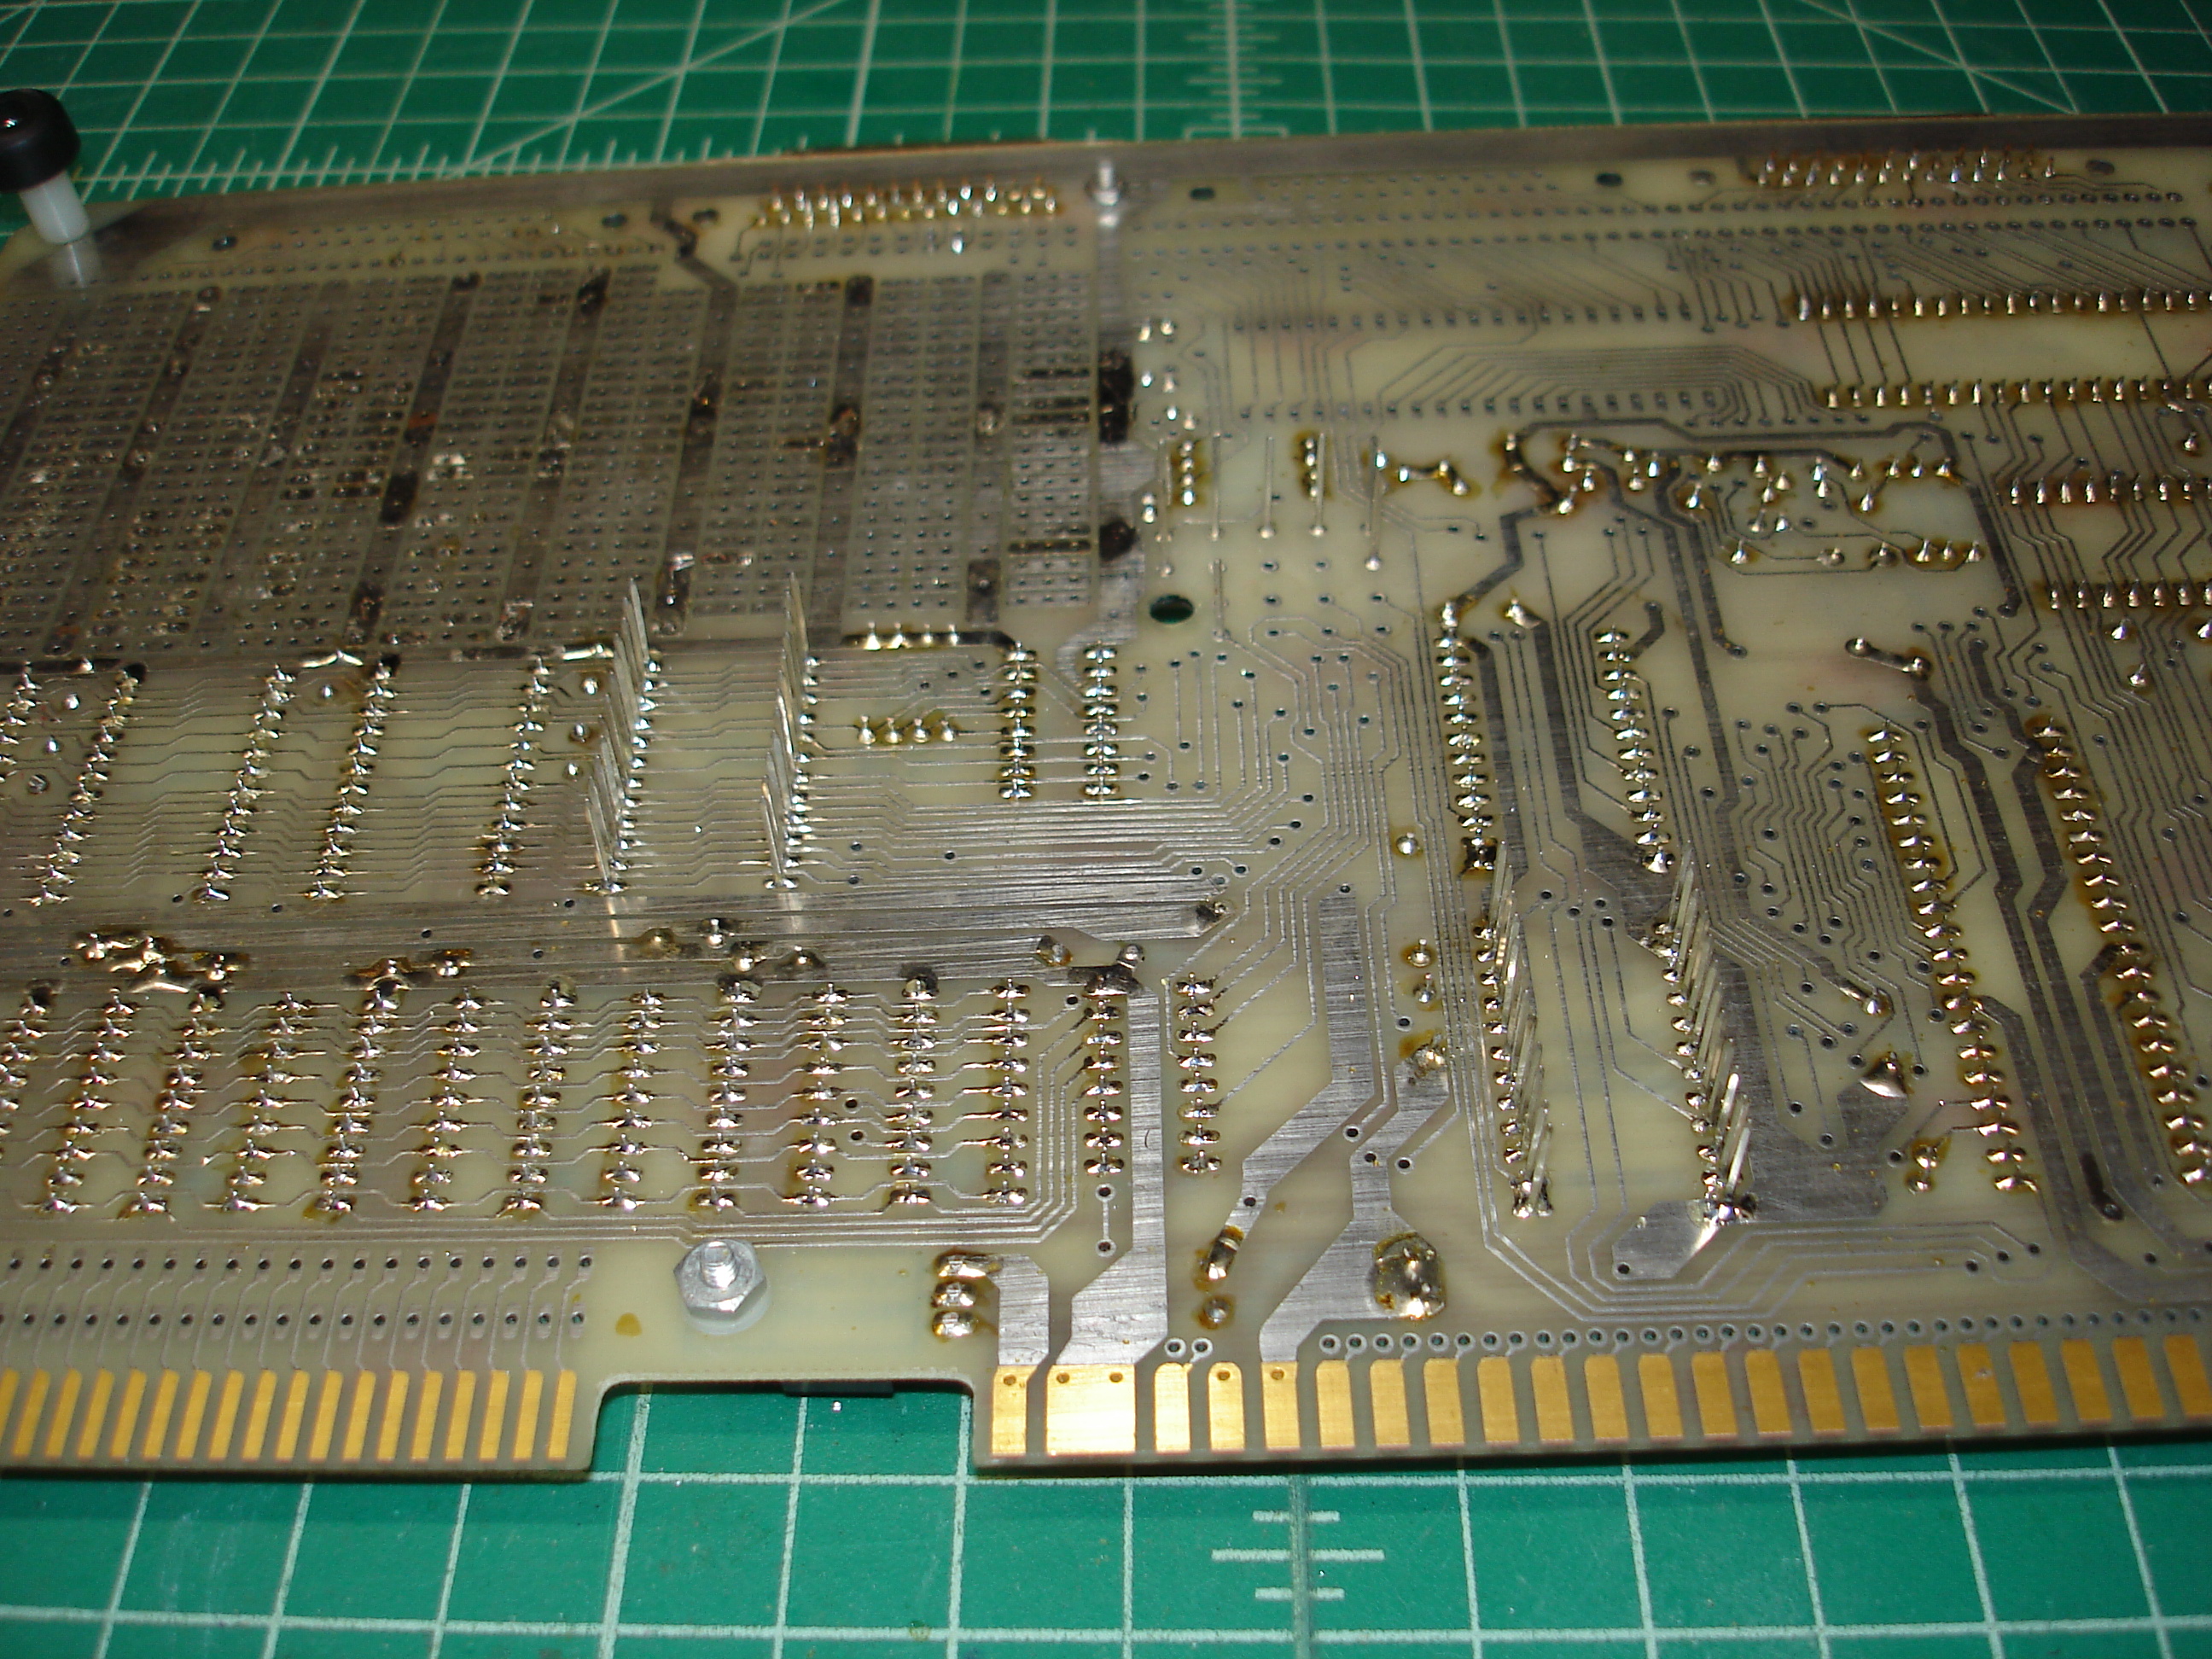
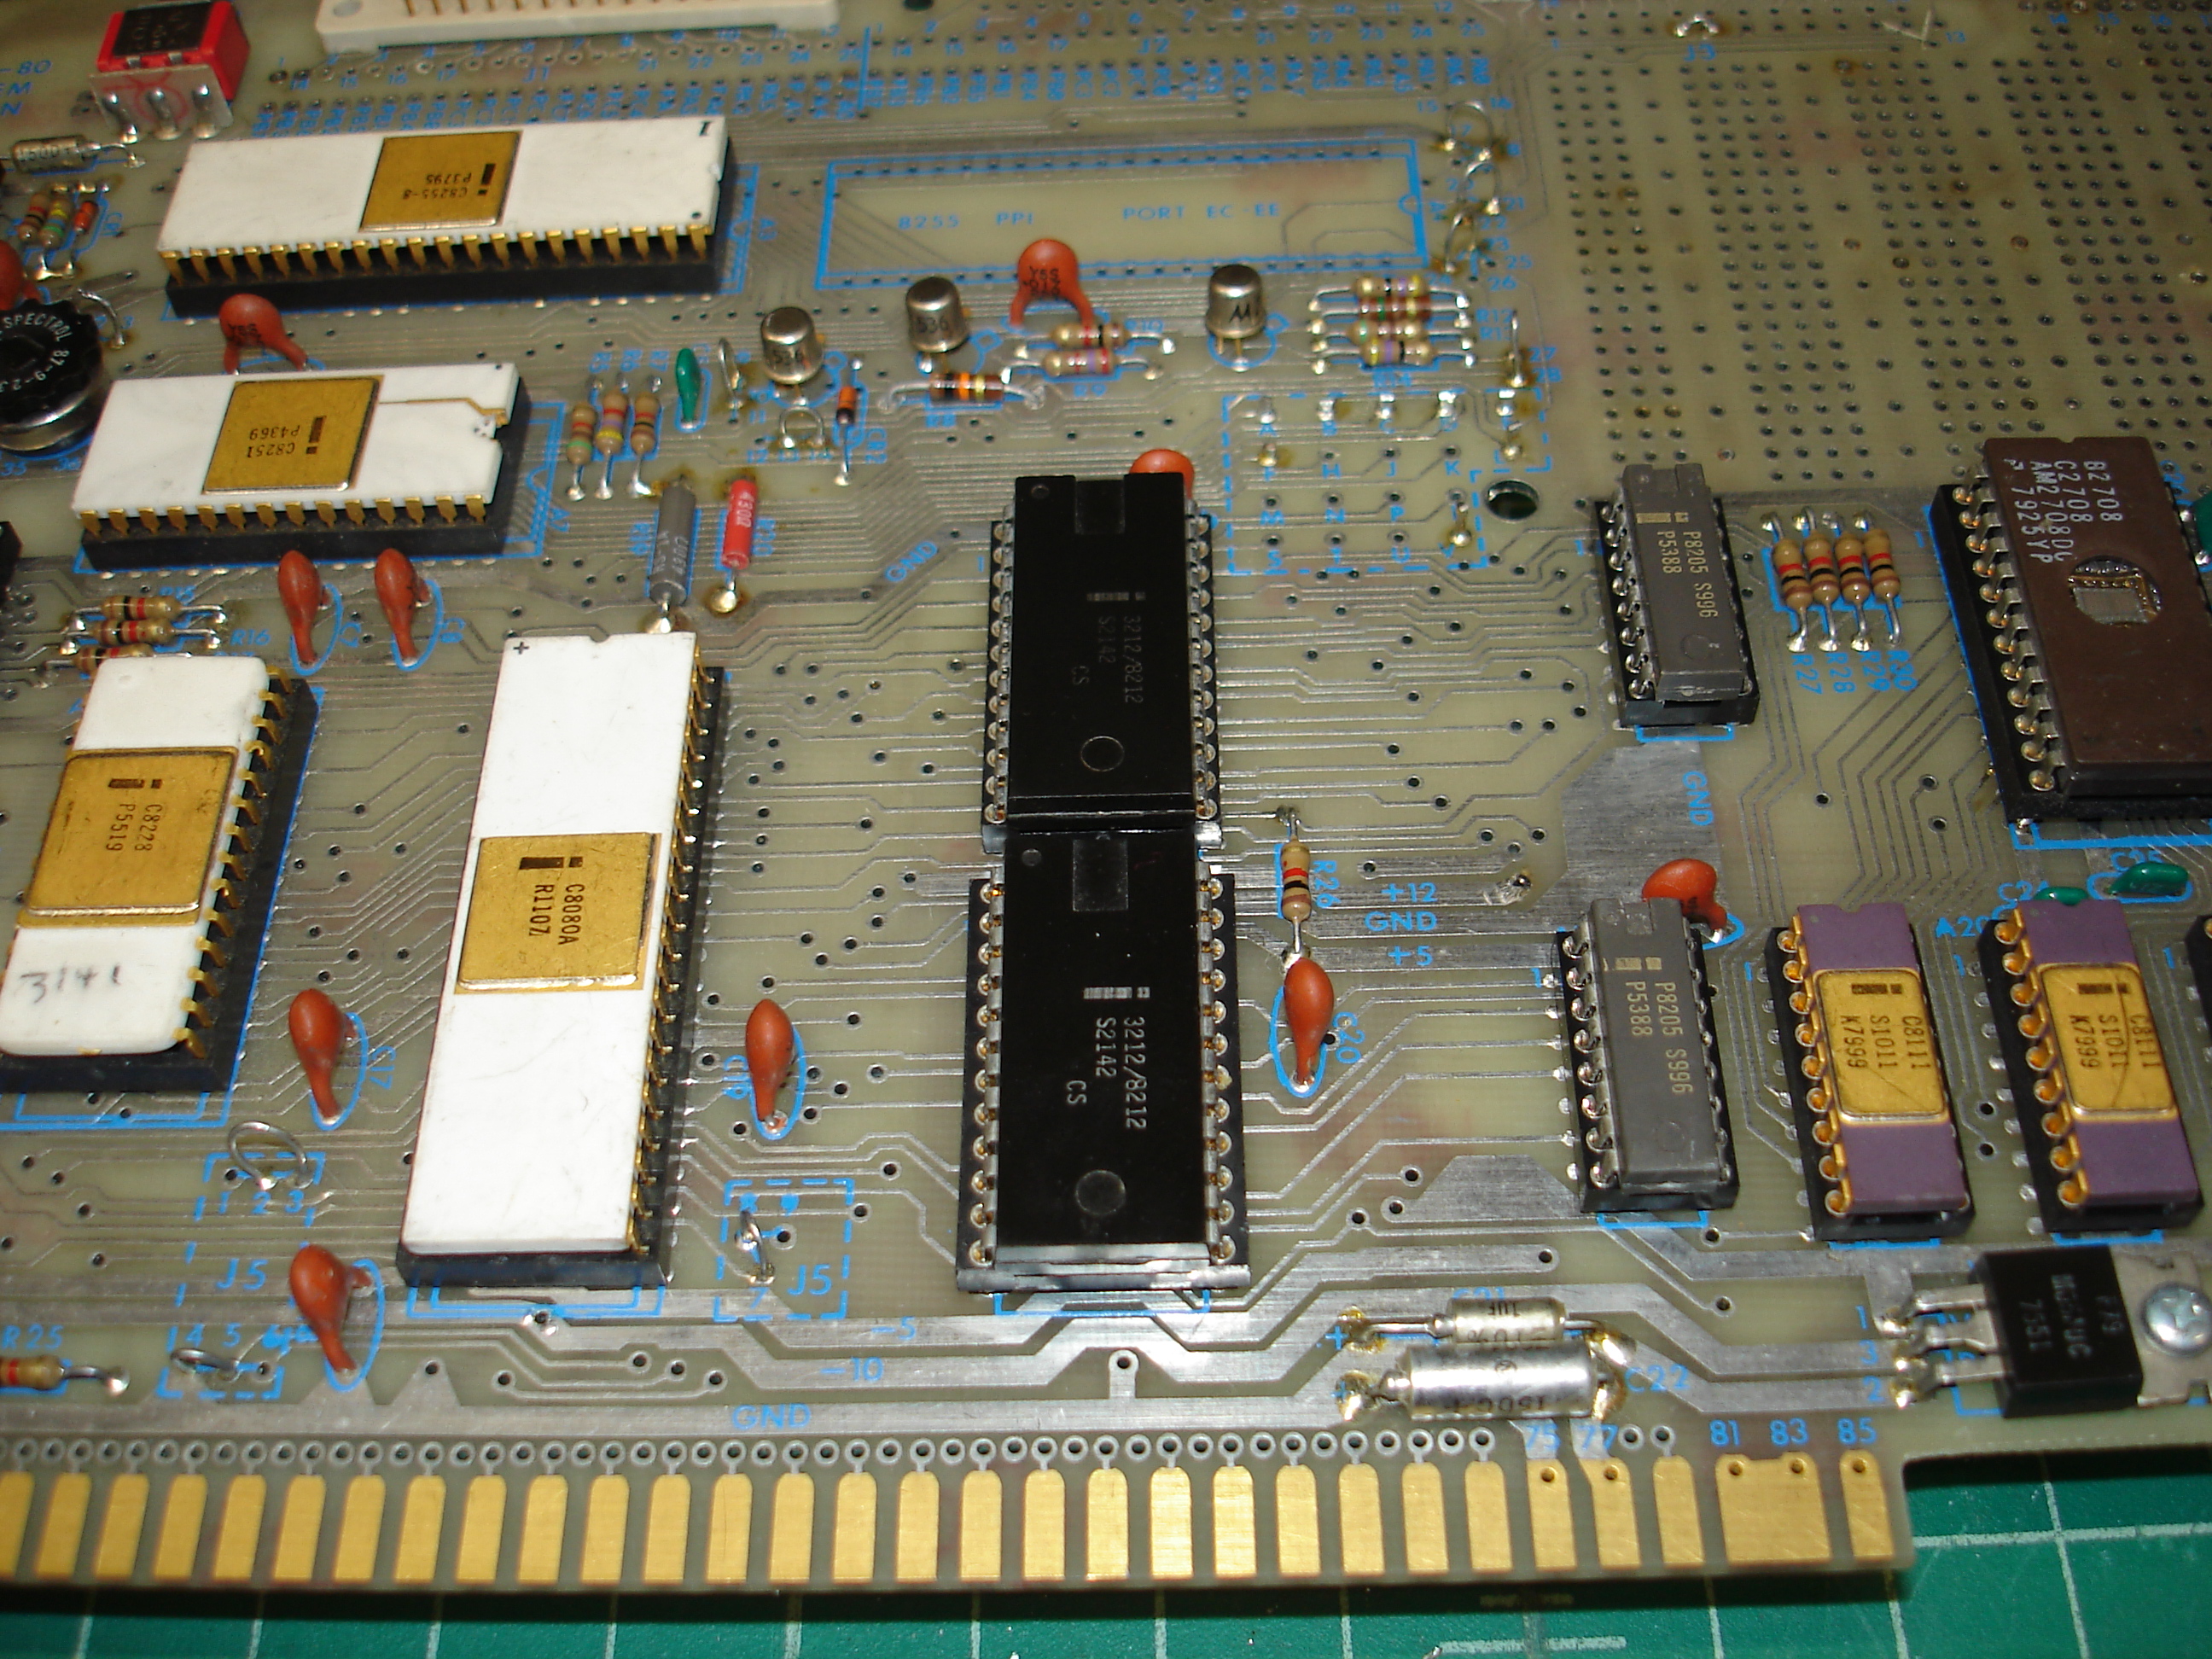
Here’s some closeups of the CPU and RAM/ROM areas:
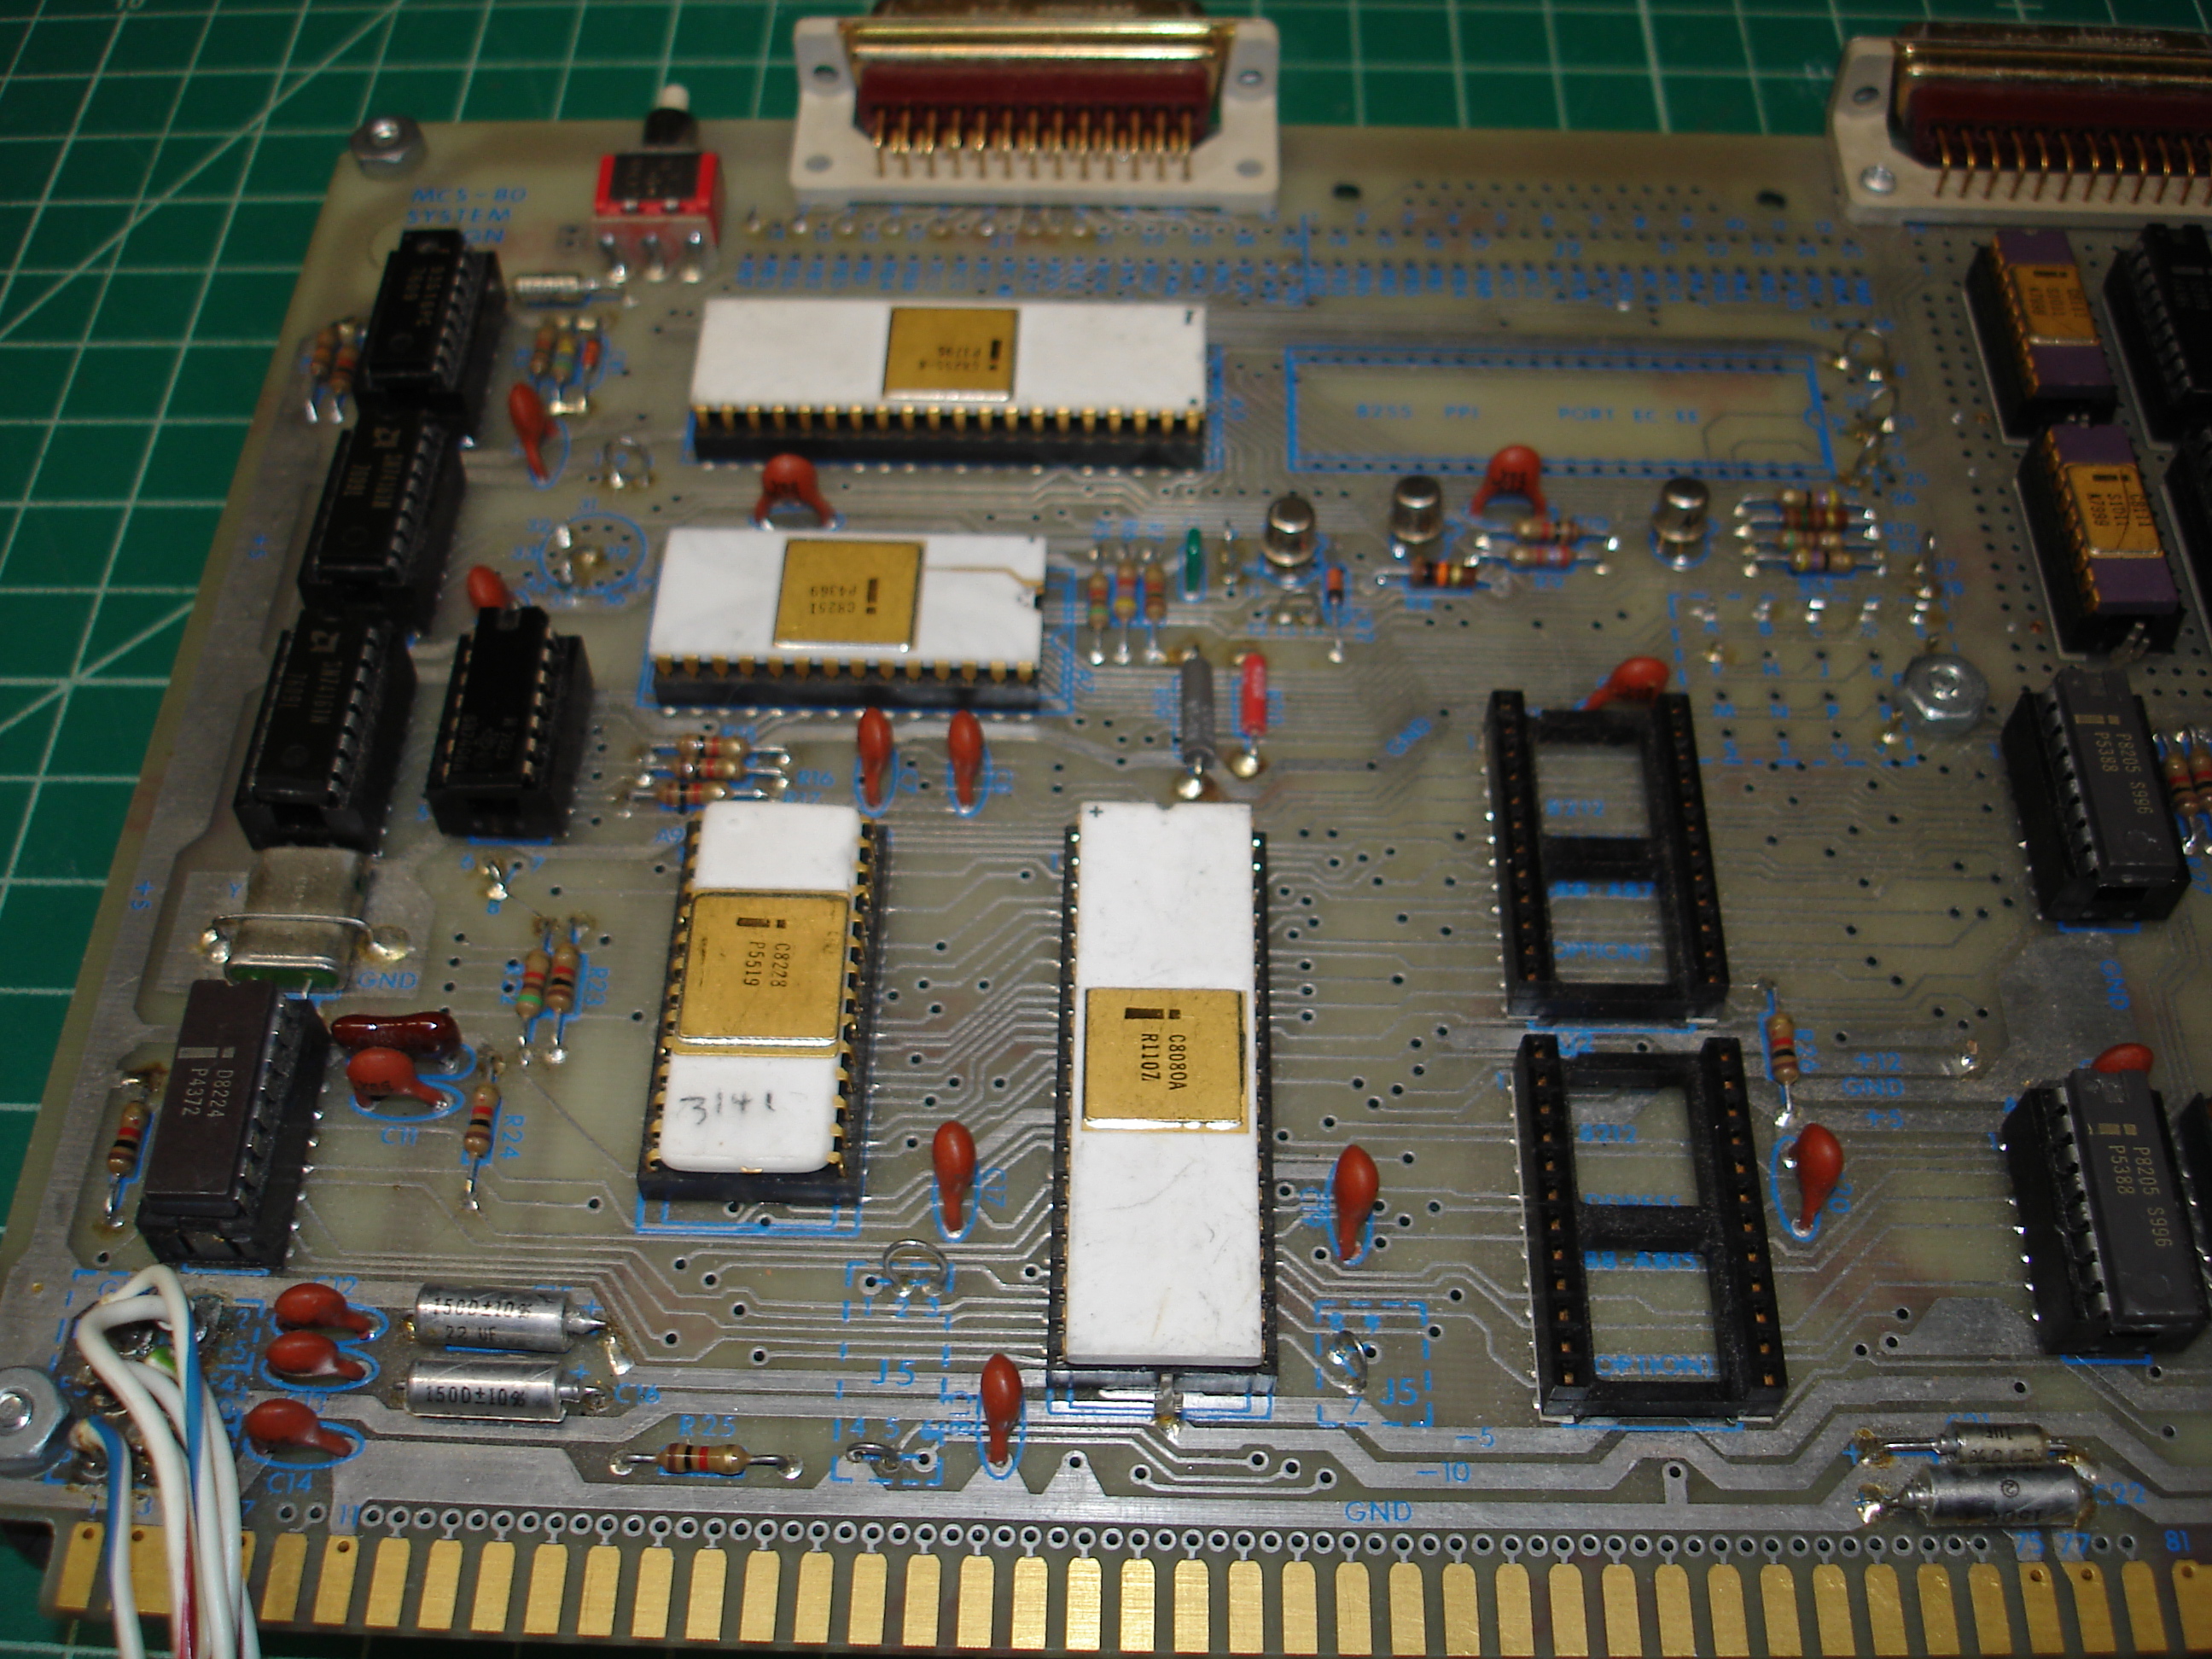

The first picture shows the main MCS-80 chipset. Most of the Intel ICs in this shot are fairly early white ceramic packages with gold lids. Very early SDK-80s came with “gray trace” ceramic DIPs, including the 8205 decoders. Note that the 8212 address bus buffers are missing: the SDK-80 manual states that they can be bypassed by jumpering the inputs to the outputs and letting the 8080 drive the address bus directly. This is probably marginal with the bus loading present on this board.
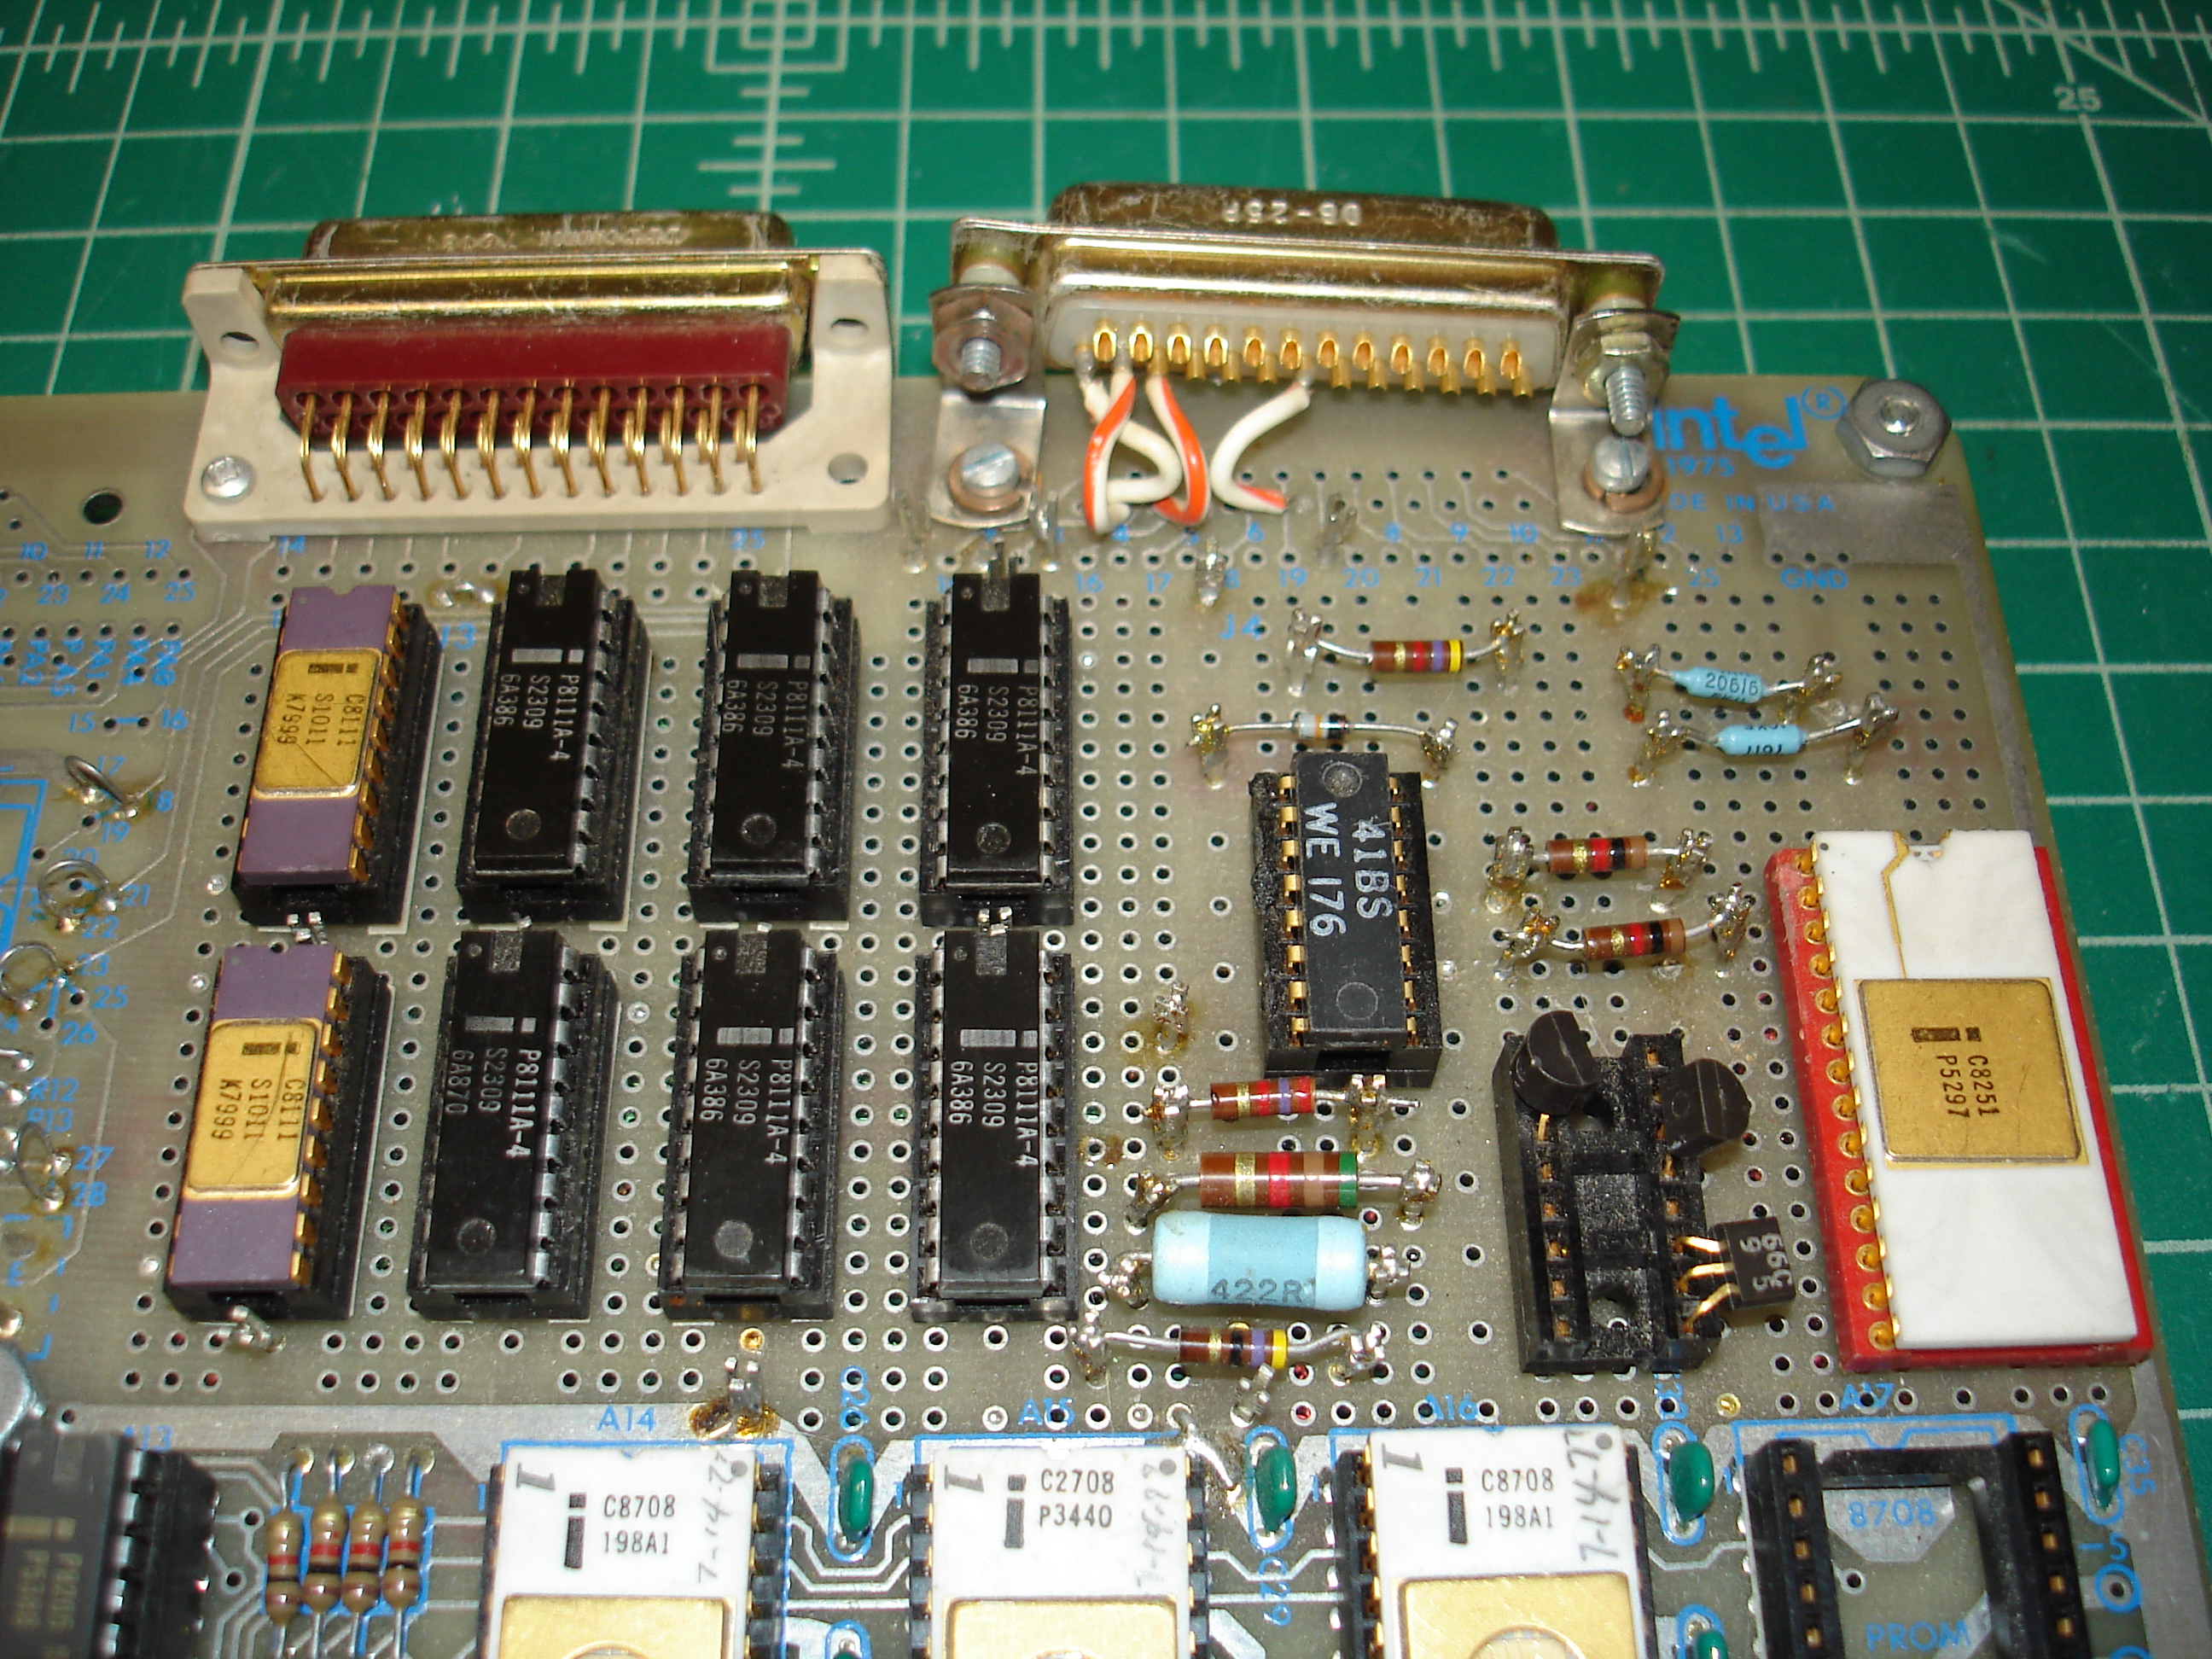
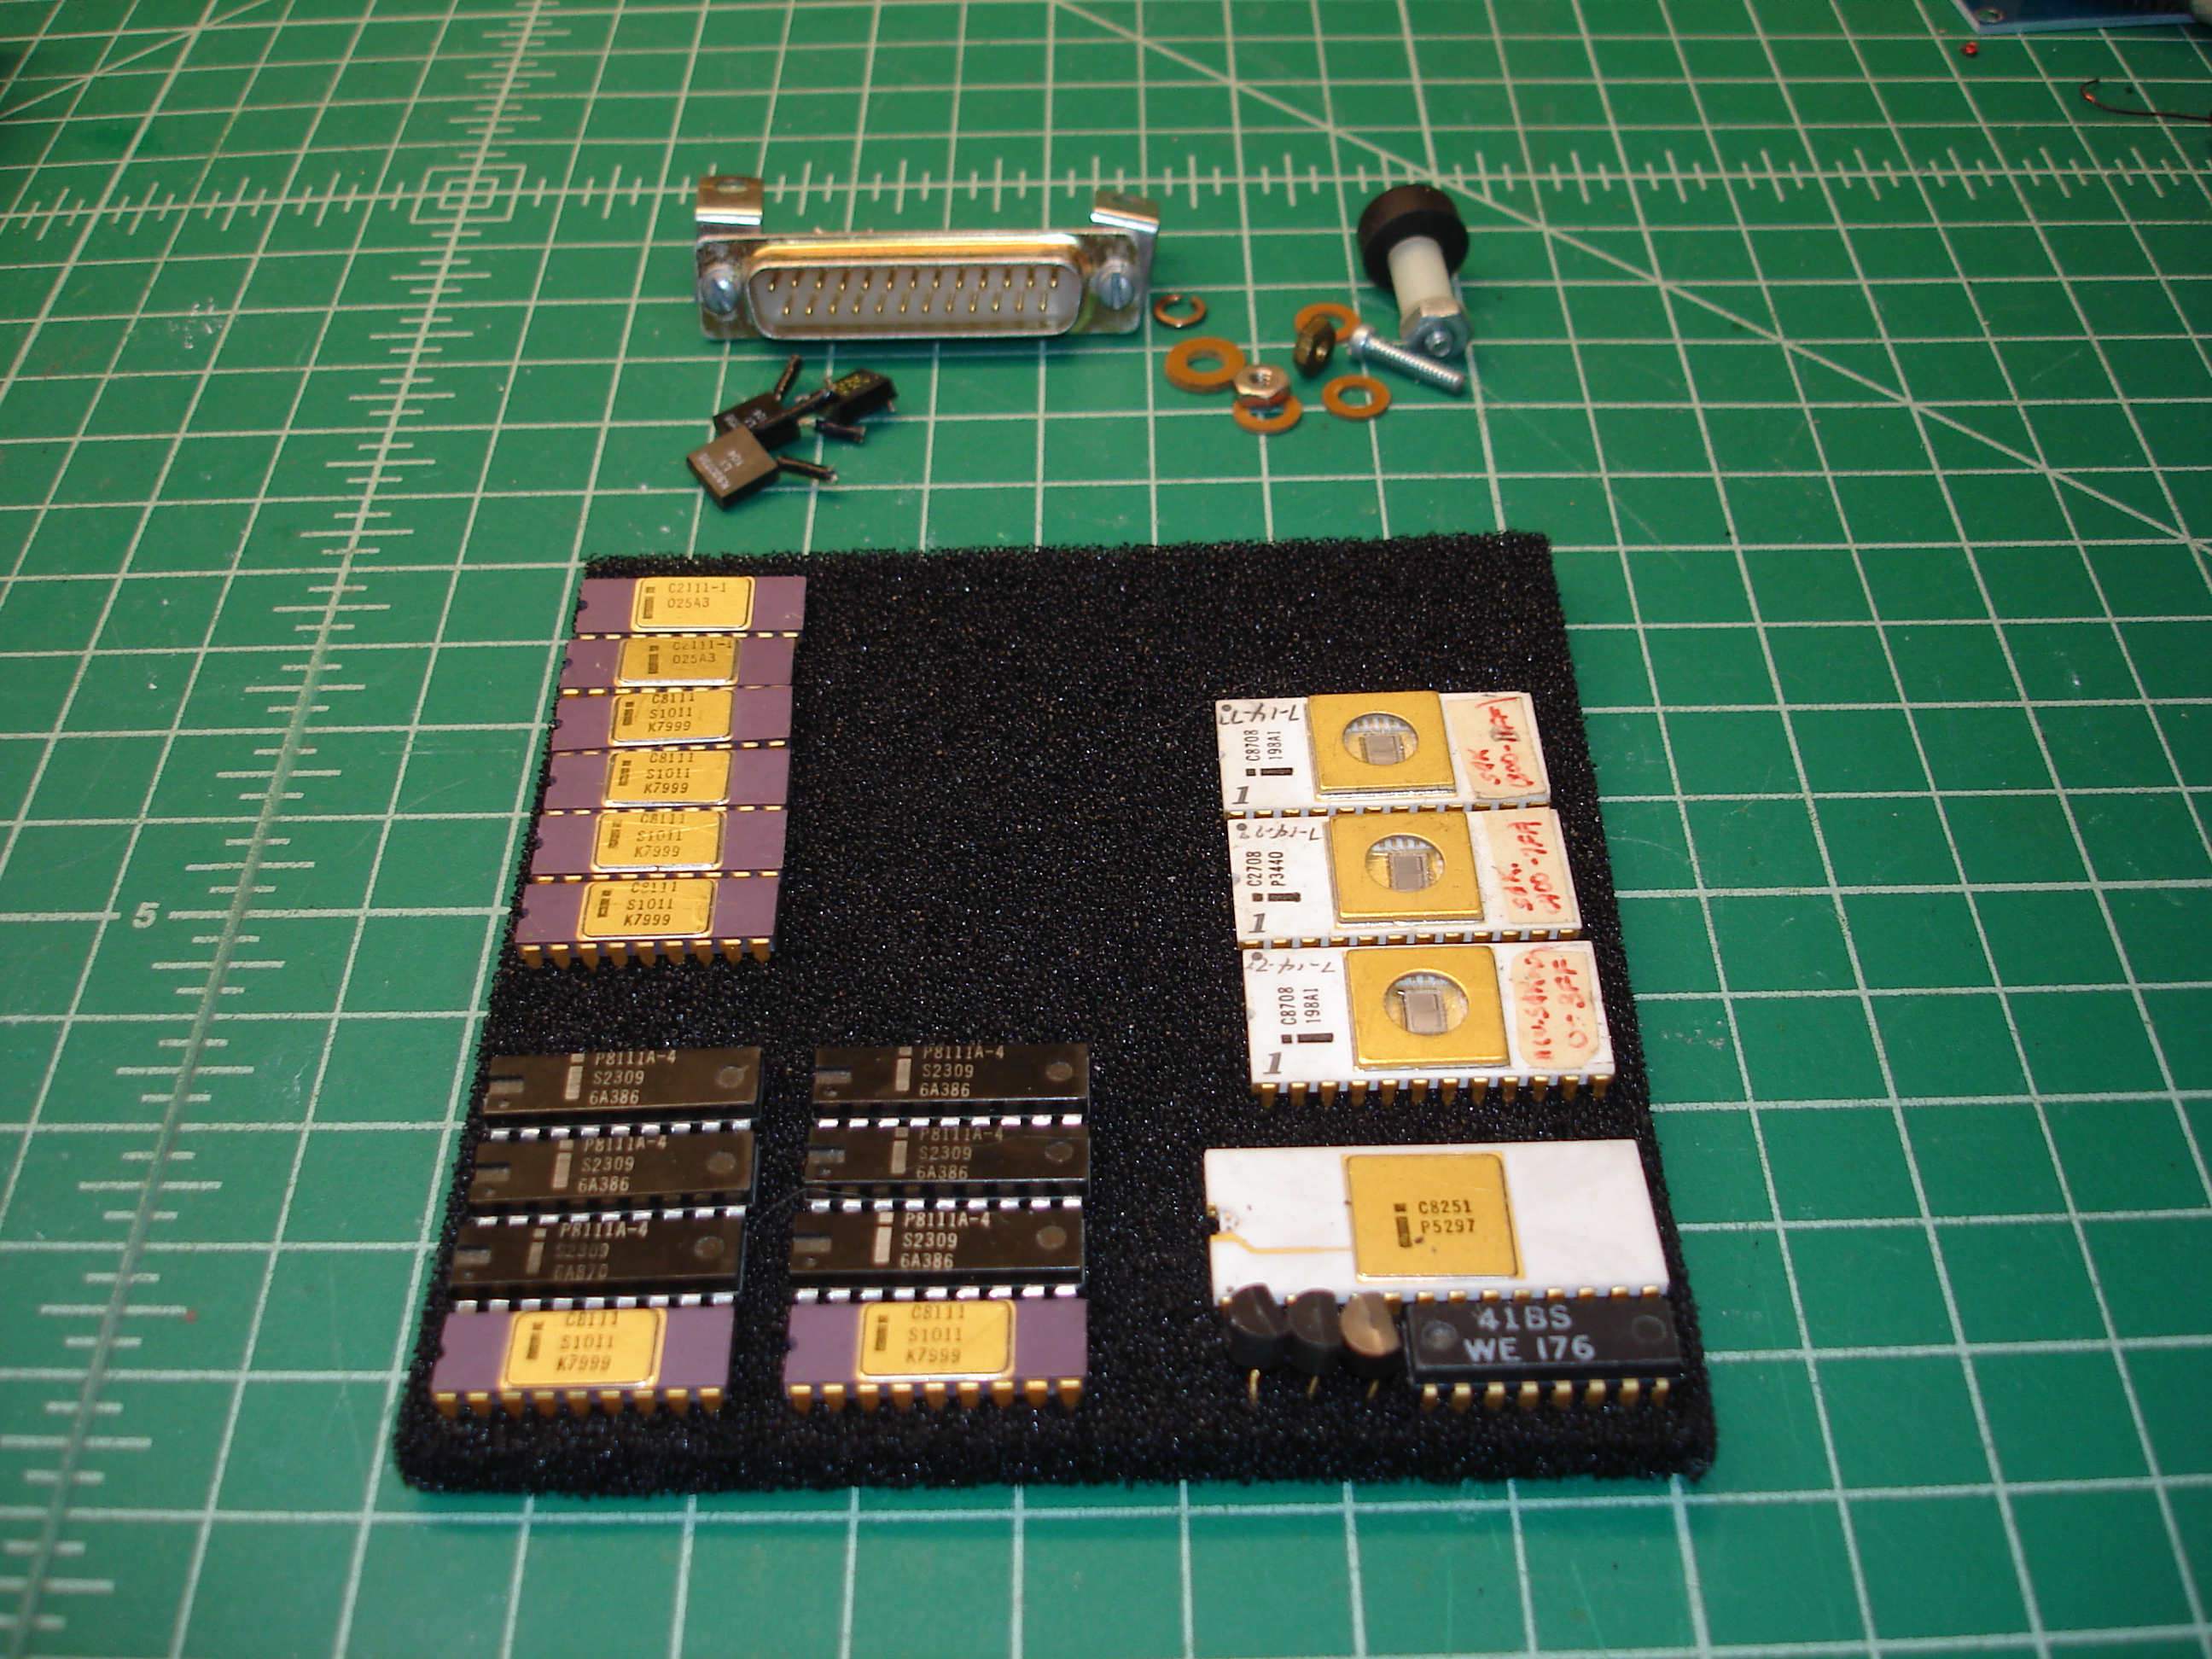
The second picture shows the RAM and ROM area. Intel provided circuitry to allow for 1K of static RAM in 8111/2111 type SRAMs, and up to 4K of ROM in 2708 EPROMs. The base configuration was 256 bytes of RAM, located in the two rightmost SRAM sockets, and 1K of ROM in the leftmost EPROM socket. The ROM contained Intel’s ROM monitor for the SDK-80, which allows development and entry of small programs via the serial console. As the board arrived, it was fully populated with Intel 8111 and 2111 static RAMs, for a full 1K of RAM. Three EPROMs were present: the first contains a slightly modified version of Intel’s monitor. The second and third EPROMs contain code which I have not yet fully disassembled, but which interfaces with the second USART in the prototype area. All SRAMs are nice purple ceramic Intel parts, and the EPROMs are white ceramic Intel 8708s and 2708s (functionally equivalent).
The above shows the prototype area, as received. It contains another 1K of RAM in Intel 8111 SRAMs, some plastic, some purple ceramic. It also contains a second Intel 8251 USART, with discrete transistor level shifters for RS-232. The RAM uses the extra select lines from the 8205 address decoder in the RAM area. The USART, like the I/O devices in the CPU area, is minimally decoded and repeats through I/O space.
While the circuitry in the prototype area looks alright from the top, the bottom is another story:
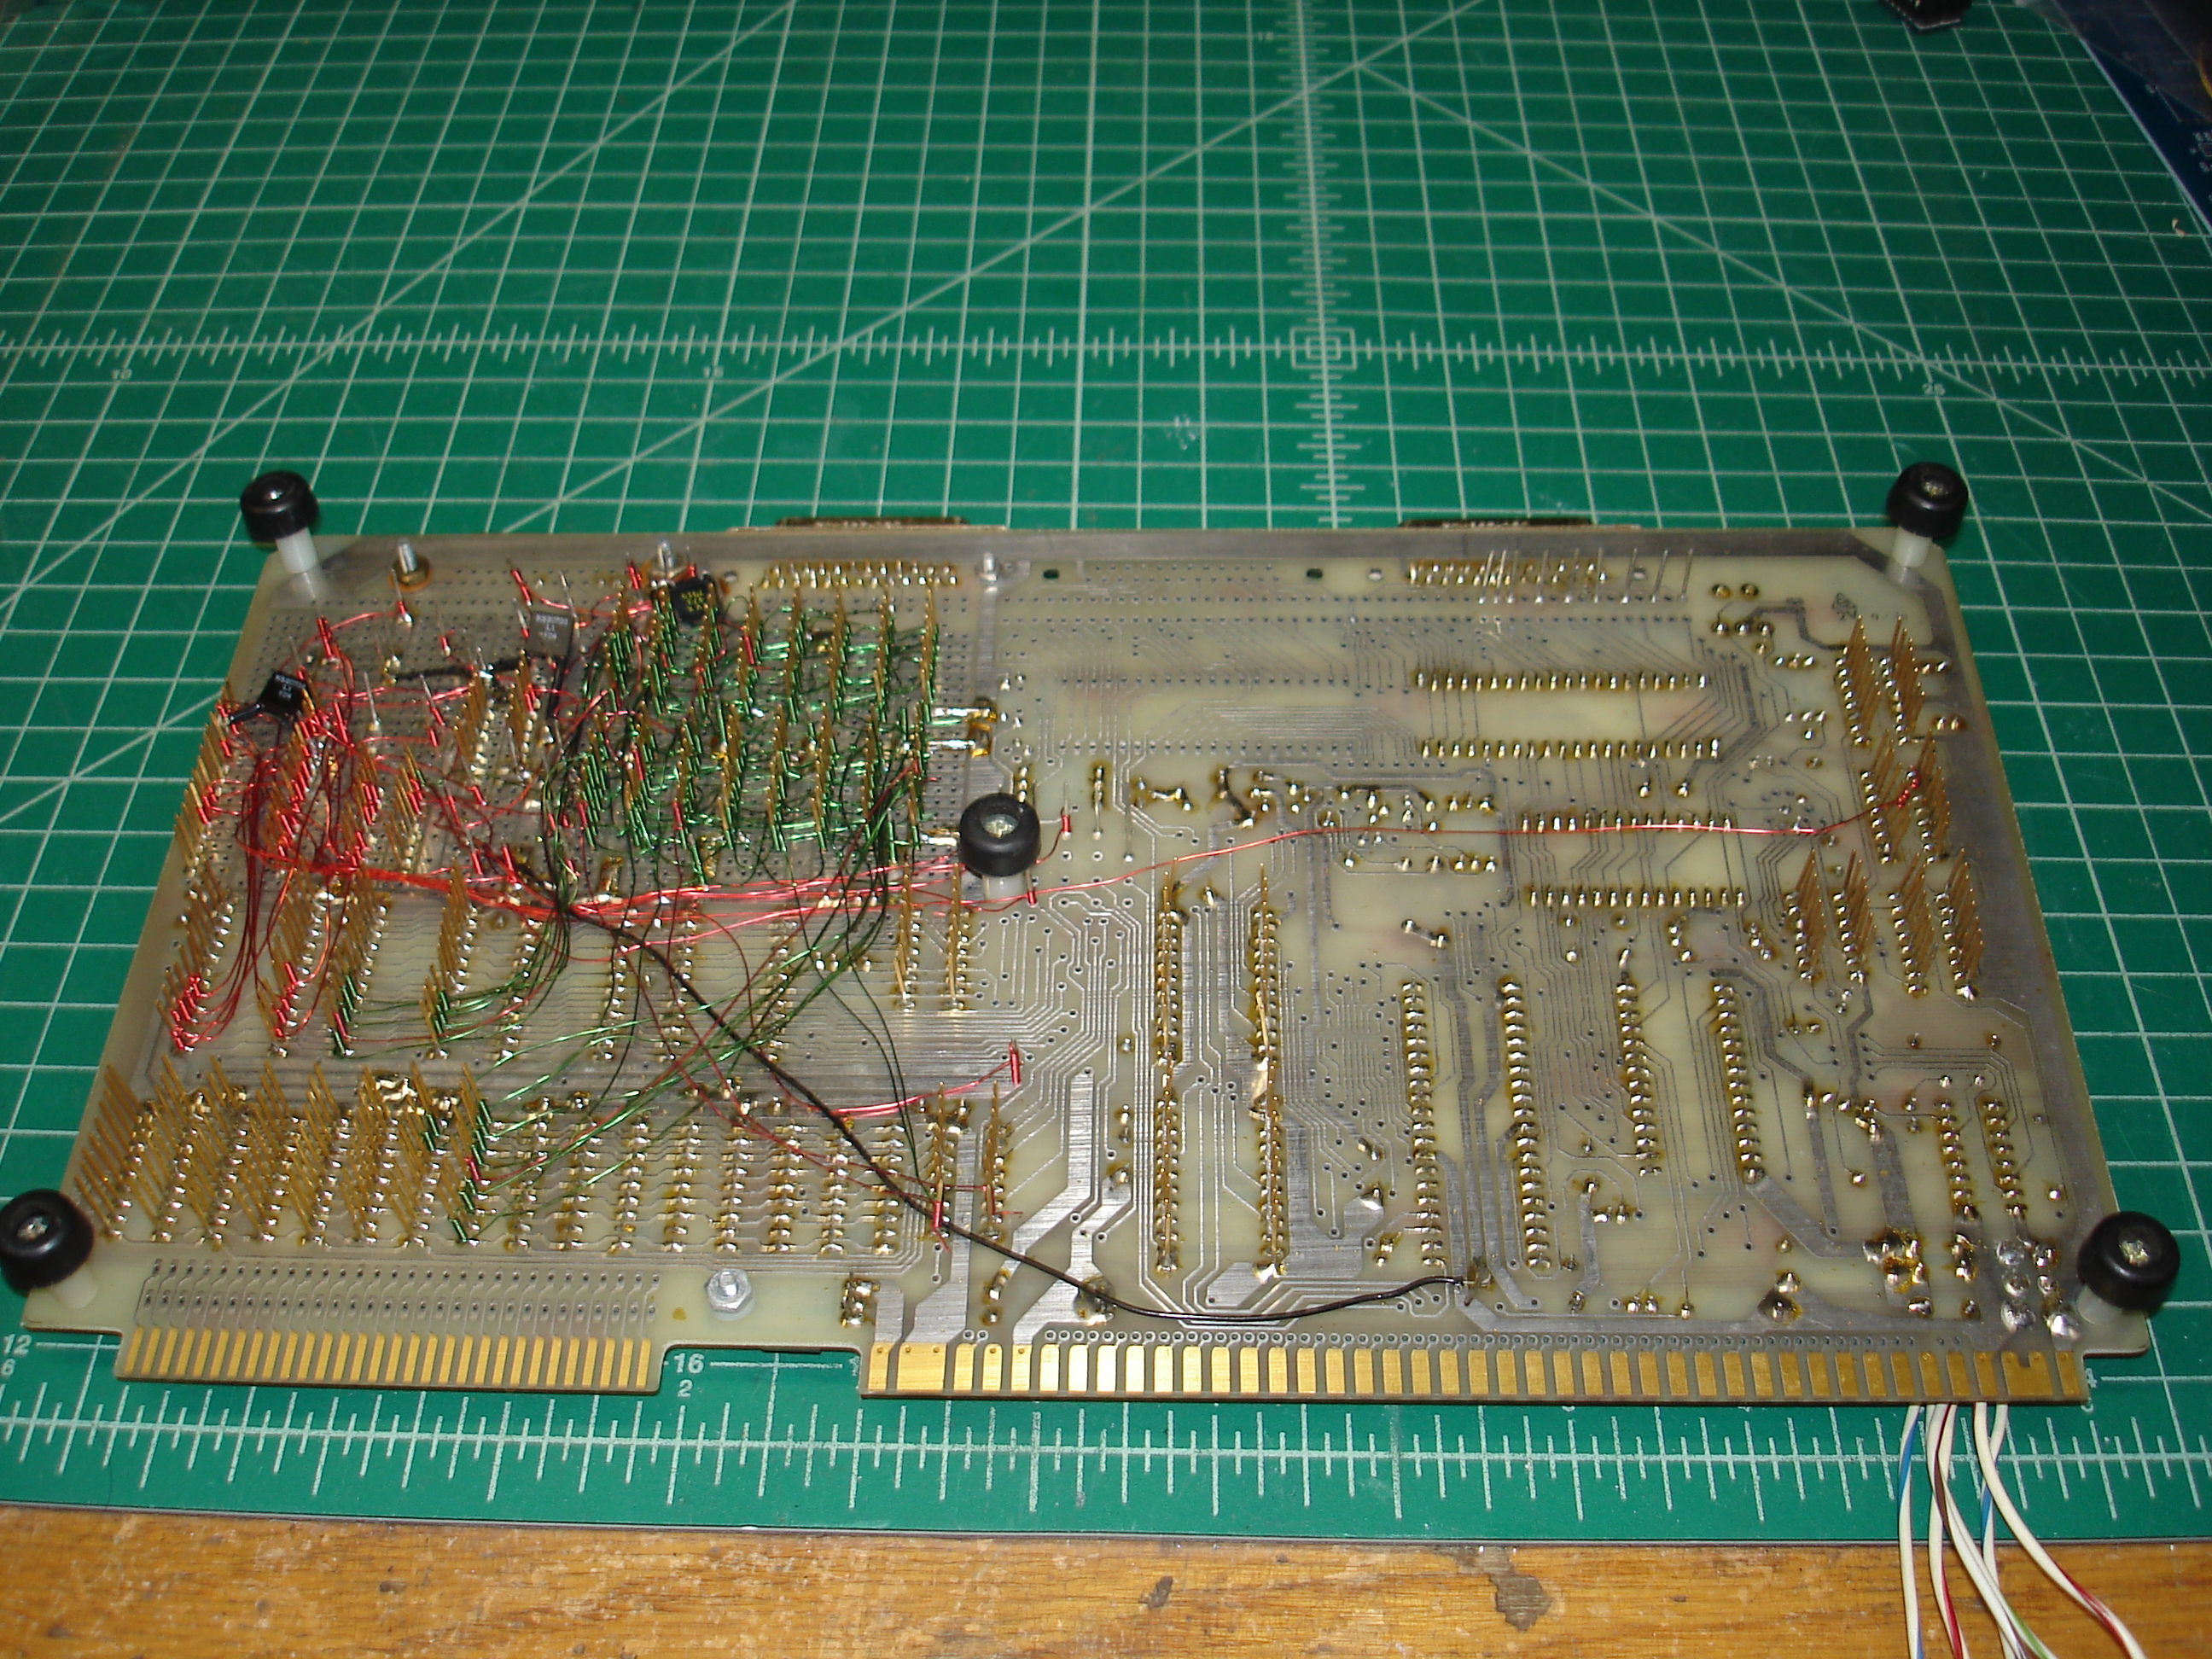
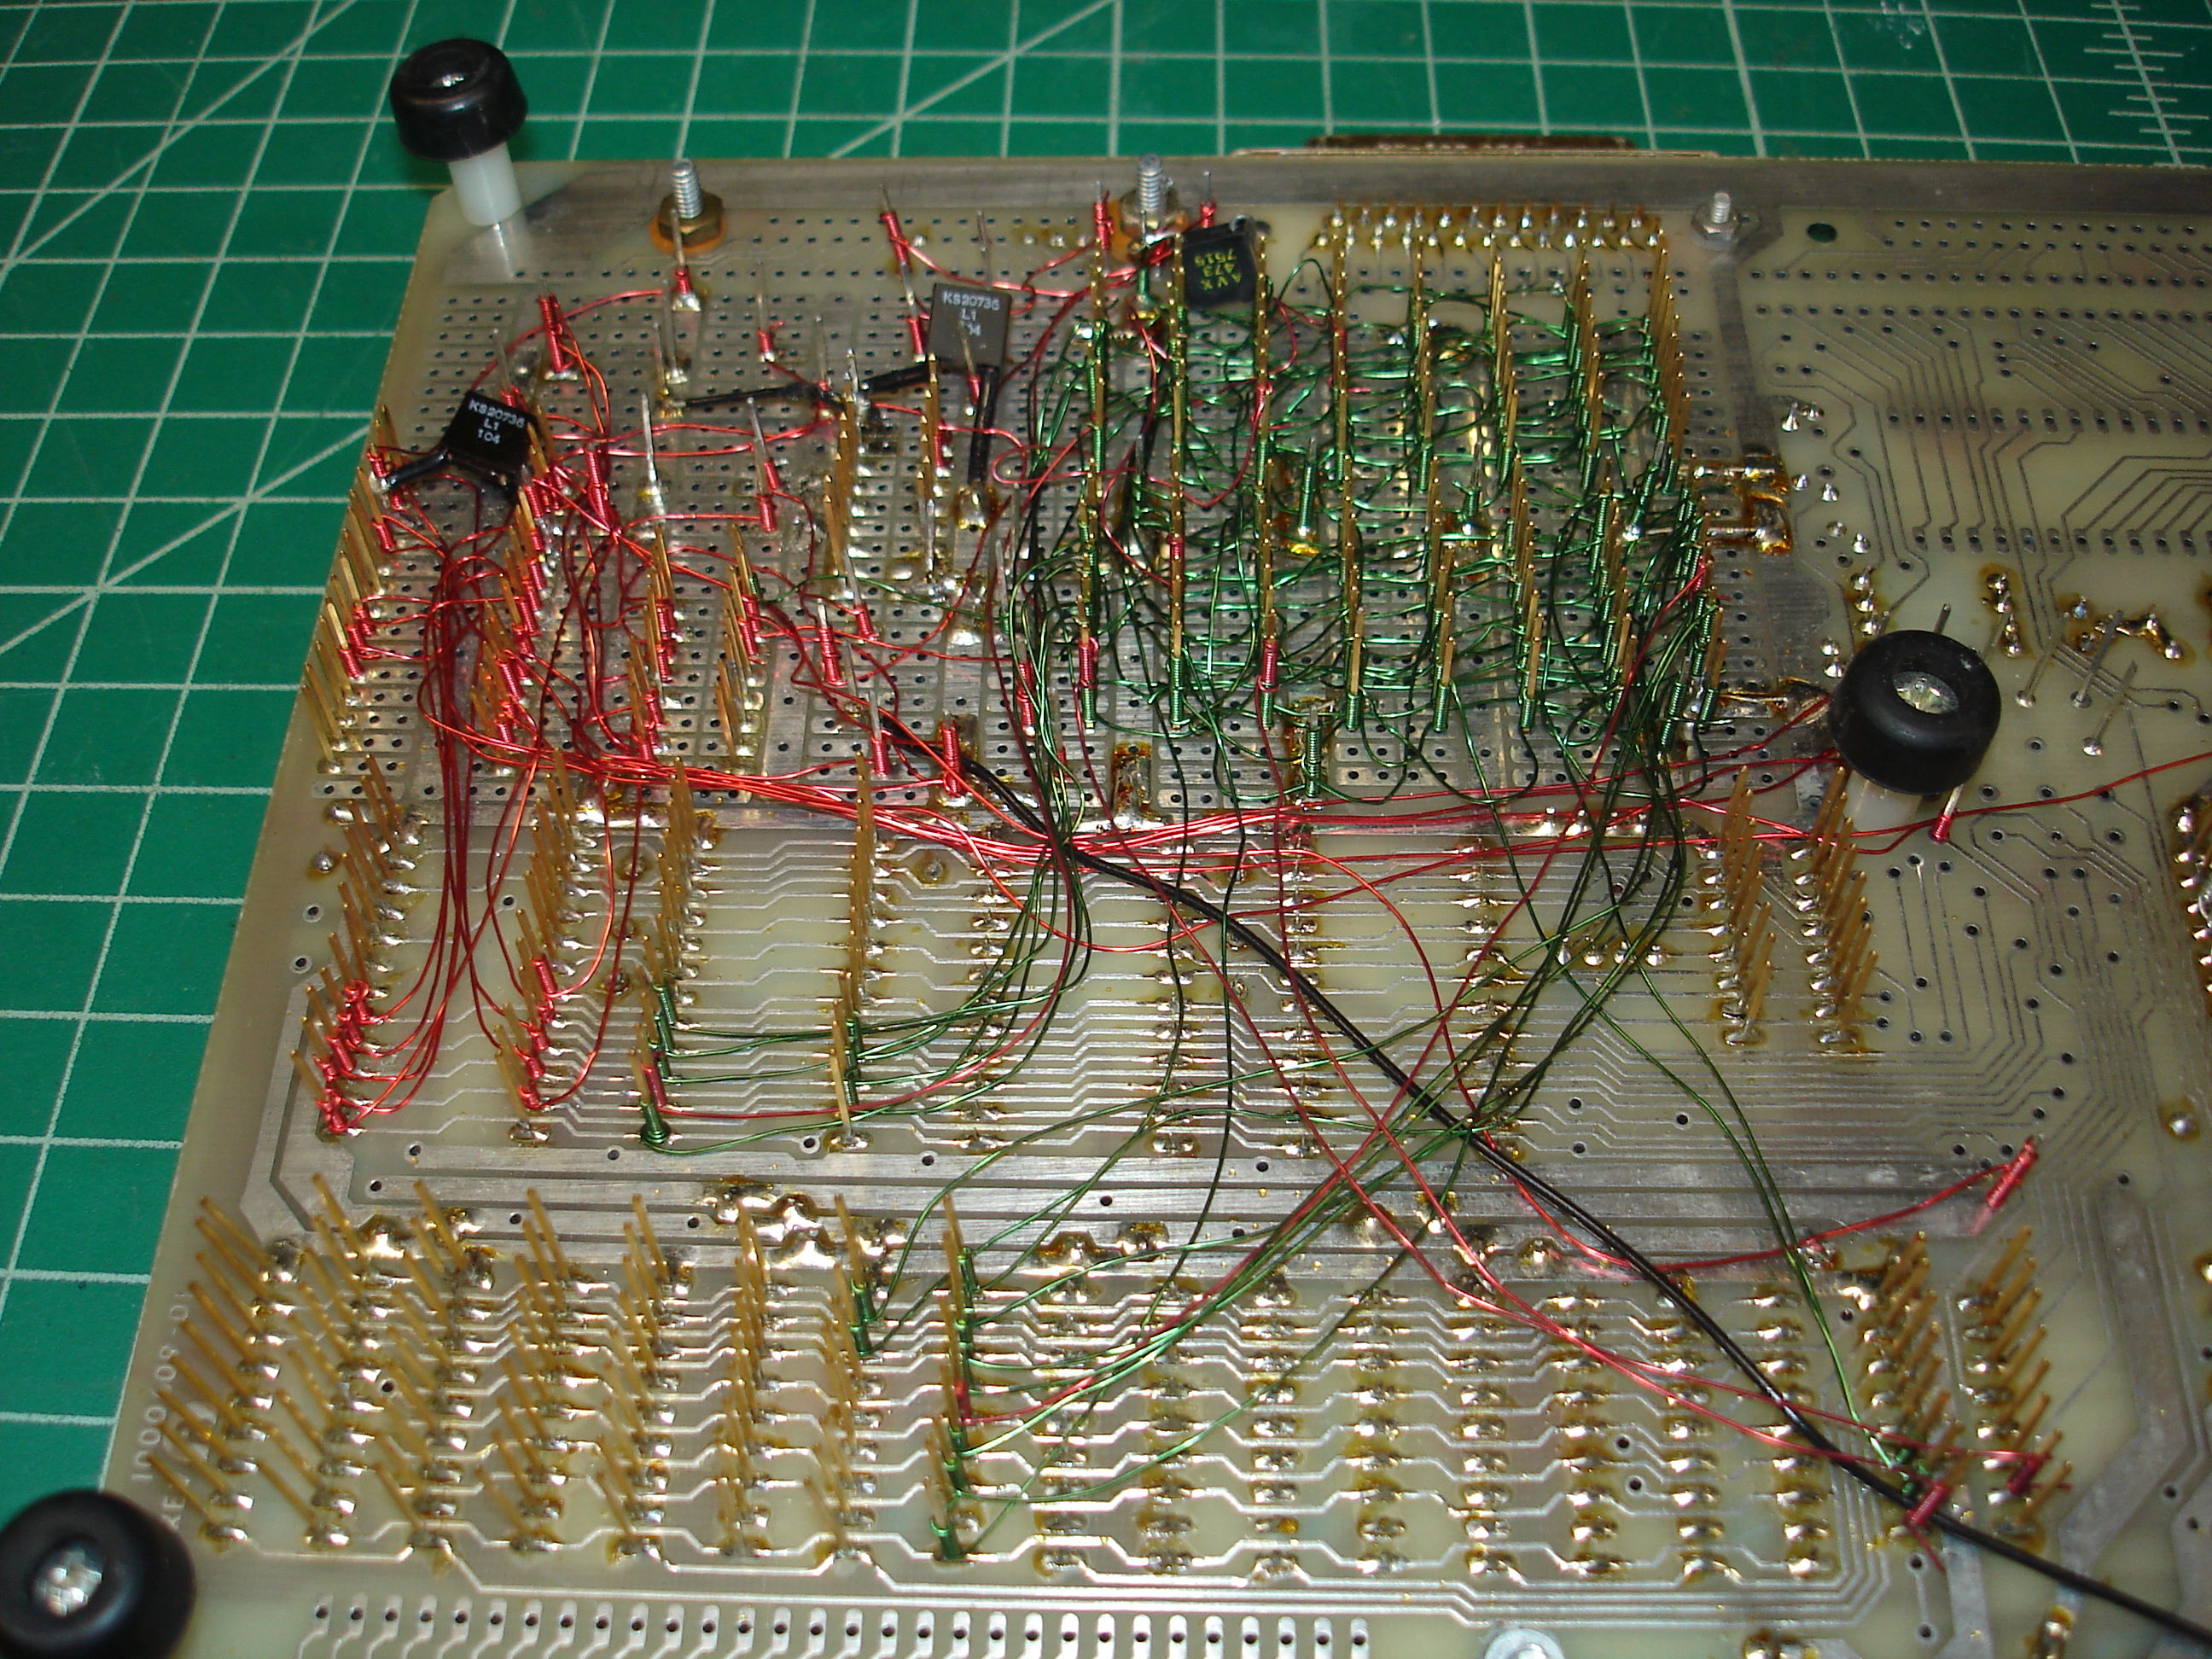
The wiring in the prototype area is a bit of a mess. In troubleshooting the board, my first step was to take it down to a bare minimum configuration, by removing all of the ICs in the prototype area. This did not restore operation. Output on the console port was strange and intermittent, as if there were problems with the RAM or ROM. Several test EPROMs were programmed to aid in debugging, but there were still intermittent problems. Here’s a topside shot of the minimal configuration with a test EPROM installed:

A closer look at the prototype area “wire wrap” reveals the real issue:
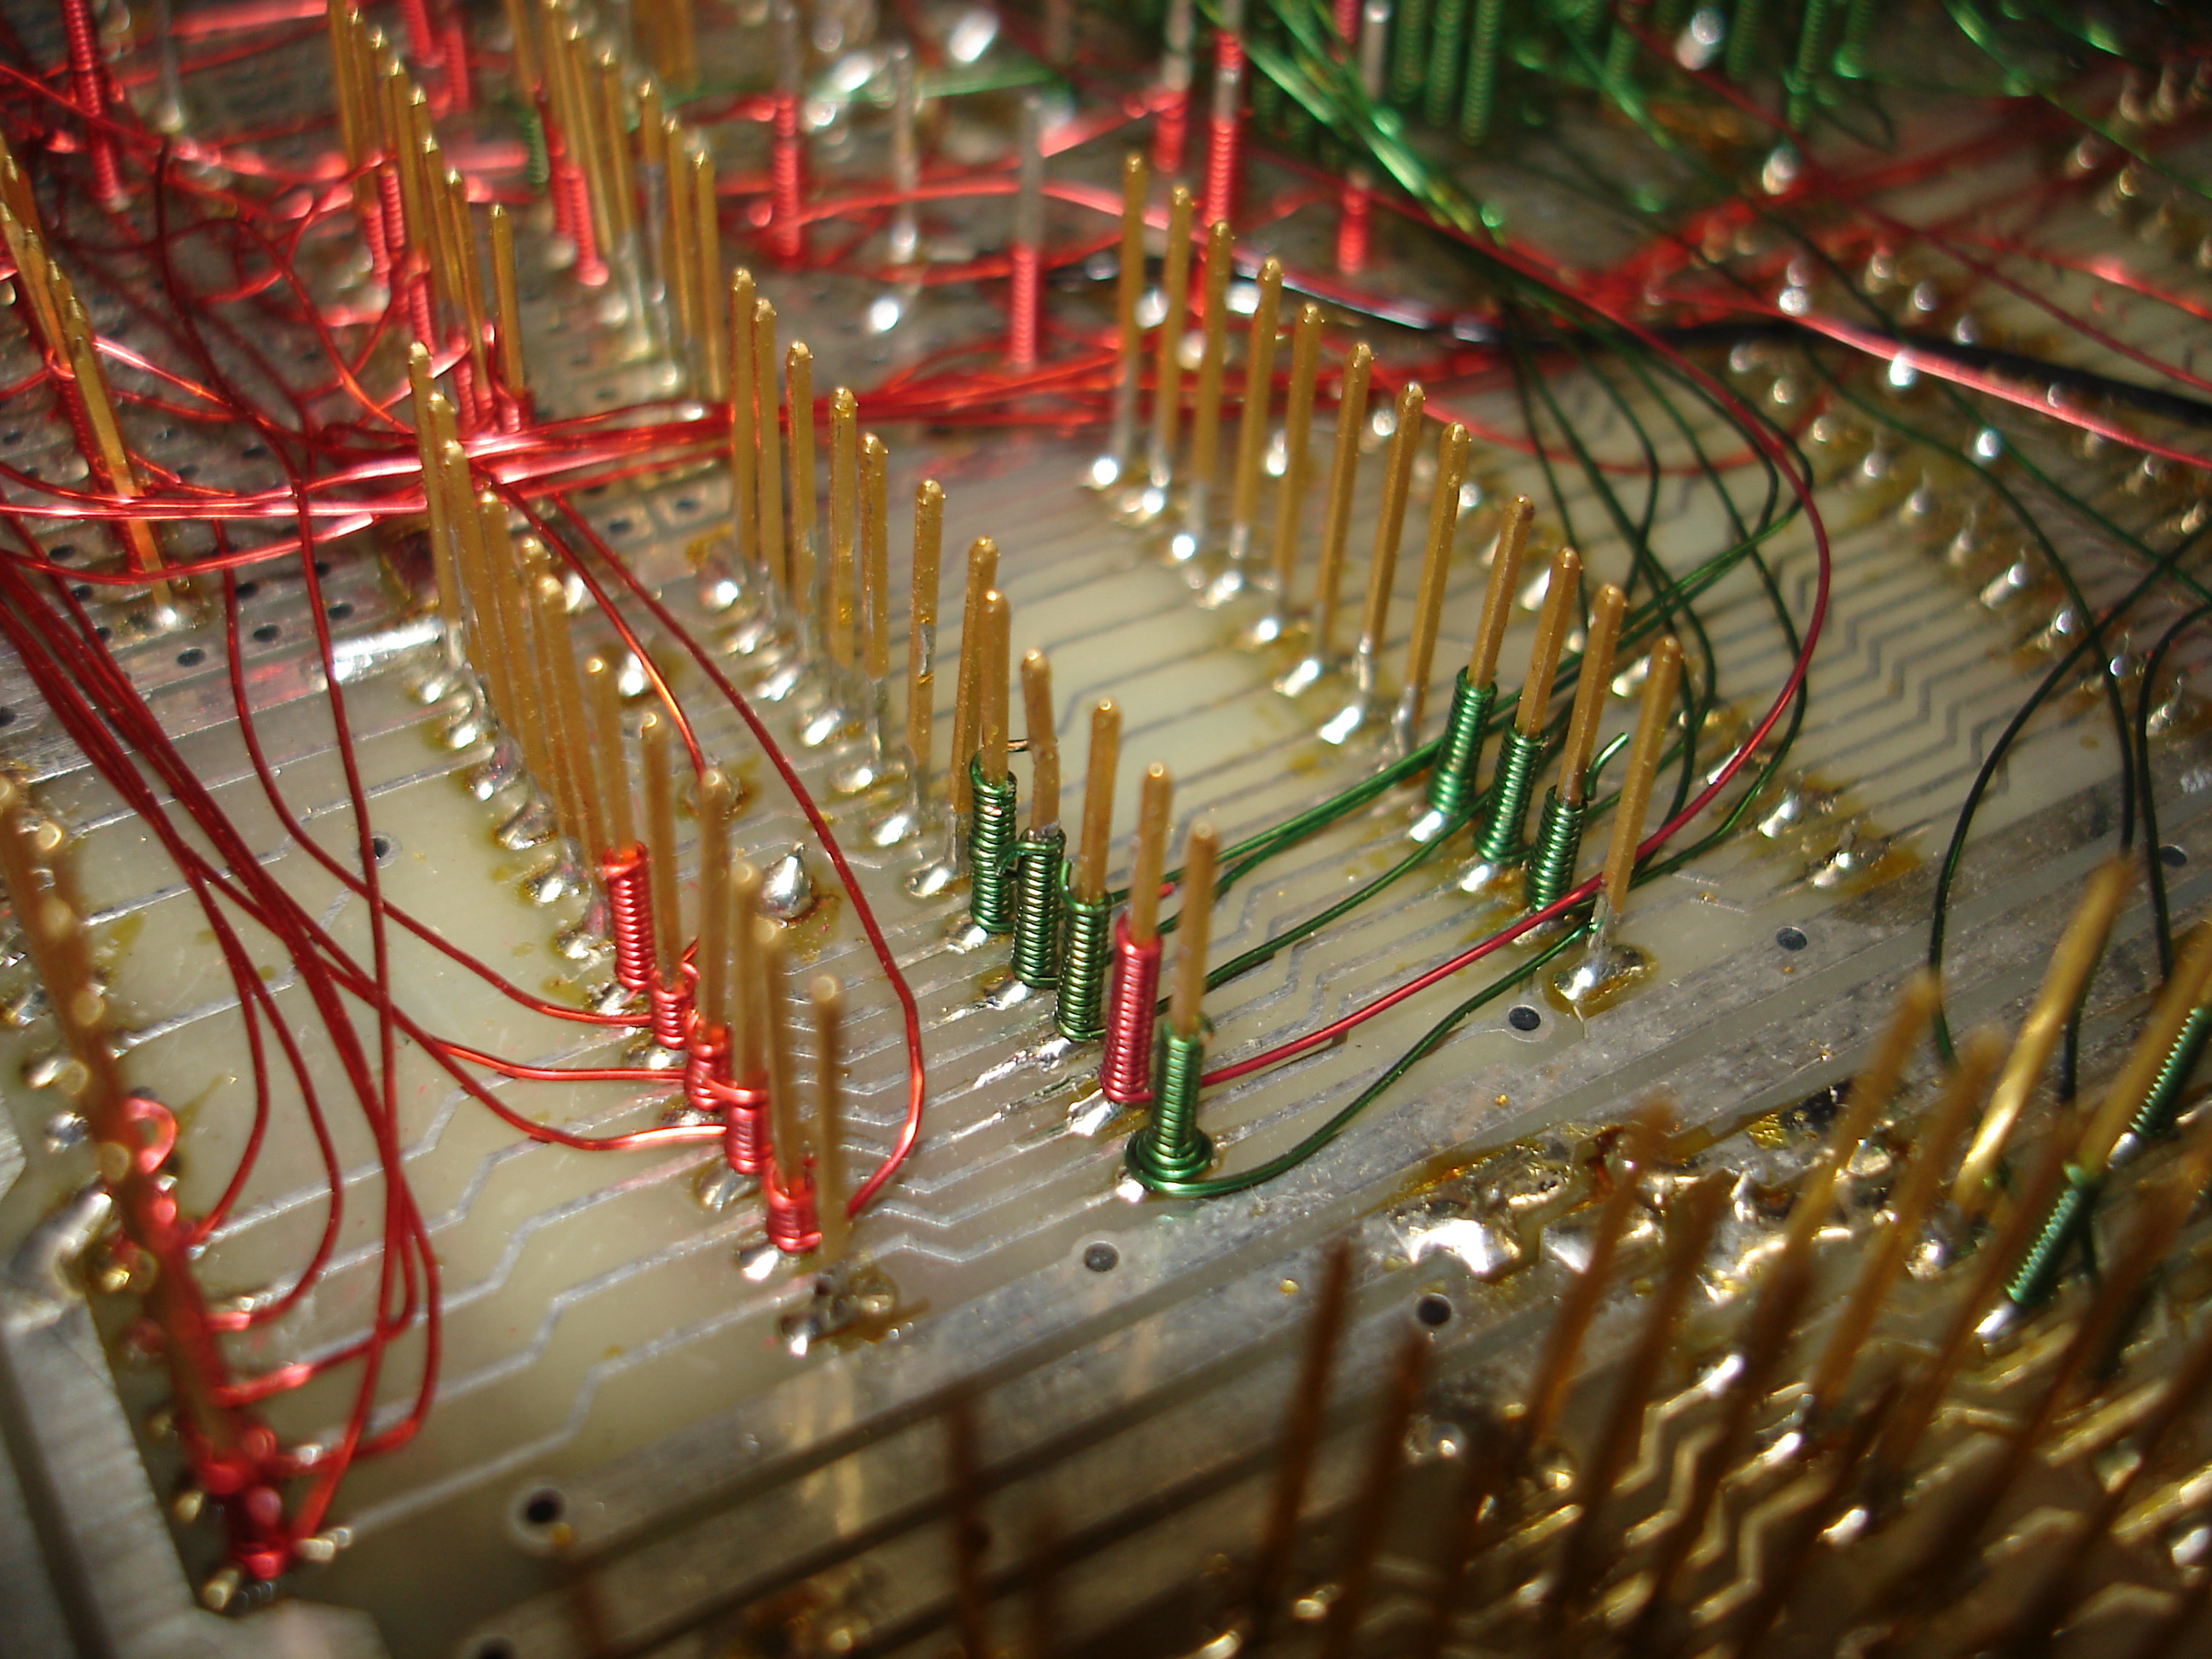
It’s sort of like wire wrap, but instead of using silver-plated wire with Kynar insulation, it appears that enamel insulated magnet wire was used. The previous owner clearly used a Vector Slit ‘n Wrap tool, which allows for easy busing of connections, but makes alterations difficult. Unfortunately, the only real step forward in getting the SDK-80 working was to completely isolate the prototype area circuitry, by cutting all of the connections to the main SDK-80 area:


All of the connections from the prototype area to the main SDK-80 were cut and the wraps removed. This is a real hassle when a Vector Slit ‘n Wrap tool has been used: at the start of each wrap chain, the beginning wrap is “upside down;” that is, the end of the wire is at the bottom of the wrap. A traditional unwrap tool can’t be used until the top end of the wrap is cut free. Chain wraps present the same problem.
After isolating the prototype area, the SDK-80 came up and operated perfectly, proving that the problem was somewhere in the mess of wiring in the prototype area. Oh well! Time to remove all of it…not an easy task. With this level of work, I decided to completely strip and restore the prototype area, removing all sockets and Vector wrap pins, leaving the prototype area in a near-unused state for future hacking. I also decided to replace many of the sockets on the SDK-80: there were many single-wipe sockets, as well as an excessive number of wire wrap sockets with very long pins.
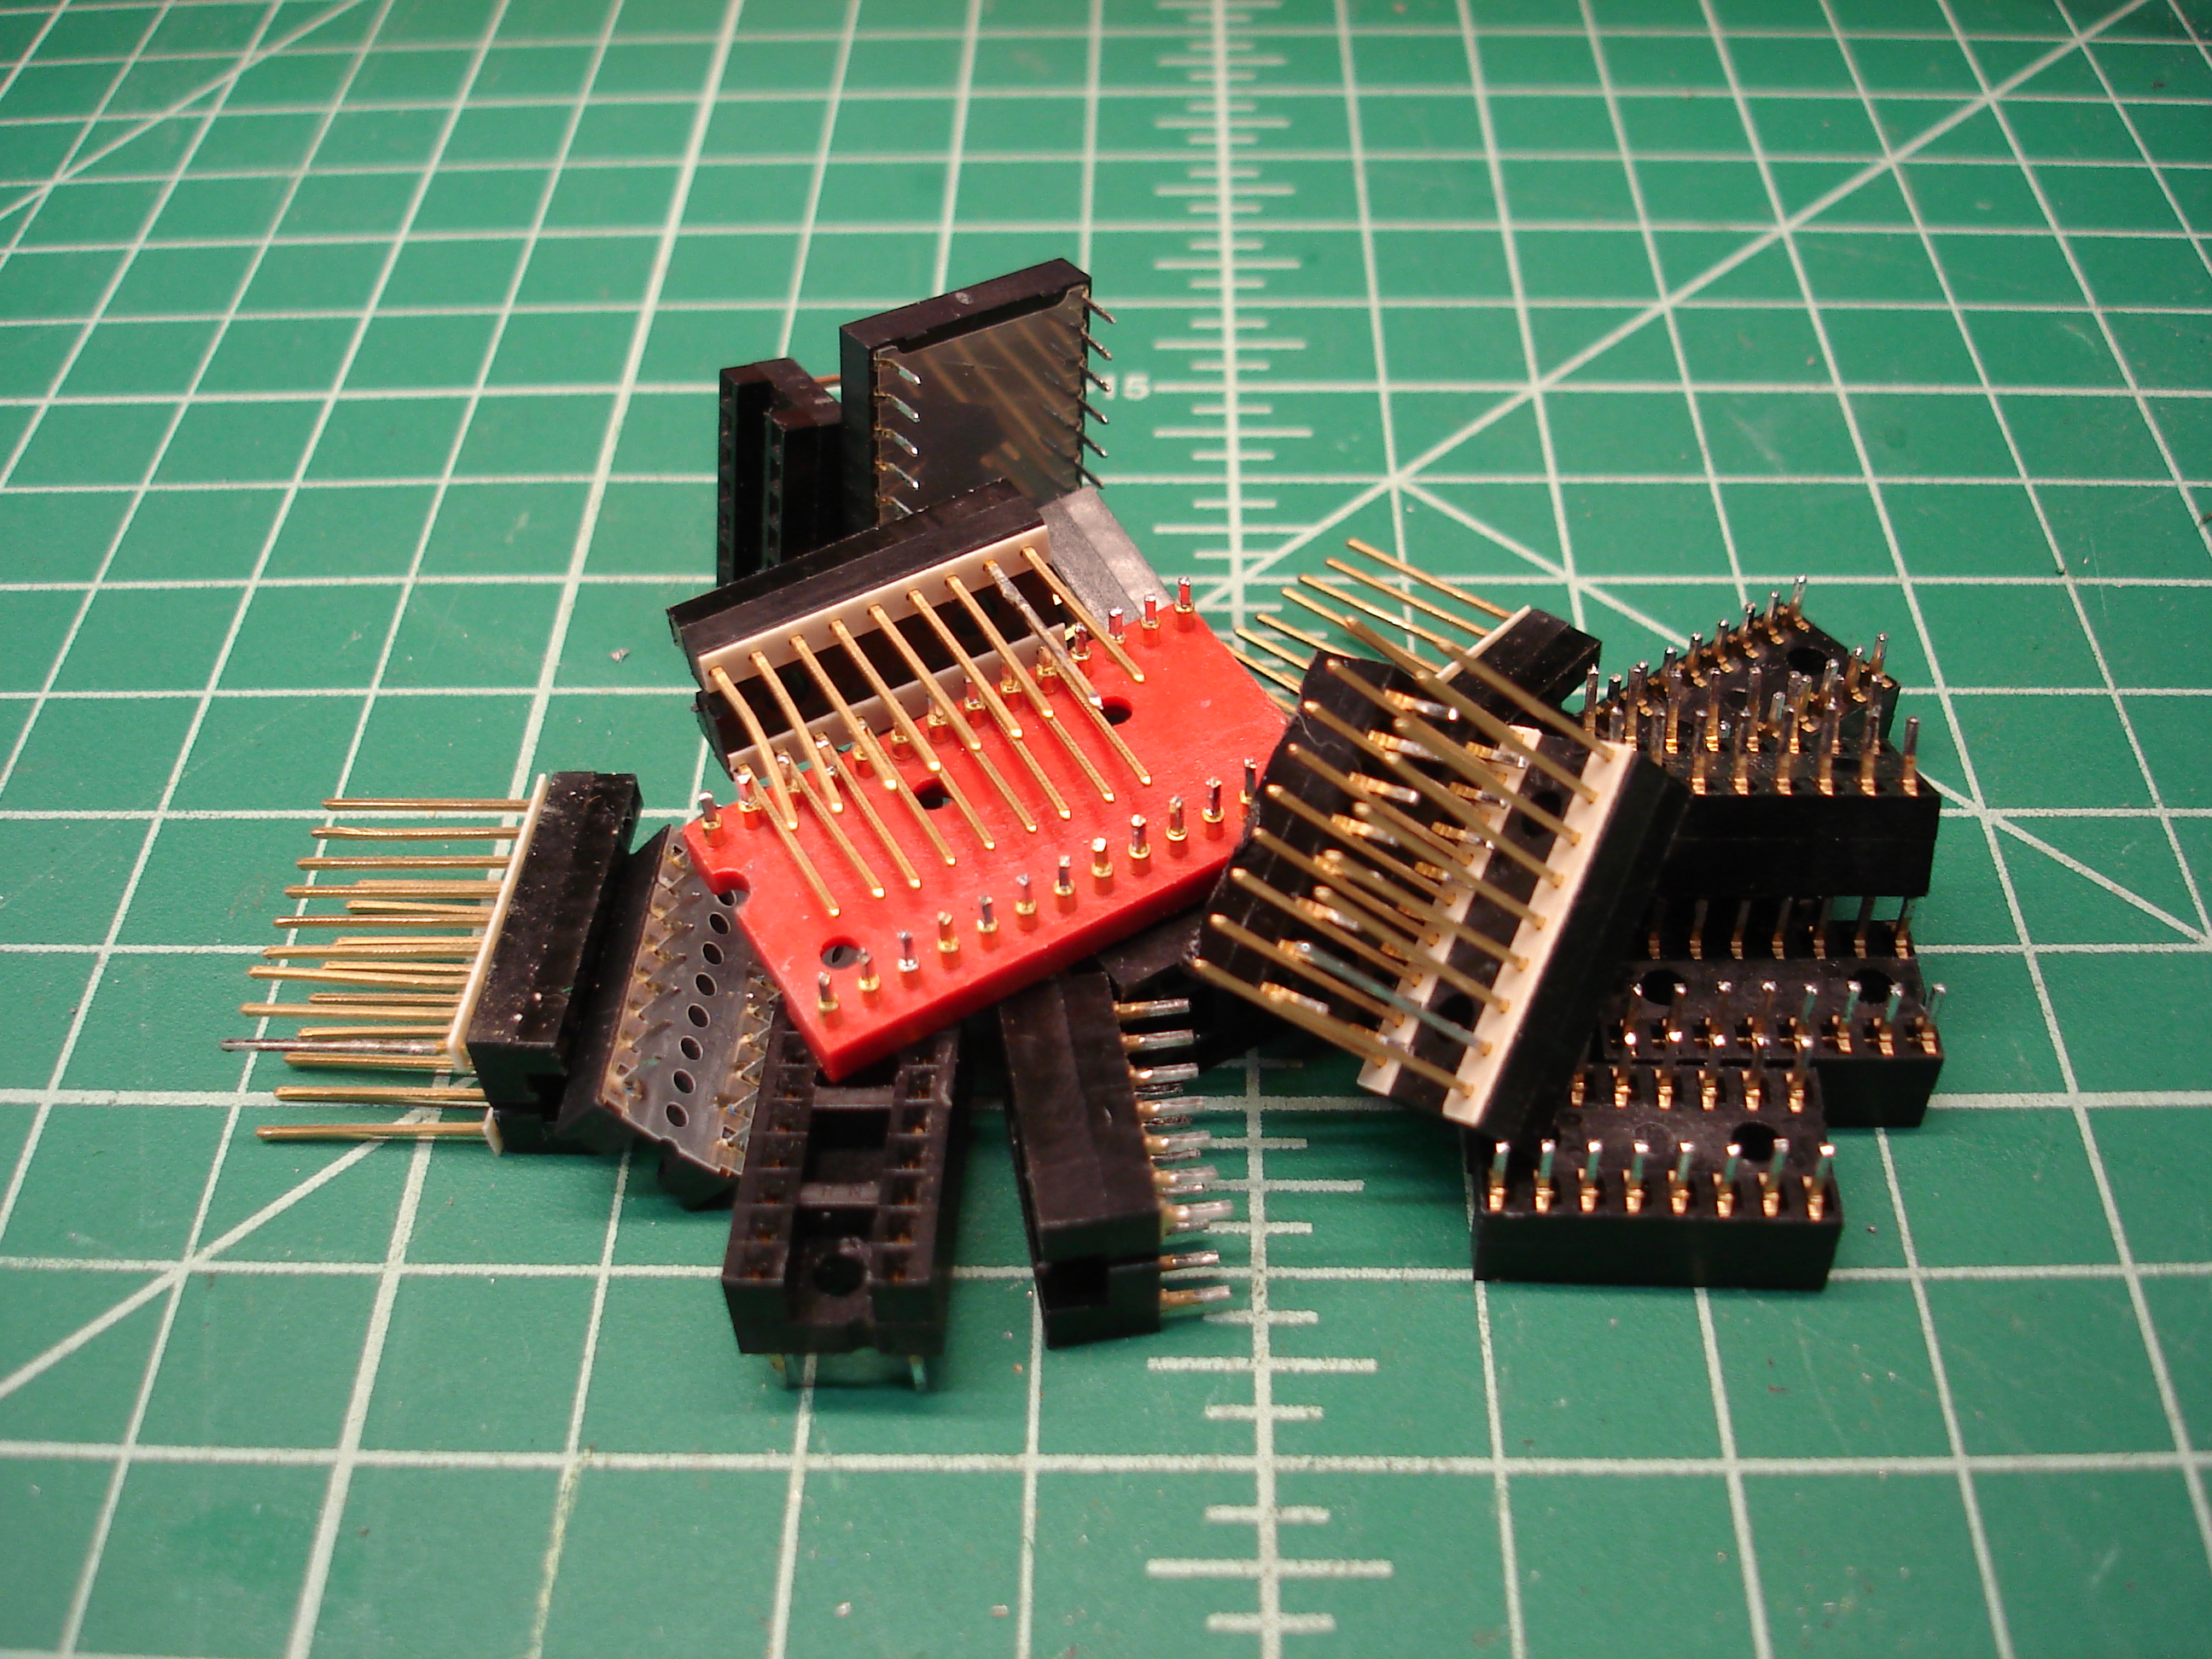
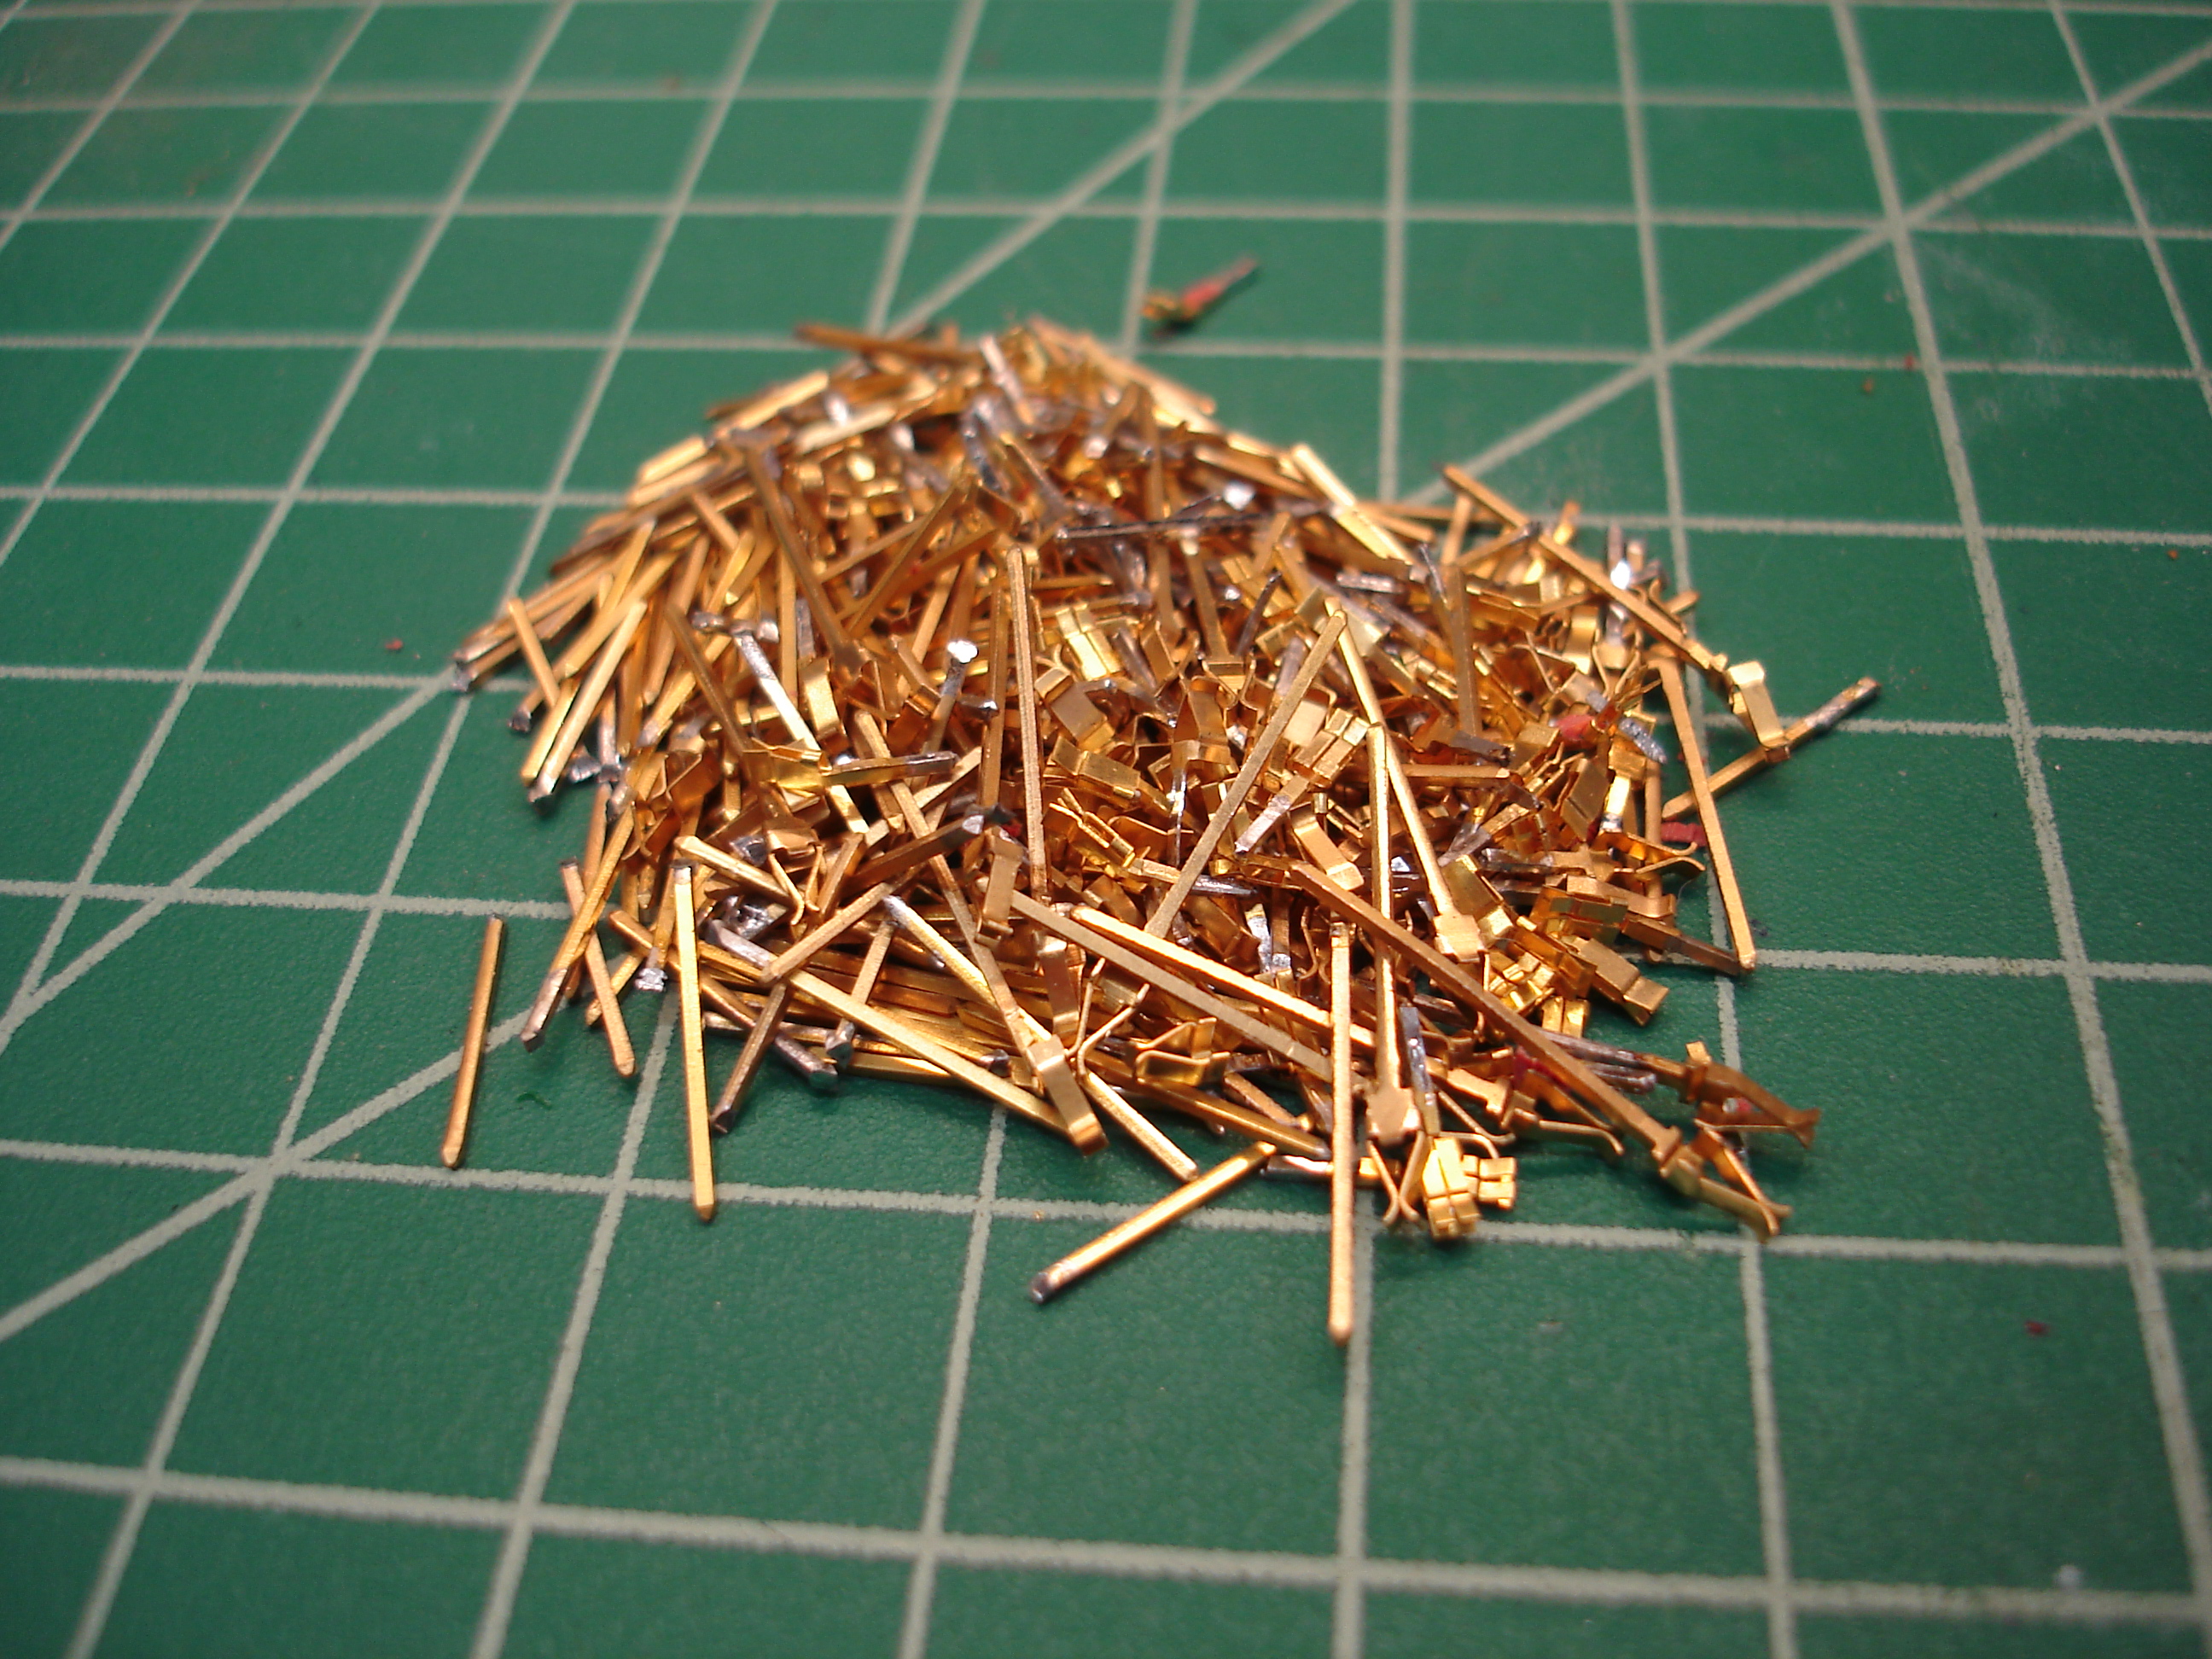
Removing the wire wrap sockets was the second-most difficult task, after dealing with the “wire wrap” mess. The pins were too long for my Hakko 472D desoldering iron, so they had to be cut off. No pads were damaged in the cleanup process. I’ll save the cut wire wrap pins for other projects: they’re handy for providing wire-wrappable jumper options.

The vector pins used to mount discrete components were removed intact and saved: these were shorter than the socket pins, and did not have other pins located immediately next to them.
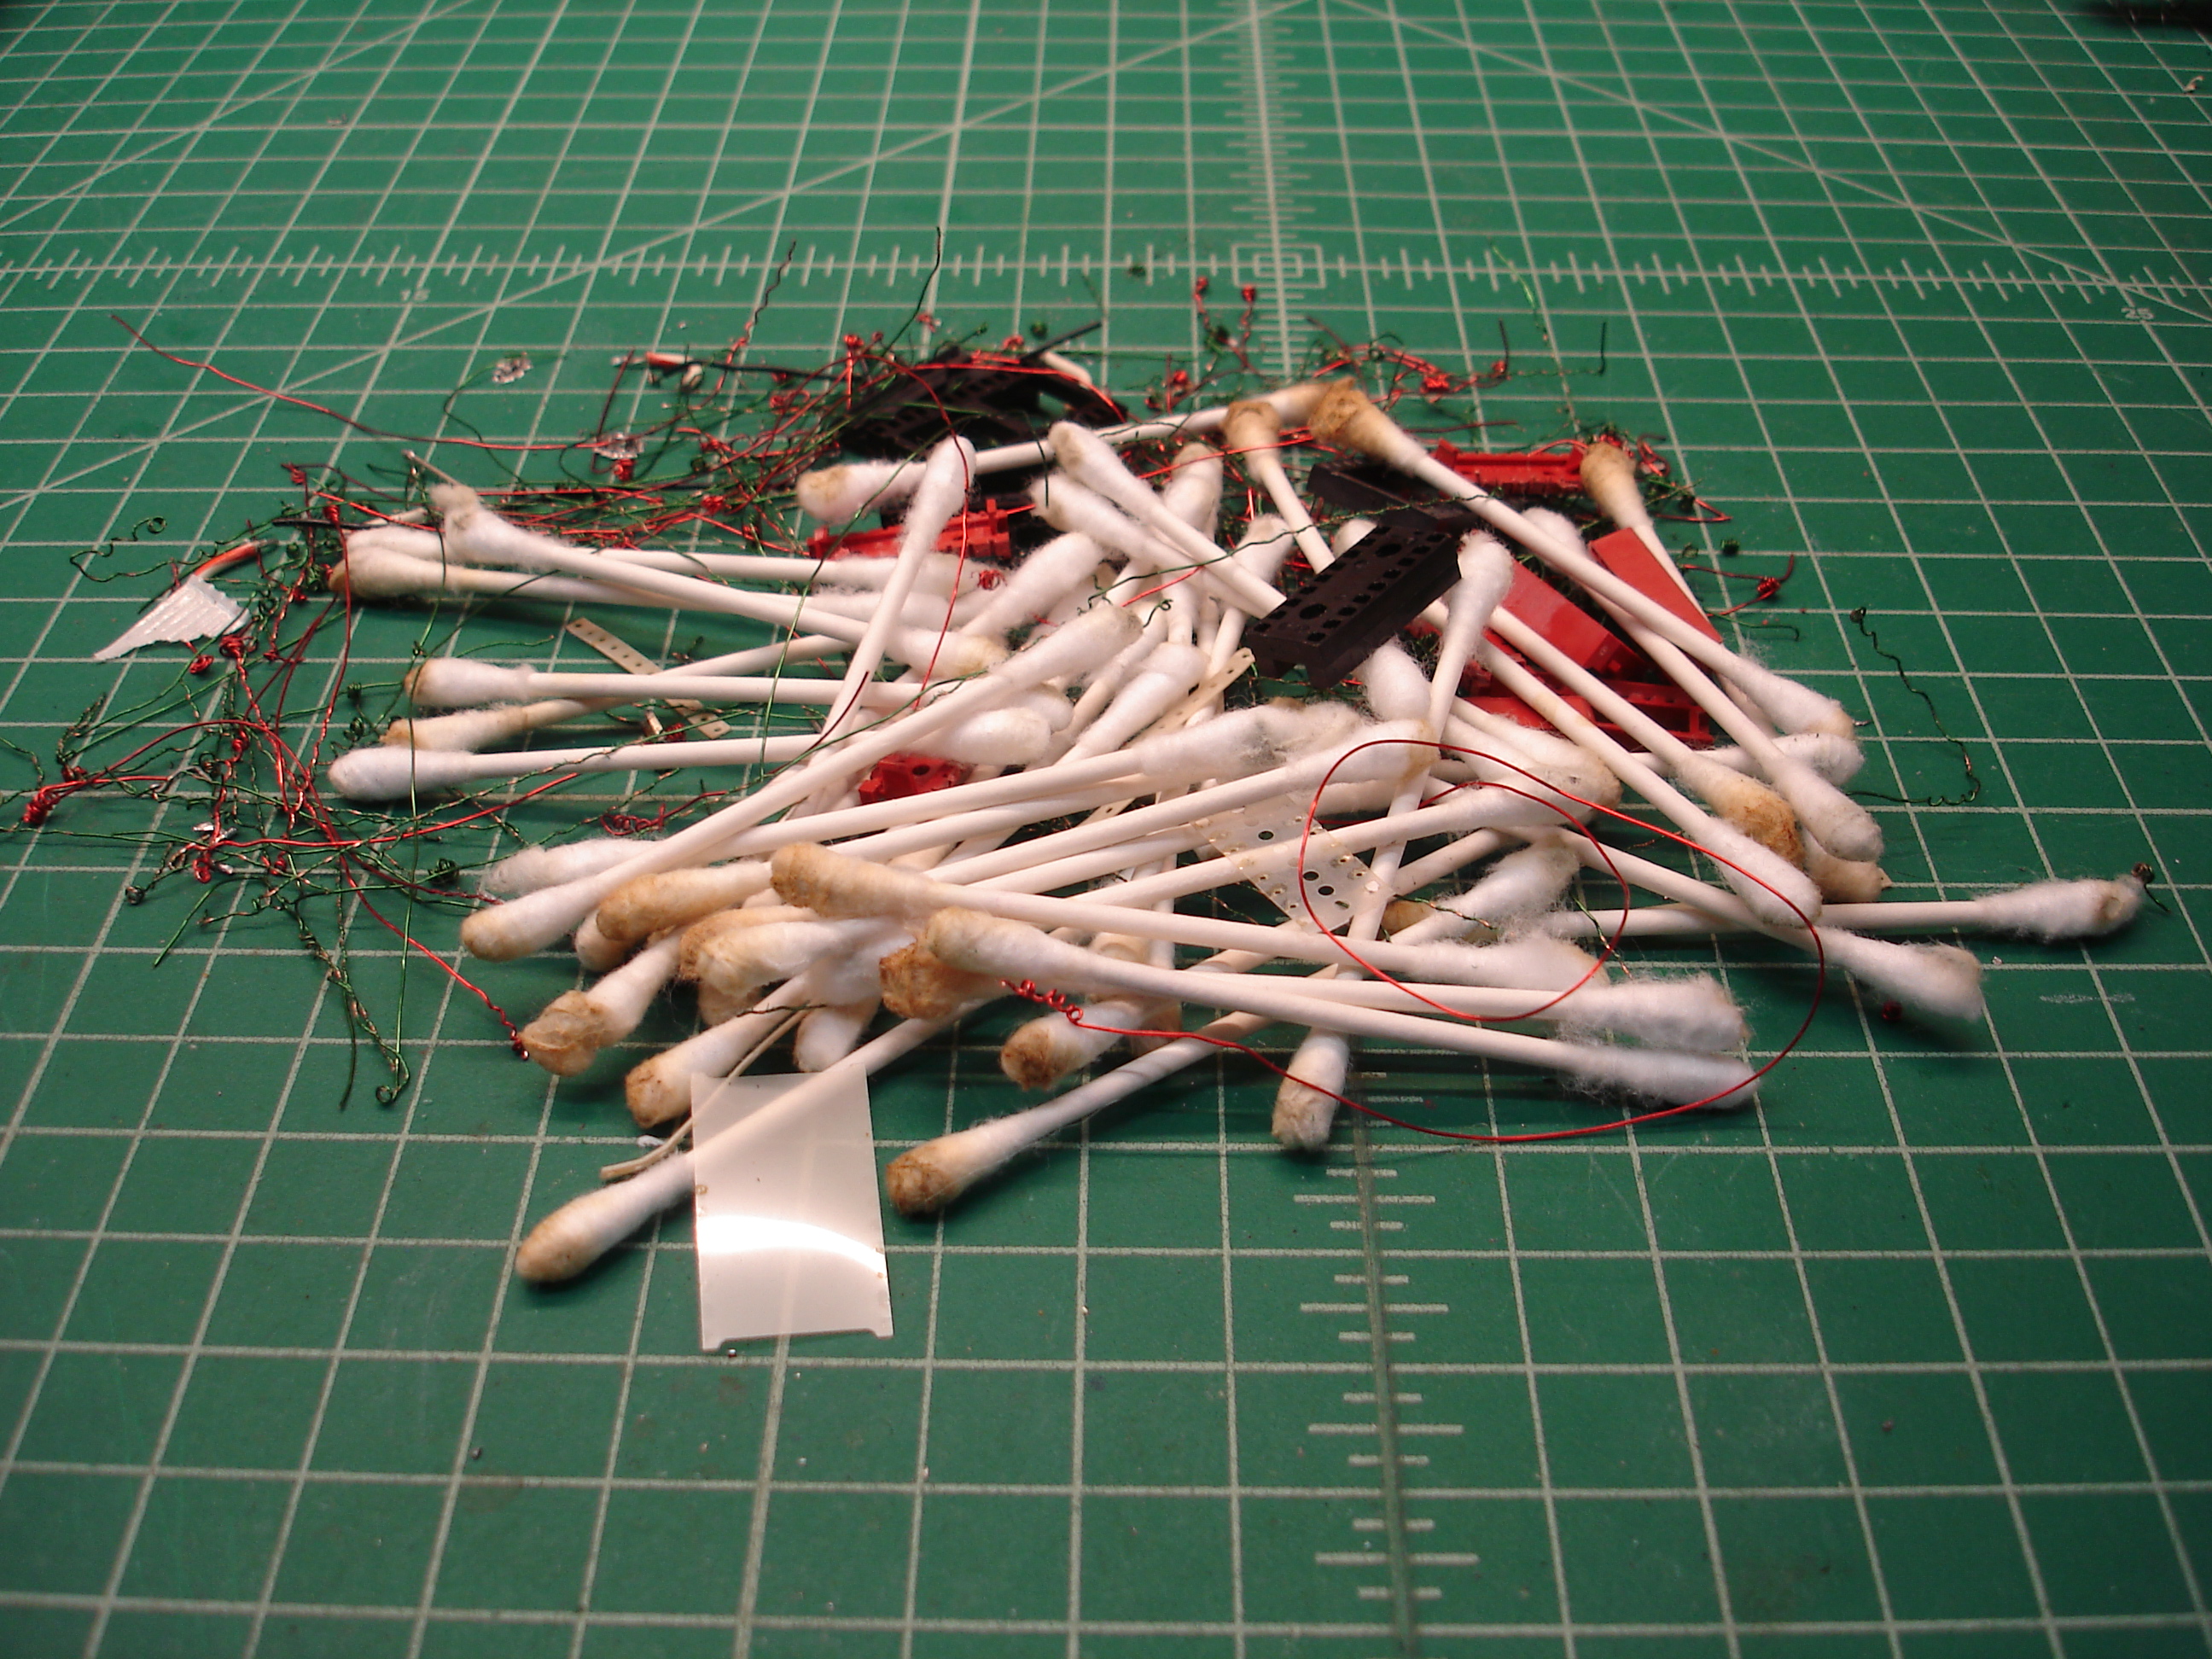
The above image shows the debris left over from the cleanup. Along with single-wipe socket housings and the unwrapped enamel wire, I used a large number of cotton swabs. There was a large amount of rosin flux residue on the board, which was removed with cotton swabs and 91% isopropyl alcohol.
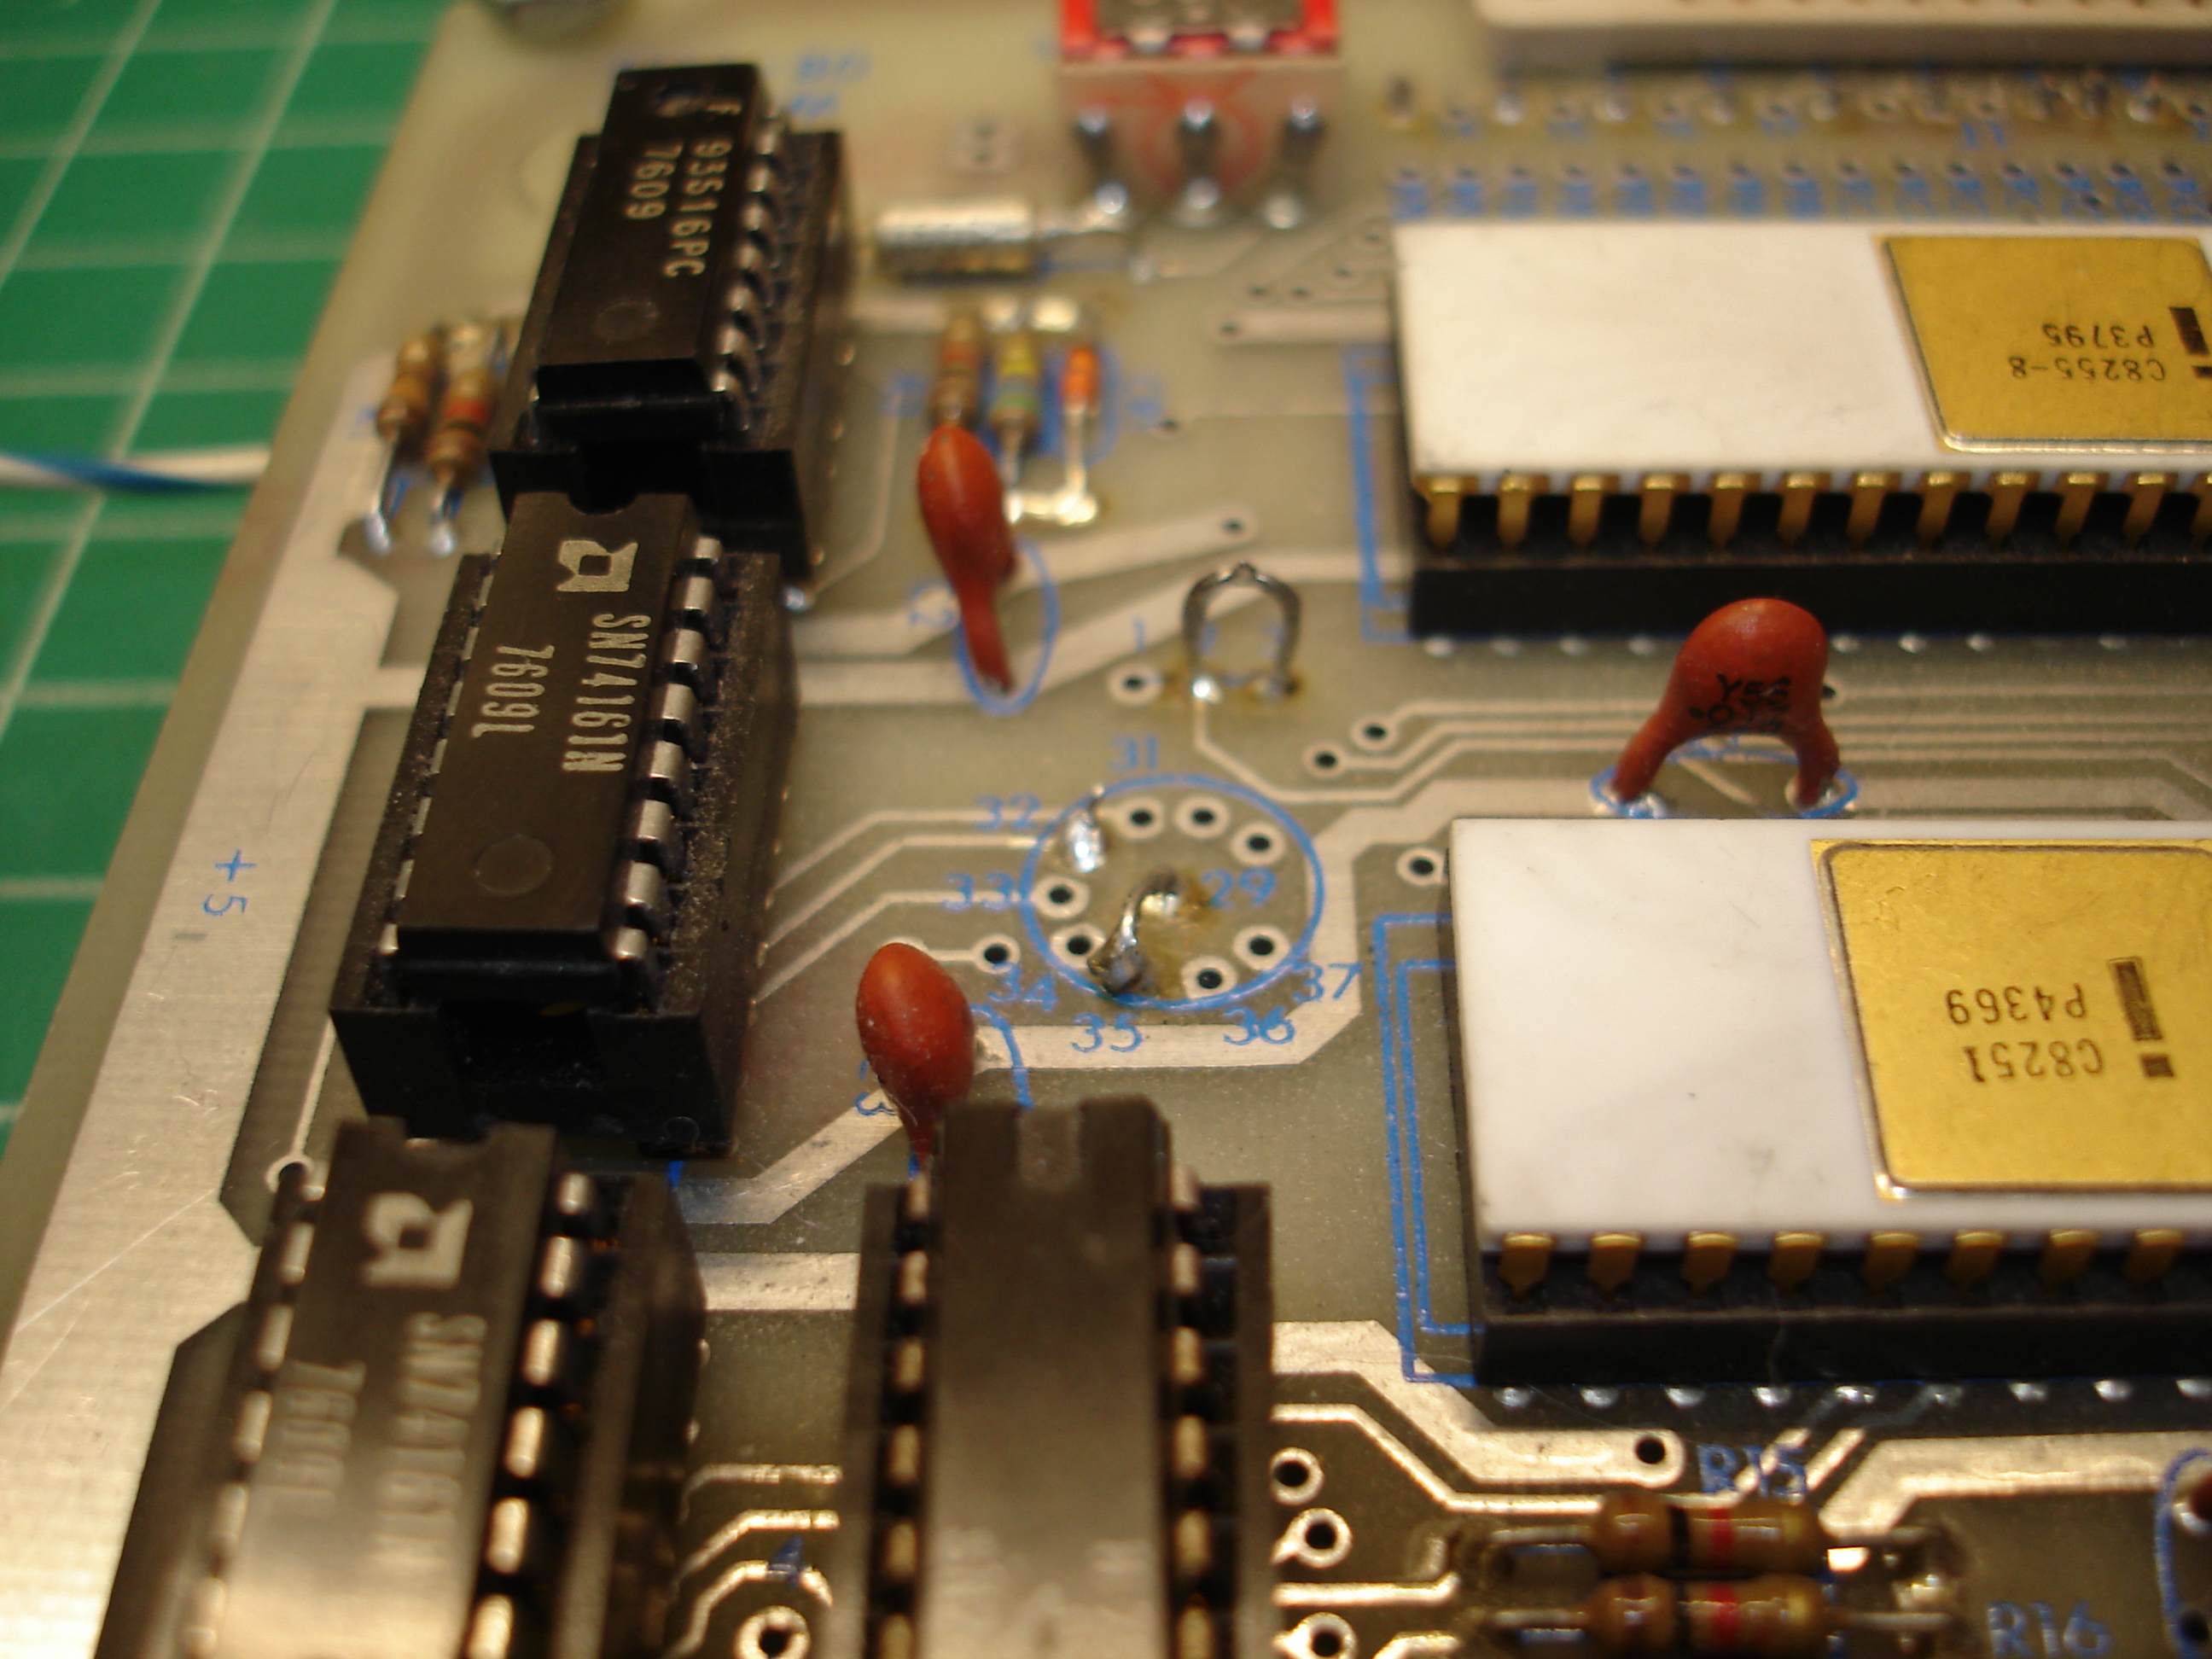
This is the bitrate selection area for the console USART. Intel states in the manual that it can be jumpered with a wire, or a miniature rotary switch can be installed. There was a jumper installed when I received the board, which was fine for testing, but was removed for the installation of a Spectrol rotary switch. Intel provided bitrates up to 4800 bps, but an extra pad in the bitrate area should allow 9600 bps to be jumpered to the rotary switch at a later time.
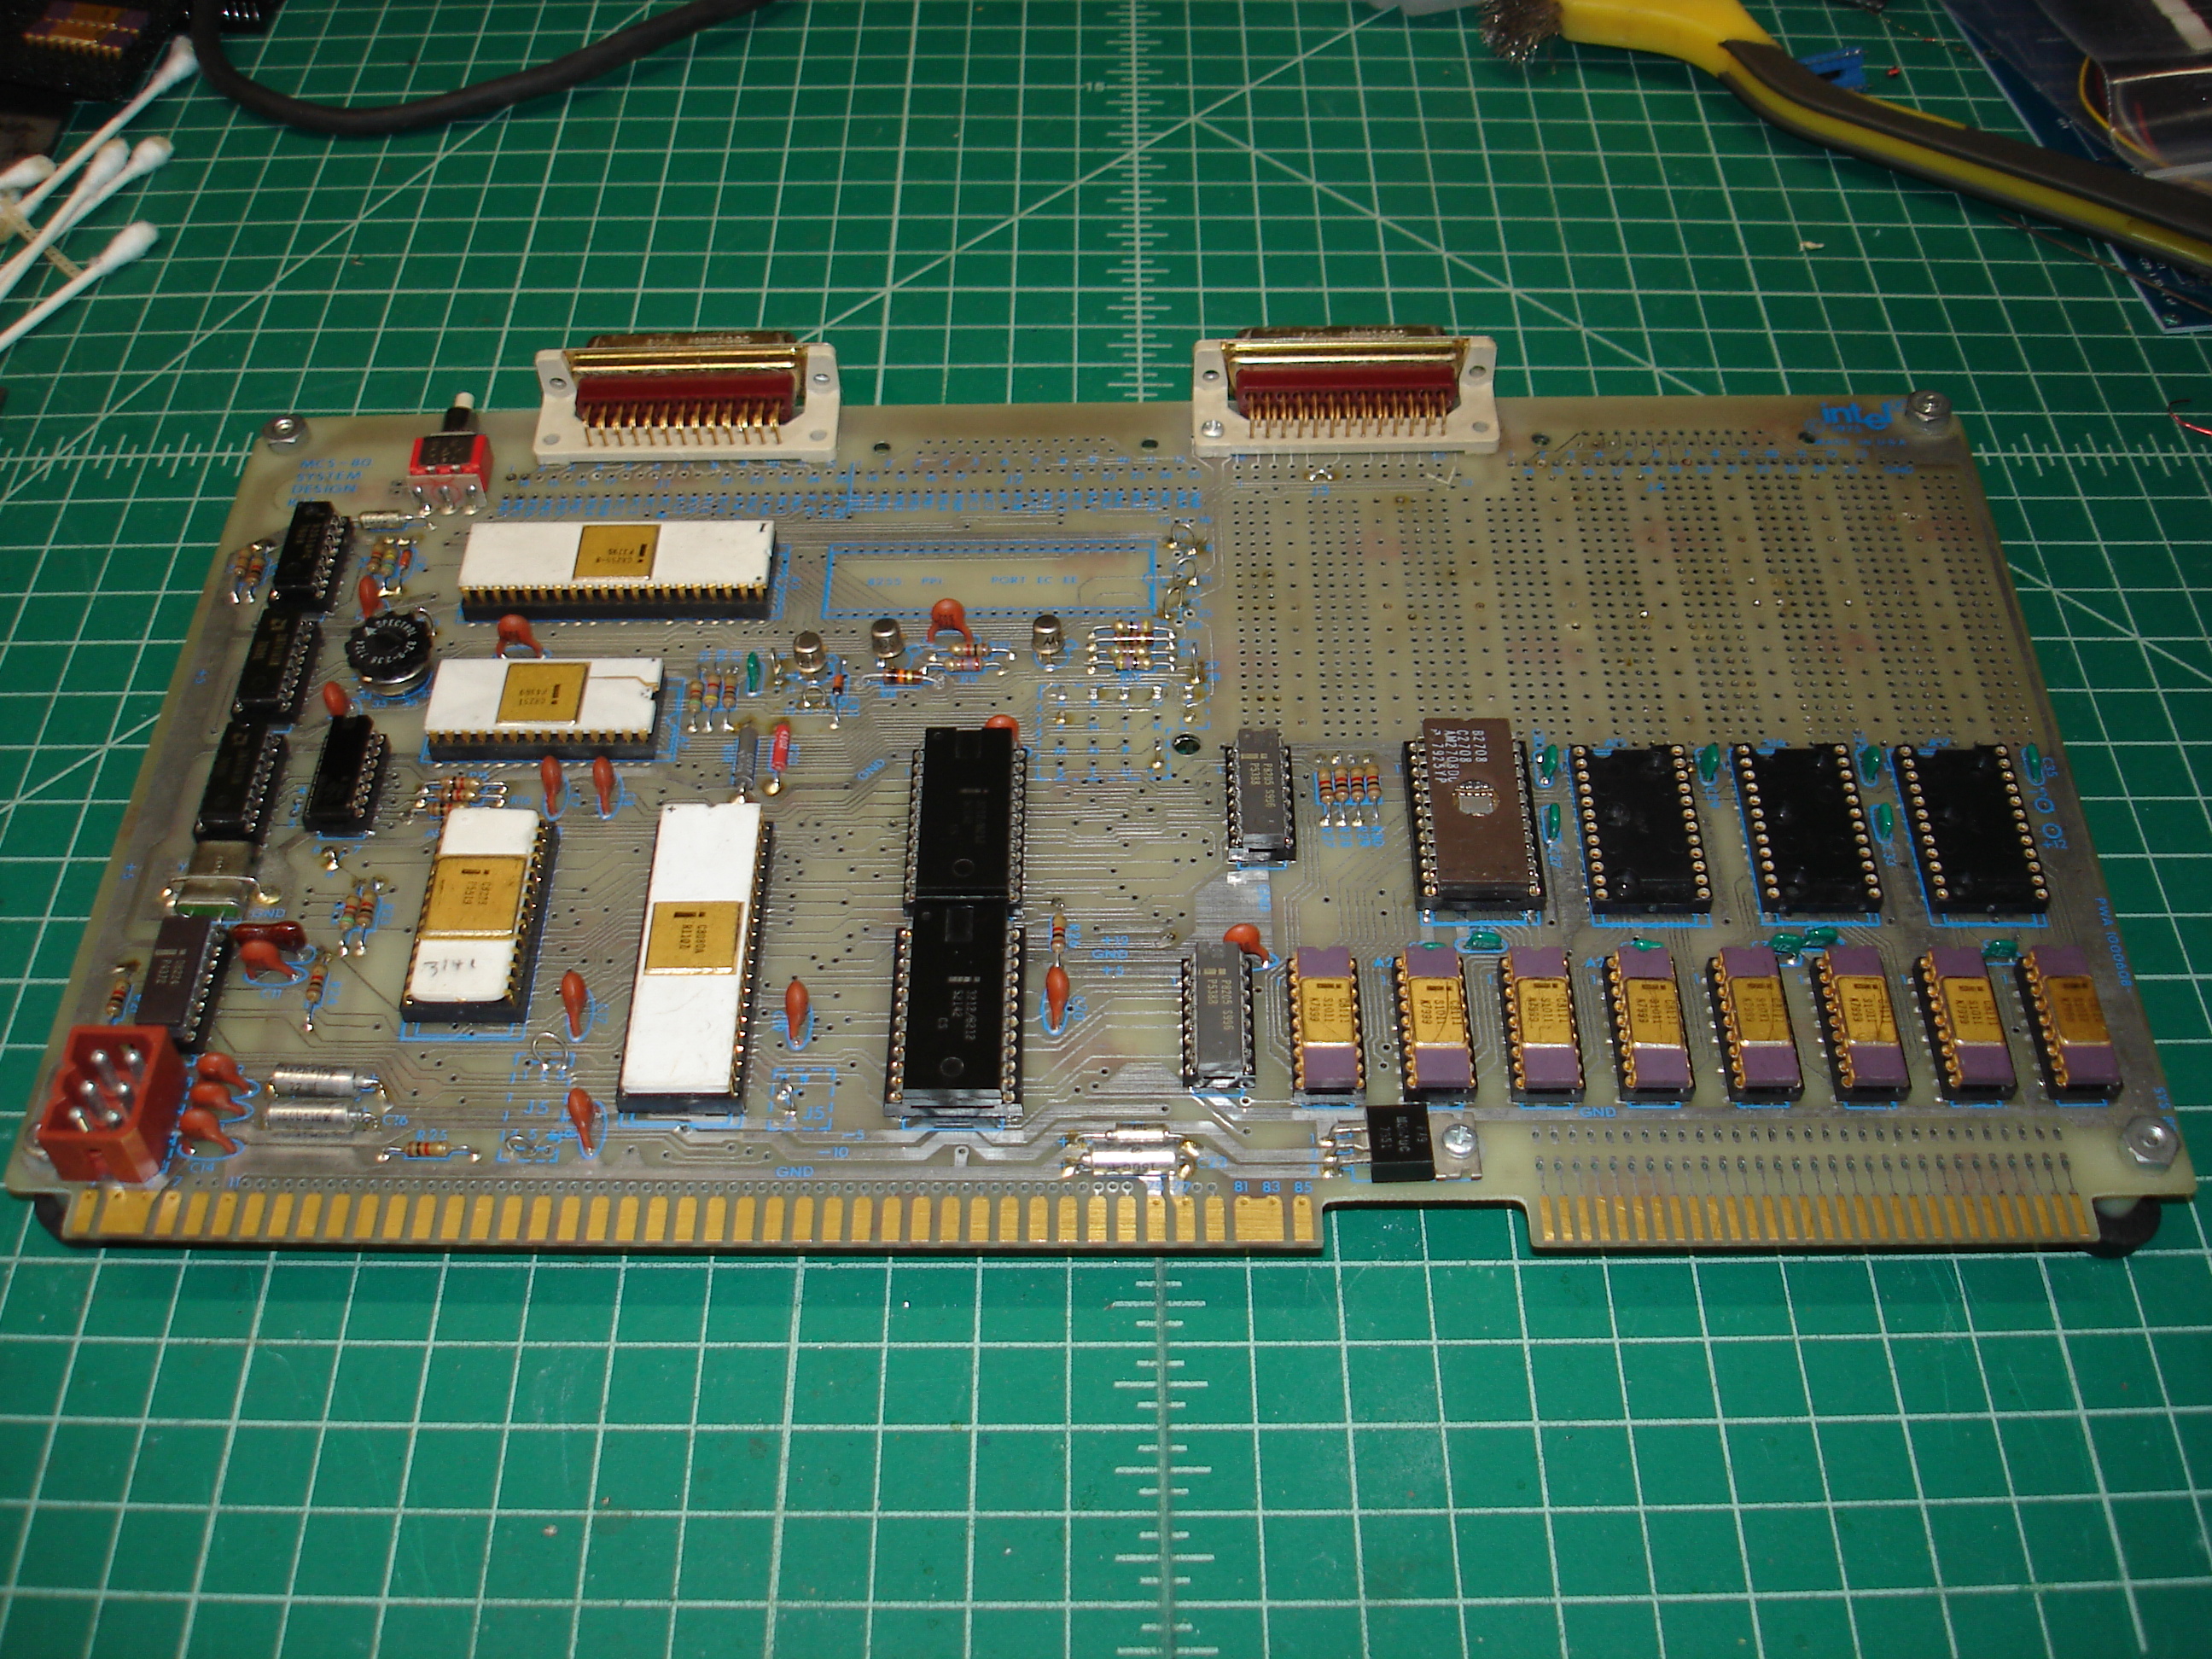
Finally finished! The SDK-80 was built up essentially as it was furnished from Intel, with the addition of more RAM in the stock RAM area, a full 1K instead of the base 256 bytes. All removed sockets were replaced with high-quality machine pin sockets. Wire wrap sockets were installed for the first EPROM socket and the high address byte buffer socket to allow for future expansion. The Vector pins in the control/status line area were retained as well. Intel 8212s were installed for bus buffering. The Spectrol miniature rotary switch can be seen to the left of the USART.
The 8212 address bus buffers will allow for adequate bus drive for the onboard RAM and ROM, as well as any additional devices installed in the prototype area. I plan to expand this SDK-80 somewhat, progress on that will be documented in later writeups.

Intel originally intended for flying leads to be used to supply power to the SDK-80. That’s how it was configured when I received it, but throughout the debugging and cleanup process, several of the wires broke at their solder joints to the circuit board. To remedy this, I installed a 6-pin Molex connector that fits the footprint provided. This makes the SDK-80 much easier to set up and take down, since it does not have a permanent home on the workbench.
So far, the SDK-80 has been very stable. I customized GWMON-80 for the console port and have used it for several hours. GWMON-80 is small enough that I was able to use the SDK-80 to debug an issue with GWMON-80 by using the Intel HEX loader to copy development versions into the 1K of RAM on the SDK-80. That work eventually resulted in this commit, which fixes a long-time issue with the D command. Overall, I find the SDK-80 a very neat little SBC, it is quickly becoming one of my favorites!
Wire Wrap Messes Fixed