Topic: Building a Lego 9767 Board
Date: 2016 SEP 12
The VCF Museum recently acquired a Lego TC Logo kit. This kit was Lego’s first computer control offering for the Technic line. Operating at 4.5V and only sold to educational institutions, the Technic Control or “TC” hardware was not a standalone device. It was controlled from a host computer, such as an IBM PC or Apple II. The kit acquired by VCF came with motors, lamps, sensors, switches, a 70455 “Interface A” control panel, Apple II Logo software, and an IBM PC compatible ISA interface, but no Apple II interface.
Fortunately, the Apple II 9767 interface is a simple board, and has already been documented online. I referenced Lukazi’s blog post about the recreation of the 9767 board for the schematics and a convenient PDF copy of install and checkout instructions. The Lego TC Logo software is available, along with other Logo disk images, from the Asimov archive.
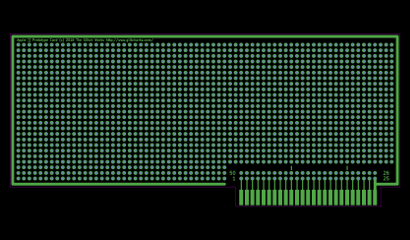
This seemed like a good excuse to work up an Apple II protoboard. Since Douglas Electronics no longer carries Apple II protoboards, and the current offerings don’t provide a layout I like, I put together a quick pad-per-hole card with a 50-pin edge connector and +5/GND traces. The holes are oversize from the usual perfboard holes to accomodate larger components and multiple leads per hole:
The boards worked out fine, but the holes are probably a little too big. I ran a small prototype quantity with HASL plating on the edge connector. Depending on interest, I’ll probably run these in a larger quantity with solder mask and hard gold plated edge connectors. The +5 trace didn’t end up being very useful, and I’m not sure the ground trace is worth keeping either.
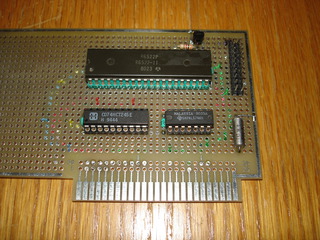
The Lego 9767 build was simple – the card is basically just a MOS 6522 VIA on the Apple II bus, with 8 bits running directly to the Interface A cable connector, and a ninth bit run through a PNP transistor driver. A 74LS74 dual flip-flop is used to synthesize Phi2 for the VIA, since Apple decided to leave it off of the Apple II expansion bus. This is a better arrangement for Phi2 than the resistor-capacitor phase lag circuit seen on other Apple II cards that use the 6522 VIA, like the John Bell Engineering parallel I/O board.
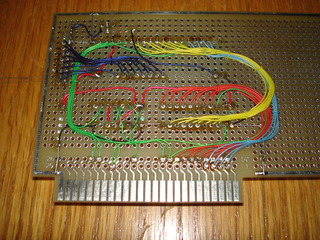
Layout is non-critical since there’s more than enough protoboard for this simple circuit. The header for the Interface A ribbon cable should probably be a little lower on the board – it would make it easier to feed the cable out though a punchout connector in an Apple IIe or IIgs. The transistor is listed as a BC558 but a 2N2907 or 2N3906 should work as well. The base resistor is not critical, I used a 3K resistor instead of a 2.2K because I found the 3K first in my box of resistors. Wiring was done with Kynar wrapping wire, soldered point-to-point.
I followed a wiring color code similar to the Ohio Scientific RAM board build. Colors are as follows:
- Heavy red is +5V
- Black is ground
- Red/Orange is Apple II data bus
- Yellow is buffered internal data bus
- Green is control signalling
- Blue is unbuffered Apple II address bus
- Purple is 6522 VIA output to the Interface A connector
There are a few bare wire jumpers for +5 and GND, connecting to the traces running around the perimeter of the board.
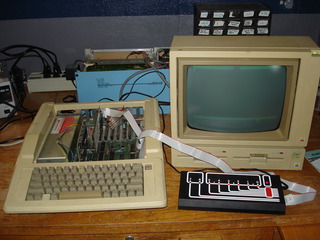
I wrote out a copy of Lego TC Logo using ADTPro, an excellent utility for writing Apple II disk images to physical disks over a serial link with a modern PC. The Lego 9767 card wants to be in Slot 2, but you’ll need to remove it and install your Super Serial Card in Slot 2 for ADTPro. With the disk image written out, I removed the Super Serial Card, installed the Lego 9769 card, and followed the checkout instructions in the user manual:
Success! The board worked on the first try! Expect to see this board in action at the VCF booth at the New York Maker Faire this year!
Lego kits revived


![["Lego 9767 back", "Lego 9767 back closeup"]](/~glitch/images/vintage-misc/lego_logo_interface/scaled/back.jpg)

![["Lego 9767 installed in an Apple IIe", "Full Apple II test setup"]](/~glitch/images/vintage-misc/lego_logo_interface/scaled/installed.jpg)
