Topic: Fixing up a Pegasus II S-100 machine
Date: 2023 FEB 25
I bought this machine from Doug Crawford in December 2019, at a Vintage Computer Federation event. I’d actually encountered it several years earlier, when Doug bought the Pegasus II and brought it to a VCF repair workshop. The machine came with documentation and a large quantity of diskettes, but had a serious problem: it’d boot from diskette, and seemed to load programs from diskette just fine, but any writes at all would clobber the diskette! Not only would data areas be corrupted, but the CP/M directory would also get destroyed. Since the machine could not duplicate its own diskettes, I made working copies of the system diskettes for Doug, so he could continue trying to troubleshoot the machine.
Doug was not able to figure out the write corruption issue, and decided to pass the system on with all of its documentation and diskettes. No one else at the event was too excited about the write corruption issue, so I decided to buy the Pegasus II and fix it up.
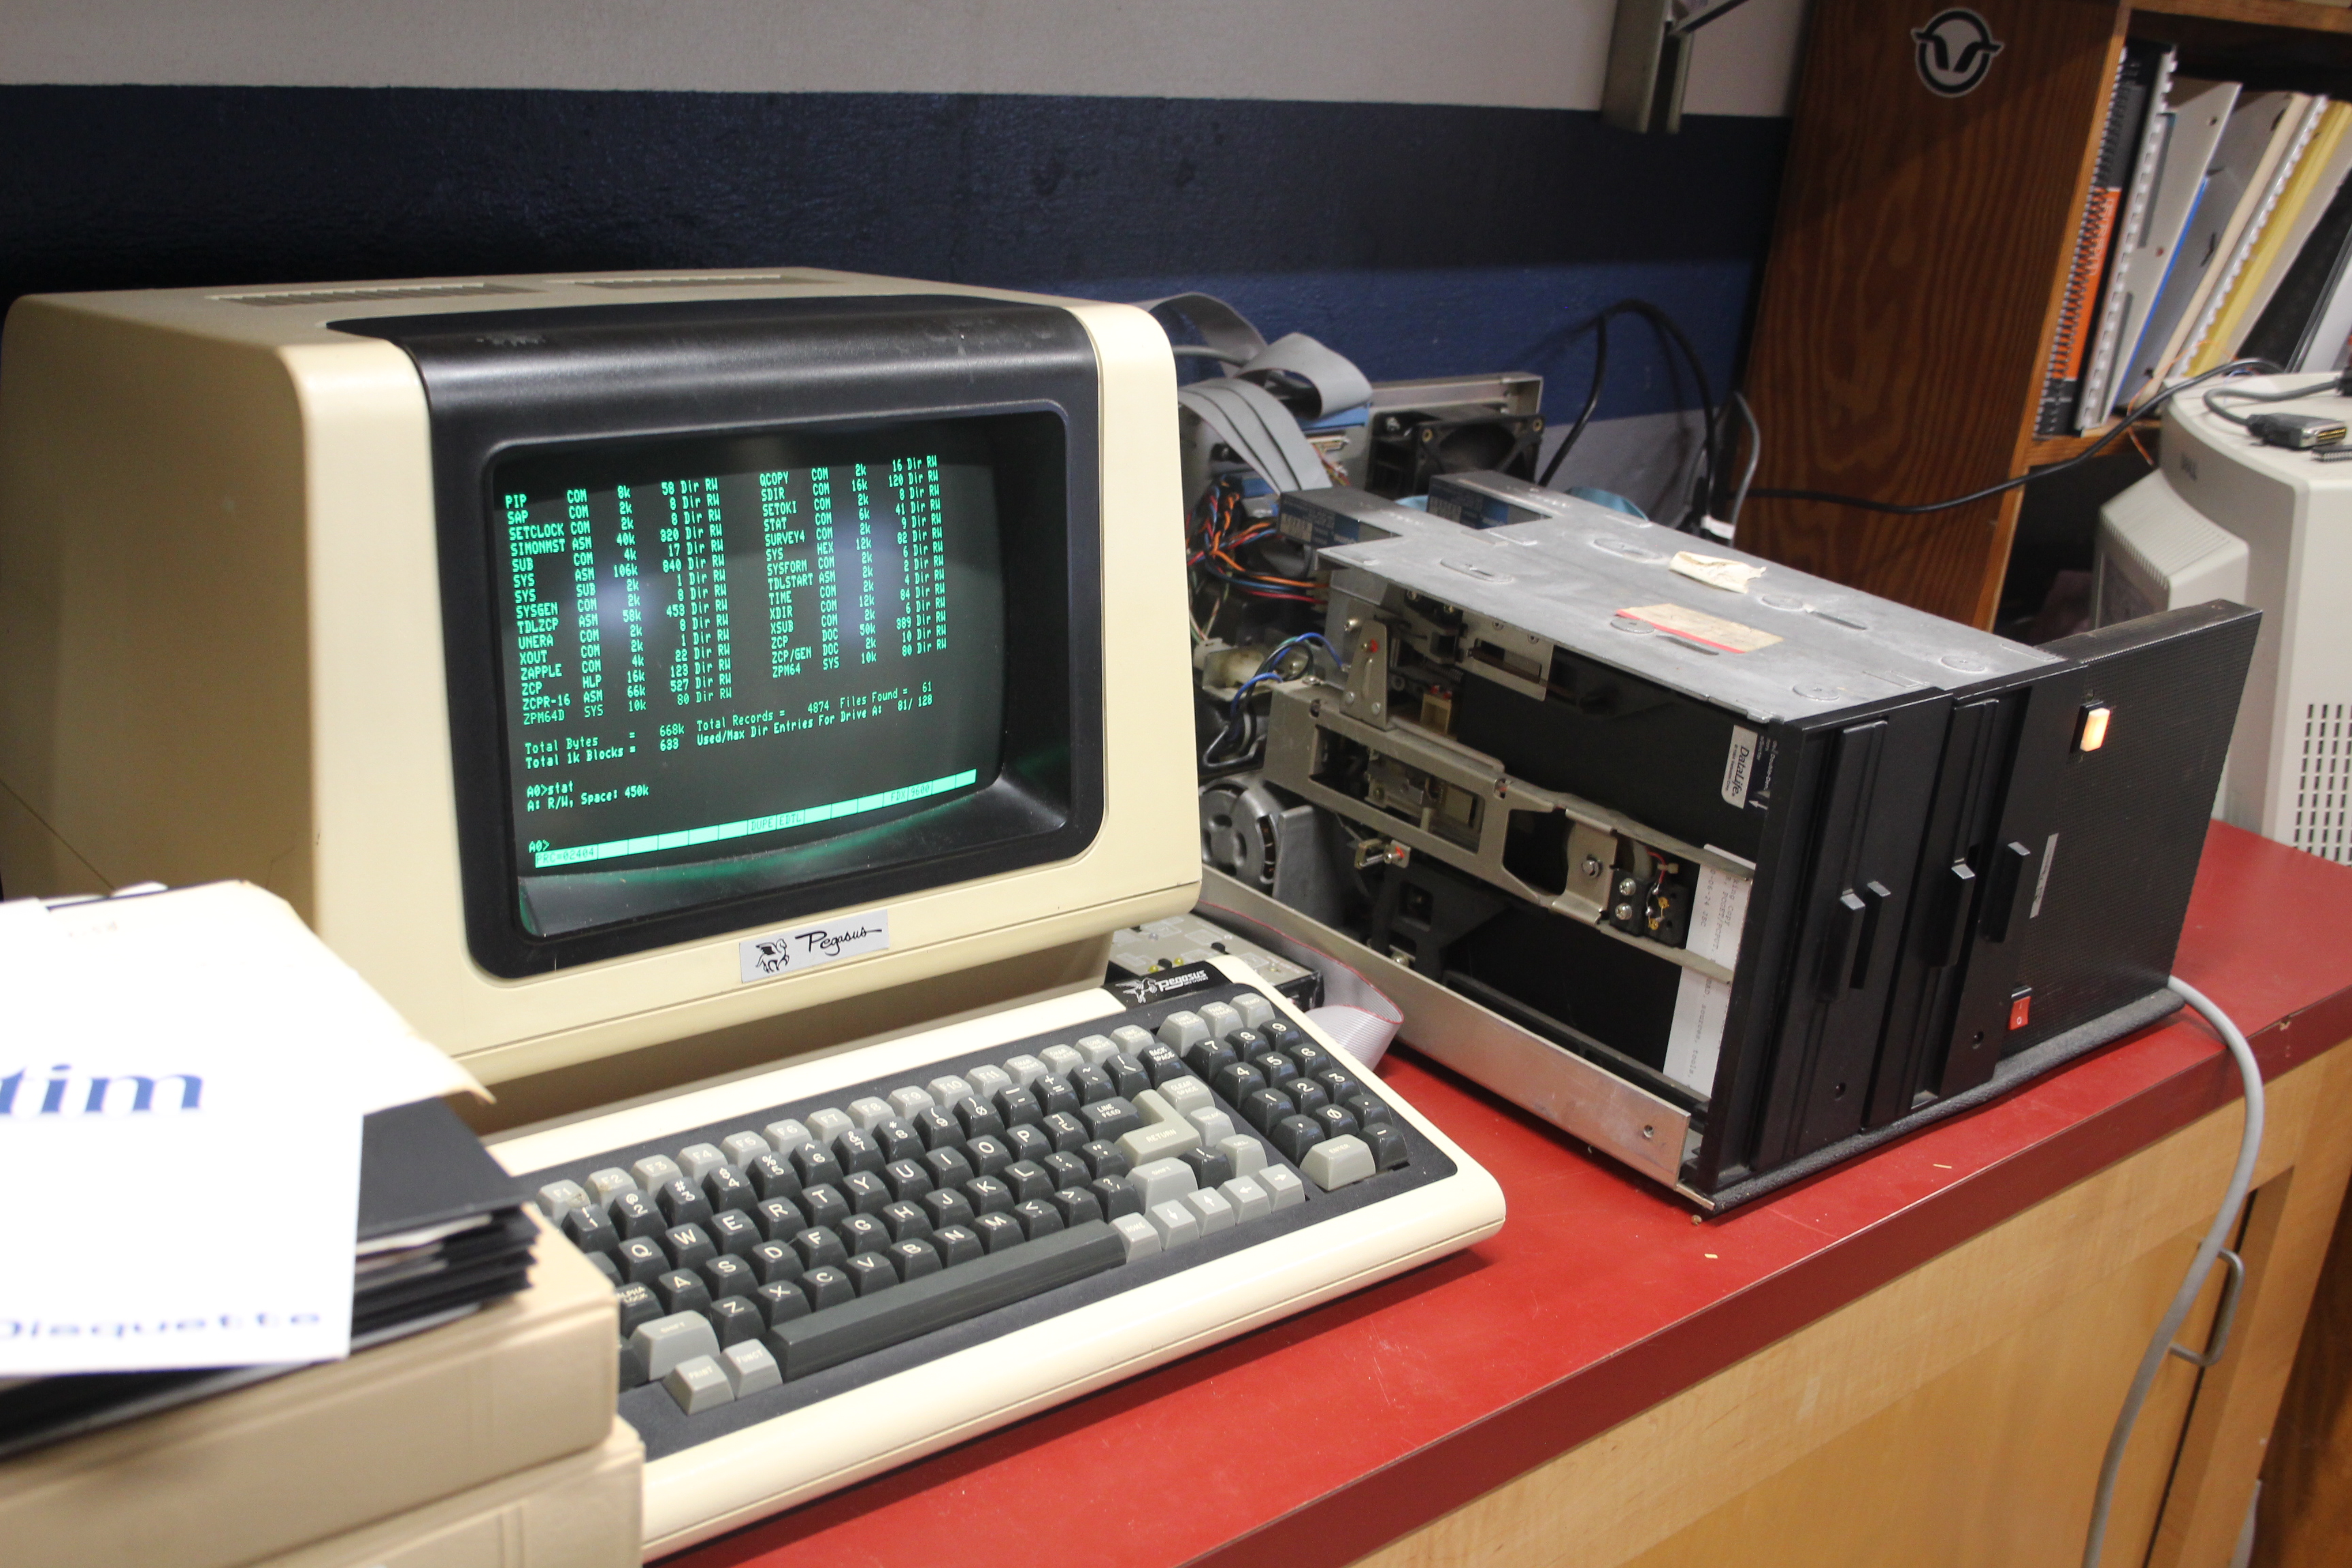
Here’s the system set up with its whitelabeled console terminal:

The diskettes and cases shown are a small portion of what came with the system. Many diskettes were not directly related to this system and must’ve been mixed in from something else. There were also lots of duplicates – no less than ten copies of WordStar!
The documentation which was specific to this system ended up fitting in a banker’s box:

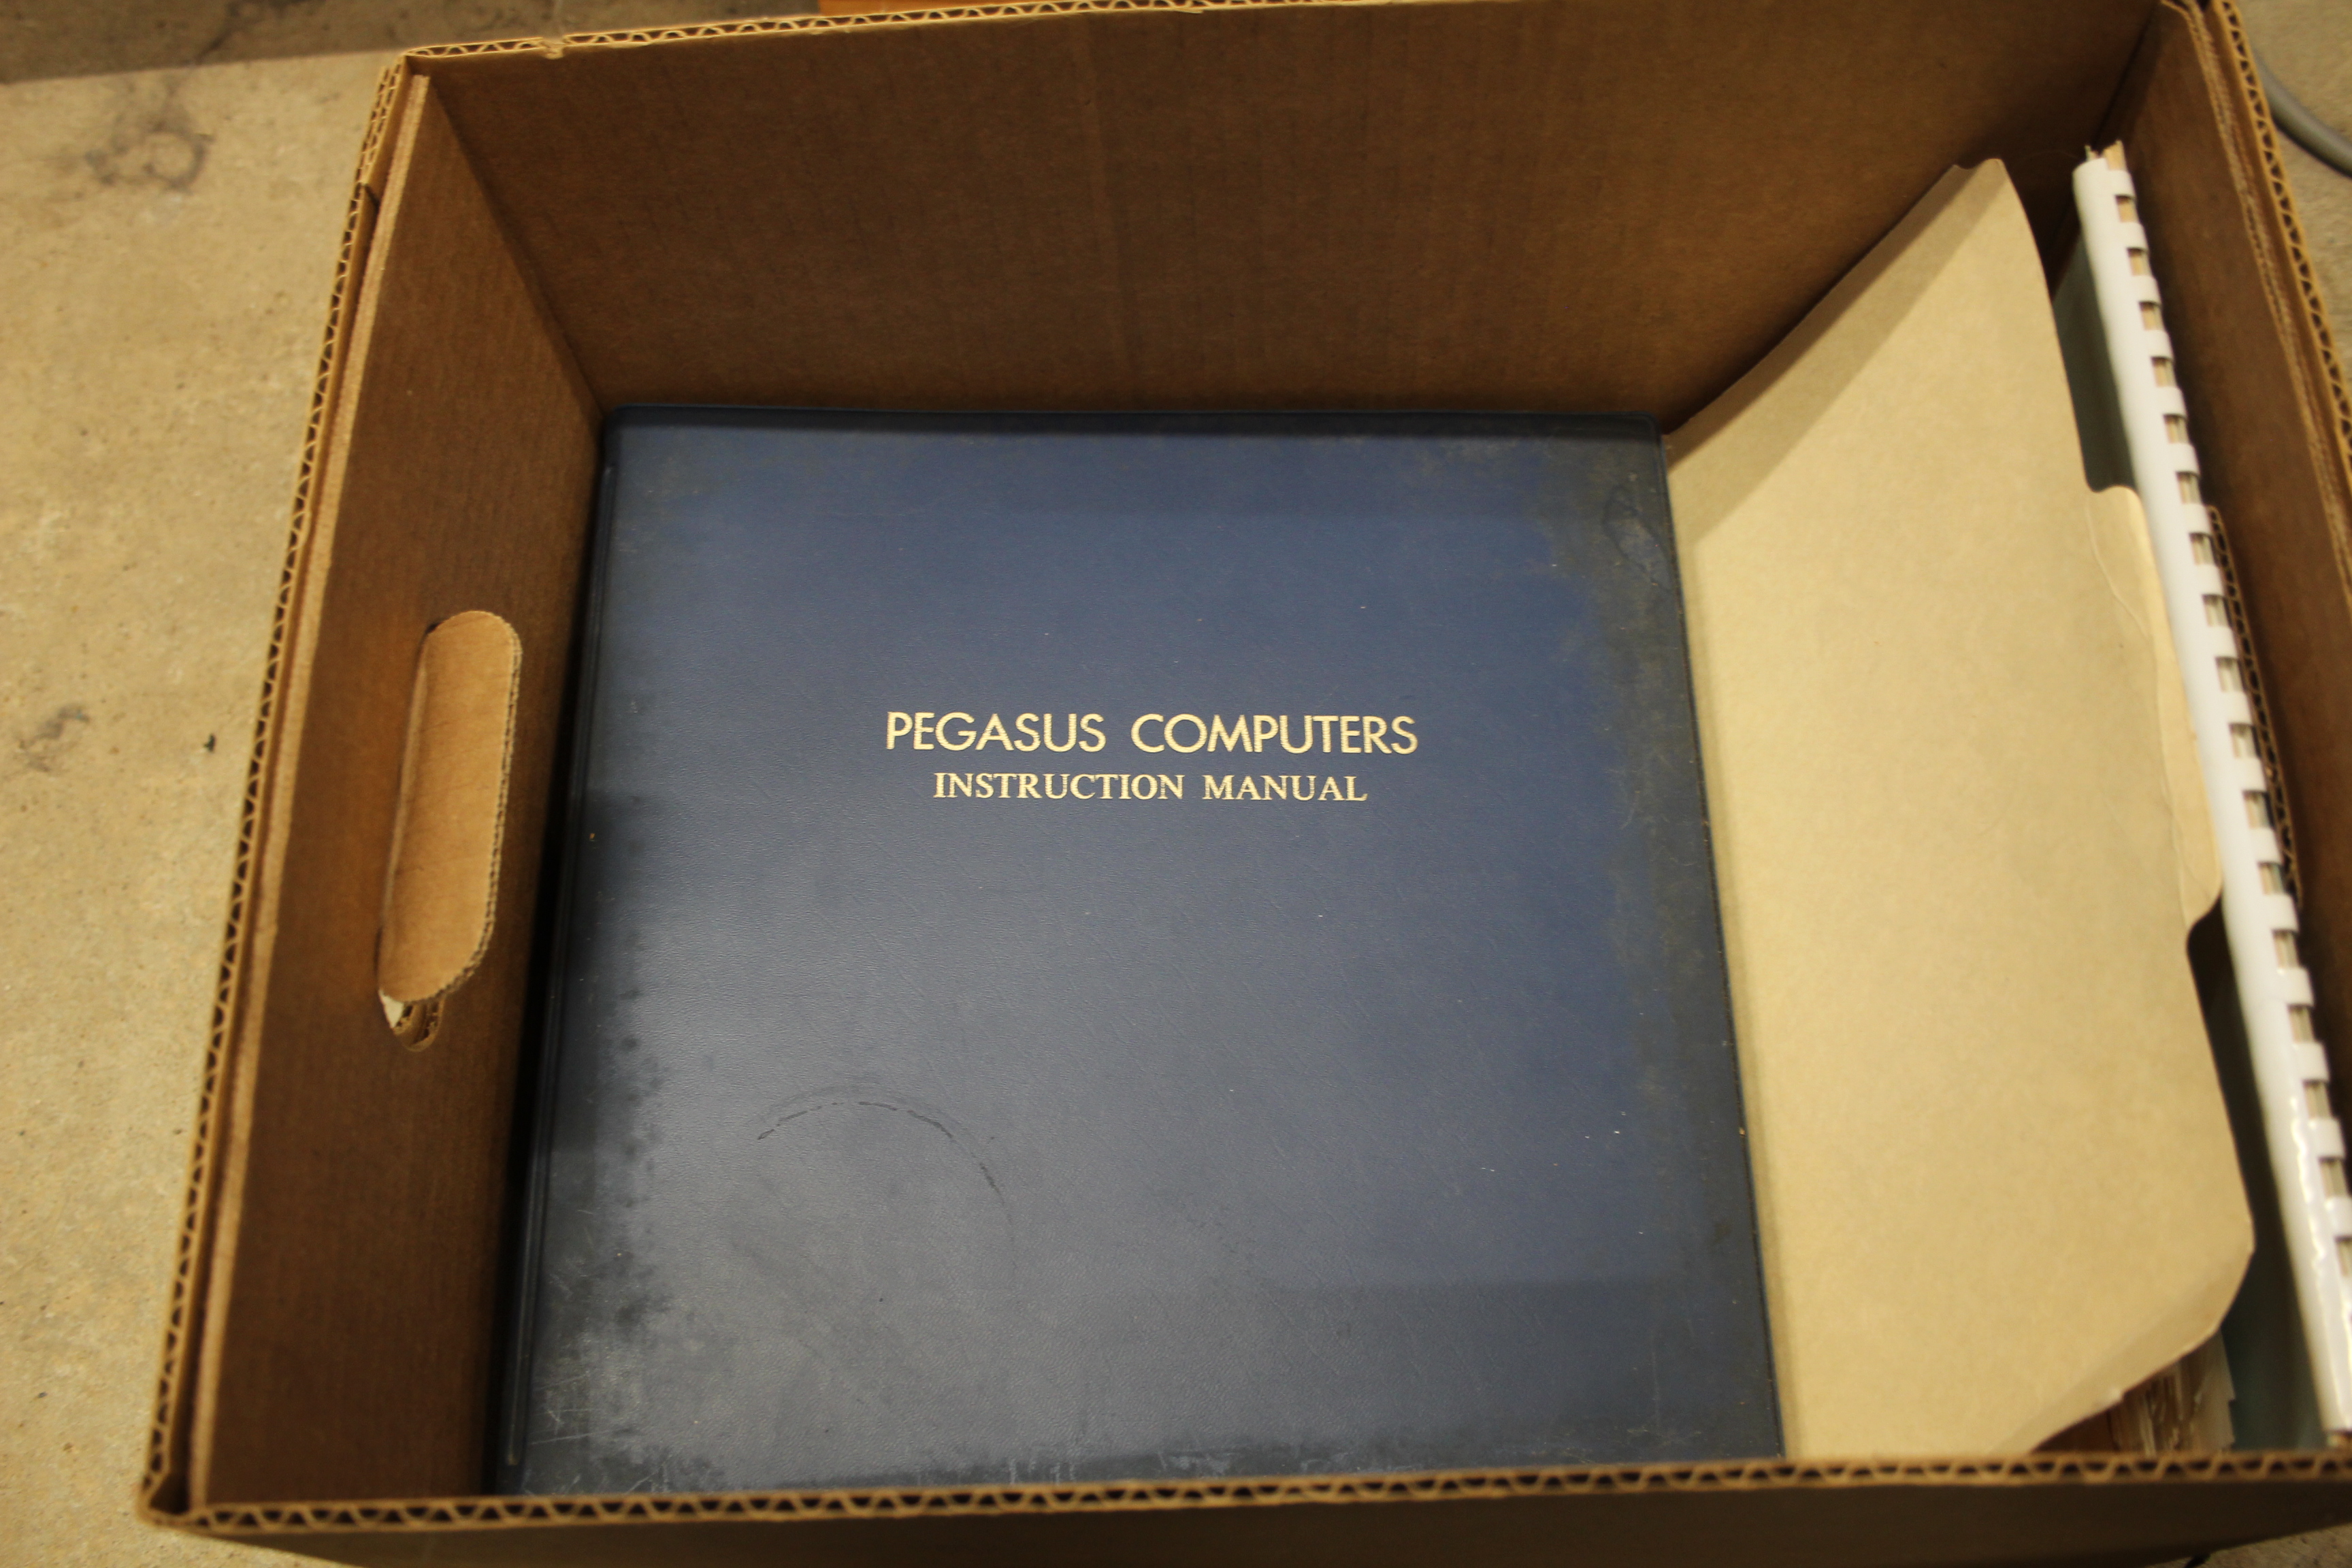
Between the official Pegasus documentation, Hugh Turner’s notes and printouts, and the third party board documentation, pretty much every part of the system is documented.
System History
Pegasus Data Systems seems to be another one of those “lost to the ages” systems integrators from the 1970s. Documentation included with the system and ads from old trade magazines put Pegasus as located in Middlesex, NJ.
Interestingly, I was able to find a FCC database which lists Harold Walker as their contact for Pegasus Data Systems. Some of the National Multiplex documentation included H.R. WALKER as the programmer, and National Multiplex was also located in New Jersey. I can’t find definite answers, but I wouldn’t be surprised if Pegasus and National Multiplex either worked very closely, or if Pegasus was simply the “system builder” name associated with National Multiplex.
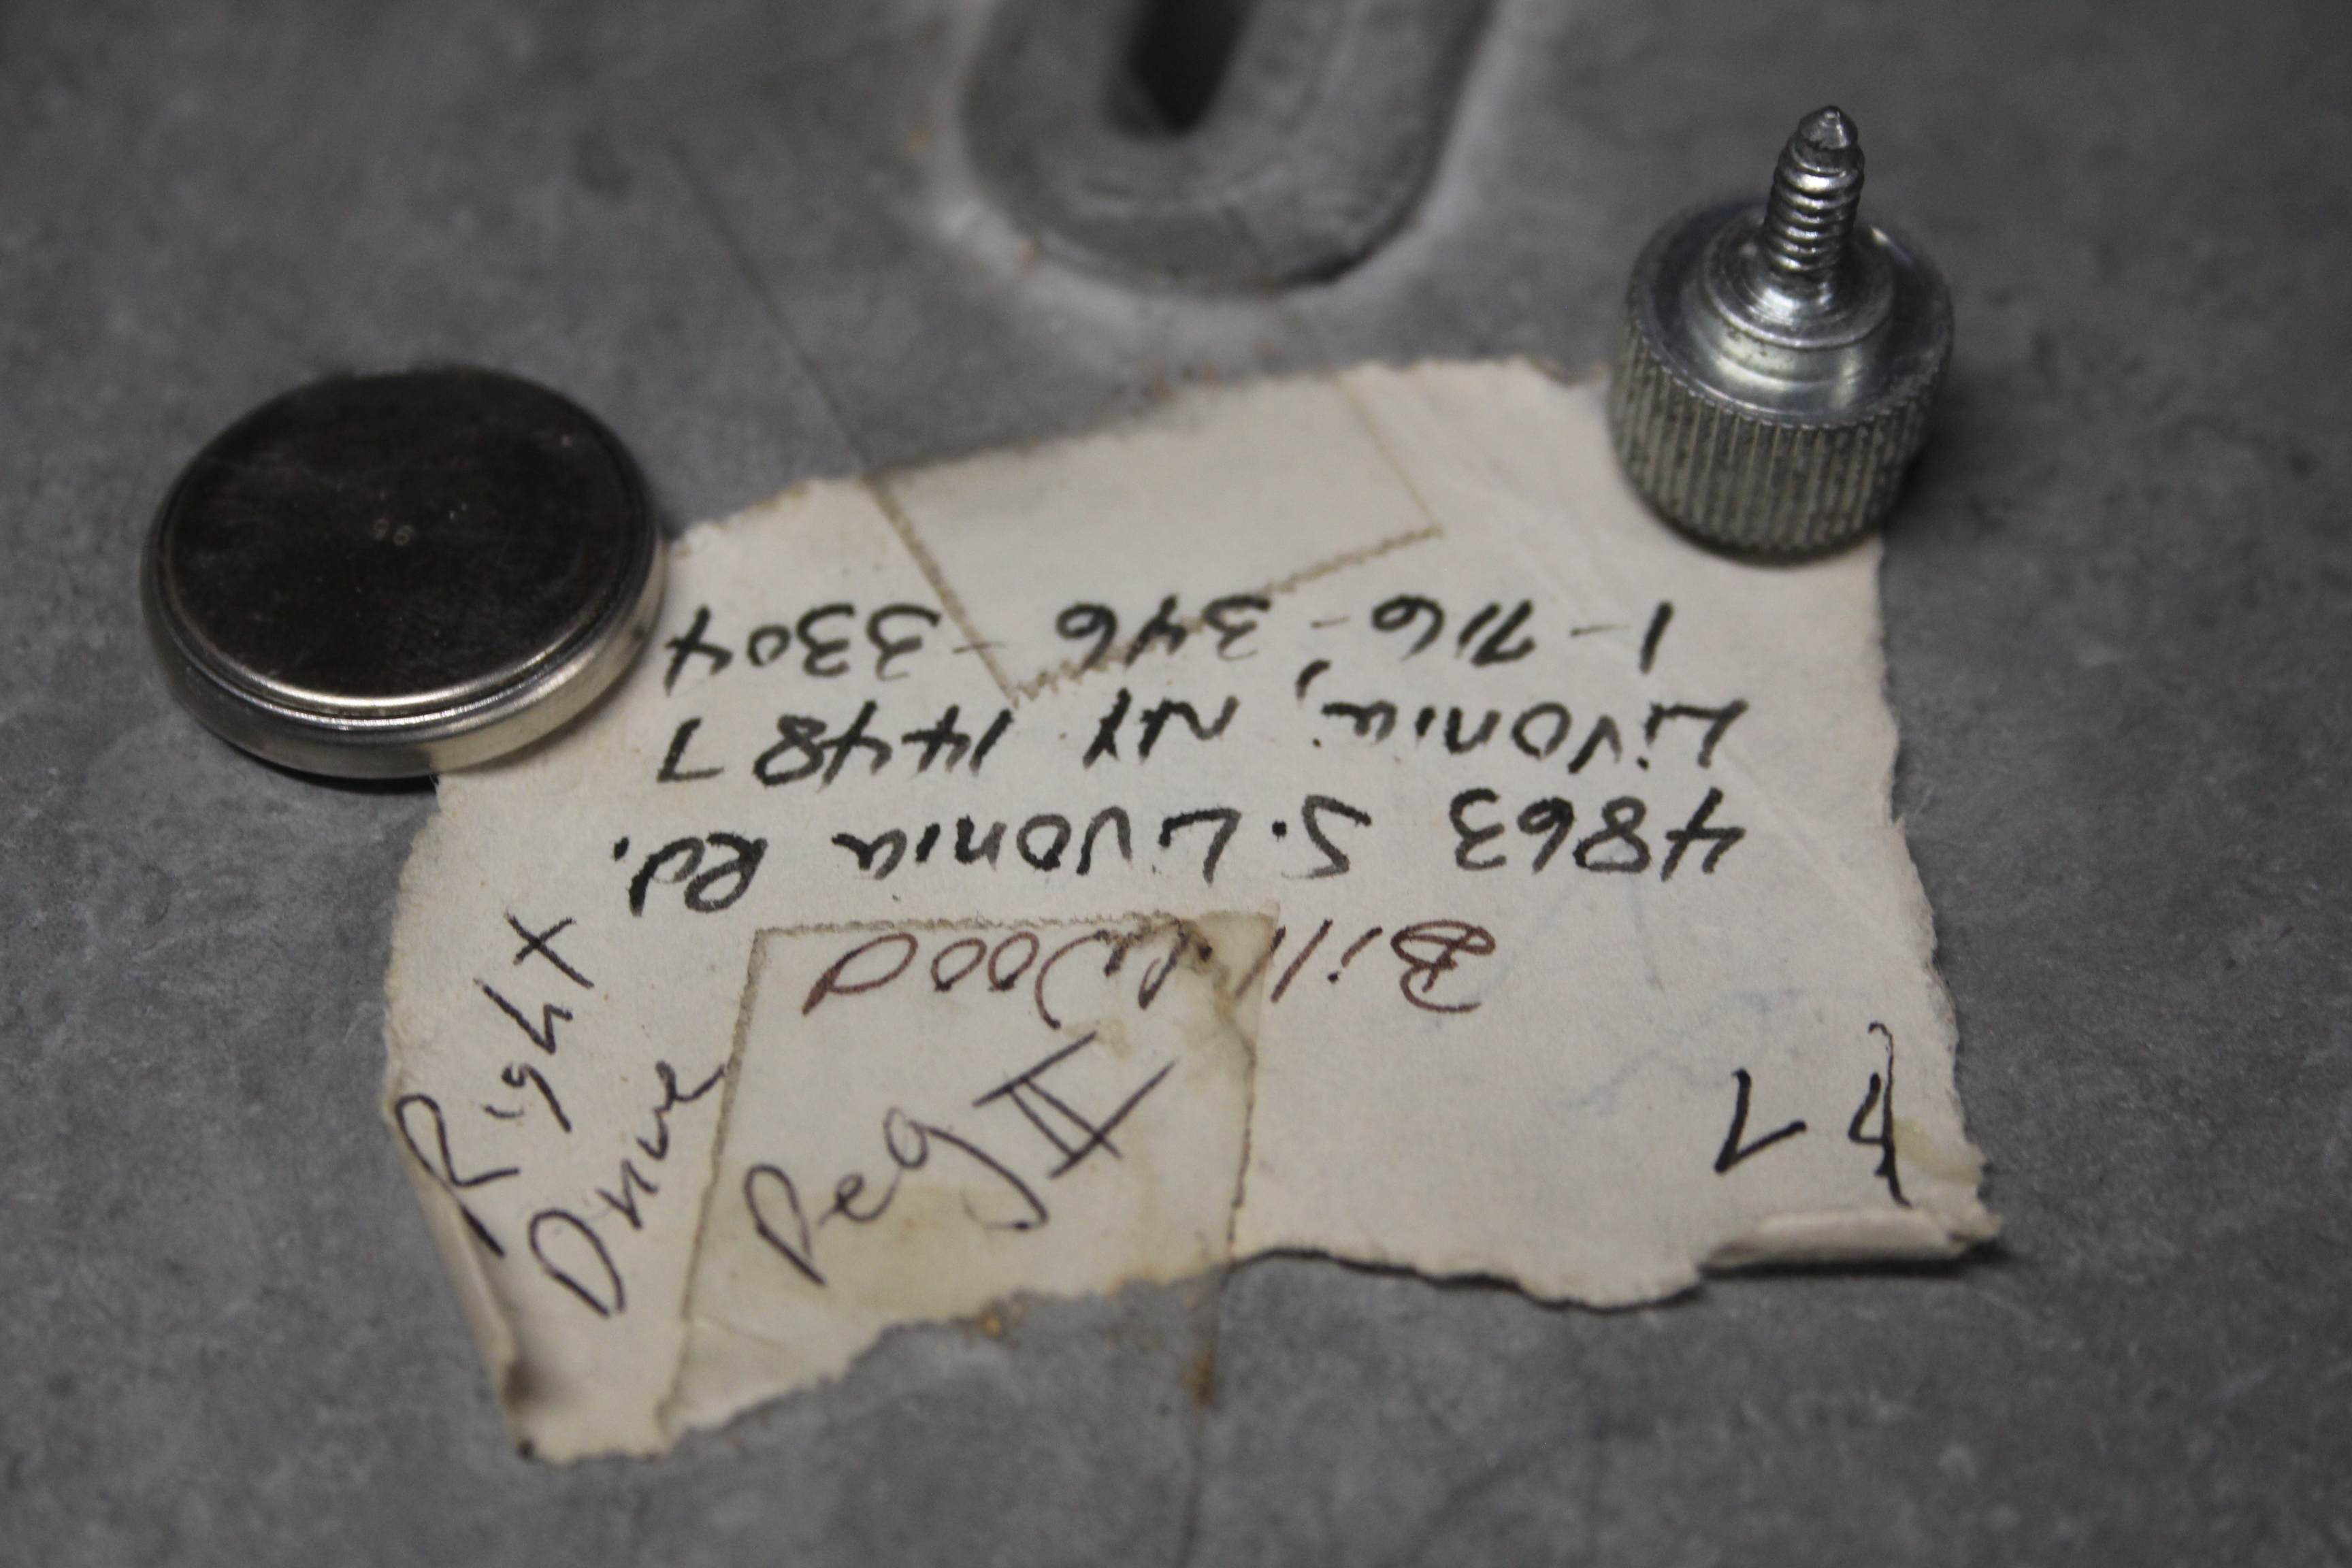
Doug purchased this system in Pennsylvania, I believe at an estate sale. It appears to have belonged to Hugh Turner: the diskettes and notes included with the system belonged to Mr. Turner, and a stylized “HT” was etched into some of the S-100 boards. Mr. Turner appears to have lived in central Pennsylvania, which would make sense with Doug’s pick-up, but had moved there from New Jersey. Unfortunately, it looks like Mr. Turner passed away in December 2014.
There’s a tag on one of the floppy drives suggesting it or perhaps the whole system once belonged to someone other than Hugh Turner:
Many of the diskettes included contained documents written in WordStar, including business correspondence. It appears Mr. Turner was developing software and doing system integration for Pegasus Data Systems. I would guess that Mr. Turner ran this system long after it was older/obsolete technology. There were diskettes with work for setting up a dialin BBS with access dates in the mid 1980s.
Initial Checkout
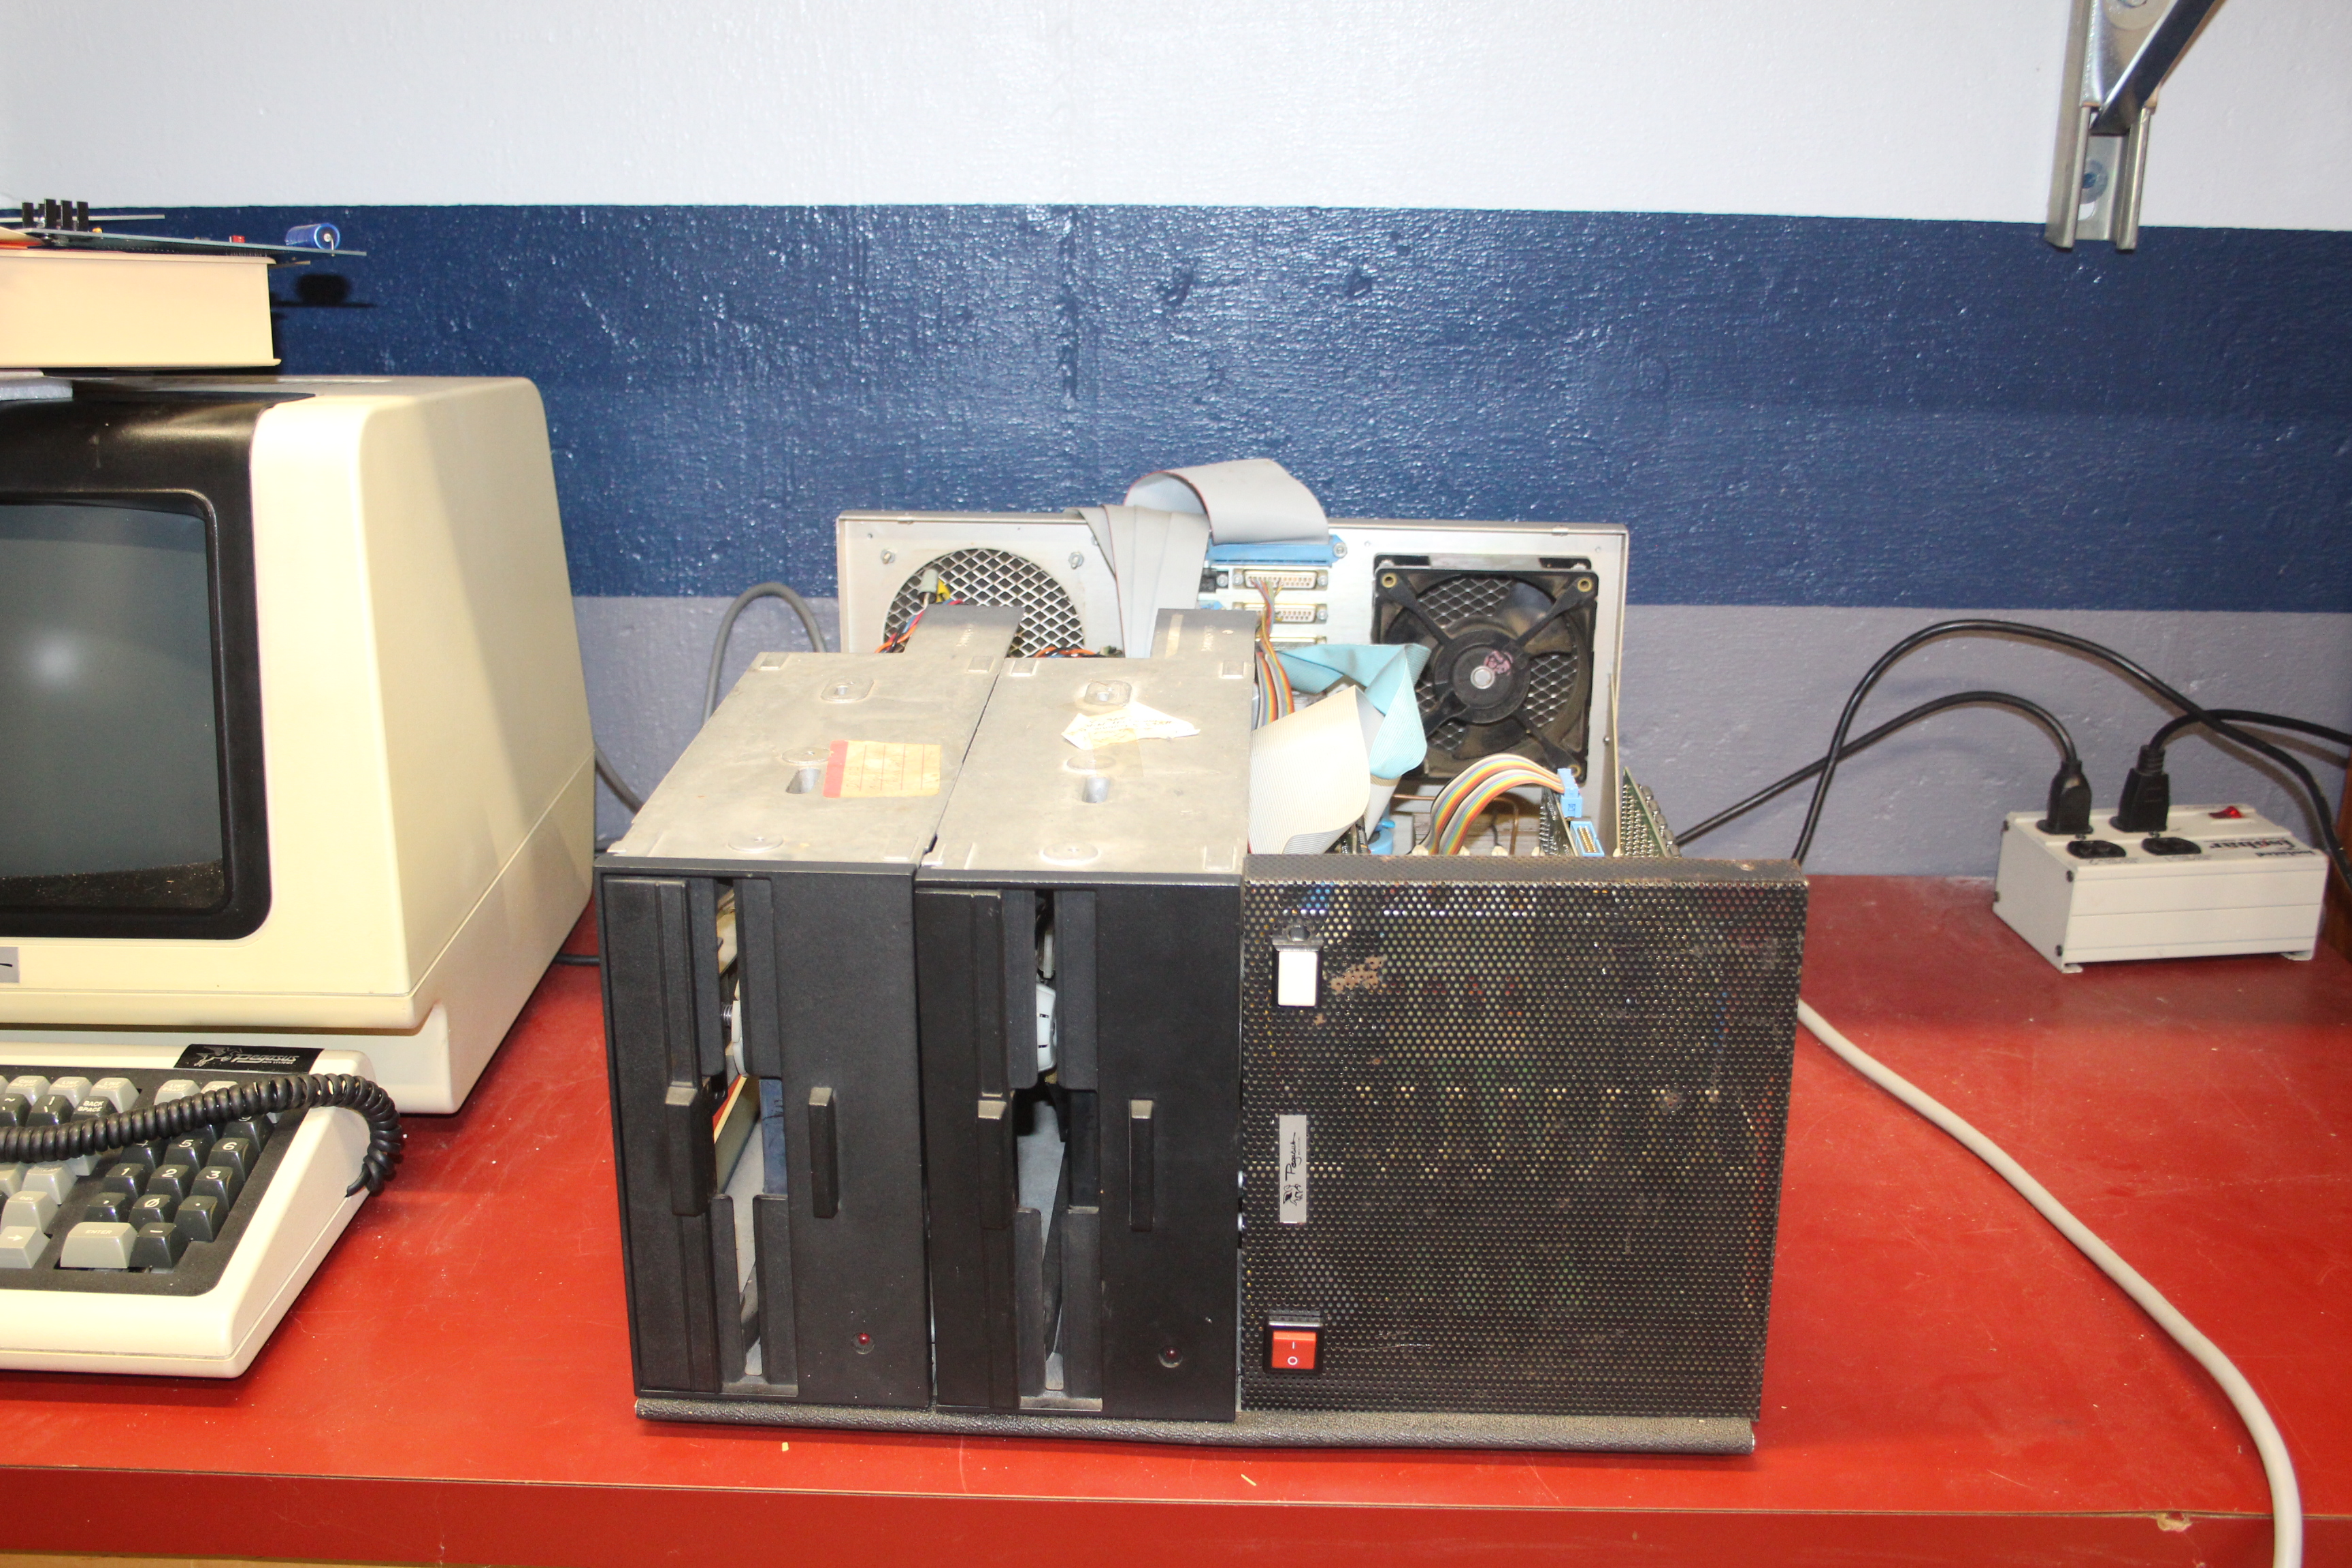
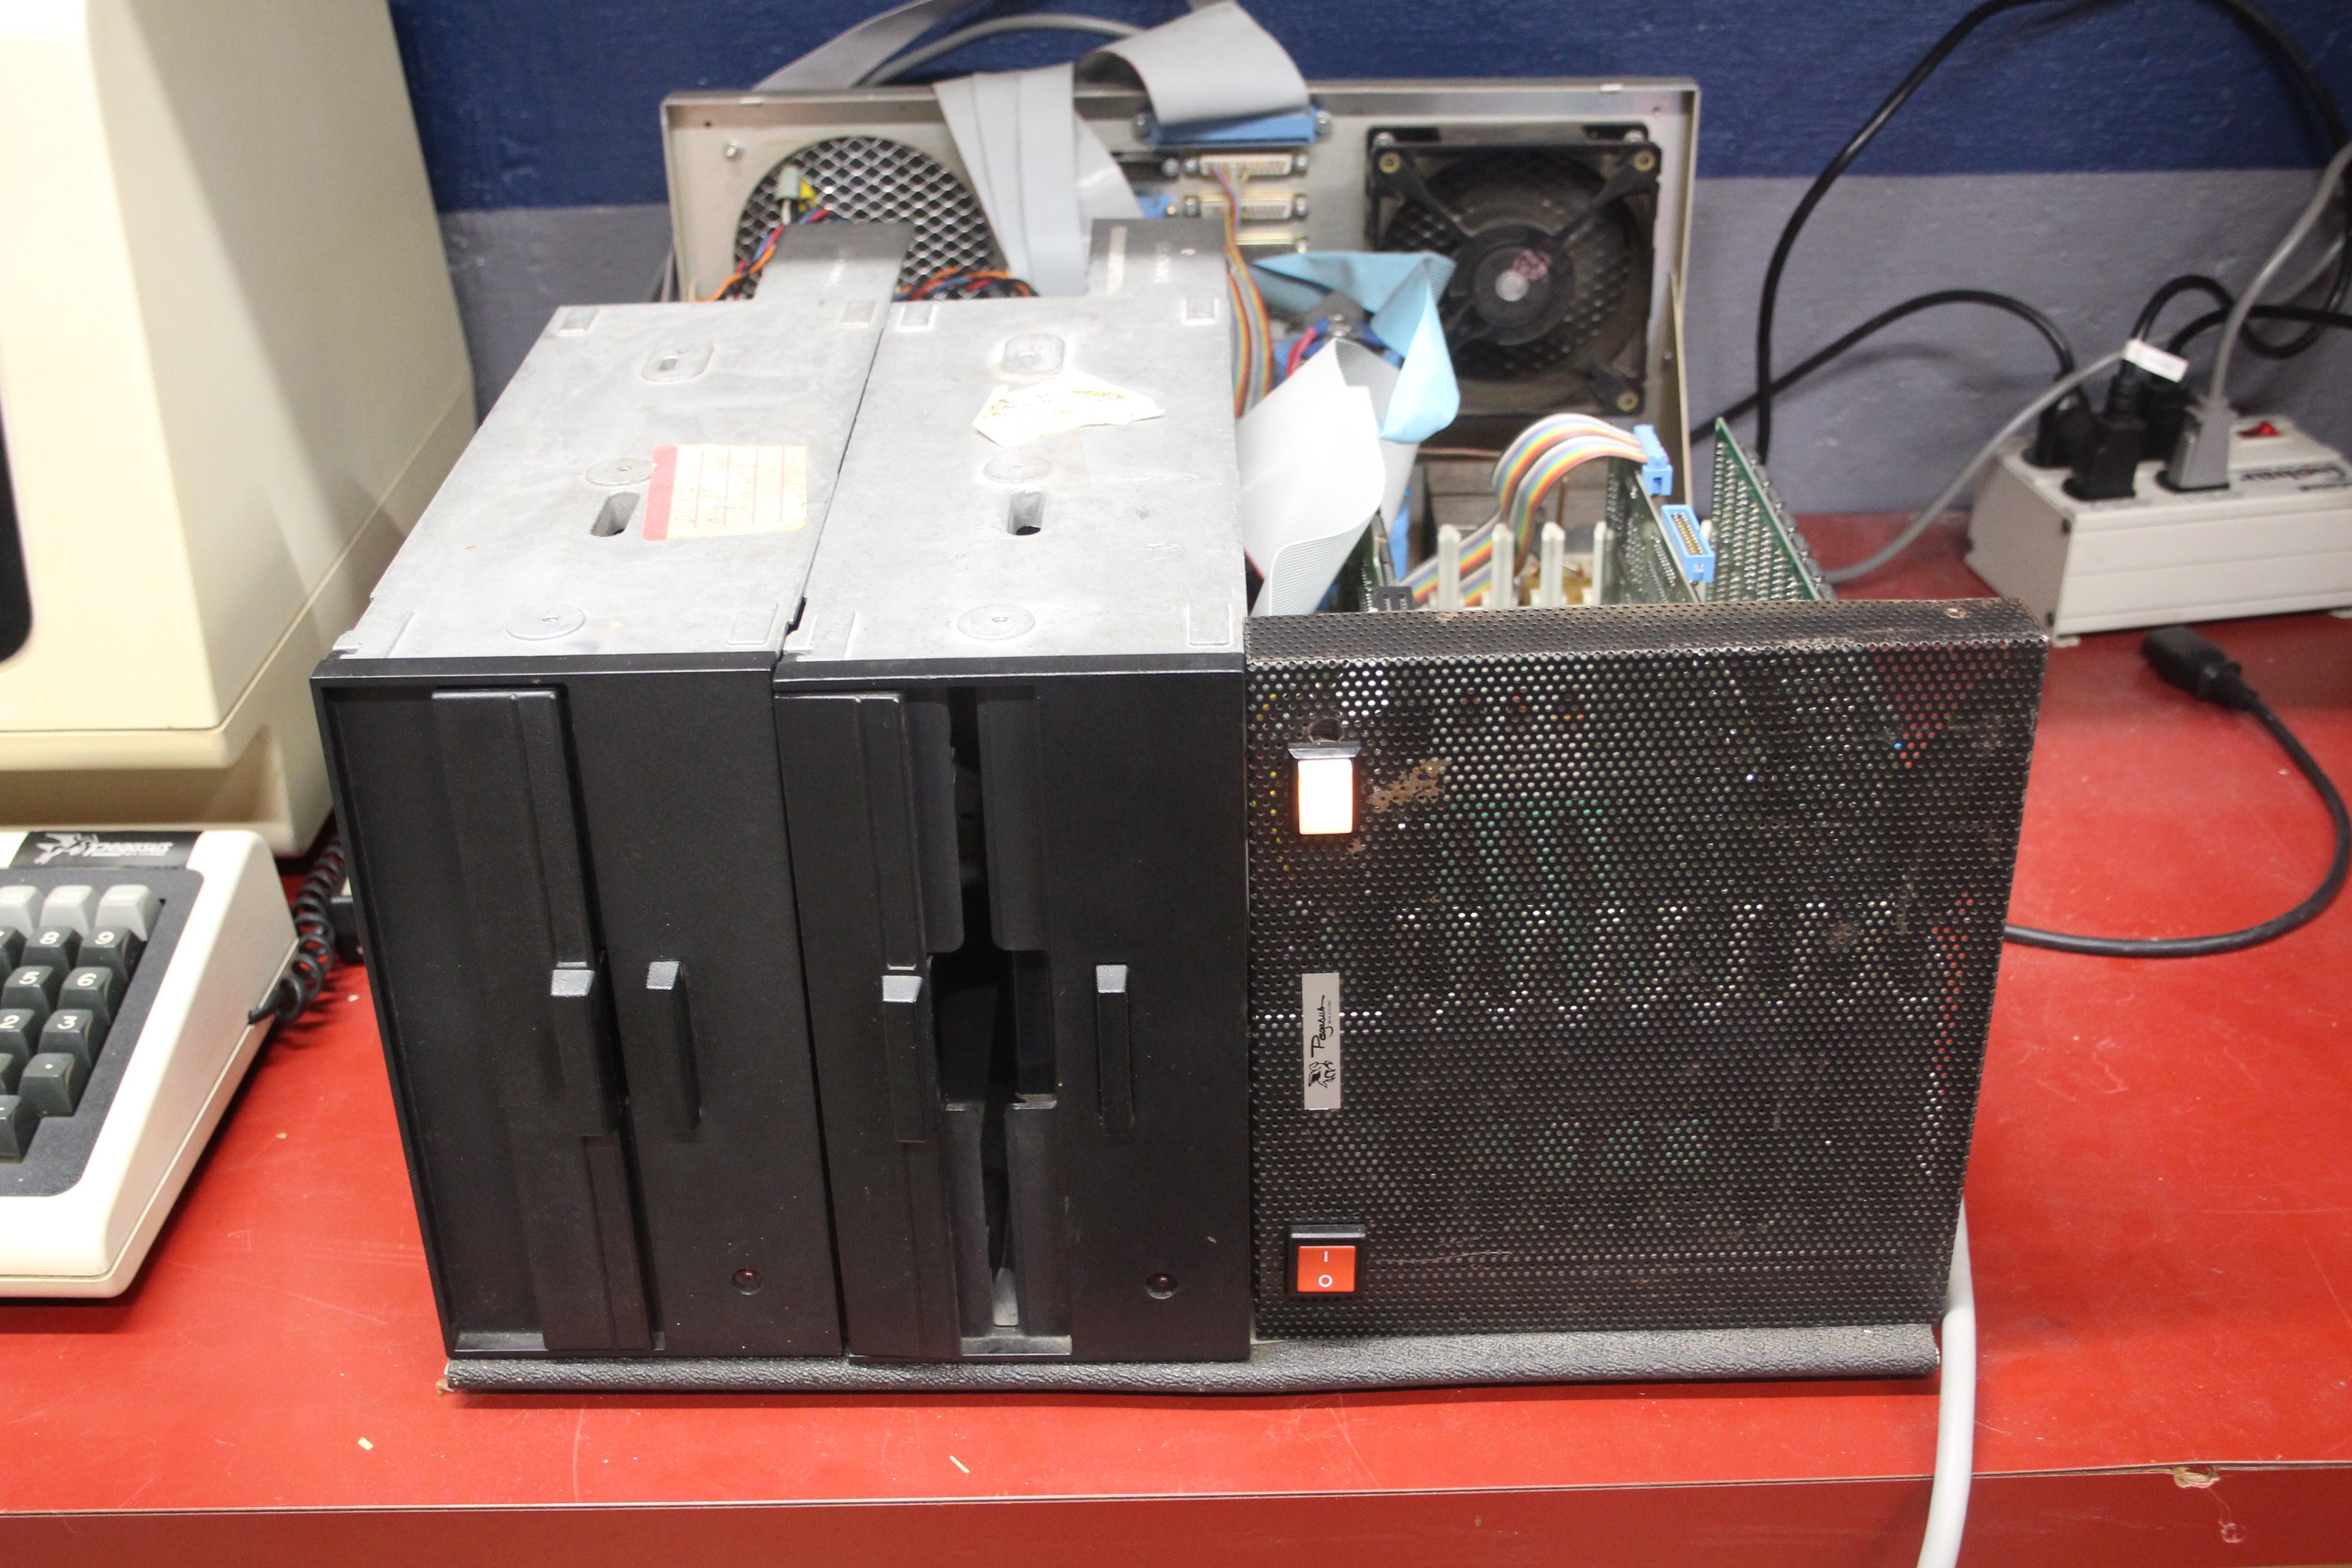
This machine is a real beast! With a linear power supply, heavy sheet metal chassis, and two full-height 8” floppy drives, it’s heavy enough that it has not moved from its spot on the red-top workbench since being set up in early 2020. I decided to pull the machine apart and clean it before starting, since it was so cumbersome to move around. The diskette drives were removed, cleaned, and tested in another machine. The chassis was vacuumed out and wiped down. The three S-100 boards were pulled and cleaned.
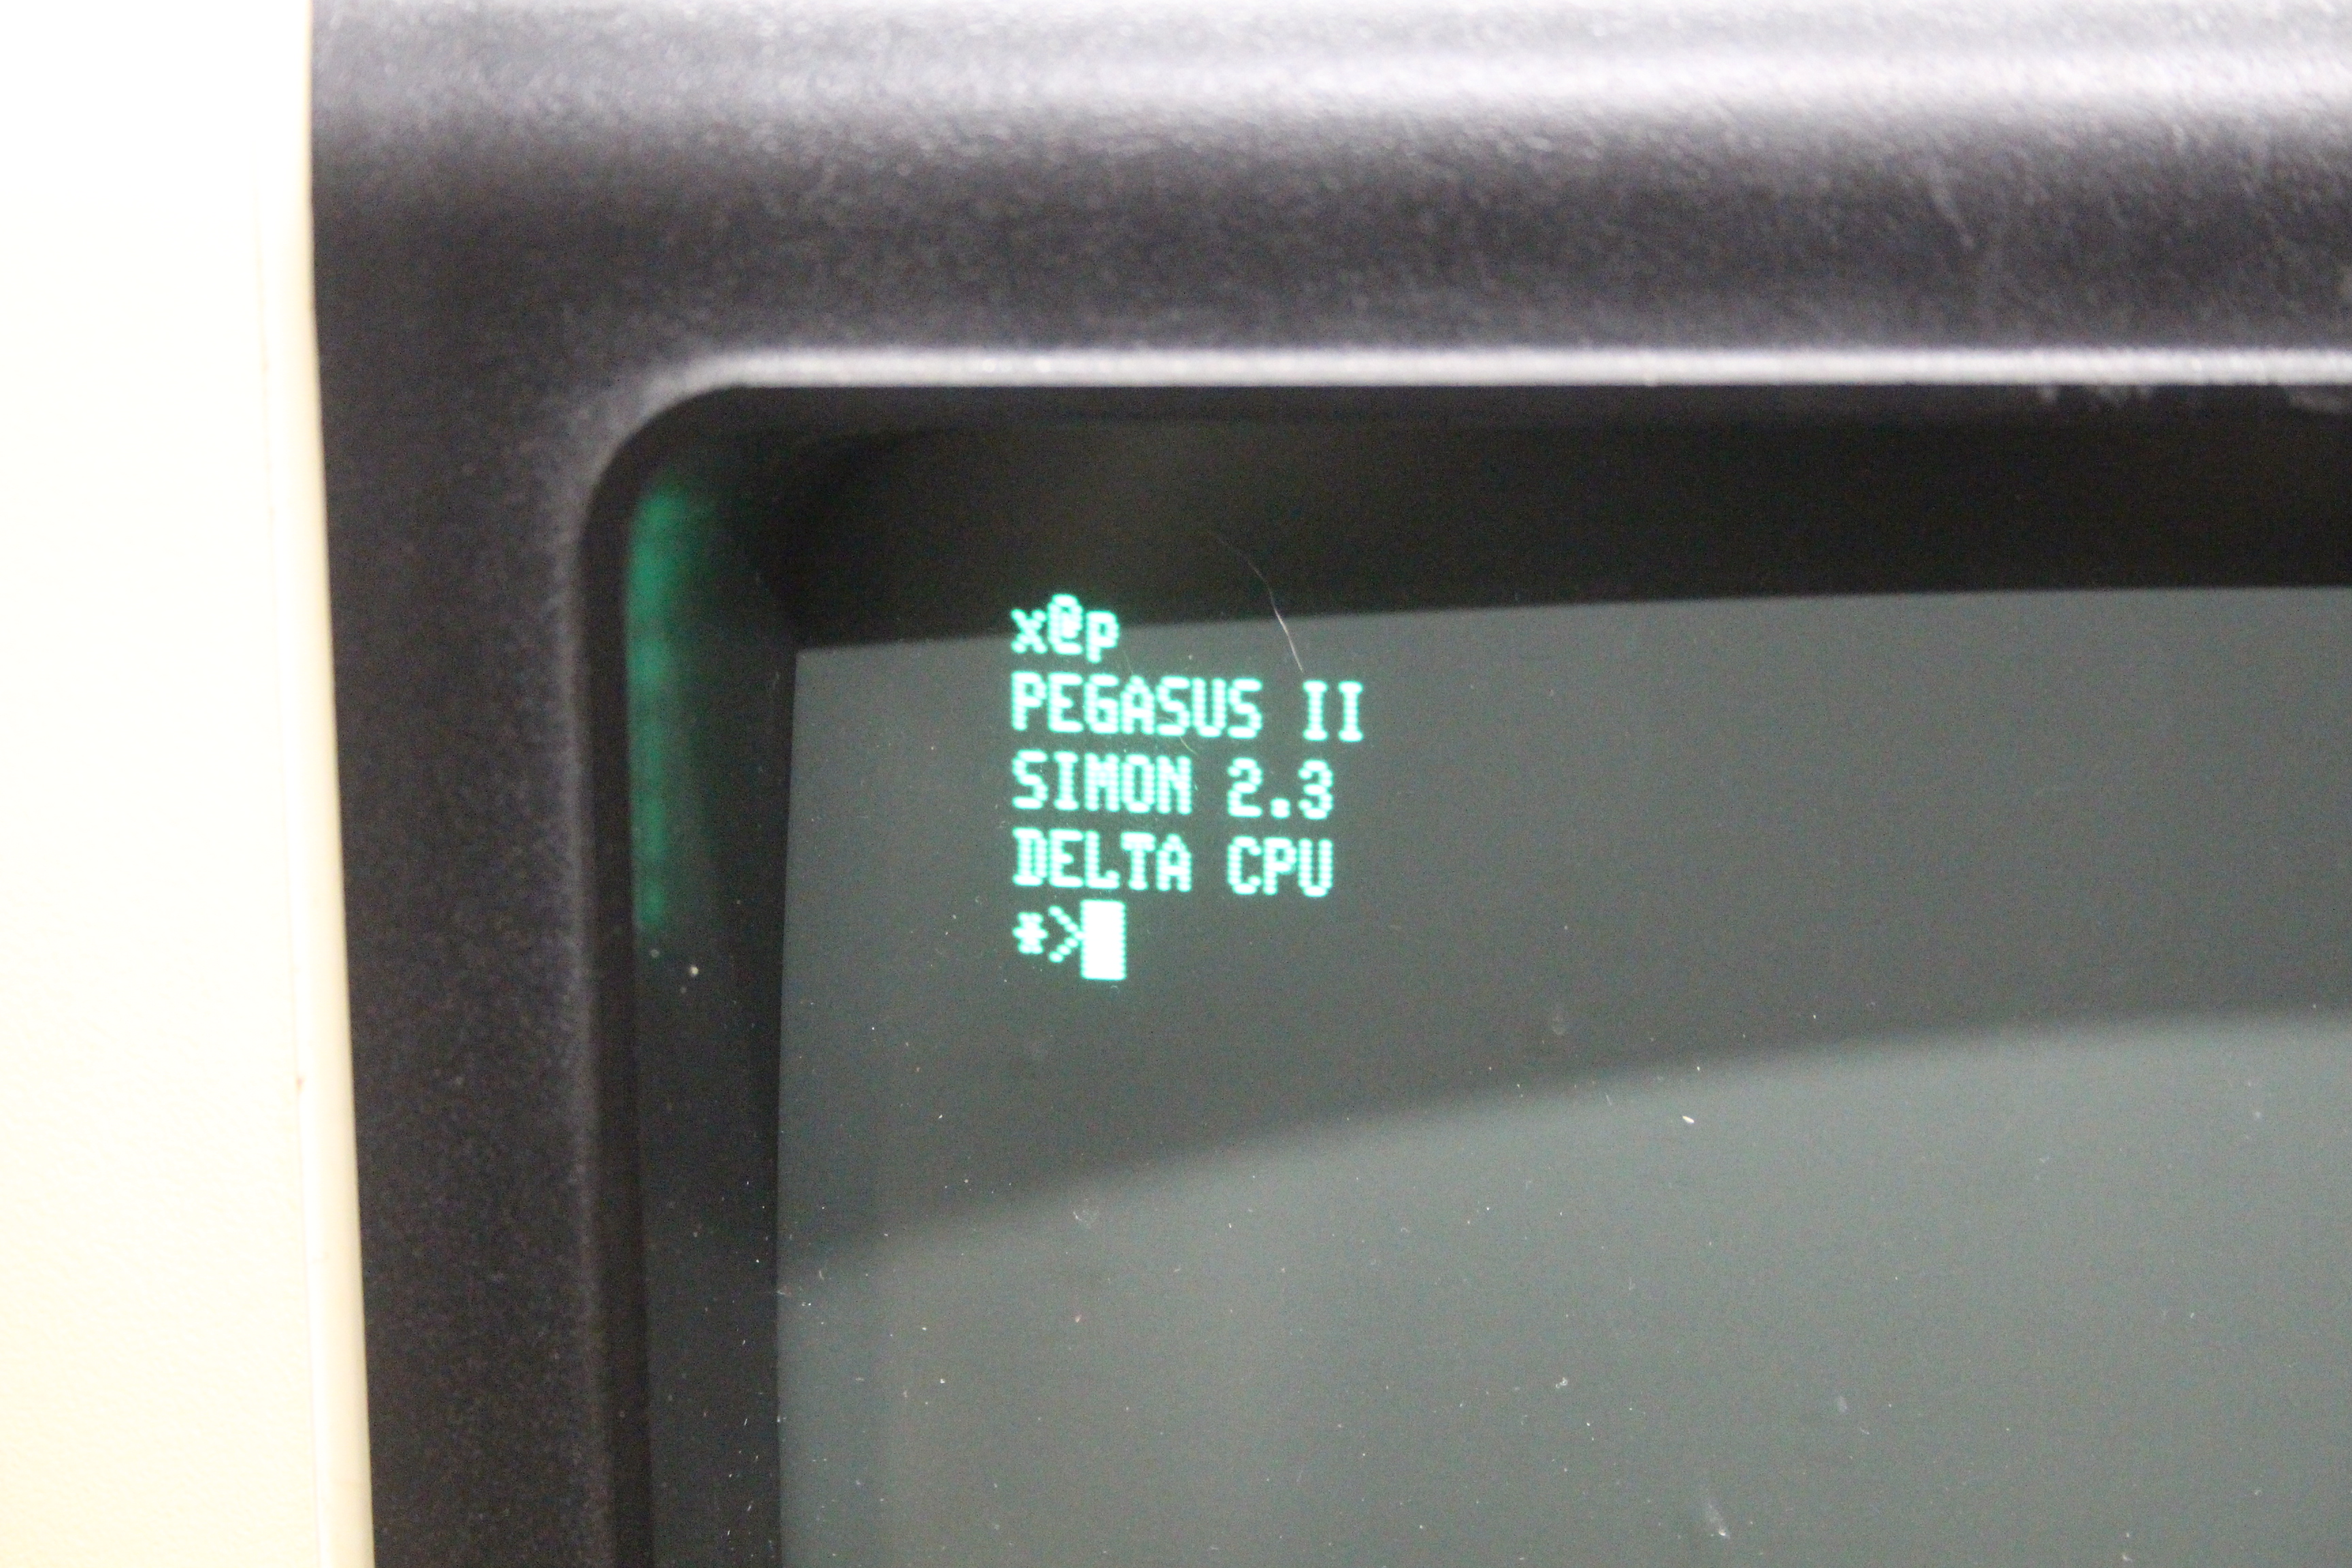
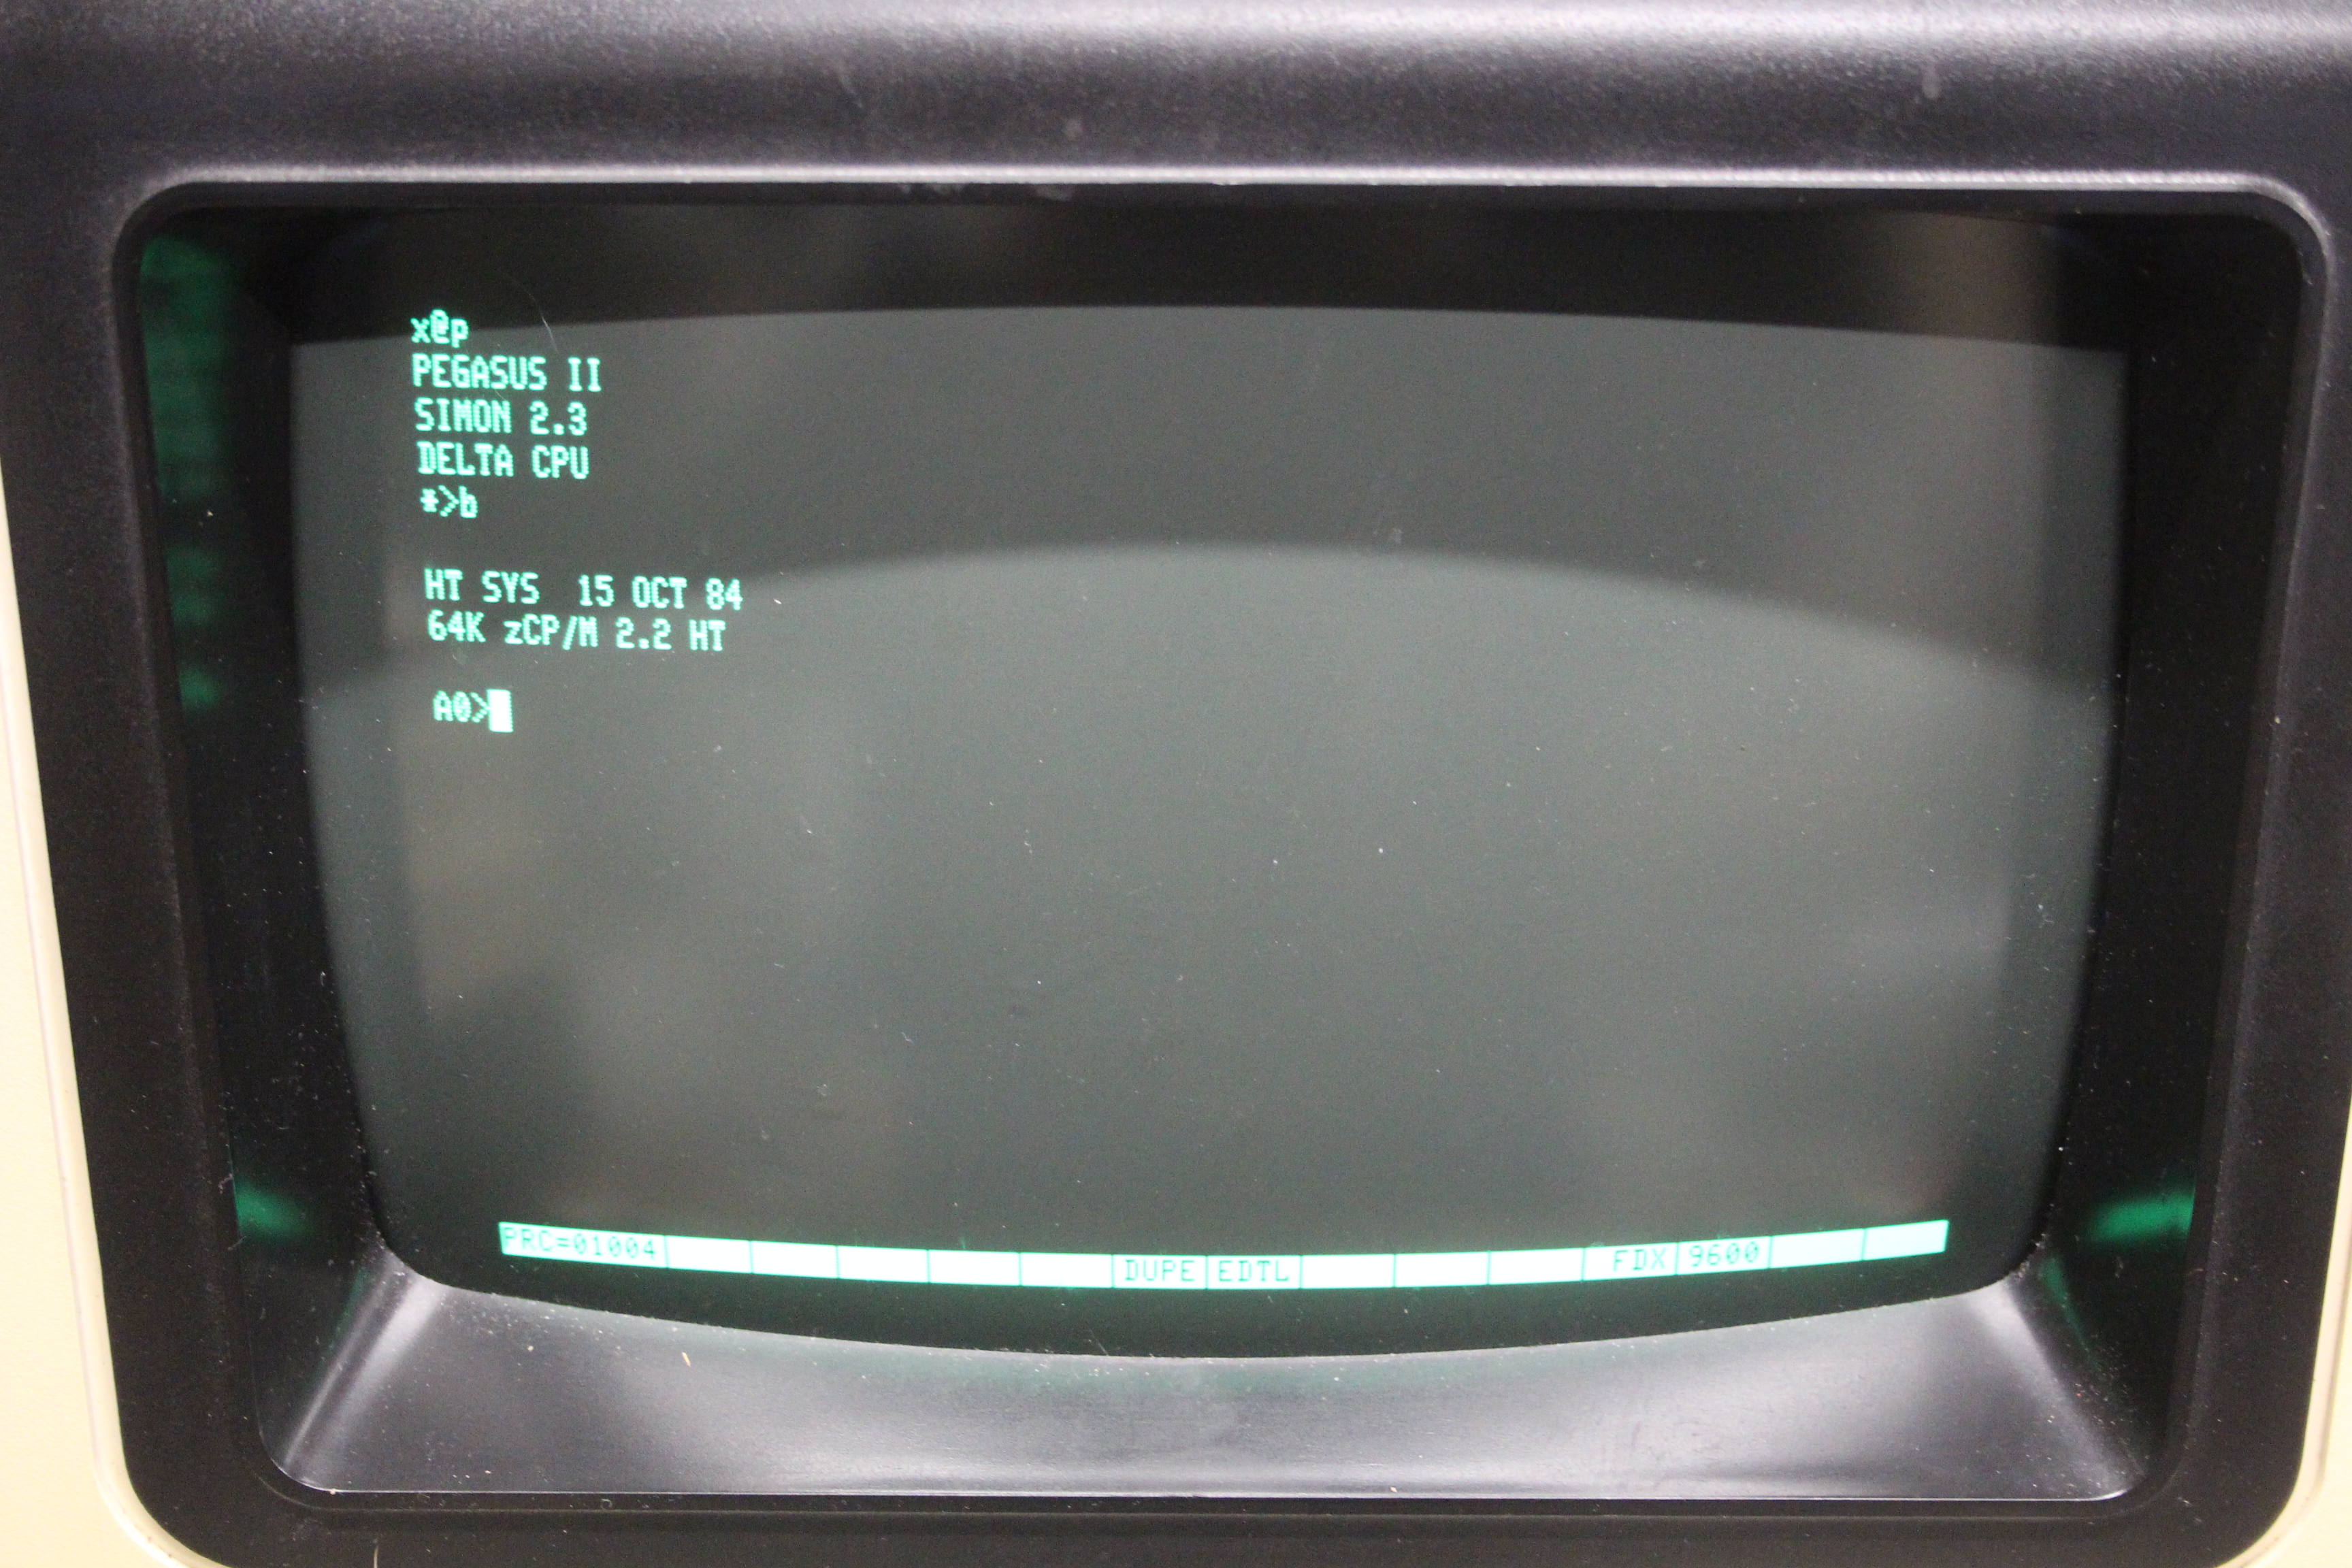
The system had of course been powered on by Doug, but it’d been a while since it was last operated. I left the S-100 cards out and brought it up on a variac. There was no excessive current draw or ripple on any of the rails, so it looked like the capacitors were still fine. The S-100 cards were reinstalled, and after figuring out which of the CPU board serial ports was console, the ROM monitor signed on:
With the system up and running, the first task was to back up all of the diskettes.
Imaging the Diskettes
I was planning on using Dave Dunfield’s fantastic ImageDisk to archive the diskettes that came with the Pegasus II. There’s nothing especially weird about the diskette format: some of the earlier versions of CP/M for this machine do use mixed density, but my utility PC has a floppy controller that handles single-density just fine.
There was a real heap of diskettes with this system, several hundred, so I started with imaging only the system diskettes and setting the others aside. The majority were imaged as I had time. Fortunately, most of the diskettes were in excellent condition and read without errors, and few were moldy or otherwise dirty enough to foul the drive’s heads.
Early diskettes in “National Multiplex” format proved a little strange to image. In order to auto-identify diskette formats, National Multiplex crammed an extra sector on the boot track – 27 instead of the usual 26! ImageDisk had no trouble reading it, but these diskettes had to be read with “full analysis,” or a defective sector would be reported on each track after the first.
Many of the diskettes included were 32 hard sector, often with Varityper branding. I’m guessing someone got a bunch of them cheap and figured out how to use them as soft sector, as none of them contained hard sectored data! More or less by chance, I tried reading the disks in a Shugart SA-801 drive, which has hardware sector and index separating for 32 hard sector diskettes. Success! With the index pulse separated from the train of sector pulses, these diskettes read as soft-sectored. Many of these were copies of various CP/M users’ groups archives. I suspect they either went with another machine, or this Pegasus II had an external drive cabinet with a Shugart SA-801, as I don’t think the Qume drives can be coerced into separating the index and sector pulses.
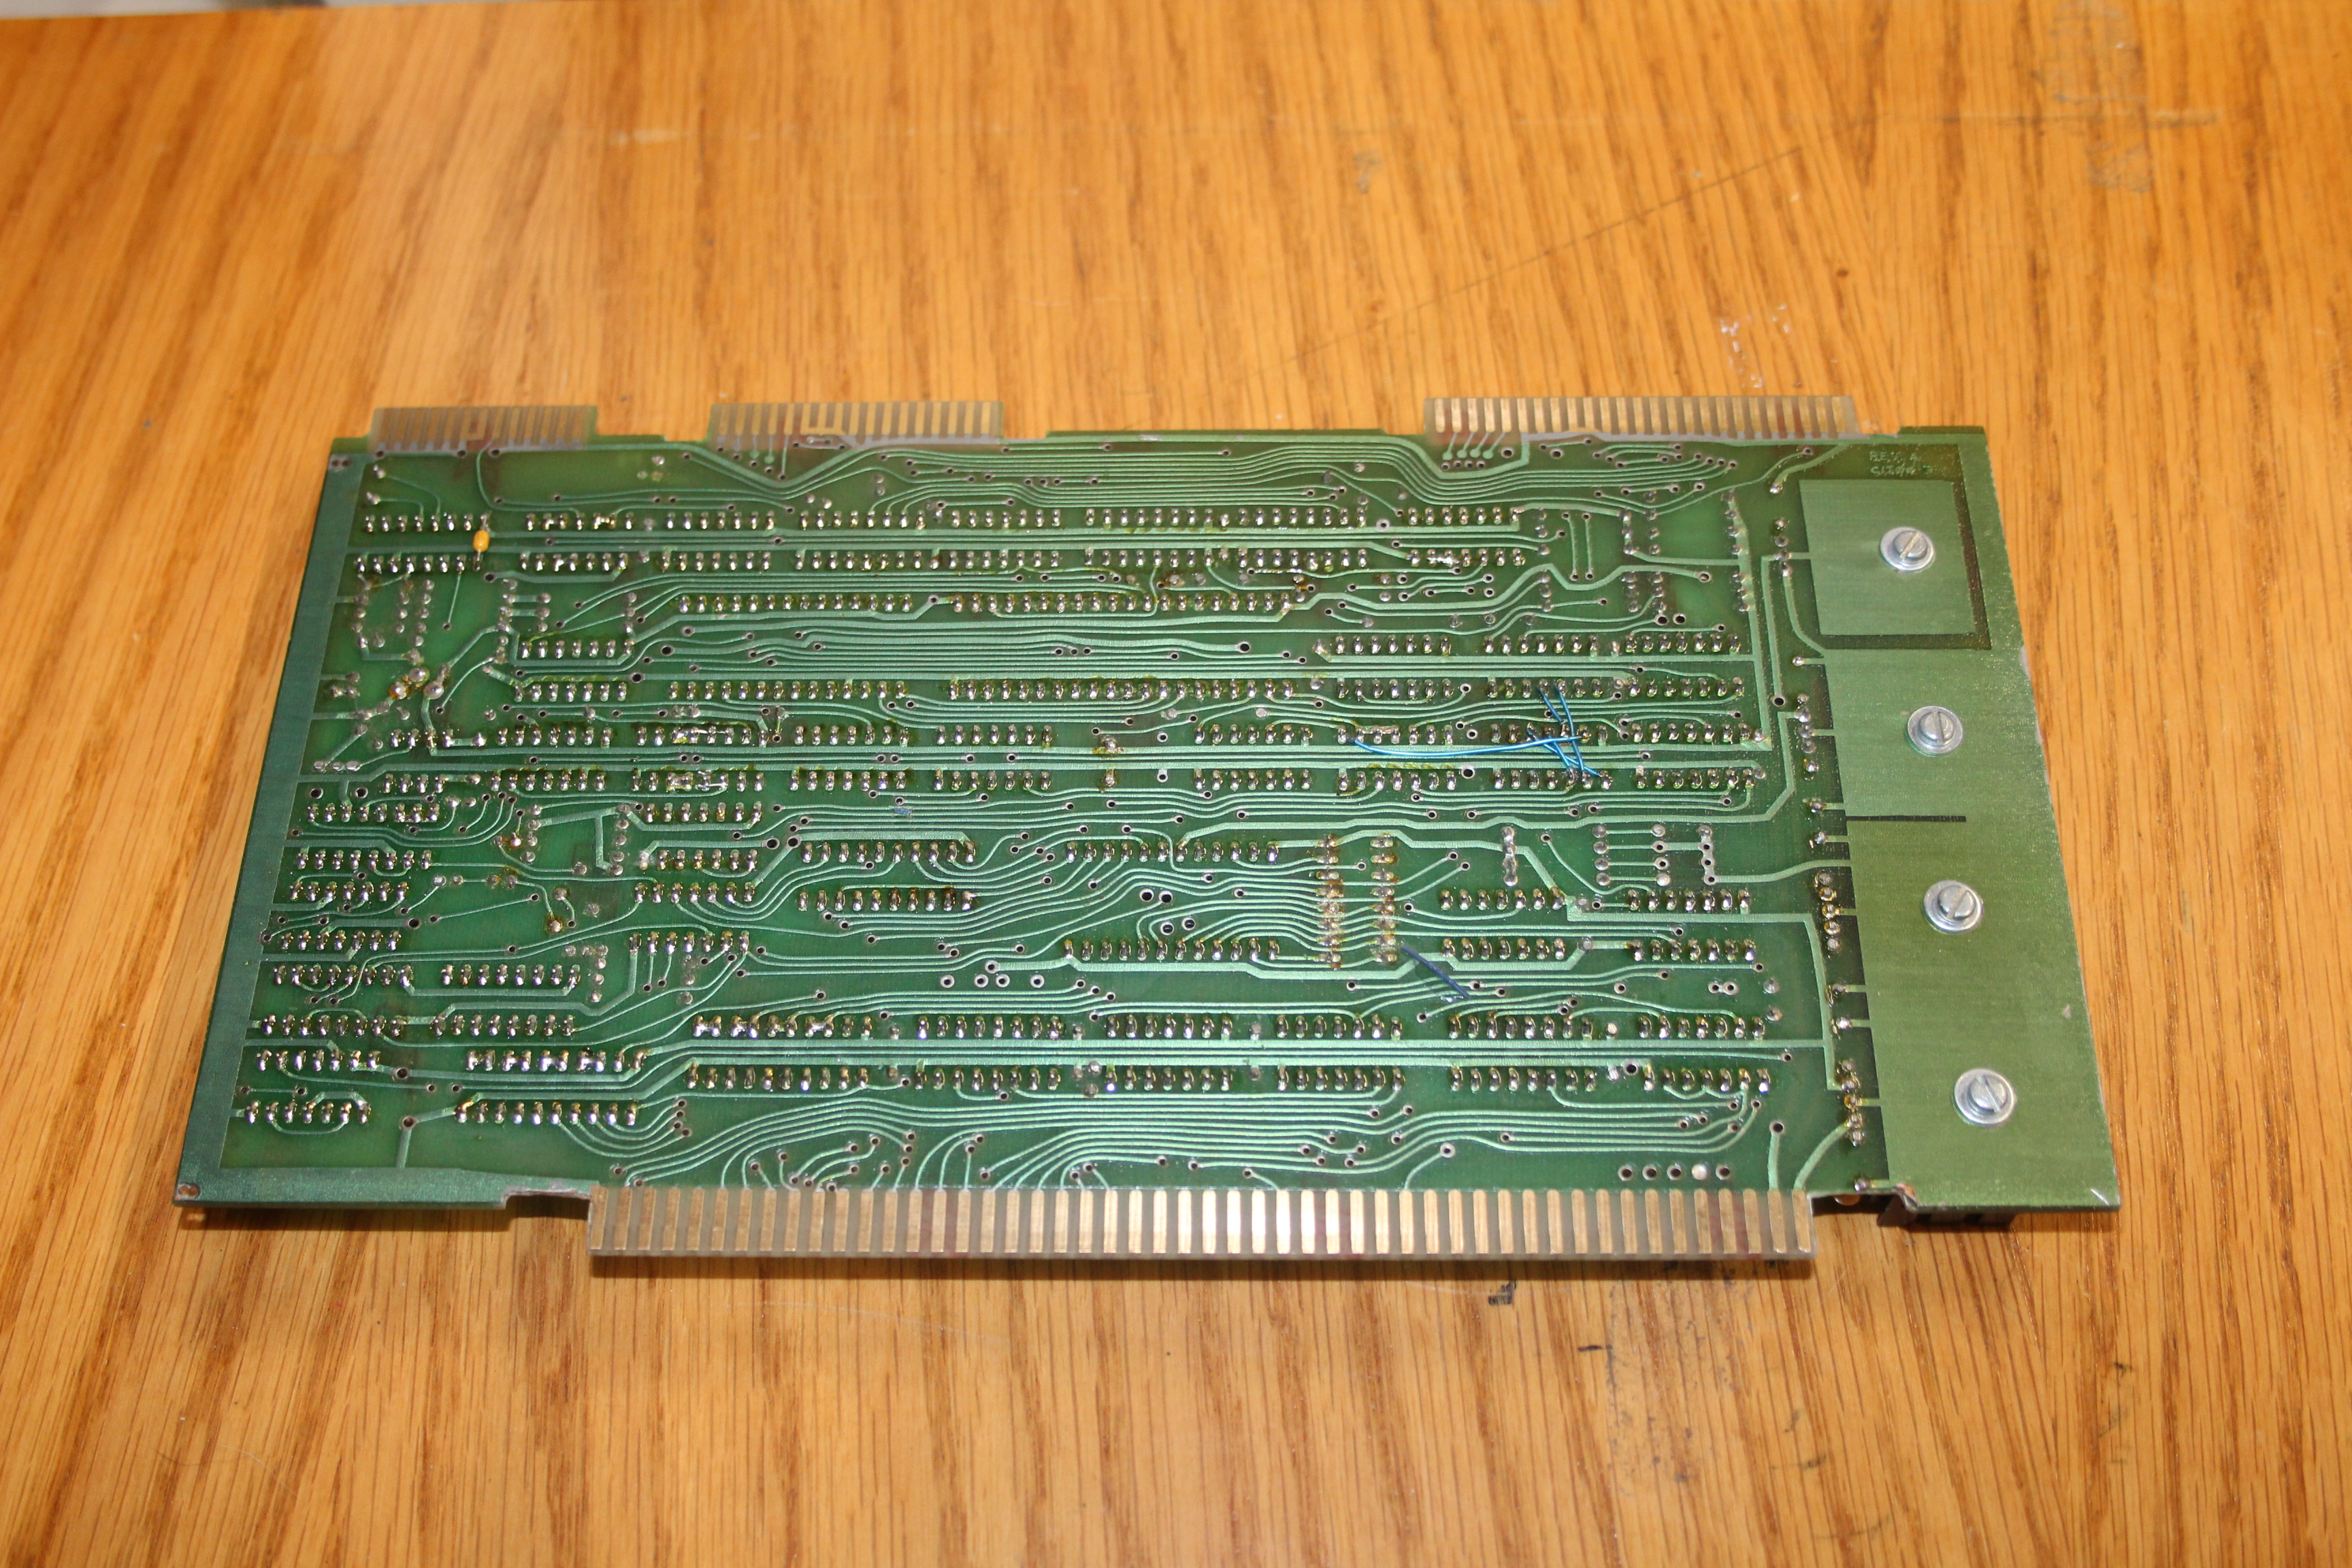
Board Inventory
Aside from the bulk, the Pegasus II is pretty easy to work on. The top removes, and the card cage is on the right, providing easy access to the S-100 boards:
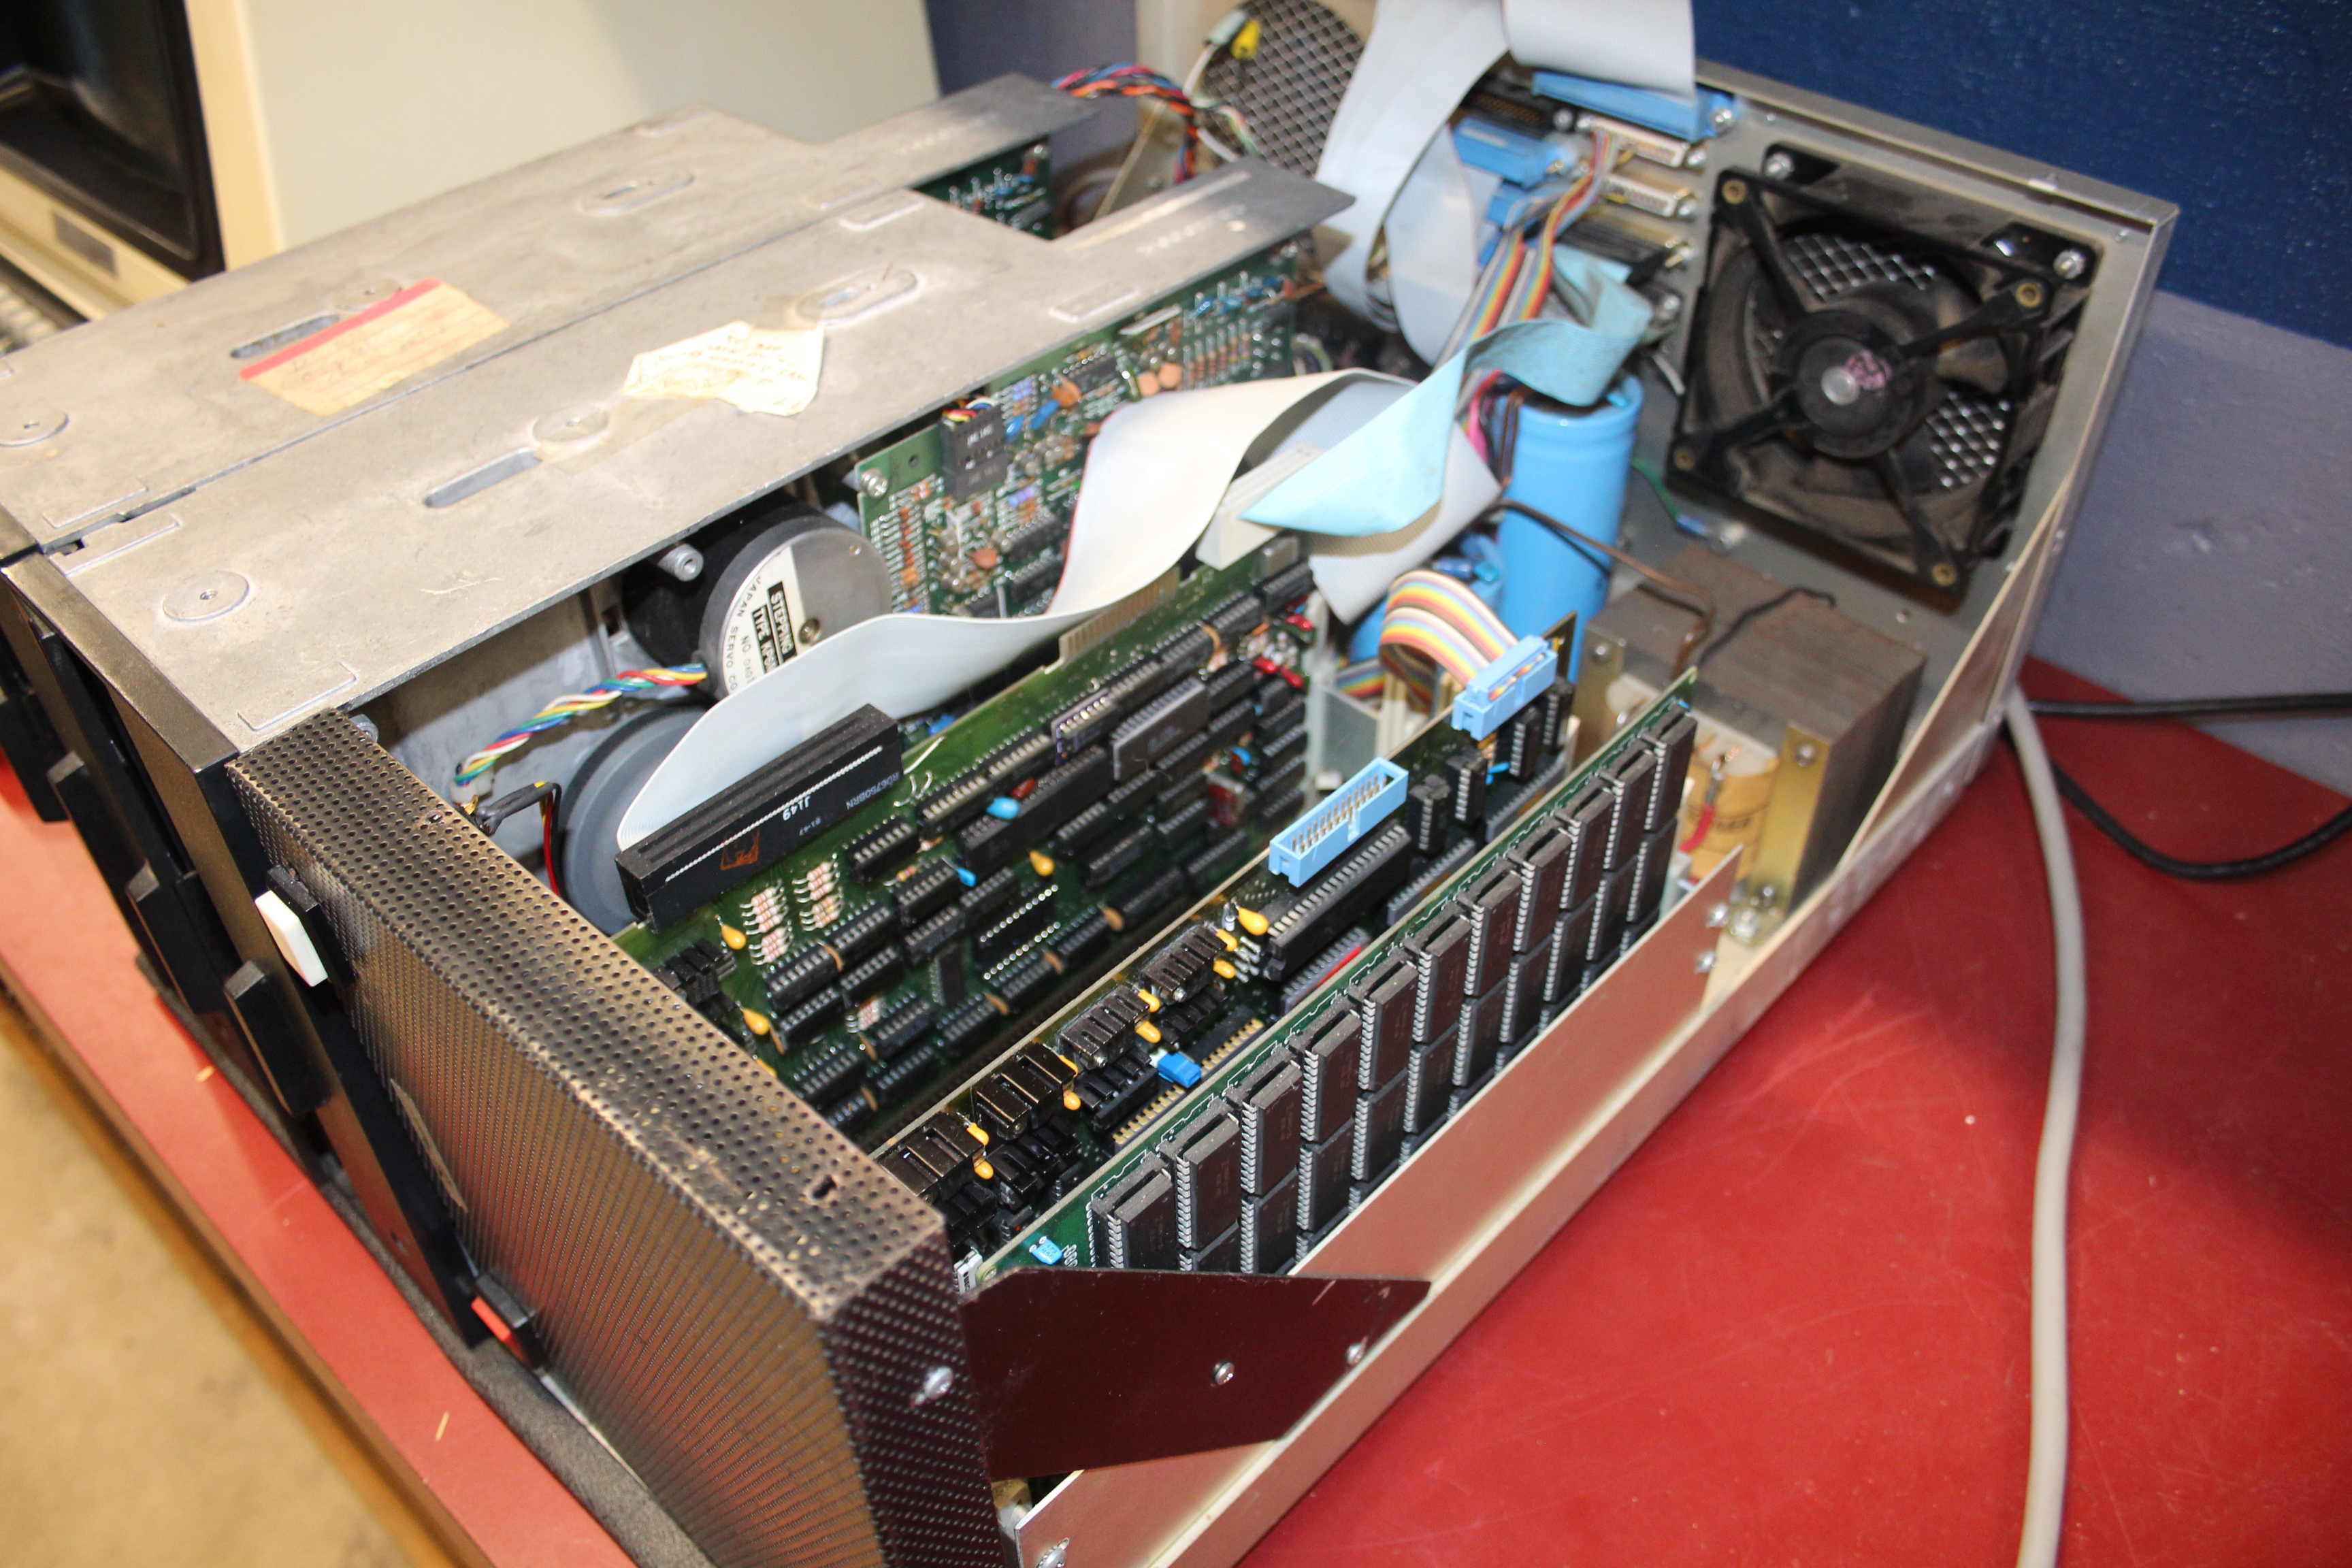
From right to left, the cards are:
- Static Memory Systems (SMS) “The Last Memory” 64K RAM
- Delta Products DP-CPU Z80 CPU
- National Multiplex D4S Diskette Controller
The Delta Products CPU board also provides two Intel 8251 compatible USARTs, one of which serves as the system console. The National Multiplex diskette controller also, oddly, provides a 2651 UART. We’ll take a closer look at the cards.
Delta Products DP-CPU Z80 CPU
The CPU board in this system is pretty typical for “late S-100,” it includes all of the I/O you’d need for a basic system, EPROM, and memory management. John Monahan has a page for the DP-CPU here, which includes a link to the manual. The board pictured on his writeup is somewhat different than mine:

This one has a very nice ceramic Z80:
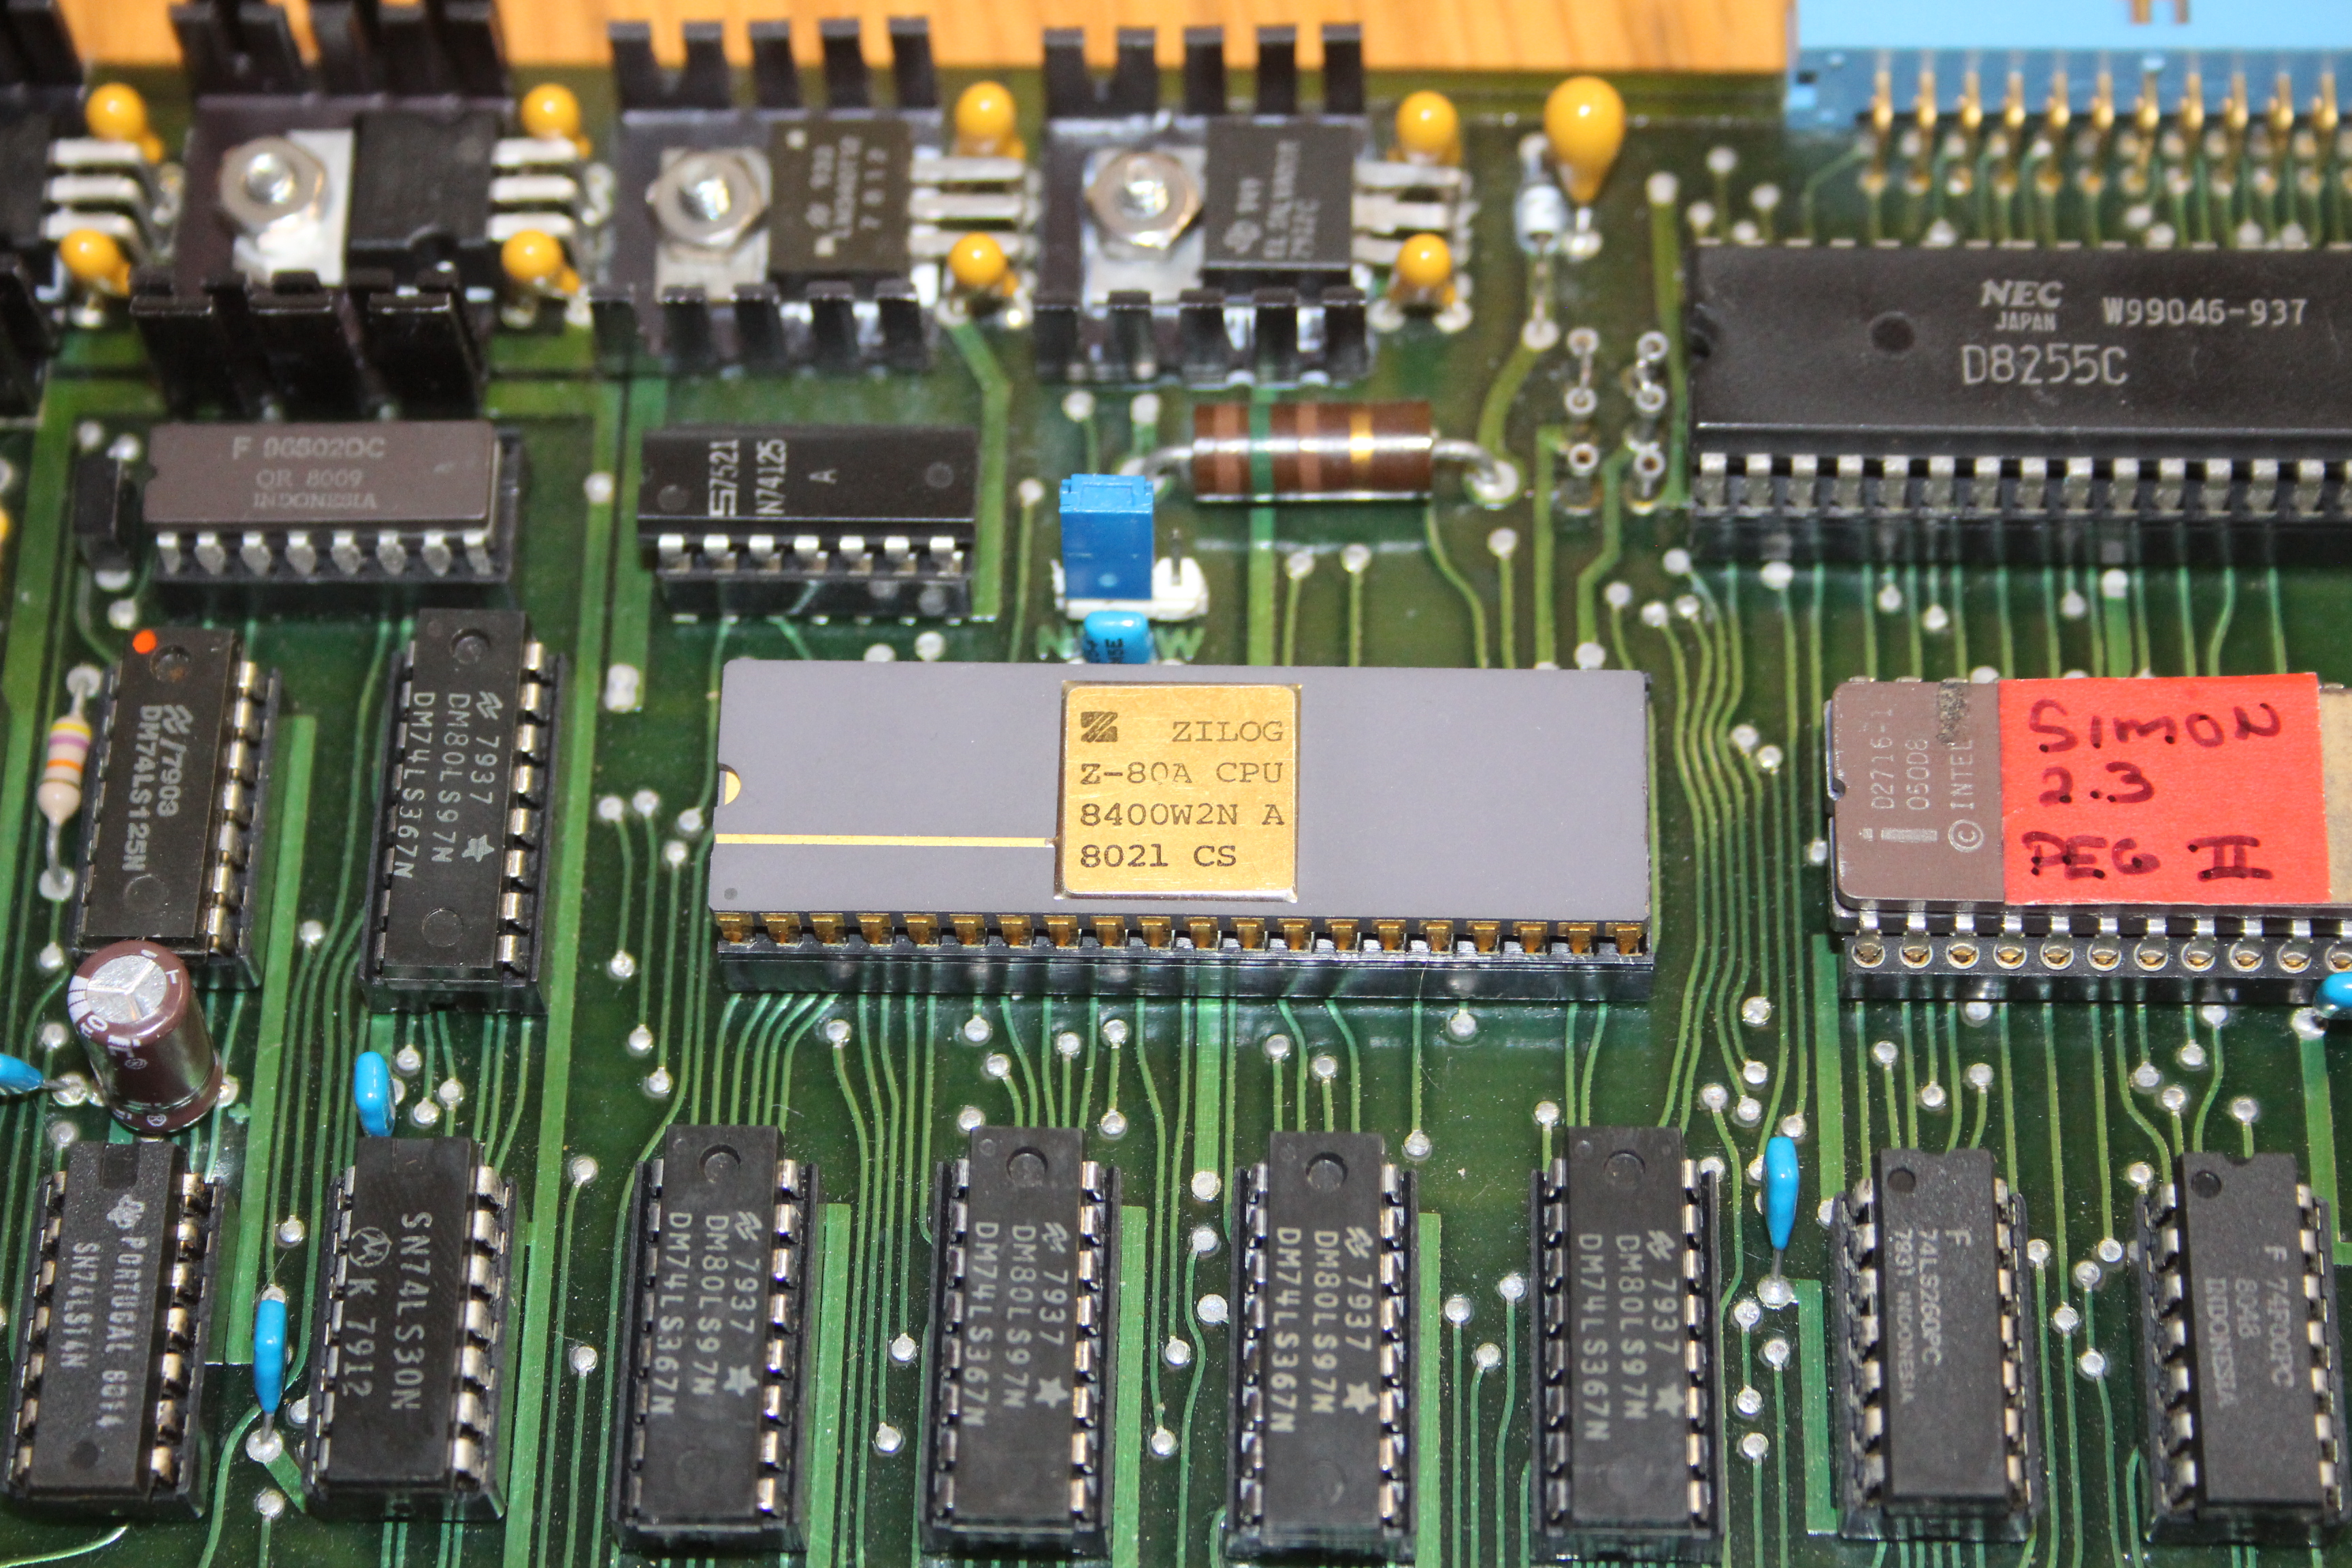
It’s marked CS, which indicates it was provided as a customer sample. Doesn’t affect performance, but interesting nonetheless!
Static Memory Systems “The Last Memory”
SMS’s “The Last Memory” is, again, somewhat typical for “late S-100.” It uses 2K x 8 6116-type static RAMs, and is both highly configurable and very reliable. RAMs can be replaced with 2716-type EPROMs, though the Pegasus II does not use this feature since it has ROM sockets on the CPU board. John Monahan has a page for this one, too, again with the manual. Here’s mine:
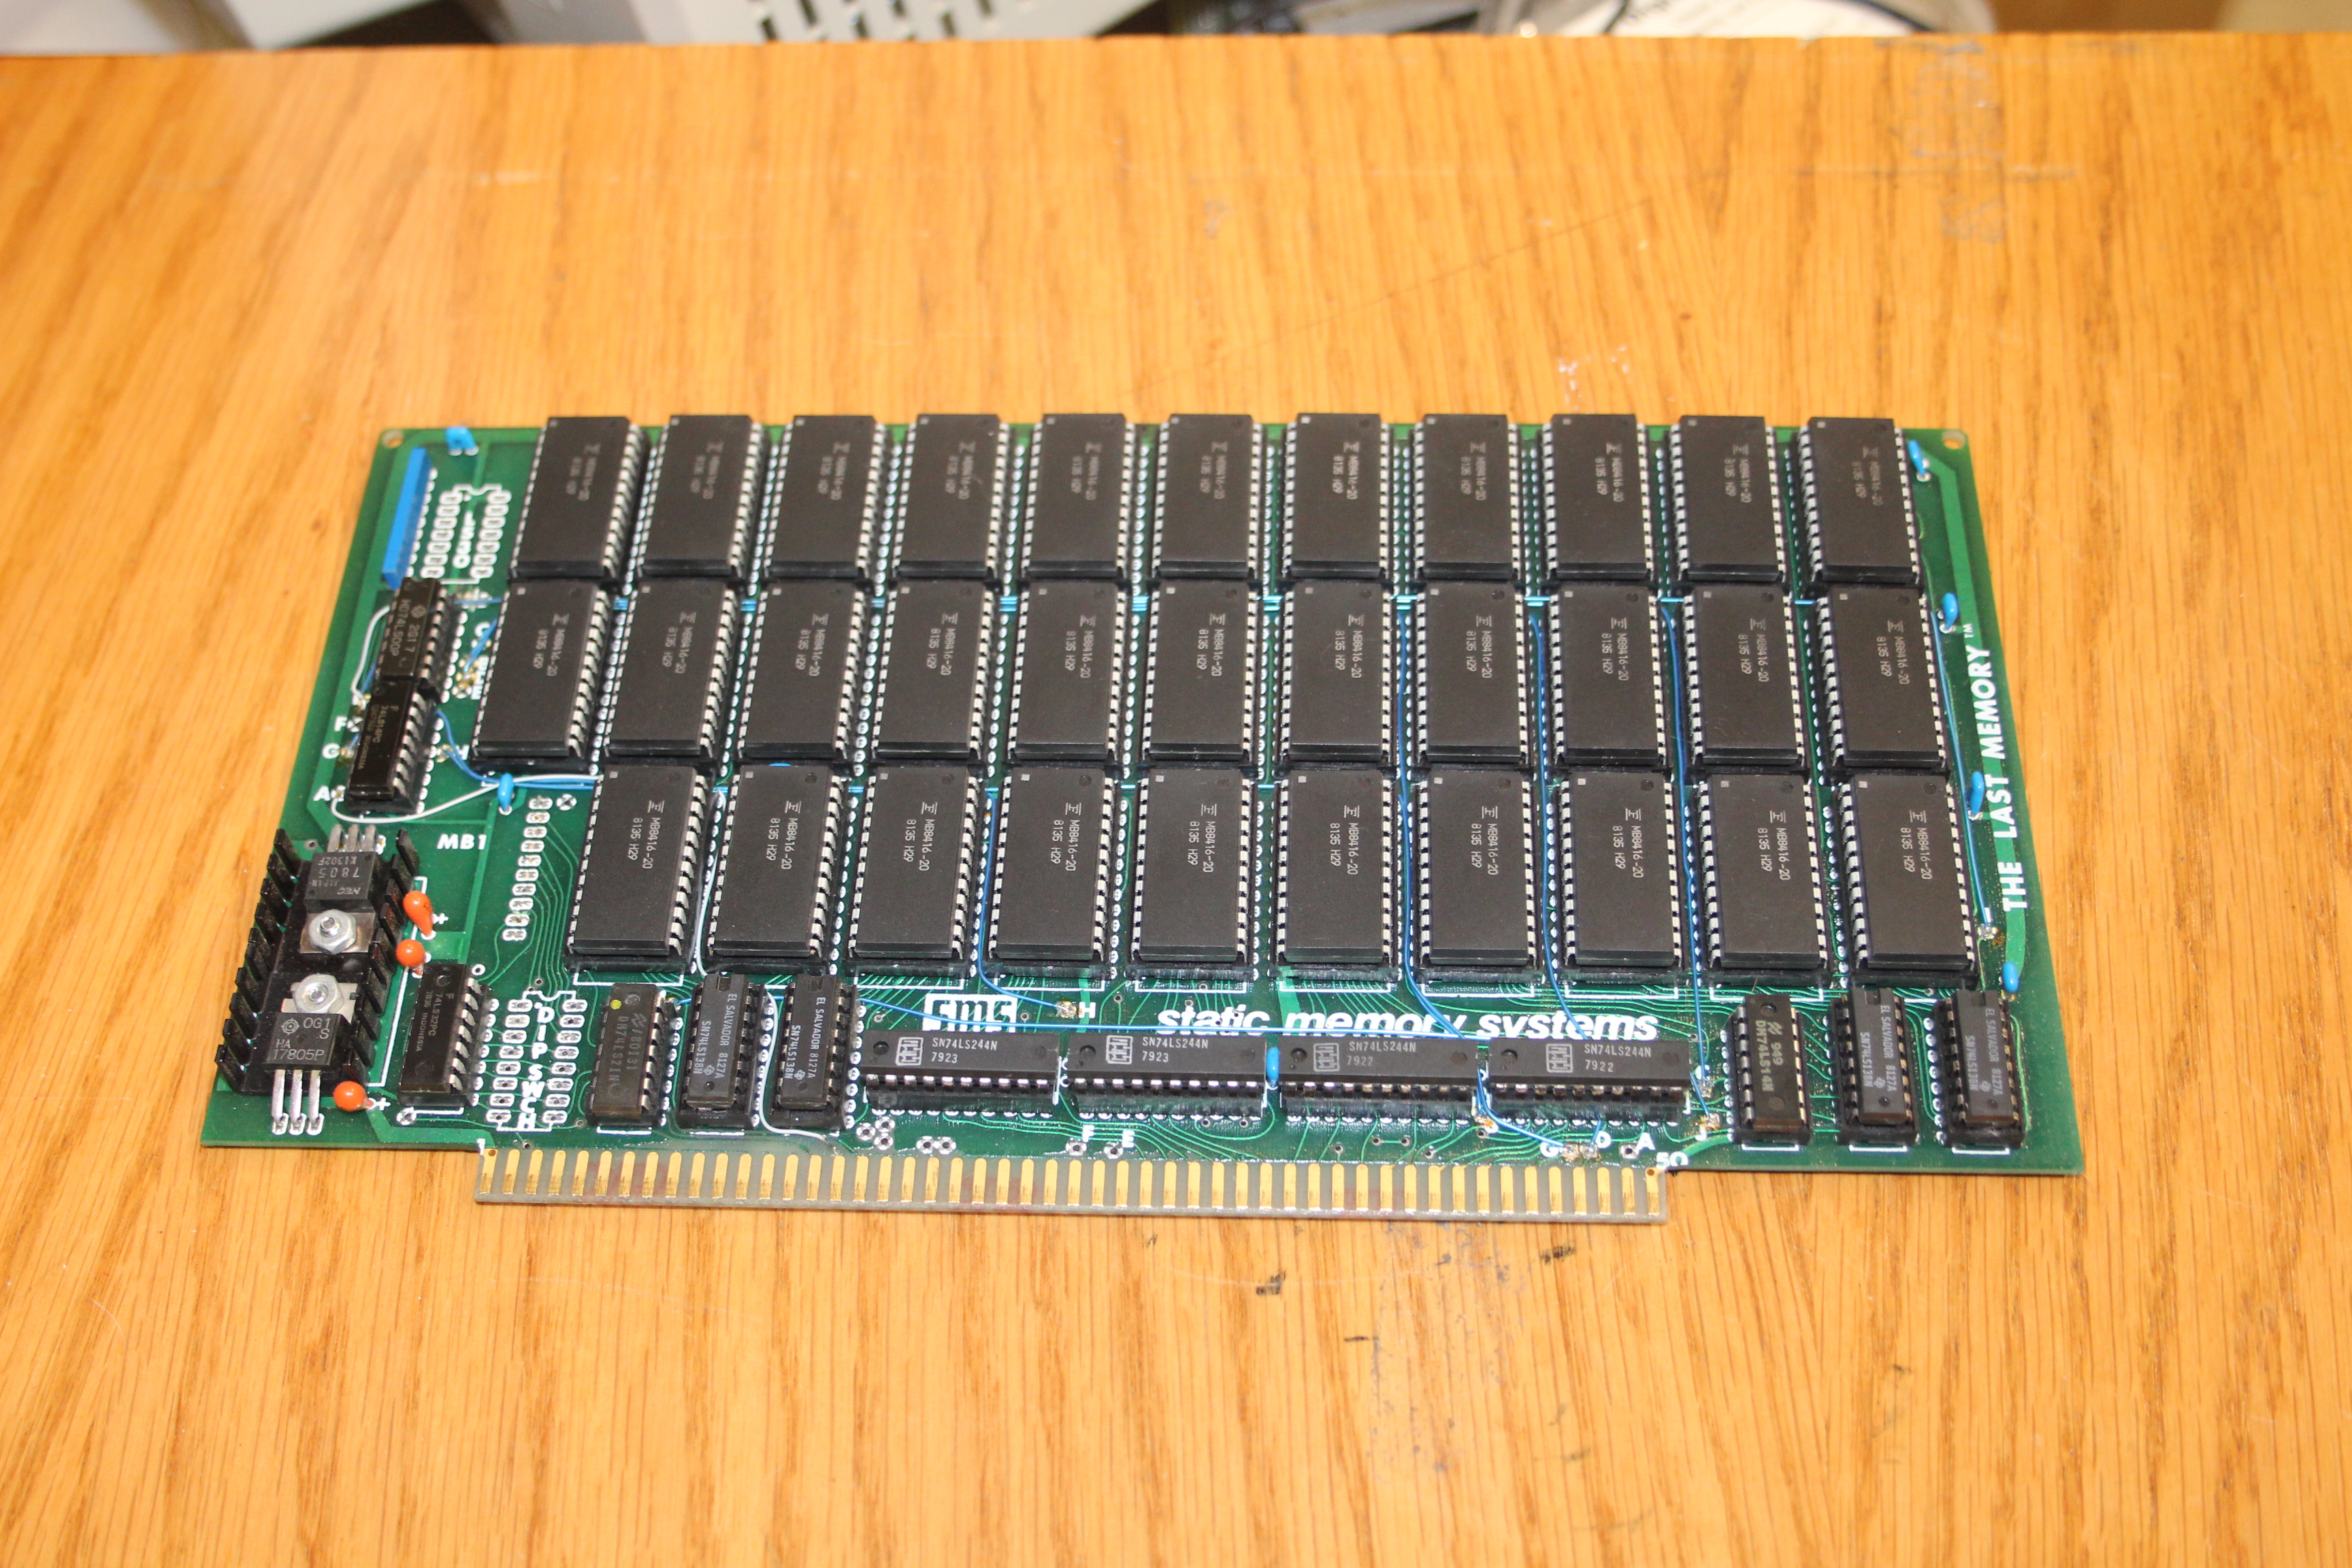

There are quite a few flywire options on this board. I haven’t documented them all, but many match up with configurations from the manual.
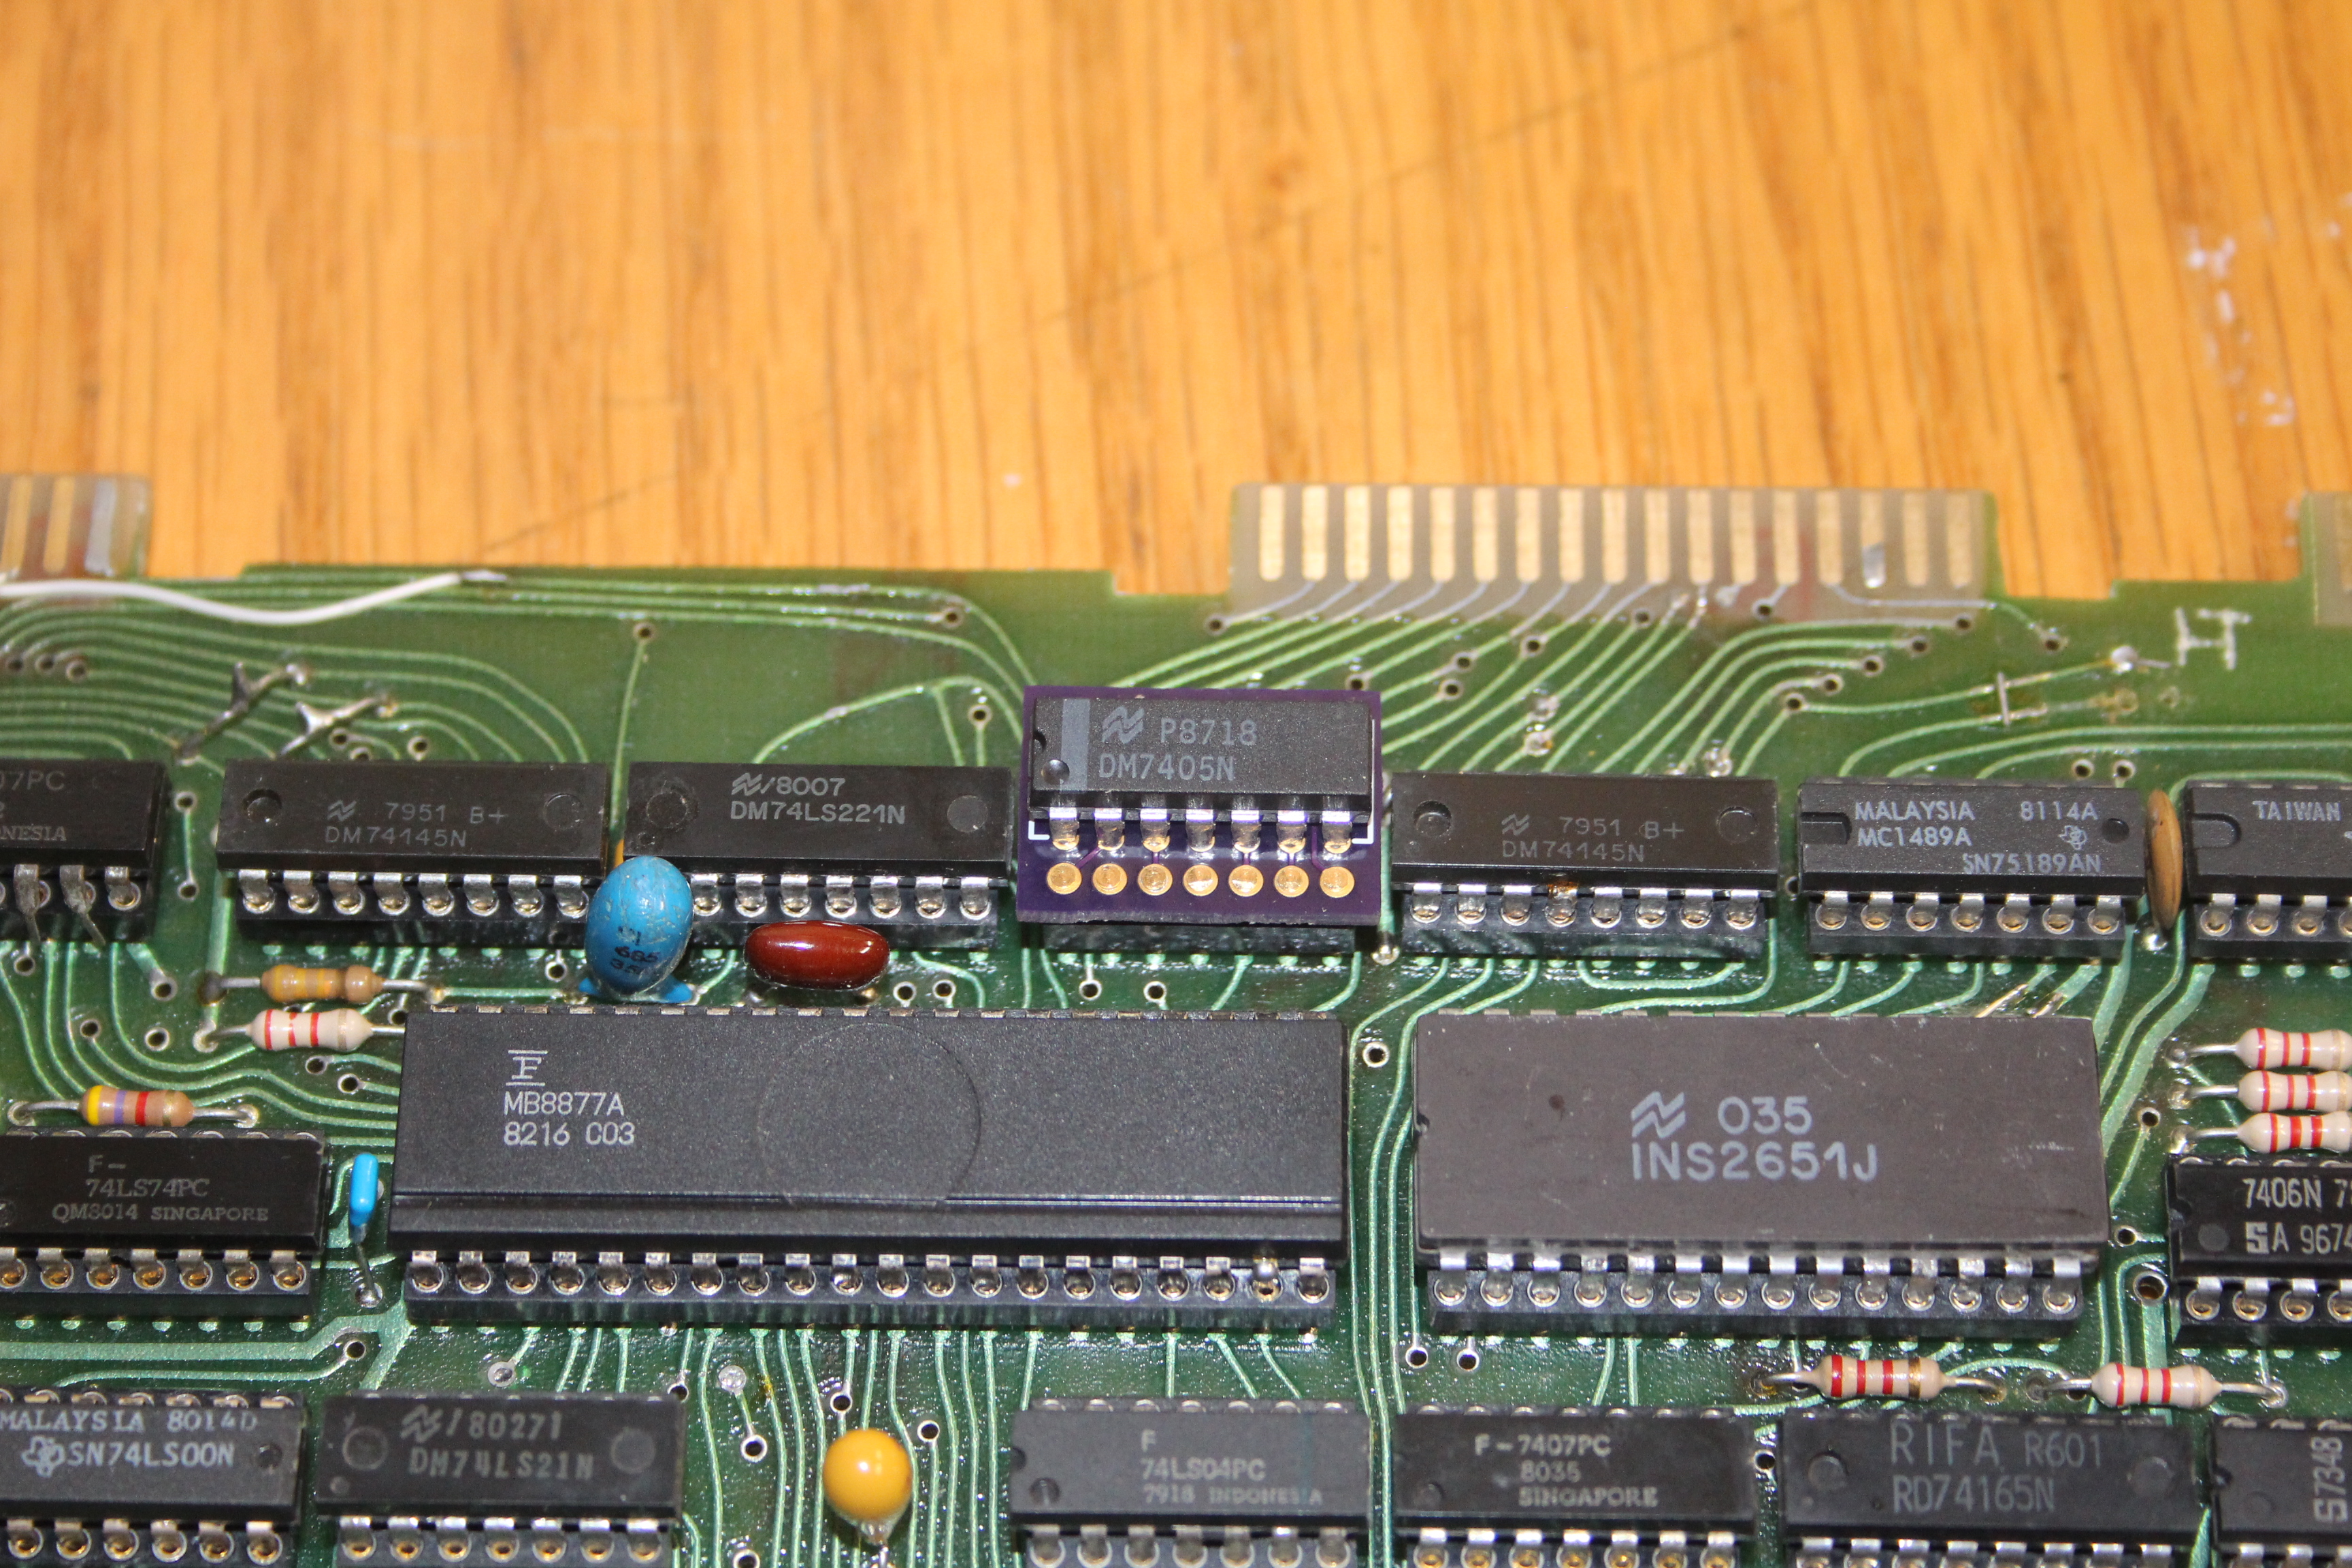
National Multiplex D4S Diskette Controller
The National Multiplex D4S is…weird. They made at least one other diskette controller, the D3S, and a much earlier S-100 board with ROM and two serial ports using different UARTs. Their designs are, well, pretty bad actually. The documentation often includes little jabs at how it’s not their fault that other systems won’t work with their boards!
Fortunately, the documentation I received from Doug included the manual and schematic for the D4S. There seems to be little to no information on their products on the Internet!
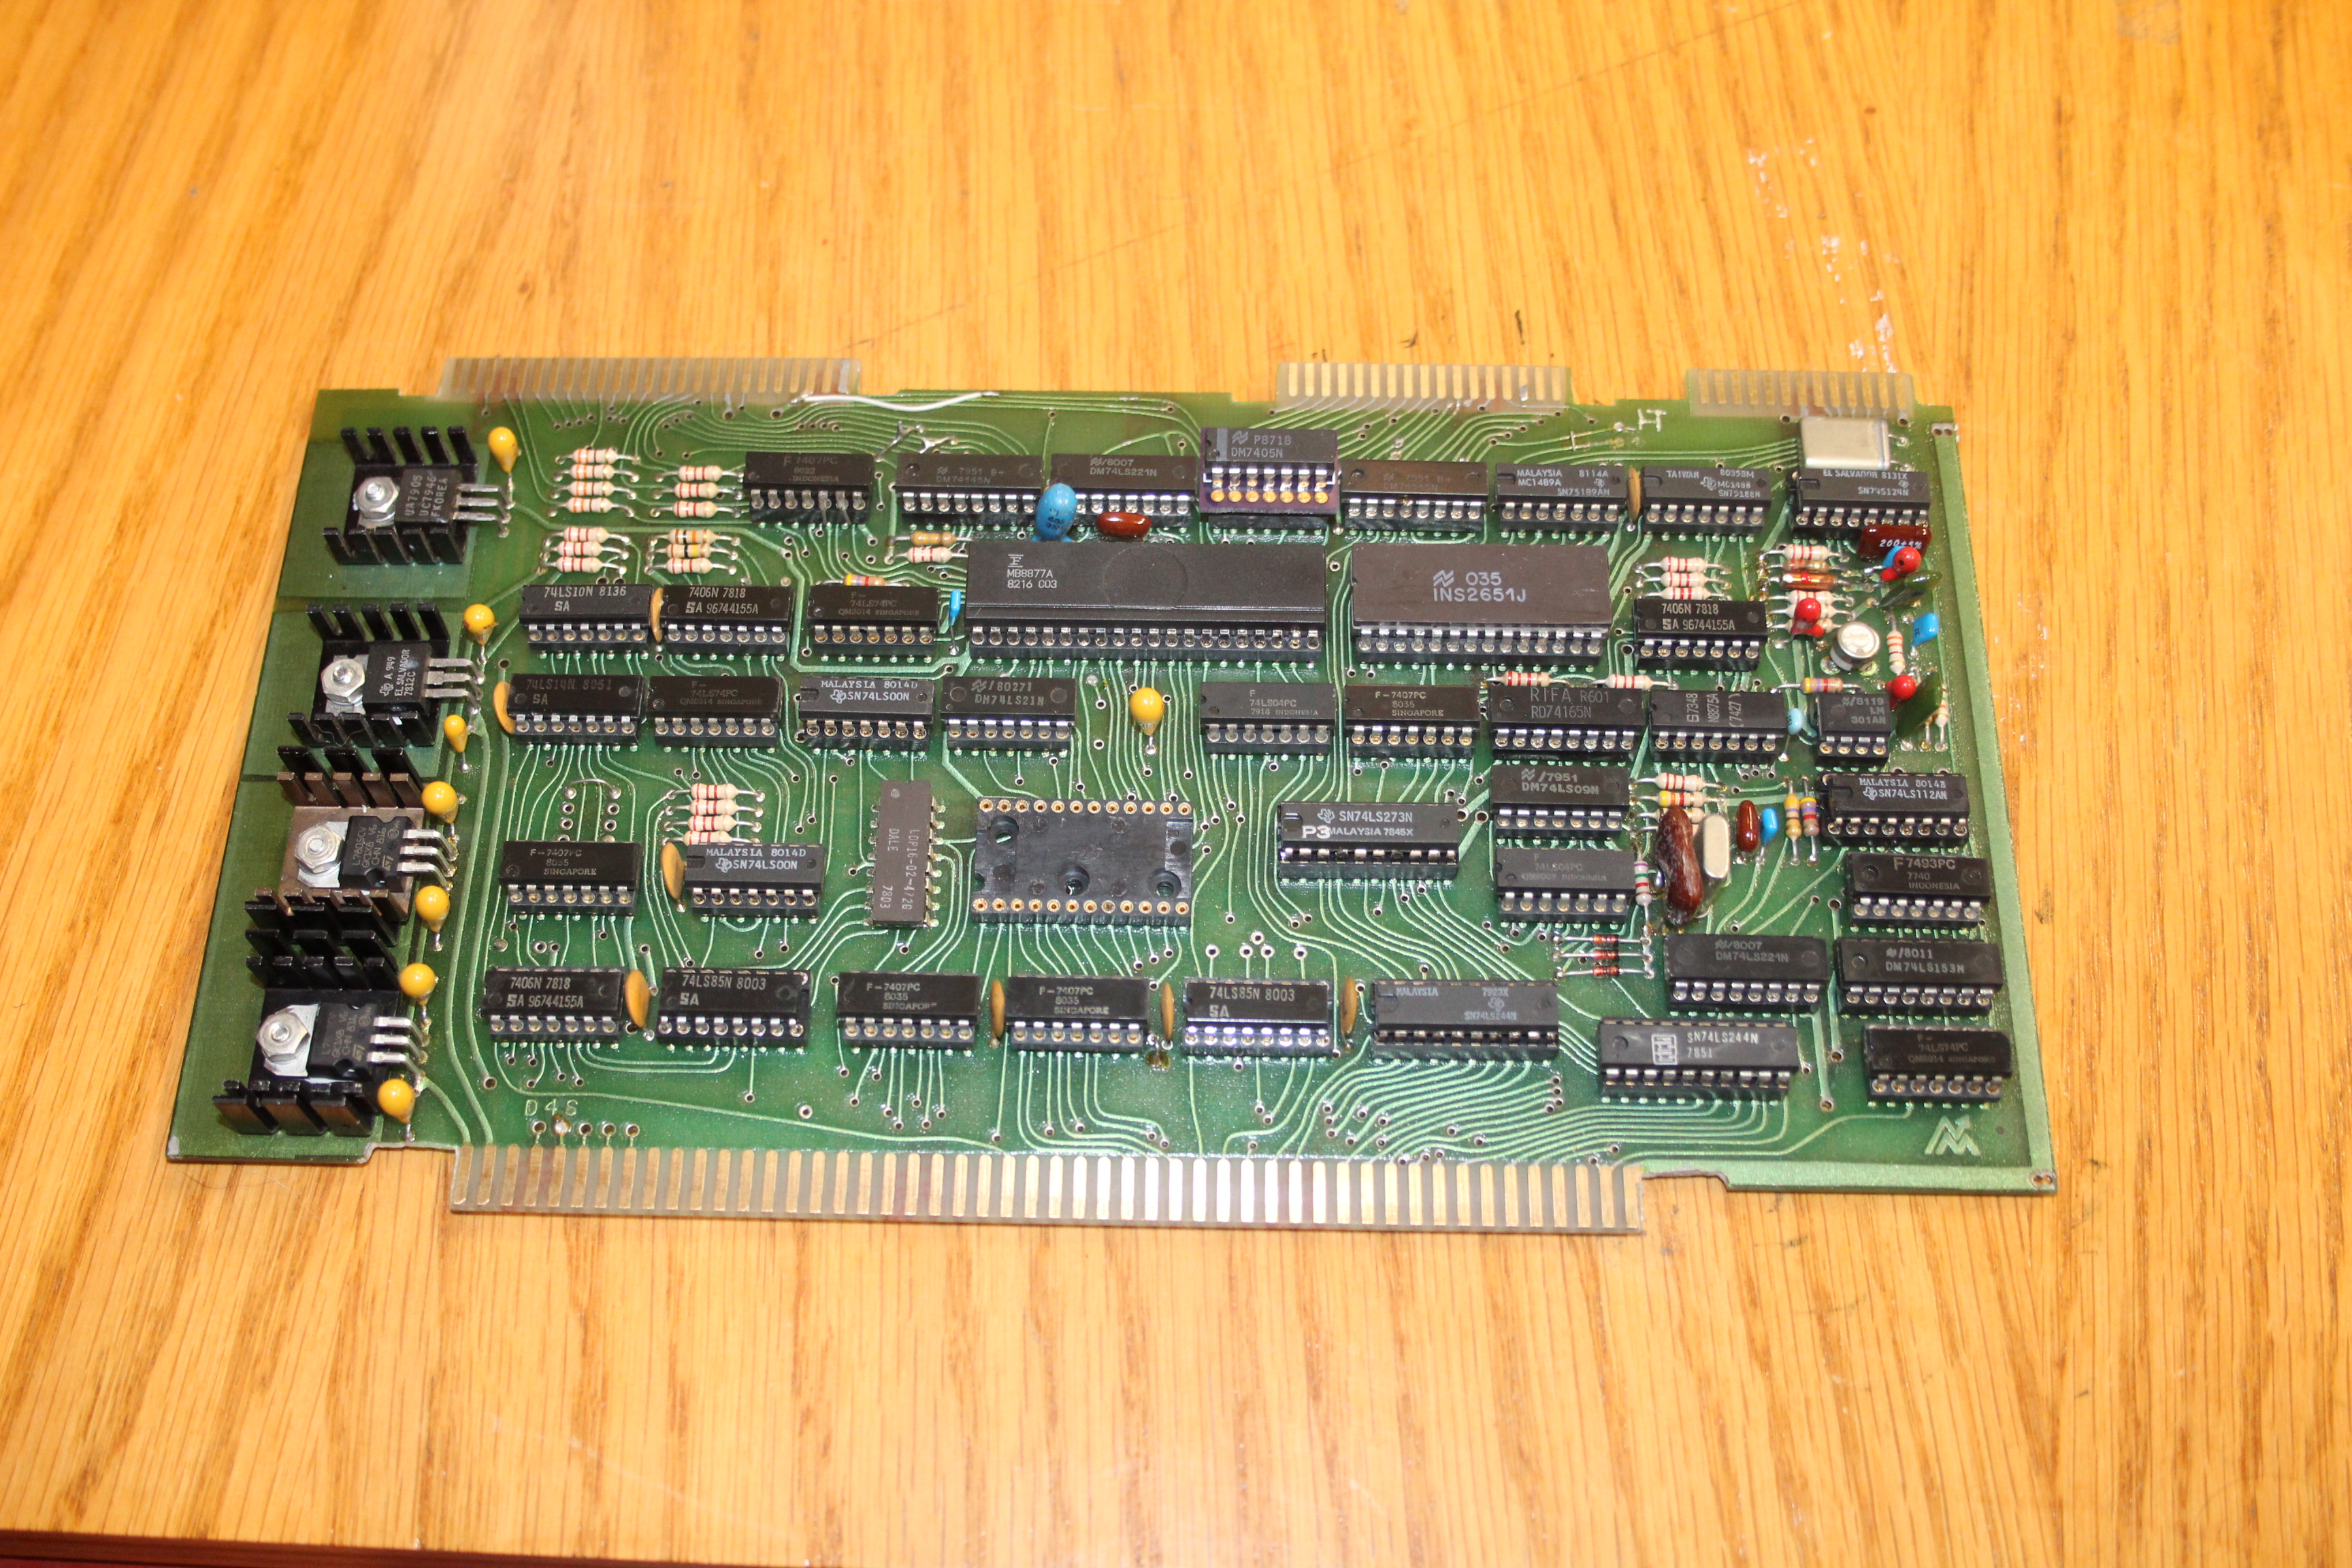
The D4S supports both 8” and 5.25” diskette drives, single or double sided, single or double density. The data separator is discrete, and seems to work well enough. In addition to the floppy controller hardware, the D4S also includes a boot ROM socket (not used in the Pegasus II) and a 2651 type UART. I assumed that the idea was to include a standard console serial port, so their standard CP/M distribution diskettes could be booted on any S-100 system, but the manual says the 2651 is unused. The Pegasus II uses a serial port on the CPU board, so the D4S port is available for other uses.
General Board Clean-Up
The S-100 boards were dusted off, the edge connectors cleaned, and generally freshened up. The EPROM on the CPU board was dumped and saved. Everything already basically worked, but I’ve found that doing maintenance at the start often avoids headaches later on.
There were a few shorted capacitors on the CPU and diskette controller boards that had failed and were replaced or cut out at some point in the past. All of the tantalum capacitors on these two boards were replaced.
The regulators on the CPU and diskette controller boards ran really hot – too hot to touch. This is my usual mitigation:
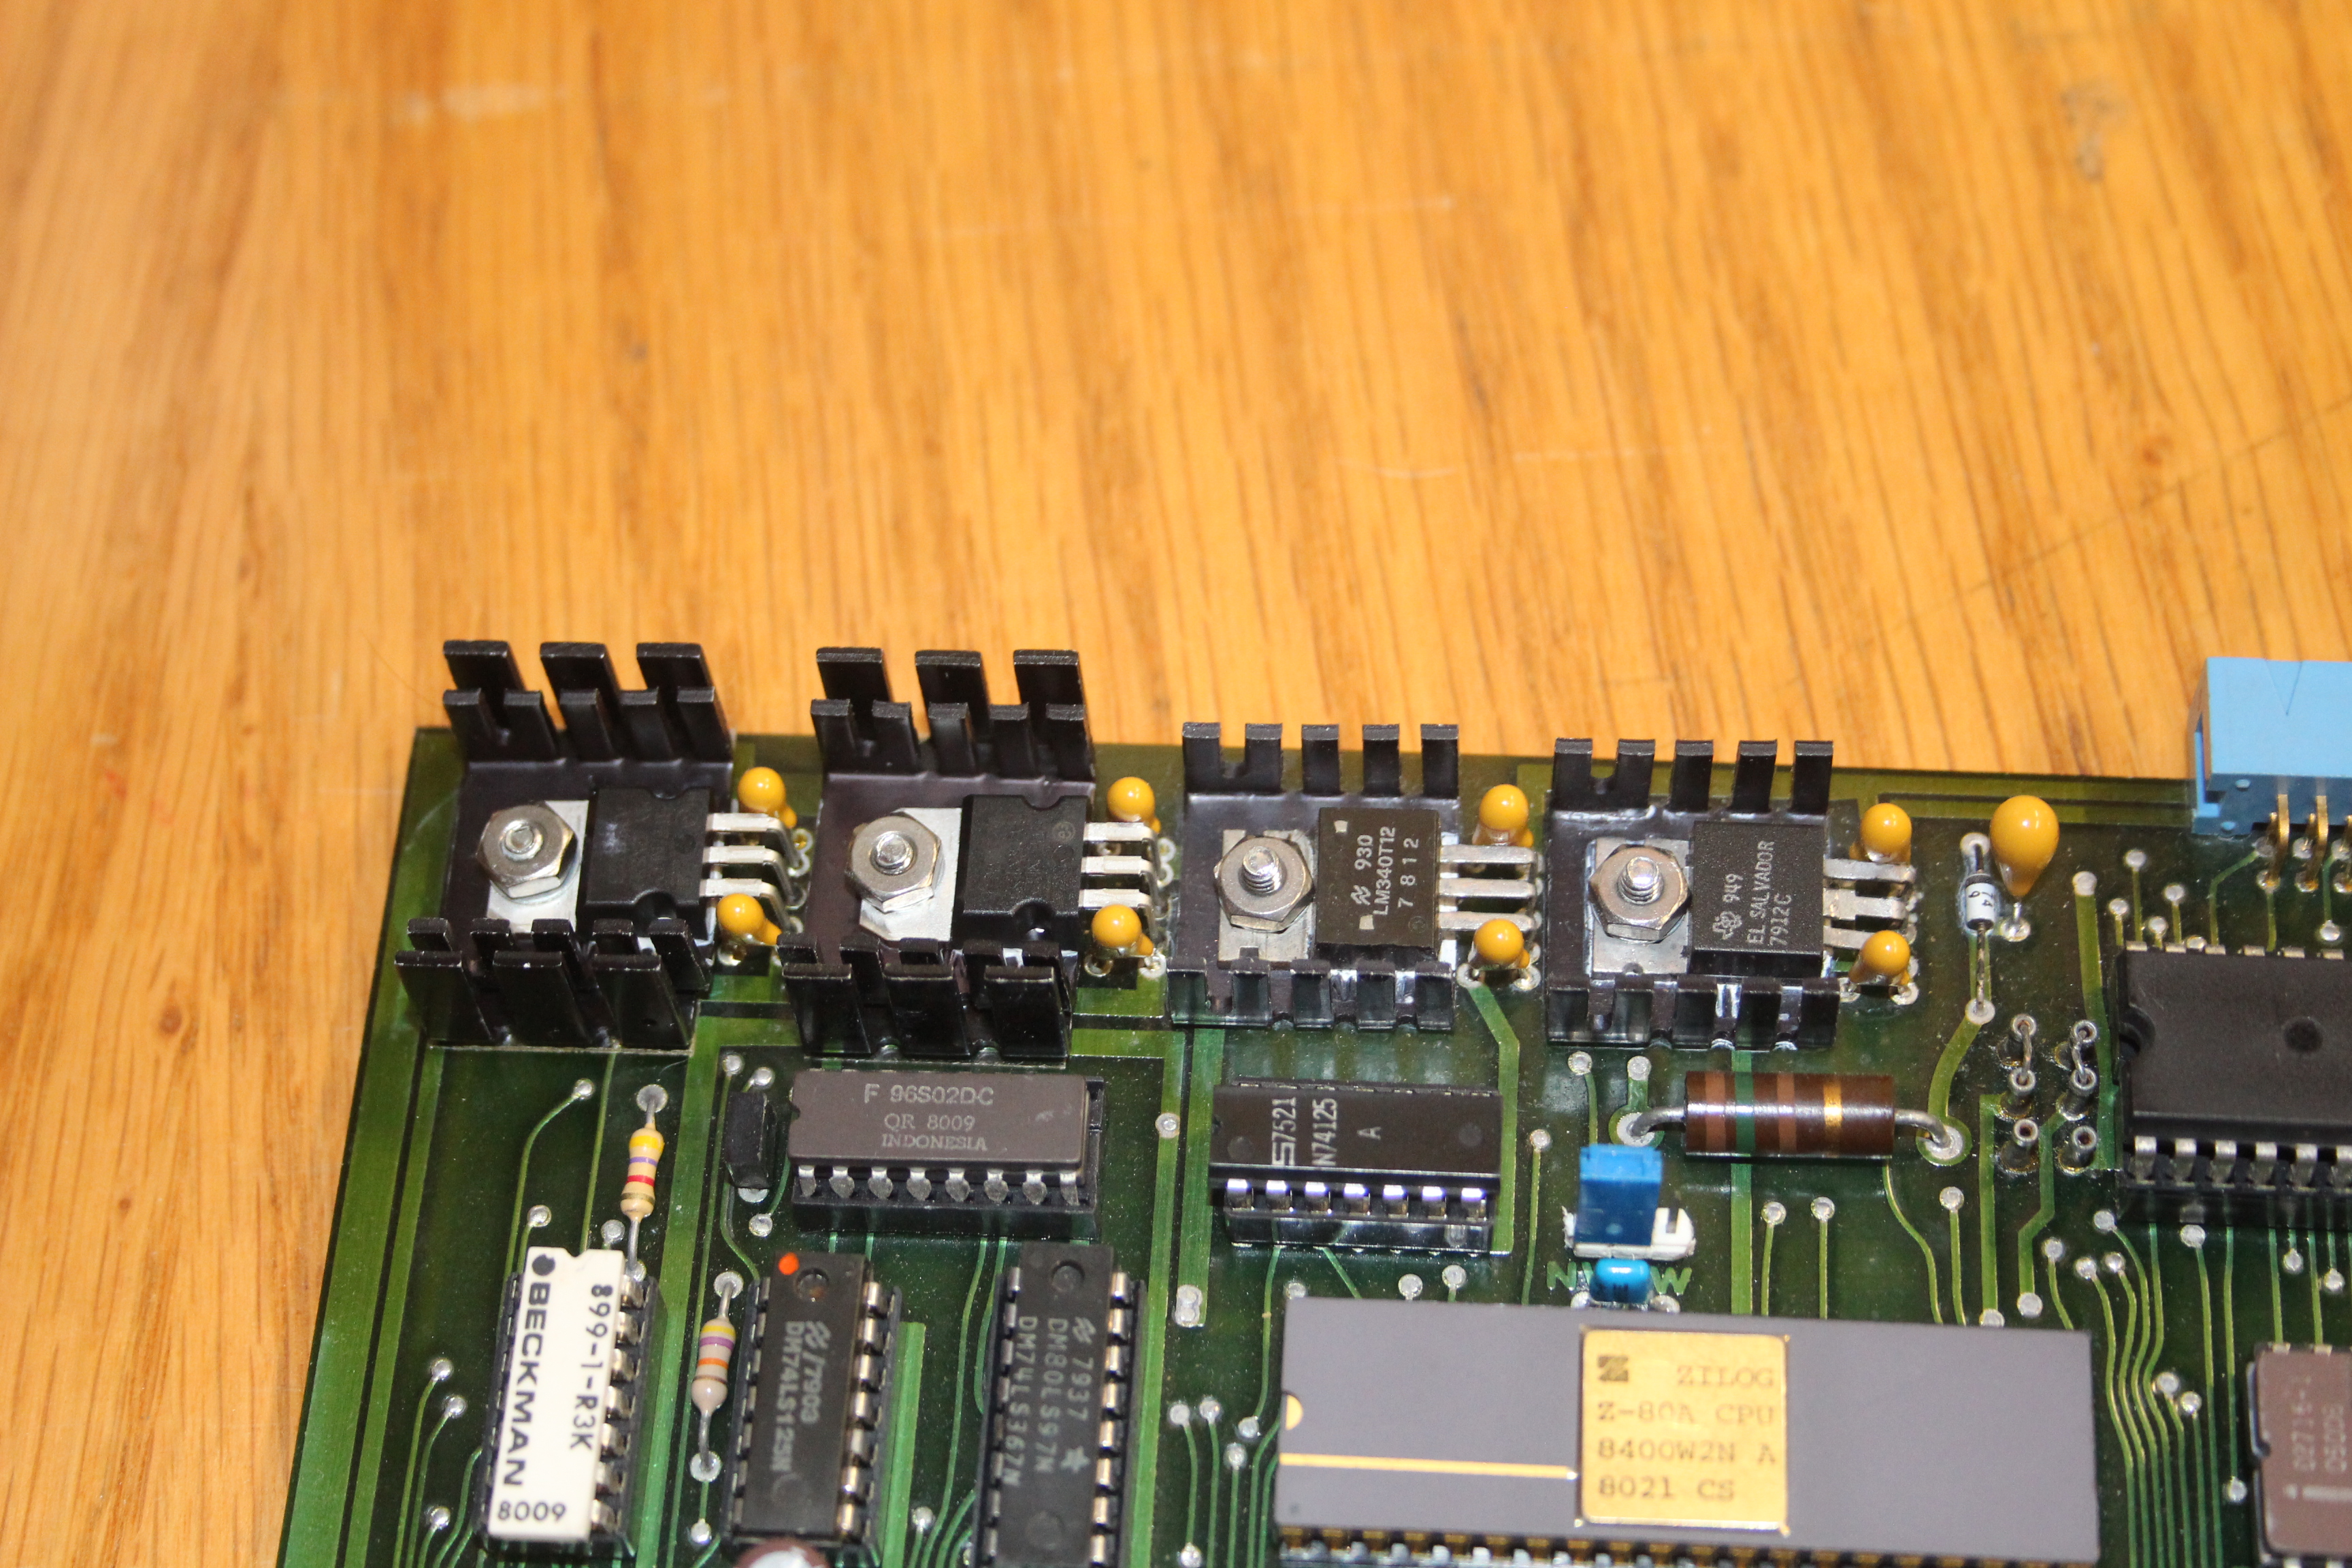
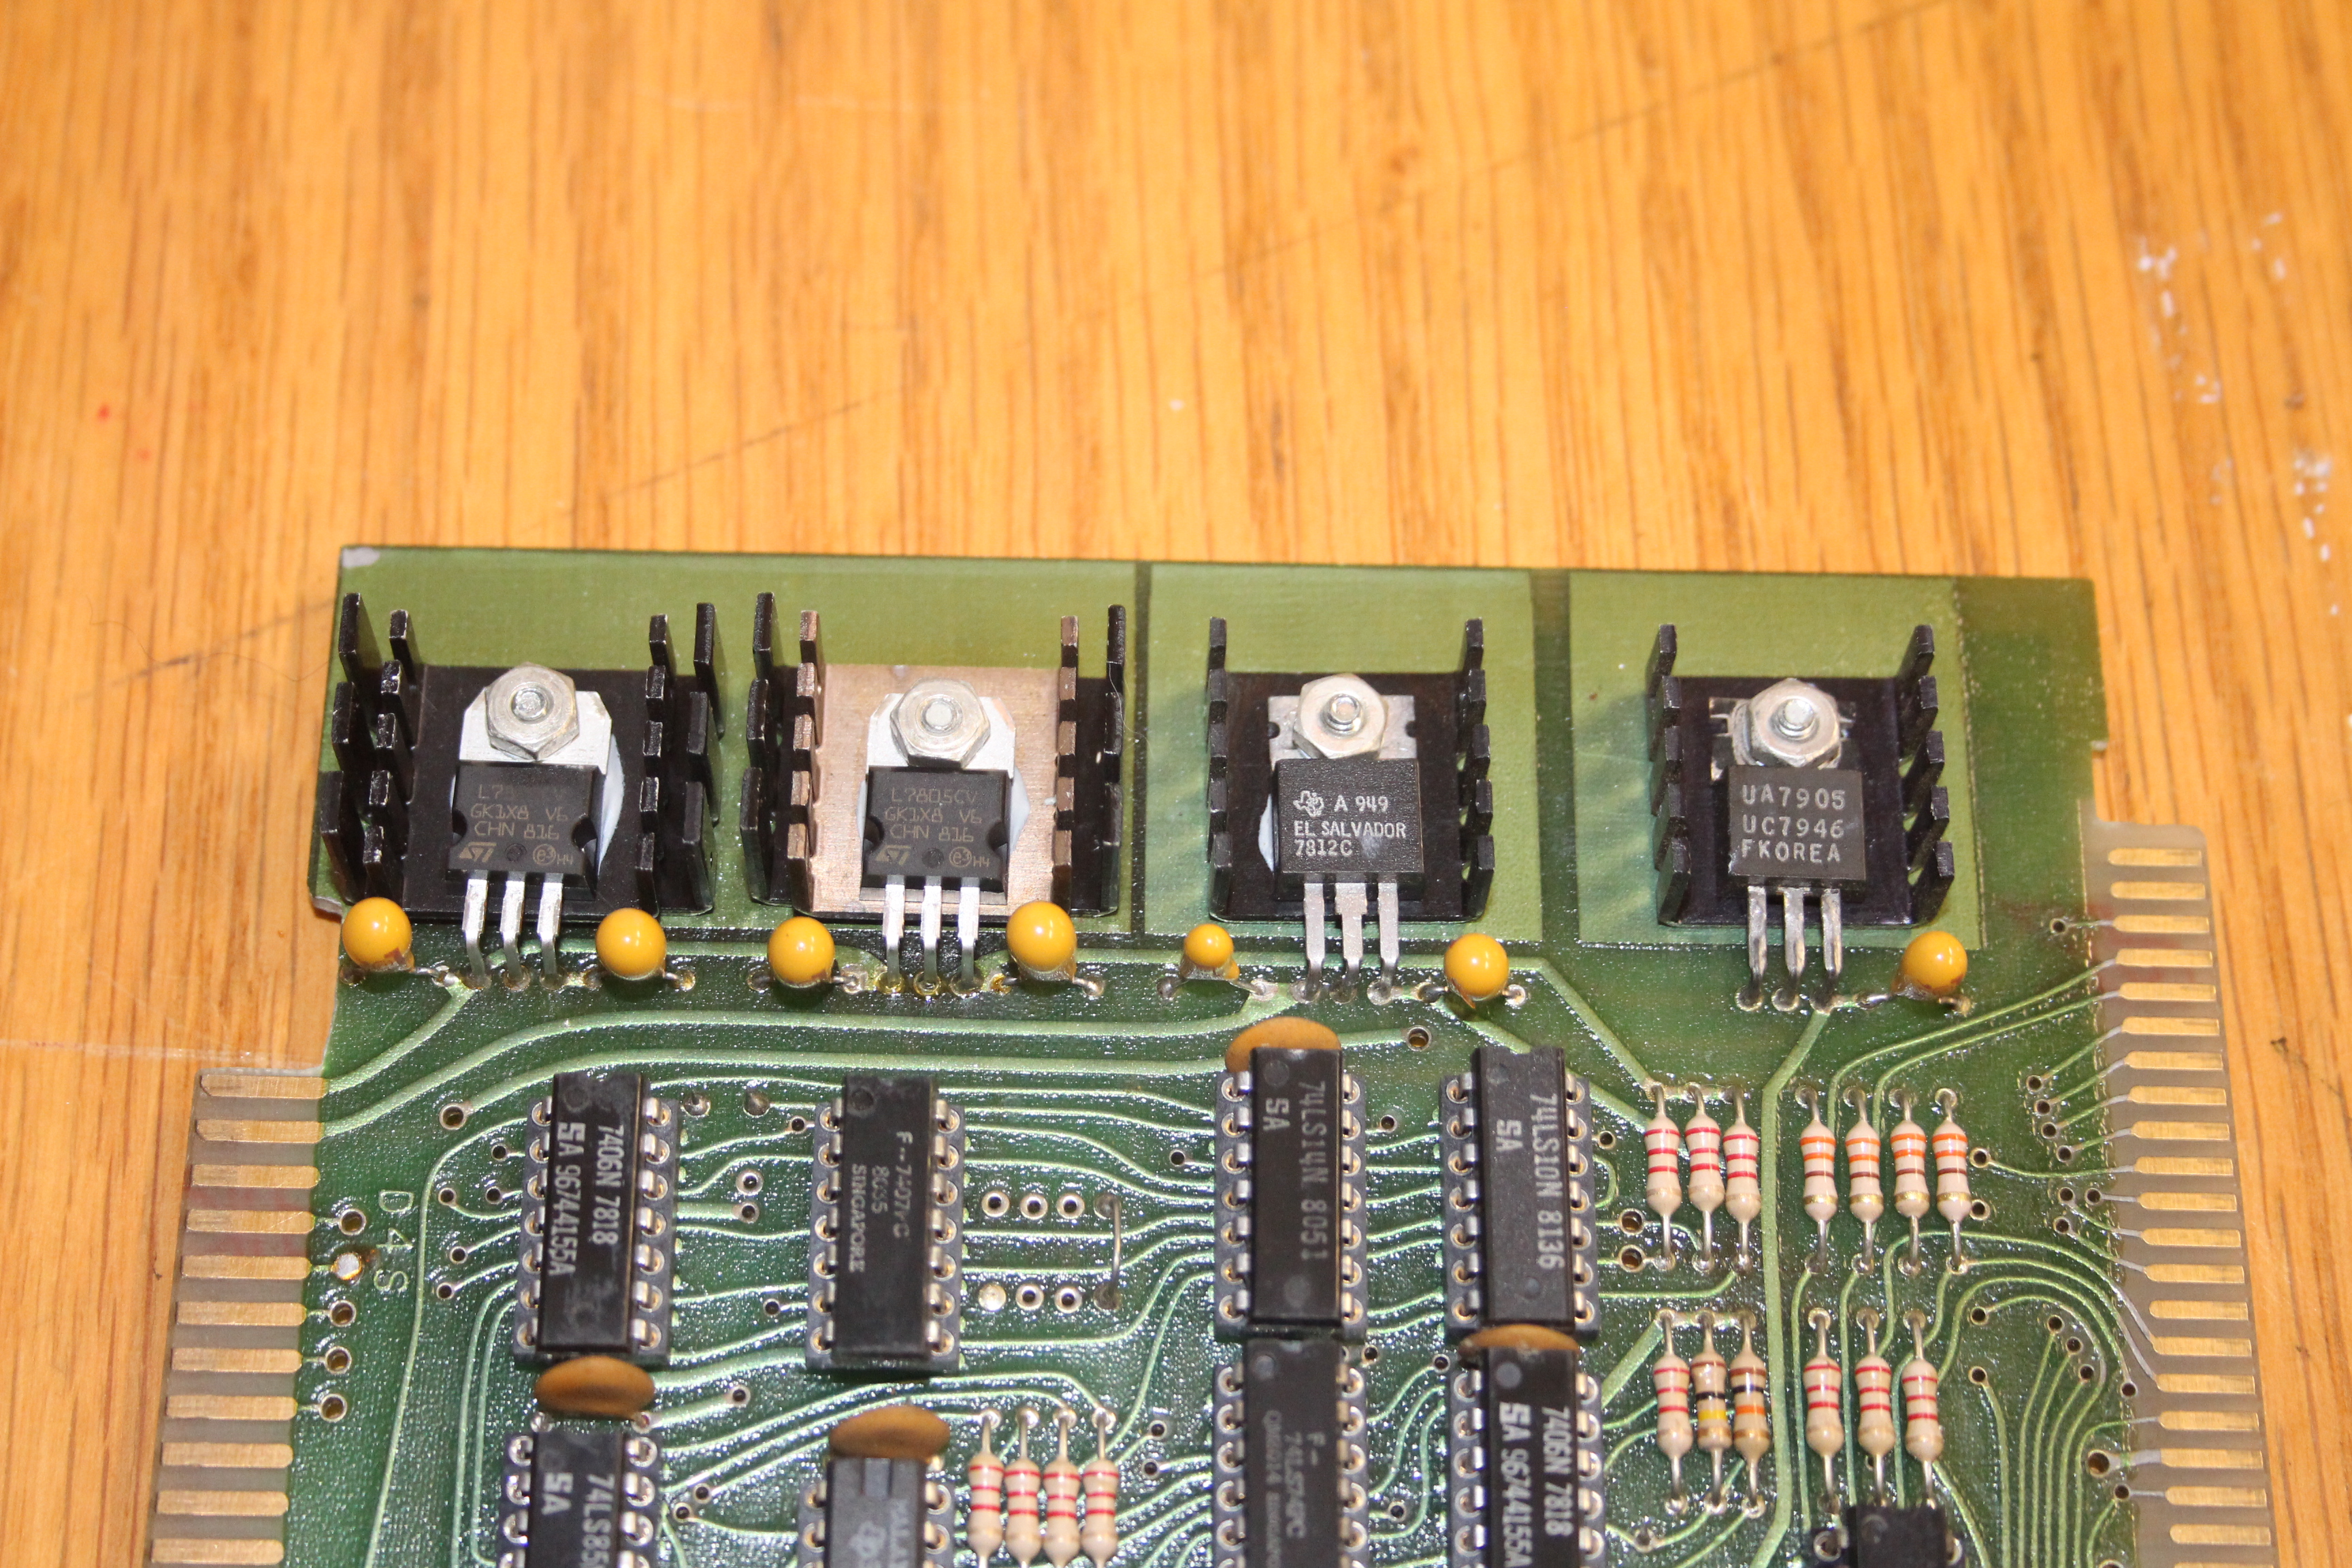
The old regulators were desoldered. The heatsinks were cleaned to remove old thermal compound. For the +5V regulators, all were replaced with new 1.5A 7805 type parts, as these are the ones that usually generate the most heat.
All regulators did of course receive new heatsink compound. On the +5V regulators, an additional slightly larger heatsink was “doubled up” under the original heatsinks. Thermal compound was applied between the original and new larger heatsinks. This modification increases the heat dissipating area available. The modification took the +5V regulators to the point where one can hold a finger against them. They’re still hot, but they won’t burn you anymore.
Fixing the Write Corruption Issue
The main issue Doug was having with the Pegasus II, and his main reason for selling it, was the problem mentioned at the beginning of this writeup: writes of any sort clobbered diskettes. Not only would the data written in the file’s data sectors be garbage, but the CP/M directory would get corrupted as well! Diskettes could not be formatted in-system. Programs that did not write to diskette at all would run, but could not save data.
I started with the easier parts to diagnose: the diskette drives themselves. This Pegasus II is fitted with two Qume 8” full height double sided drives, which use a standard Shugart-style interface. This makes them easy to plug into my utility PC and exercise. They were tested for alignment, write protection, and general performance. Aside from sticky bumpers in the door lock solenoids, there was nothing mechanically or electrically wrong with them. I’d tested other known-good drive cables in the system with no change, so that left only the D4S diskette controller.
There were no steady-state issues visible on the D4S; that is, I wasn’t able to catch write problems with the board plugged into my IMSAI, single-stepping through test routines. The board was filled with old single-wipe sockets and low profile TI “side wipe” sockets, which are often trouble points on old boards. To rule them out, I simply resocketed the entire board: we’ve got Hakko 472D desoldering tools around the shop, and it makes for a pretty quick job. Some of the bus buffers got high quality dual wipe sockets, but everything else was replaced with machine pin sockets.
Resocketing the board got rid of the occasional failure to boot, but did not solve the write corruption issue. The root of the problem was exposed while running test routines: at one point, the drive under test was homed, and the stepper made weird noises, jerking back and forth seemingly randomly, until it suddenly righted itself and homed. STEP and DIRECTION happen to run through elements in the same chip as the write circuit: we’ve got a likely fault candidate!
These lines are all open-collector. National Multiplex was doing something weird, though. The chip driving these lines was a 75492, which is a six-element…LED driver?!
I’m guessing the chips were cheap surplus or something, as this doesn’t look like a great candidate for driving floppy data. Sure, it’s open collector, but it was designed by TI for driving calculator displays. Additionally, there’s a more typical 7406 open collector inverter elsewhere on the board, so clearly National Multiplex knew they existed.
I didn’t have a 75492 on hand, so I wired up an adapter board using a chunk of pad-per-hole protoboard, some machine pin header strips, and a 7405 open collector inverter. This worked perfectly, finally fixing the write corruption problem! Rather than sourcing another calculator display driver, I decided to stick with the 7405. I did lay out a small circuit board for the adapter, though:

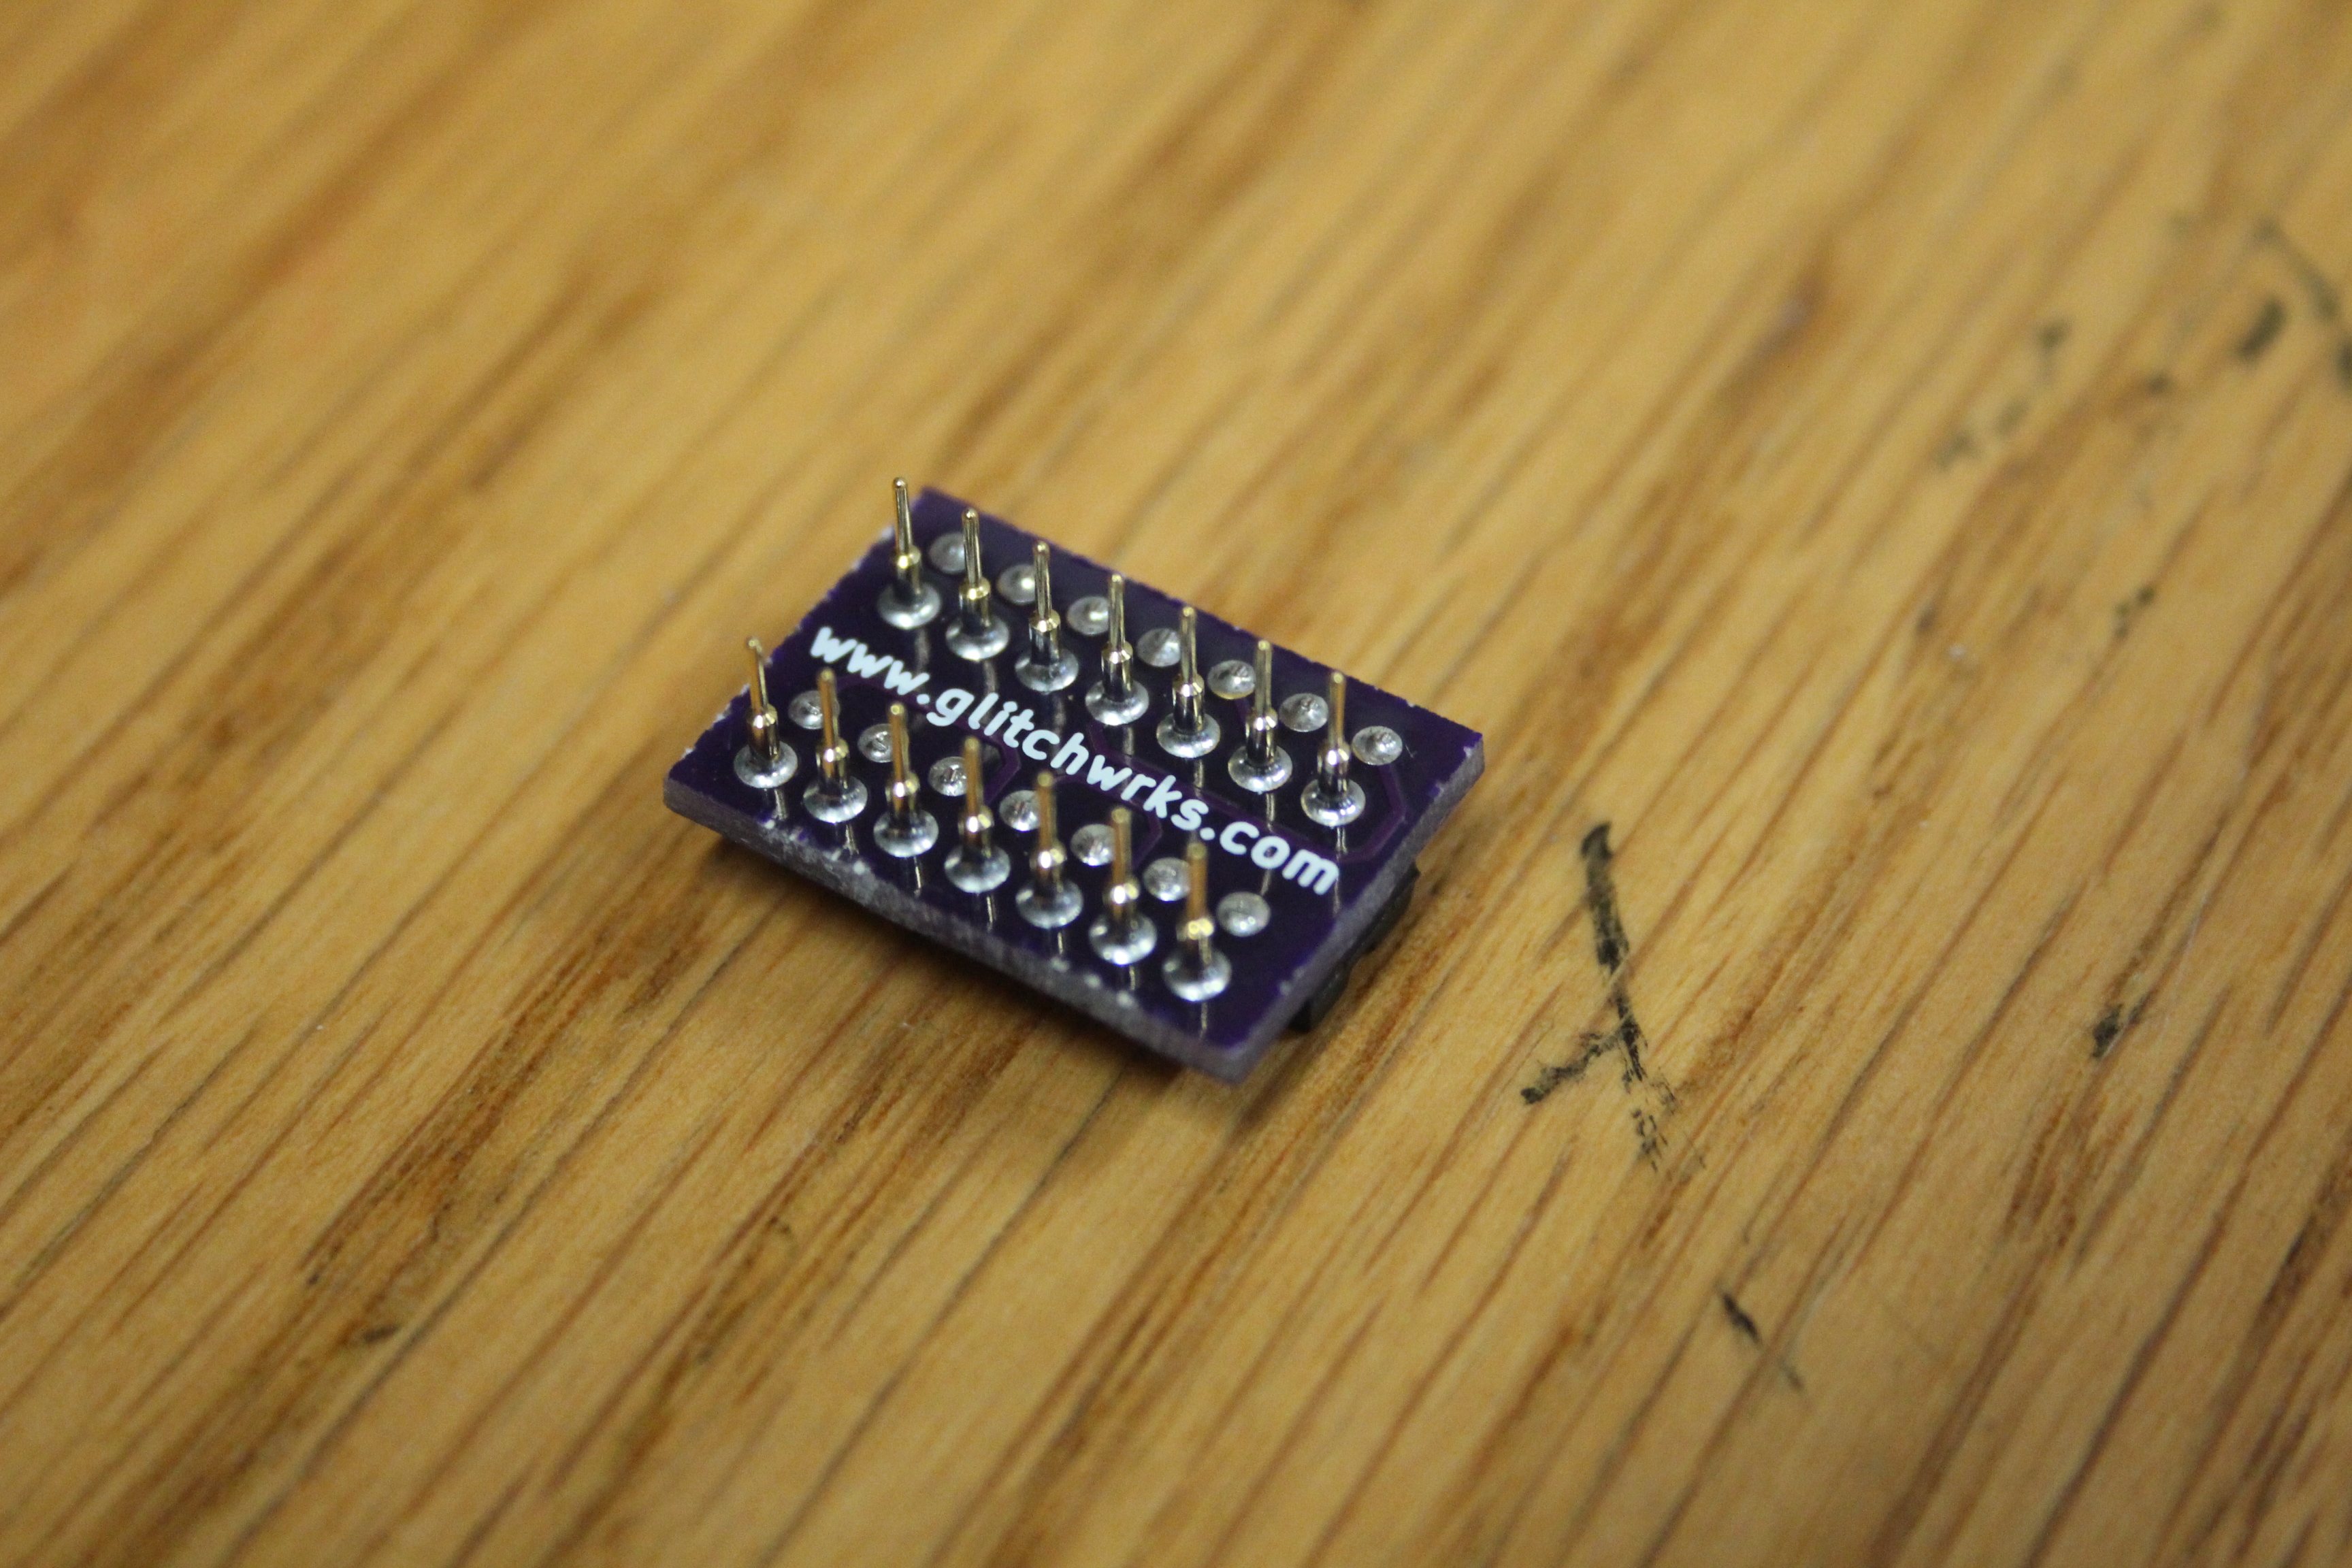
This little board uses Mill-Max pins to help keep the height down, so that a S-100 board could be installed in the slot immediately in front of the D4S, if desired. It also doesn’t overhang the 5.25” drive connector, as the prototype did. The little boards were run at OSH Park. It installed nicely on the D4S:
With the adapter installed, the system was now 100% operational! From the order date, it looks like this was fixed in June 2020.
Backplane Repairs and Rewire
During the course of figuring out the write corruption issue, I blew up the Pegasus II’s S-100 backplane. The edge connector on the D4S appears to have been “routed” by hand, perhaps with a dull hacksaw. There’s so much slop in the connector that I was able to short +8V and -16V in the S-100 connector, even with the card guides! The backplane had to come out of the card cage for this. Turns out the wiring was soldered directly:

This meant desoldering to remove the backplane. The reset switch and power lamp wiring were also soldered:
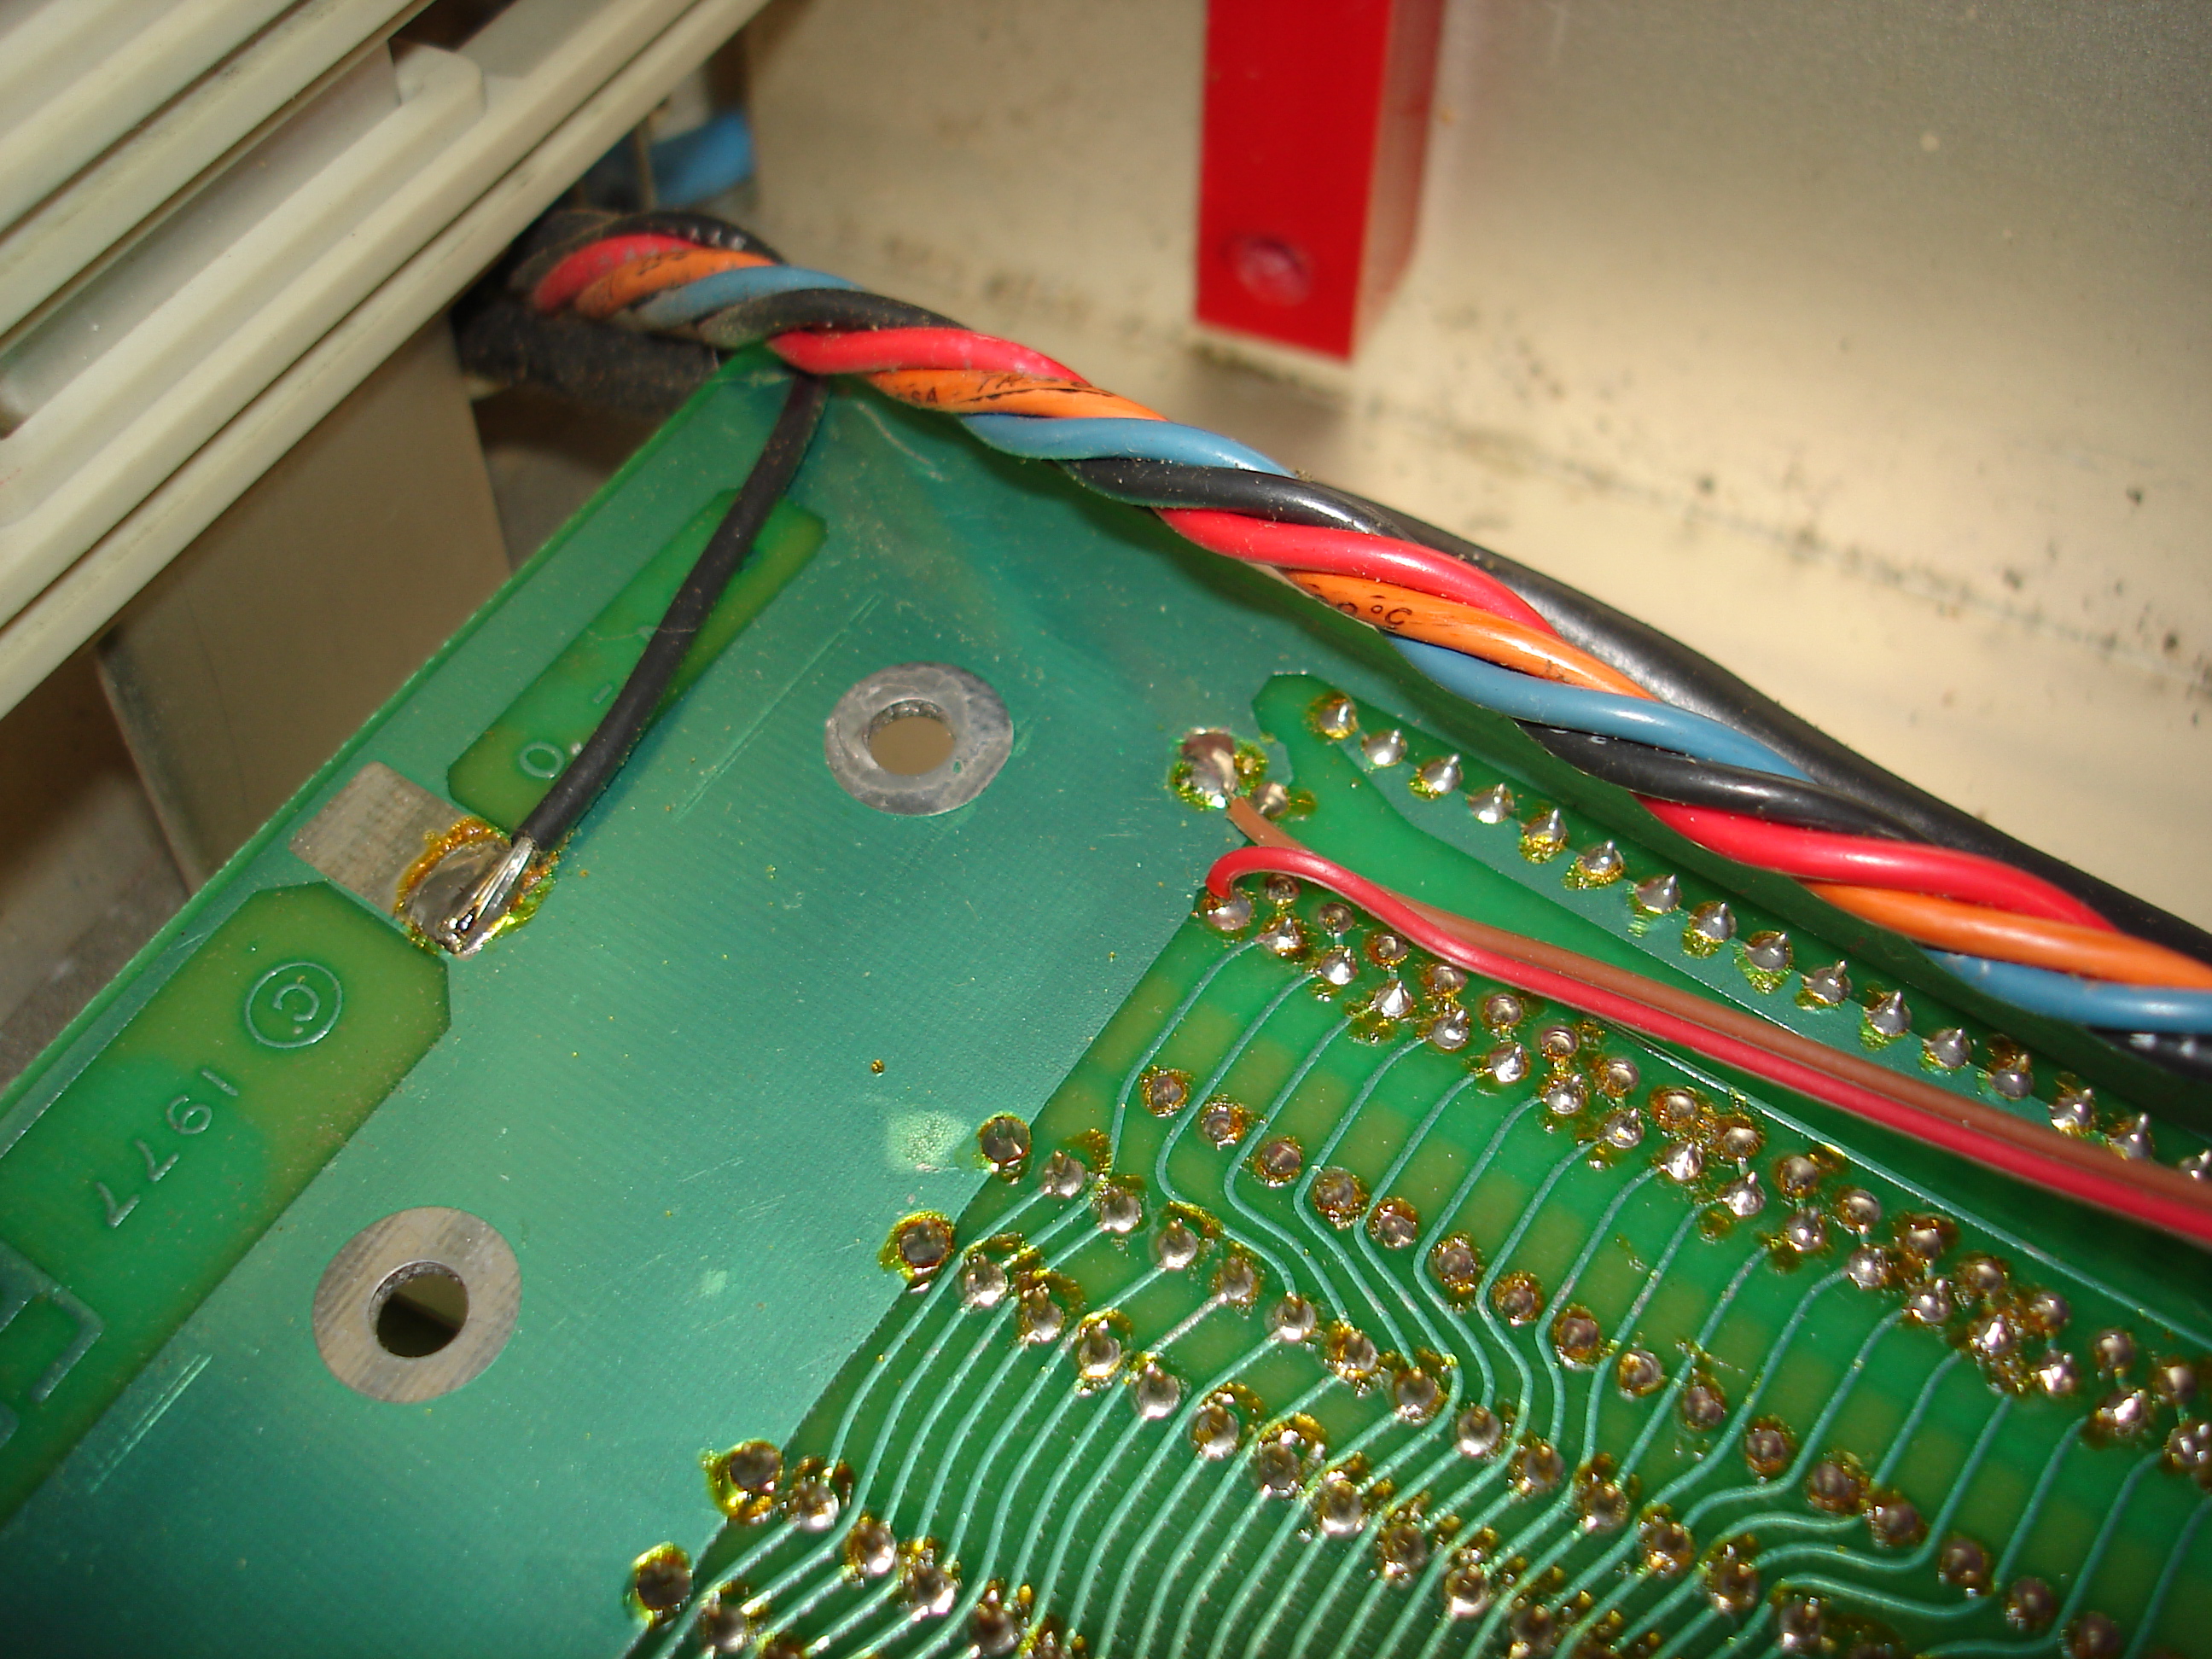
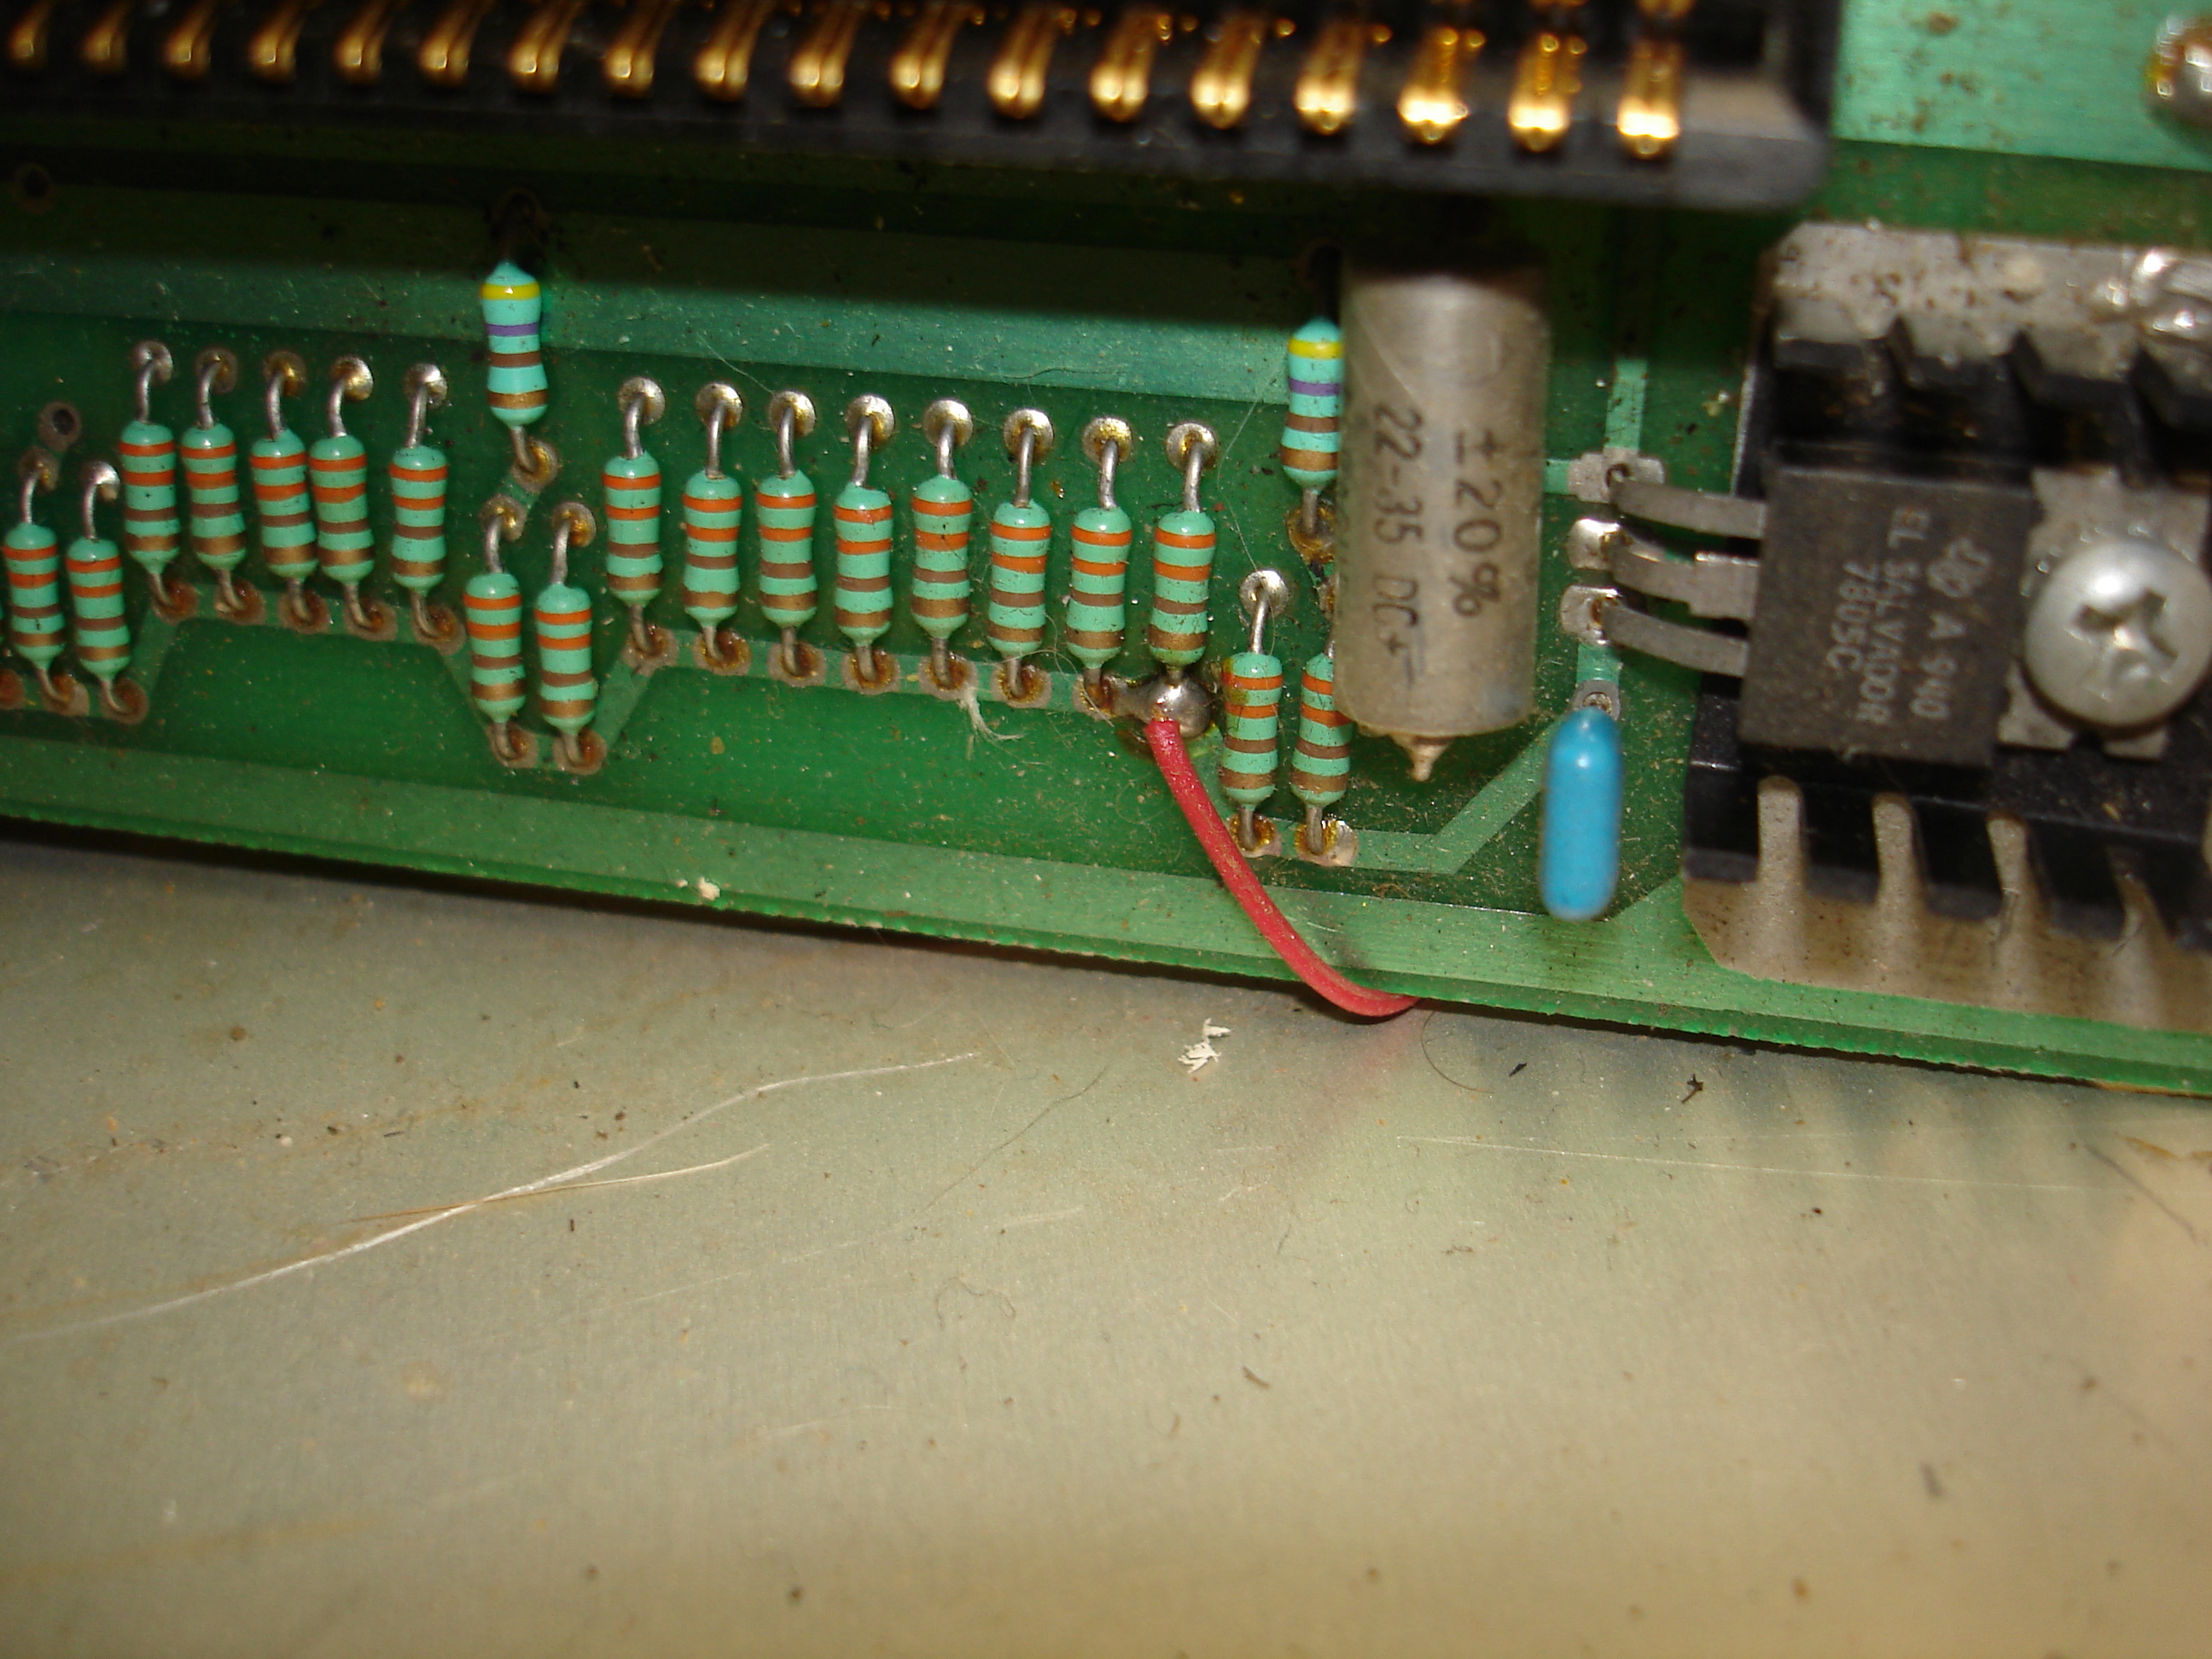
Rather than soldering these connections during reassembly, I decided to install a barrier strip. This would make future disassembly easier, and allow probing of backplane power rails without poking meter prods into S-100 connectors. I also installed a two pin Mate-n-Lok connector on the AC power switch wiring, which had also been soldered and runs across the backplane. Here’s the new barrier strip:

The power lamp in the reset switch was very dim with the original wiring, which fed it regulated +5V. I moved it to the +8V unregulated rail, which makes it much brighter:
I believe there’s a 12V lamp in there, currently, so it should still last a very long time, even with the increased voltage.
System Software
With the Pegasus II repaired and running properly, I was able to start going through the software included with it. While the diskettes were all imaged before using them in the Pegasus II, they were dumped as a single file per diskette, and were not gone through at that stage.
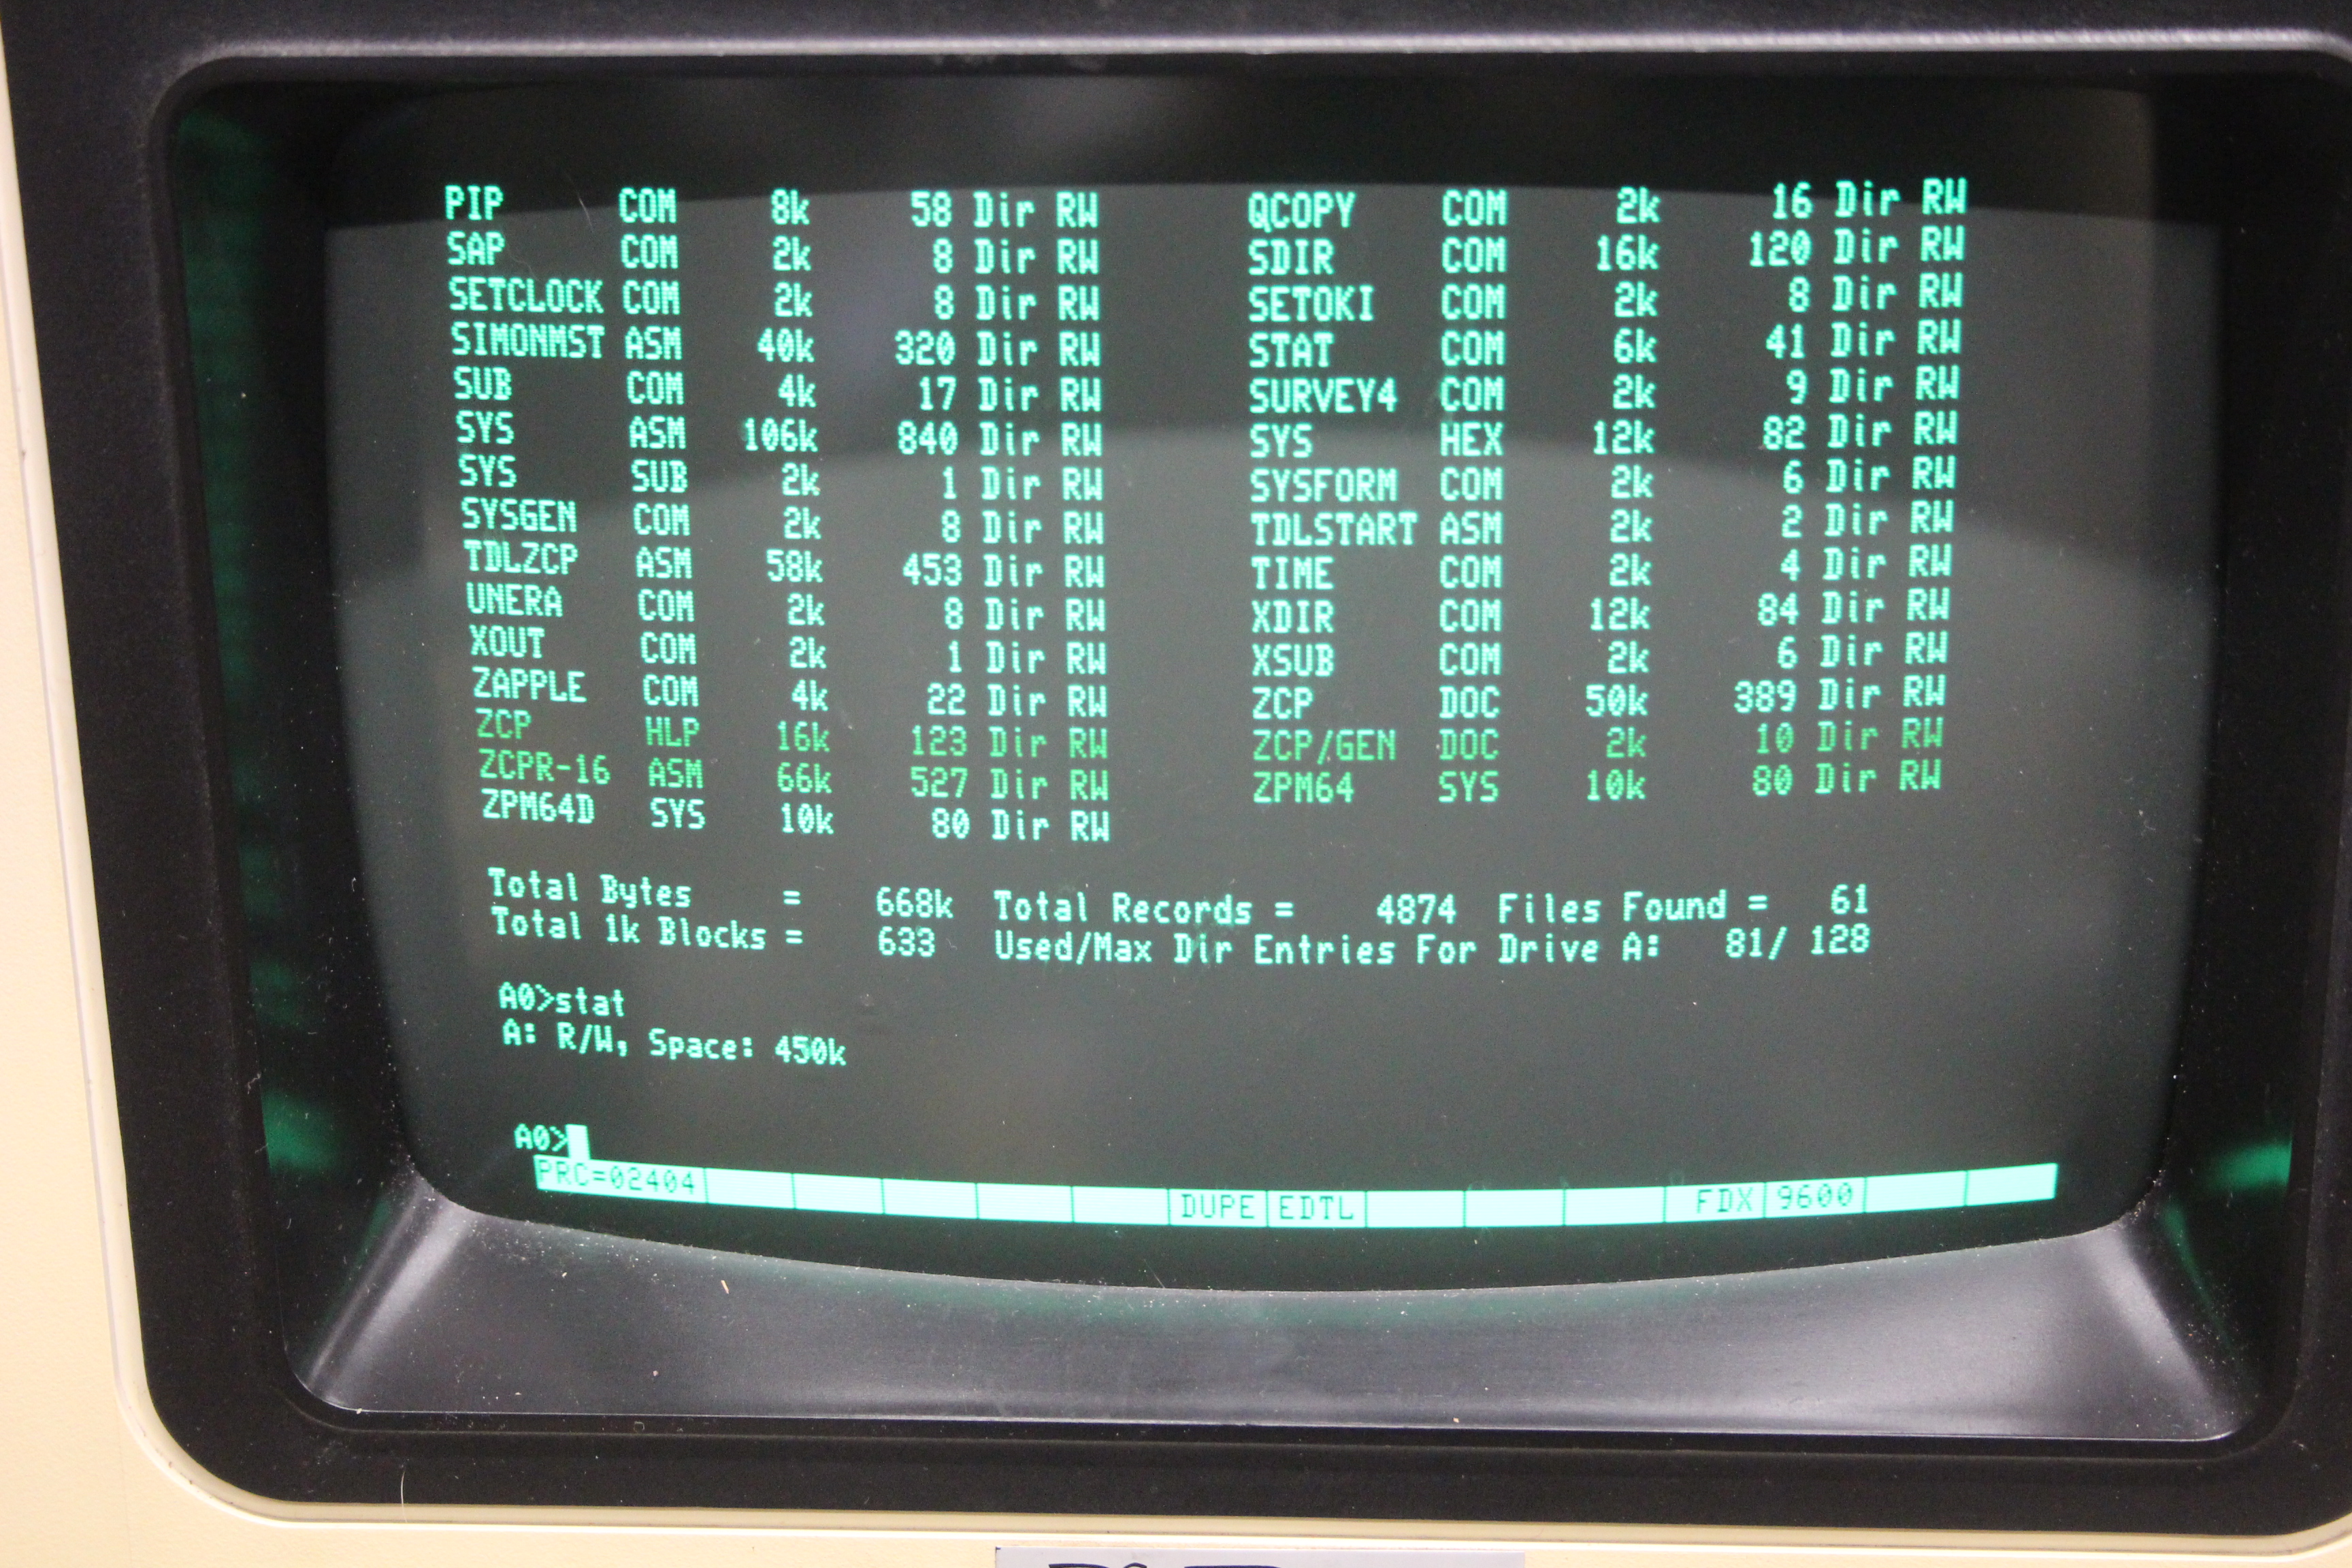
Digging through the system diskettes yielded a build from October 1984:
This turned out to be a really nicely done ZCPR 2 implementation. Gaby hosts a bunch of ZCPR related files, including user documentation. Hugh Turner must’ve experimented with packing as much data as could be done reliably on these drives, as they hold very nearly 1.2 MB each:

After going through a bunch of diskettes and amassing all of the really useful bits of software on a new working diskette, I started customizing some file transfer utilities for the Pegasus II. Fortunately, there was already a customization of Ward Christensen’s MODEM program, which talks XMODEM. It was hard coded for 300 BPS on the D4S serial port, but it let me get new programs transferred over.
The first thing to come over was a customization of PCGET and PCPUT. Mike Douglas started making these programs available for various systems. They implement traditional XMODEM, but talk over the console port, and are very convenient if you’re using a PC as the console “terminal” via emulation software.
With a working PCGET and PCPUT, I then wrote a KERMIT-80 customization which I apparently haven’t pushed to the Git repository yet! This customization allows use of either the second serial port on the Delta Products CPU board, or the 2651 on the D4S diskette controller. Using the port on the D4S is especially nice as Kermit can be configured for software selectable bitrates, which the 2651 supports. Kermit also allows batch transfer of files, which makes dumping the file content (as opposed to grabbing just a full image) of a diskette easy and convenient.
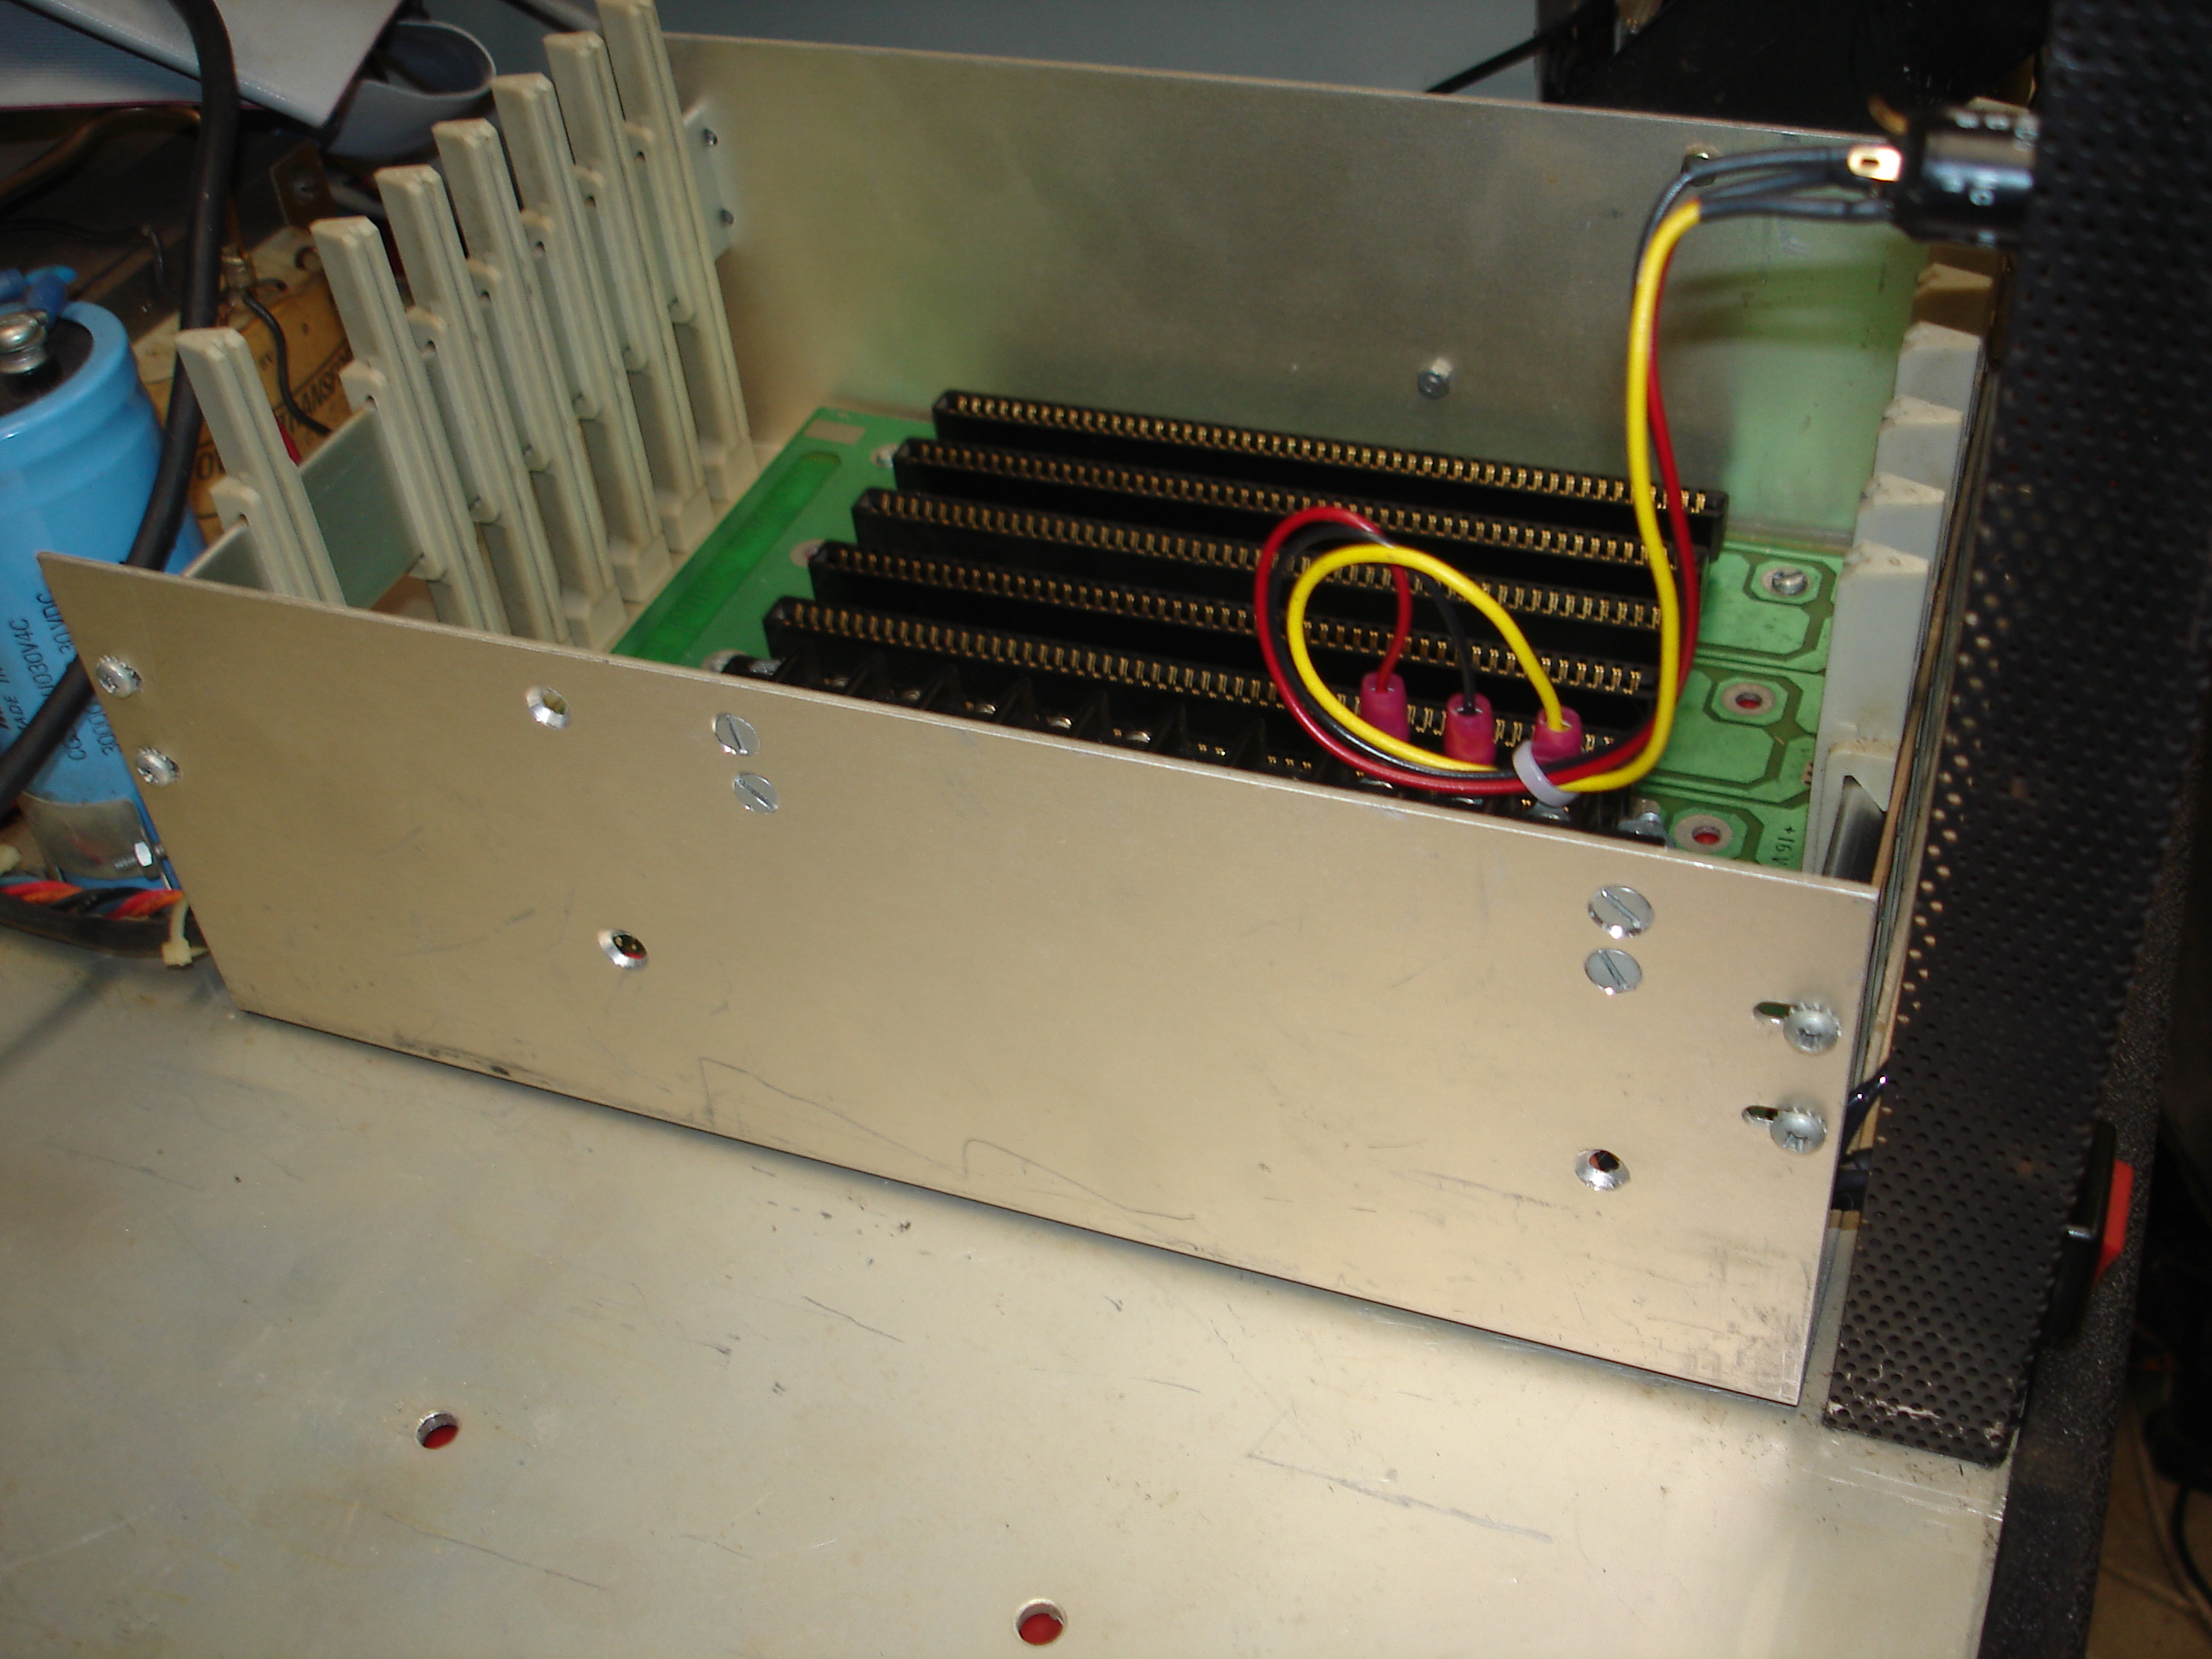
The Missing Board
One may notice there are some extra ribbon cables going to the enclosure’s backplates. Doug wasn’t completely sure what these went to. In going through the source code for Hugh Turner’s ZCPR work, I was able to get a pretty good idea. The board likely contained:
- Two or three 2651 UARTs
- Parallel port hardware
- A real-time clock with battery backup
Based on this description, Doug went through some other hardware he’d purchased at the same time as the Pegasus II, and found a hand wired board that matched! That board is now in my possession, but has not been repaired yet. It will be covered in a future writeup.
Console Terminal and System Branding
The console terminal that came with the Pegasus II is just a whitelabeled/rebranded Televideo 950:
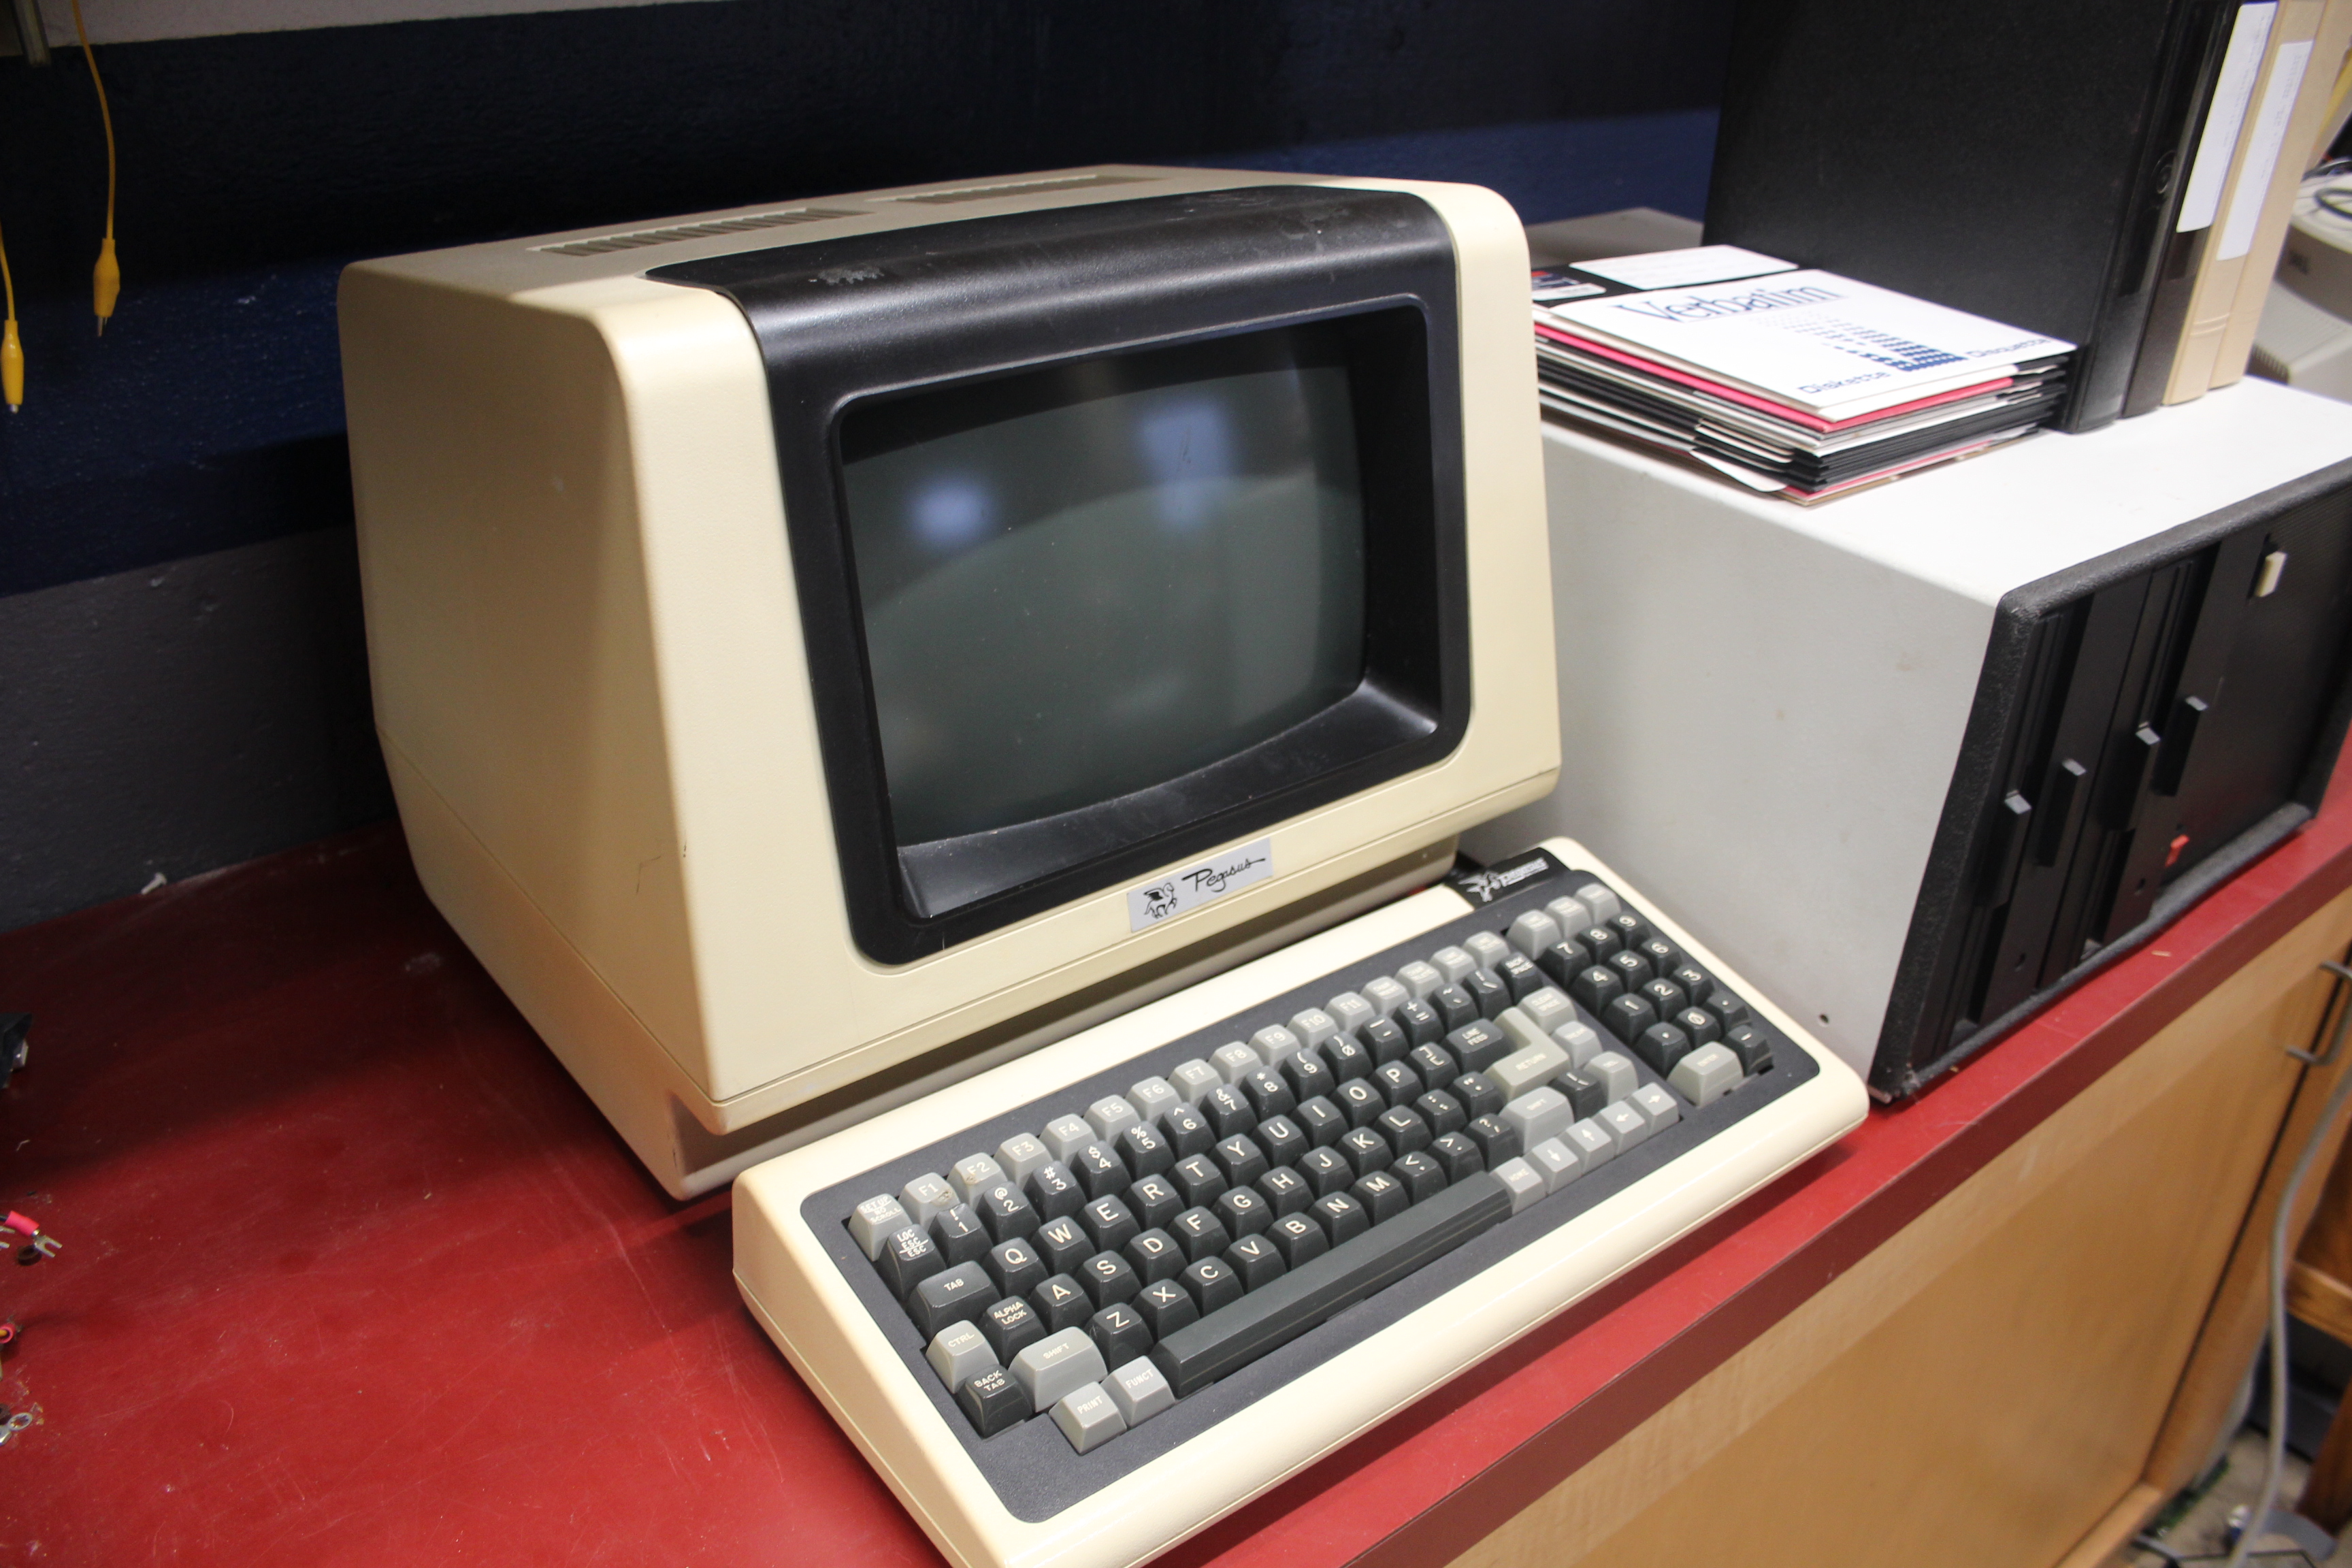
The terminal and its keyboard both carry Pegasus badging:
The terminal has been completely cleaned up and gone through (to be covered in a separate writeup). It’s in pretty good shape, but it looks like someone left either a burning cigarette or a hot soldering iron against the F1 and F2 keys. The top of the 1 key is slightly scorched too.
The system chassis carries a Pegasus Data Systems badge as well:
I’m not sure if the chassis is something custom-designed for Pegasus, or if it’s just a rebadged unit from some other manufacturer.
Final Thoughts
You’ve made it to the end! This is a very long writeup, but it was a very long process in getting this system to fully operational. There’s still a little bit of work to be done:
- Put the diskette images online
- Scan relevant documentation that isn’t already online
- Finish testing
KERMIT-80customization - Finish a
FINDBADcustomization for the mixed density diskettes - Repair, debug, and document the “missing” I/O board
- Install a fan in the empty fan opening for more airflow
For now, the Pegasus II continues to live on the red-topped workbench. It’s my go-to CP/M machine at home, and often gets used for formatting and verifying 8” diskettes that are to be reused.
diskettes fragged with LED drivers