Topic: Rebuilding a Sun 511 SCSI shoebox enclosure
Date: 2023 JAN 30
In November 2022, Doug McIntyre offered a Sun 511 SCSI shoebox on the sun-rescue mailing list. The Sun 511 shoebox was the typical external enclosure used with Sun-2 and Sun-3 systems that had SCSI, and would be a more appropriate fit with my Sun 3/50 system than the drive box currently paired with it. This one ended up being quite a bit of work to get back in operating condition!
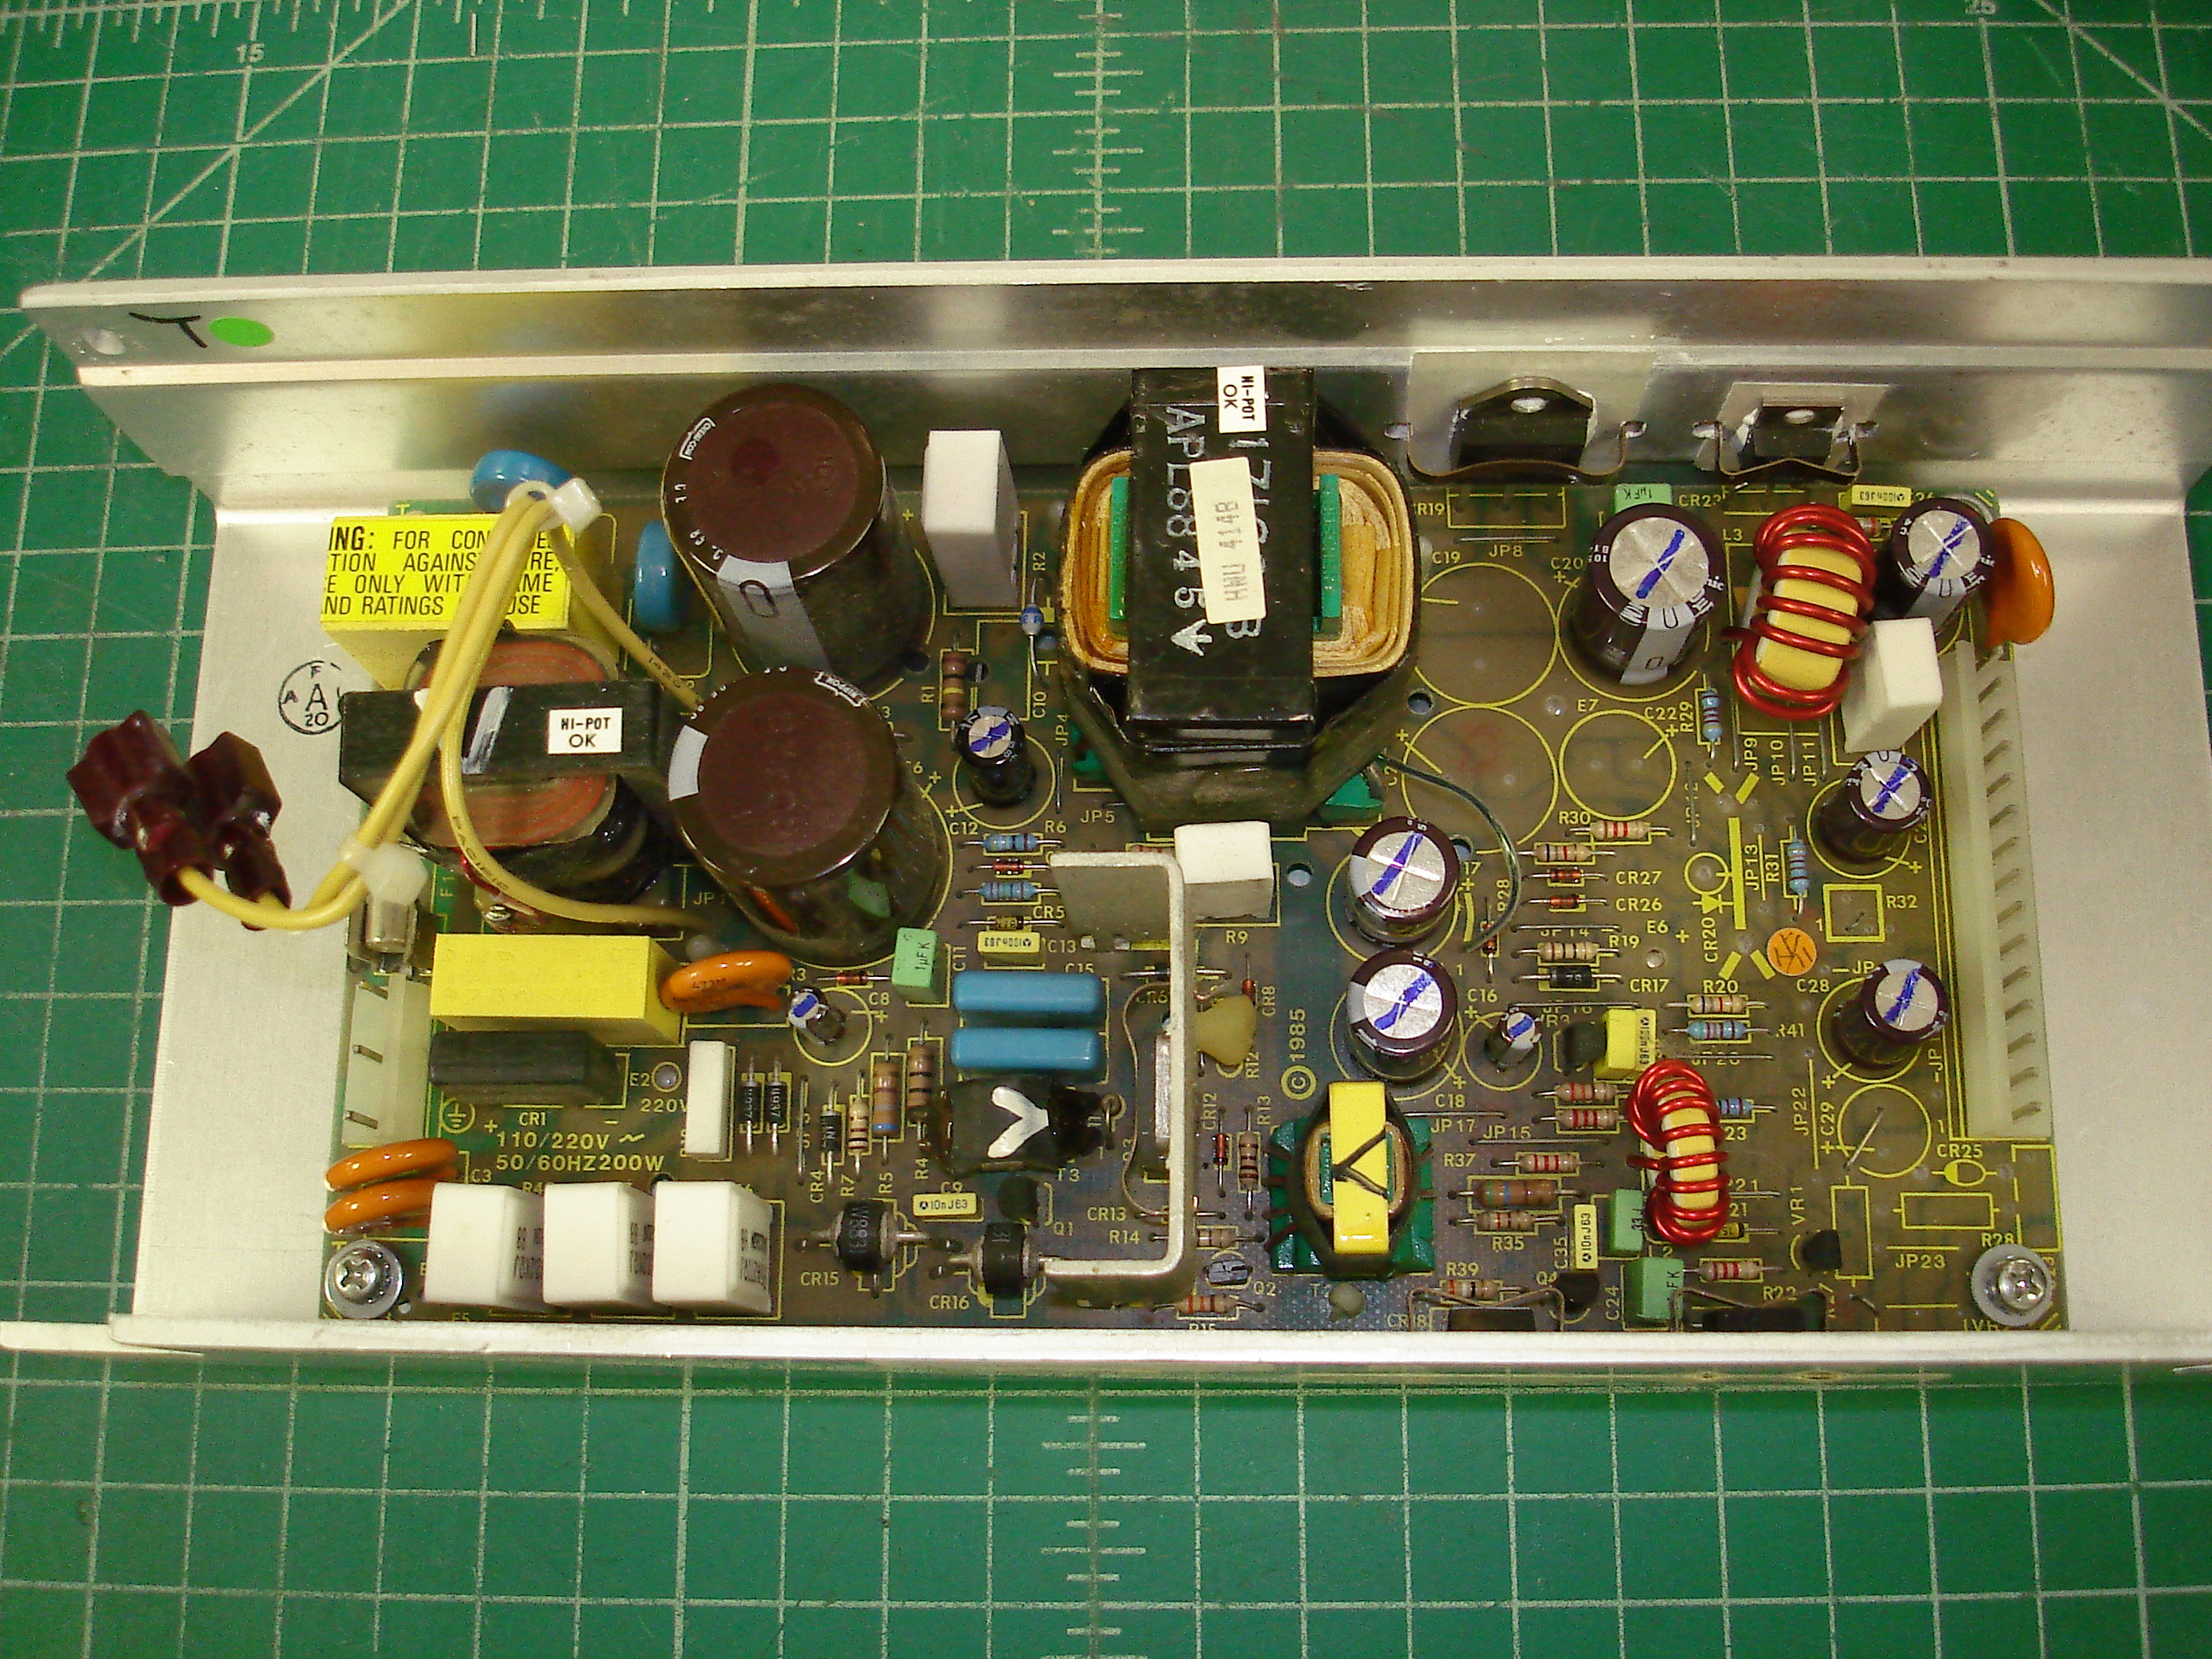
As received, the shoebox contained only the power supply (Computer Products/Boschert model), fans, DD50 SCSI cabling, and drive mounting brackets. There was no hard disk or tape drive included. As luck would have it, I’d bought an Adaptec ACB-4000 MFM to SCSI adapter, paired with a Kyocera KC-20B 20 MB MFM hard disk, so I already had an appropriate disk controller. I figured I could source a full height tape drive and controller for the enclosure without too much trouble.
Disassembly, Cleanup, PSU Work
The shoebox arrived in fairly clean condition. There was a good amount of fluff packed into the grilles on the fans, which is pretty much standard on anything that hasn’t lived in a cleanroom or computer room with heavy air filtration. The chassis was stripped down:
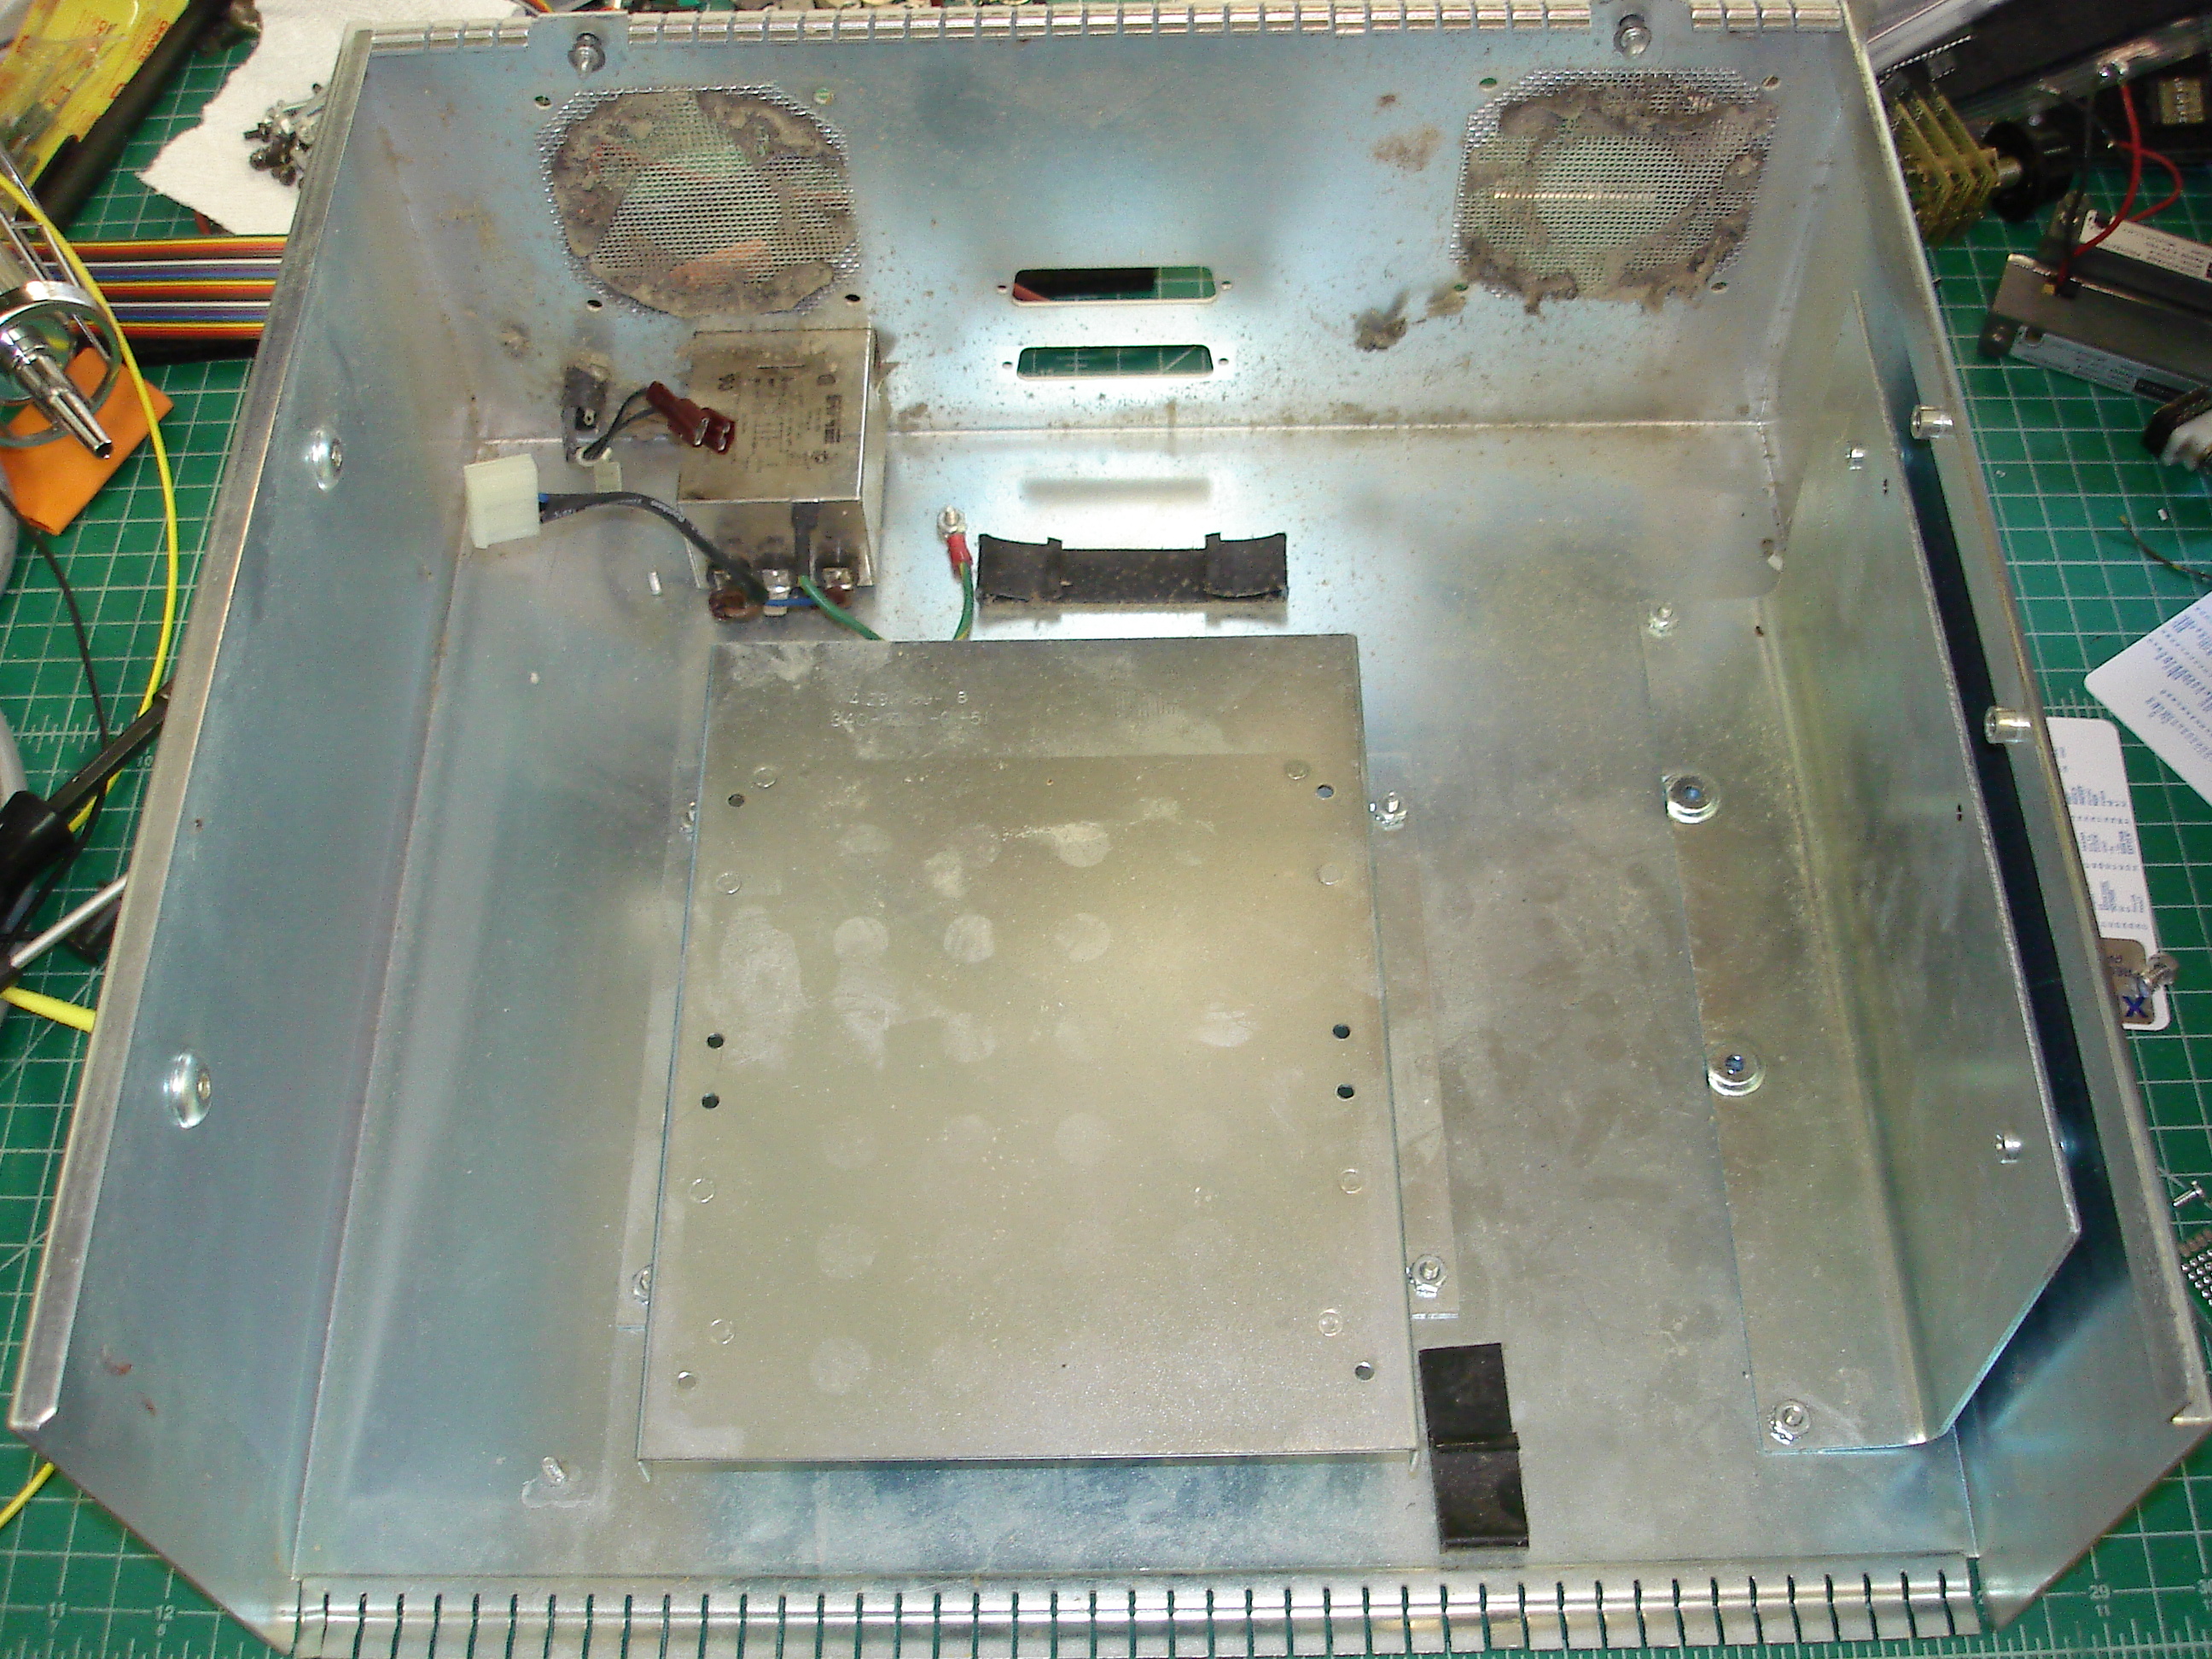
Many of the internal bits were washed with hot soapy water and a toothbrush, then dried in the hot air drying cabinet, including the fans. The fans ran fine, with no wobble or bearing noise, and were not replaced.
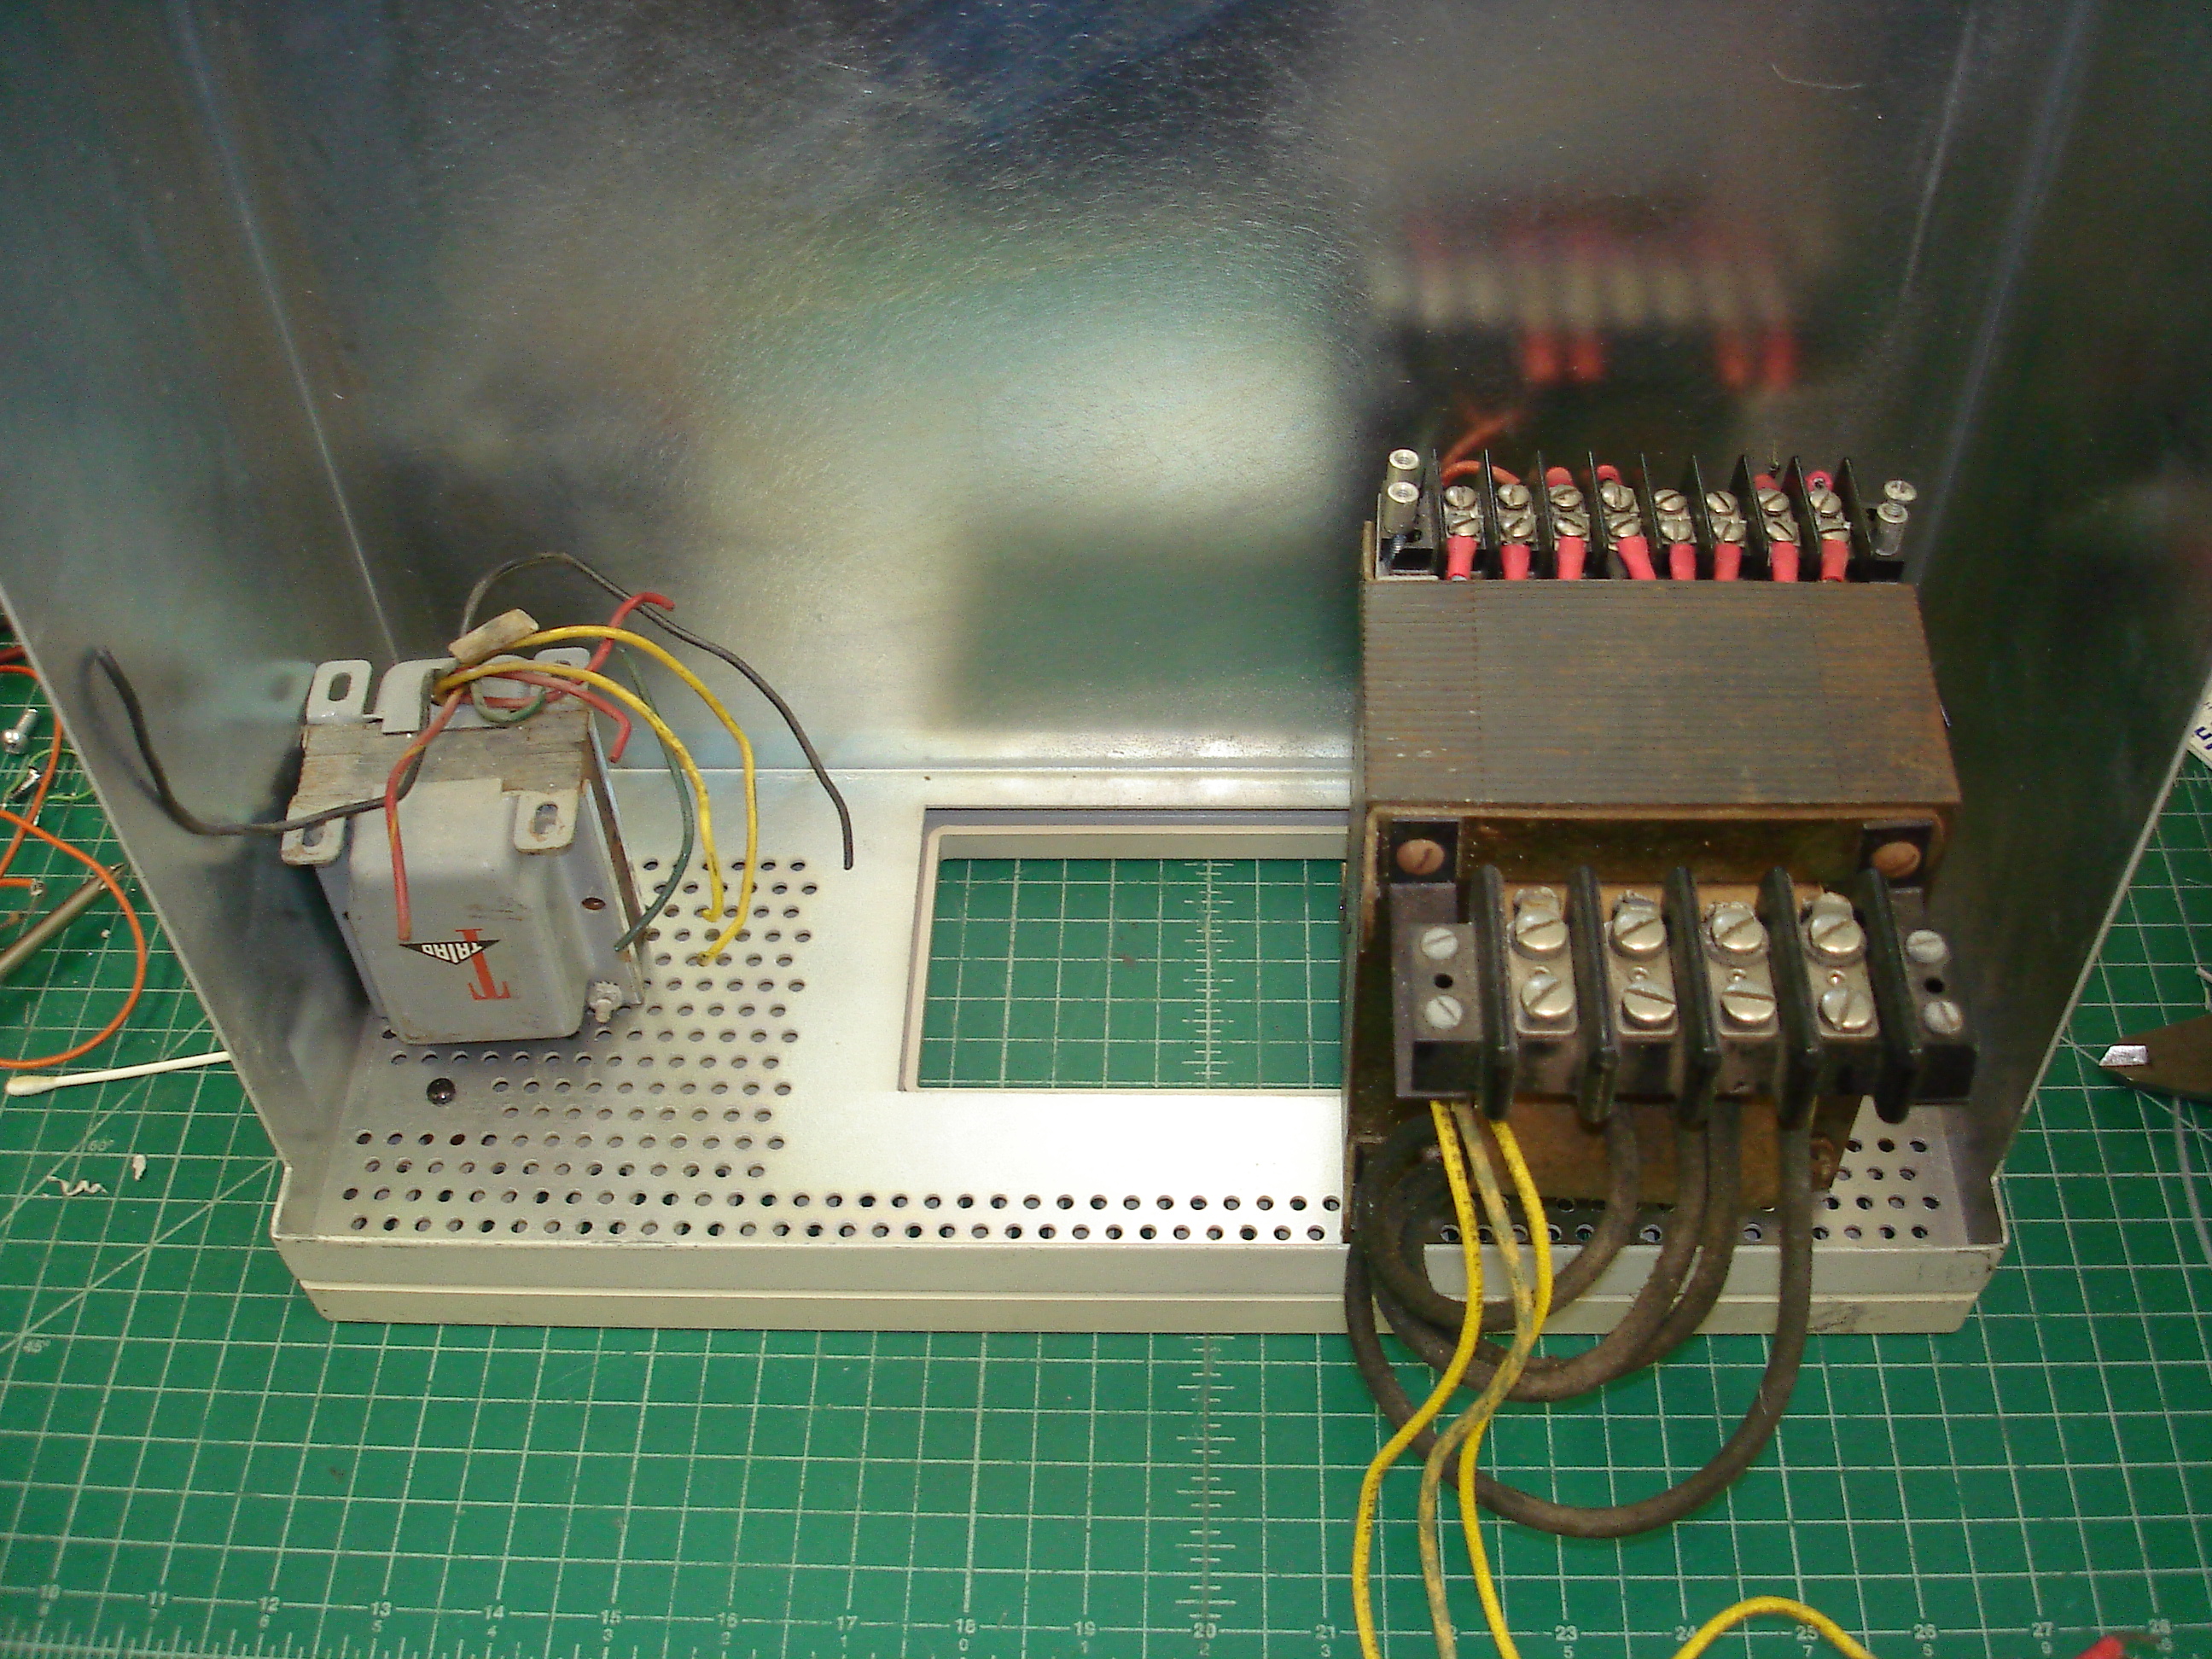
The power supply was tested with a dummy load and worked fine. It did contain several RIFA capacitors, which were cracked and would have to be replaced:
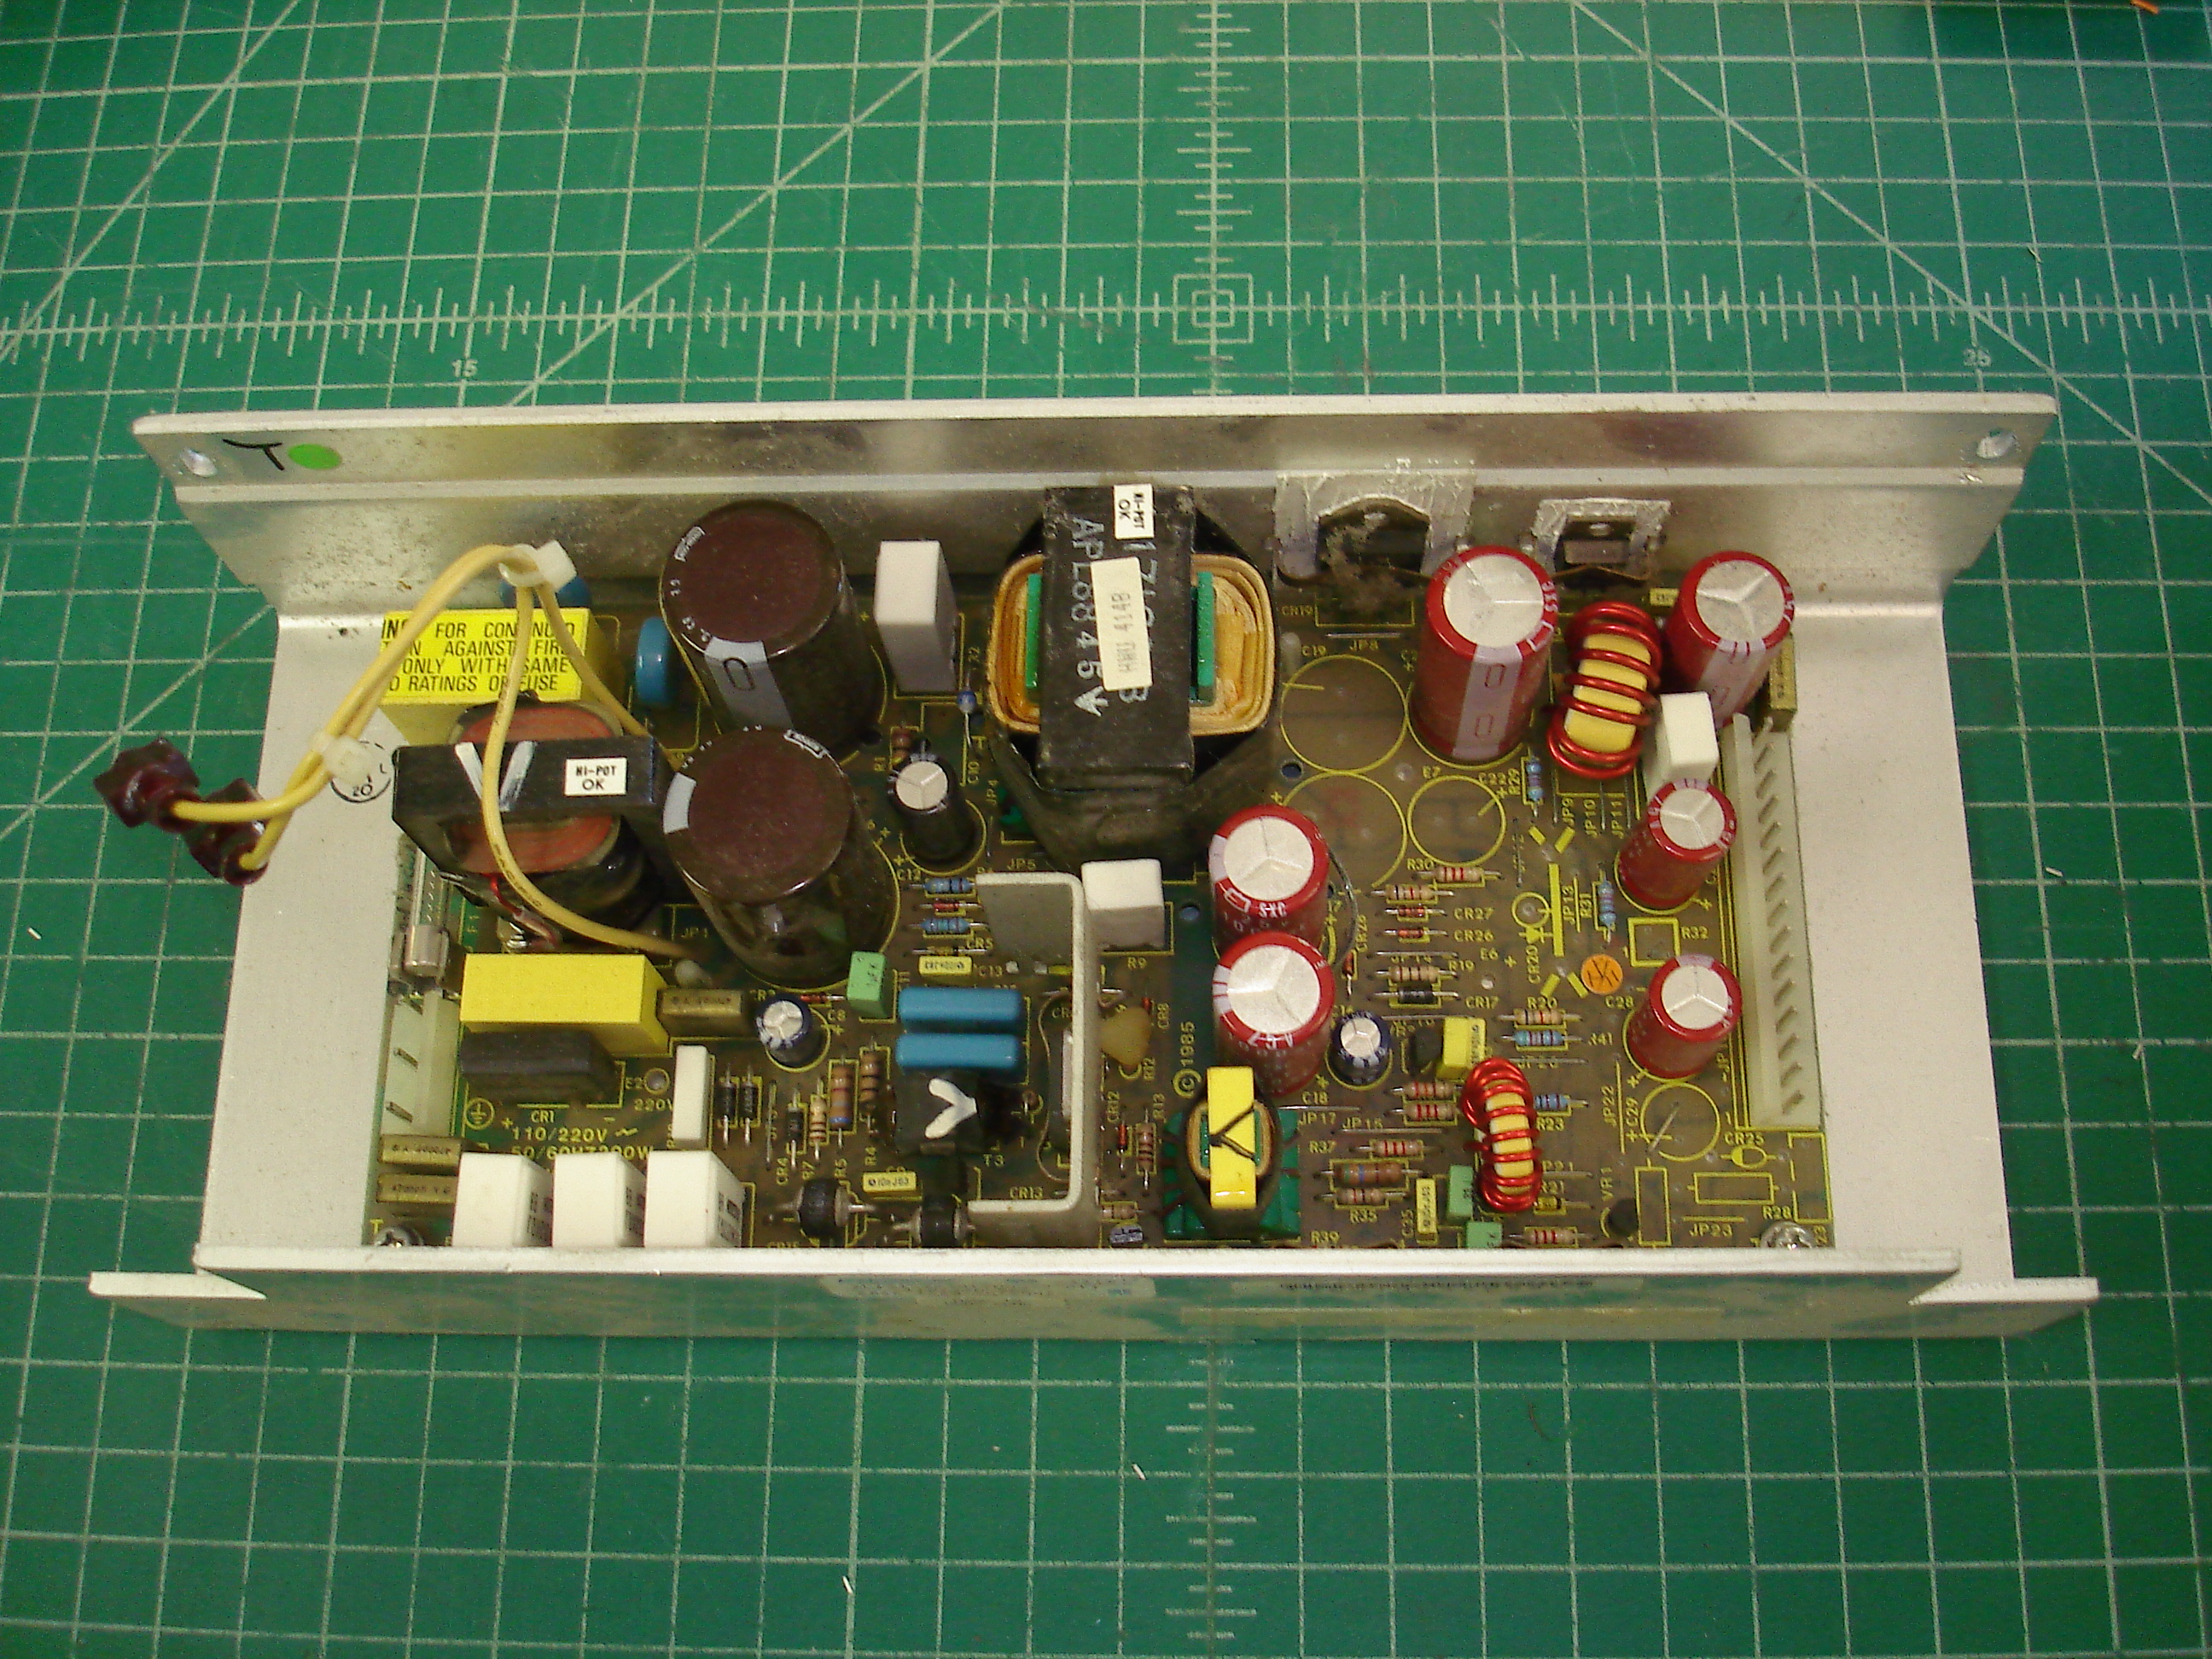
This particular shoebox uses the Computer Products/Boschert power supply, likely 130W according to the Sun Field Engineer Handbook. There were four 4.7 nF RIFA capacitors present, and the supply would require disassembly to remove them. That’s something of a pain in these power supplies, because various power devices are heatsunk to the U-shaped chassis:
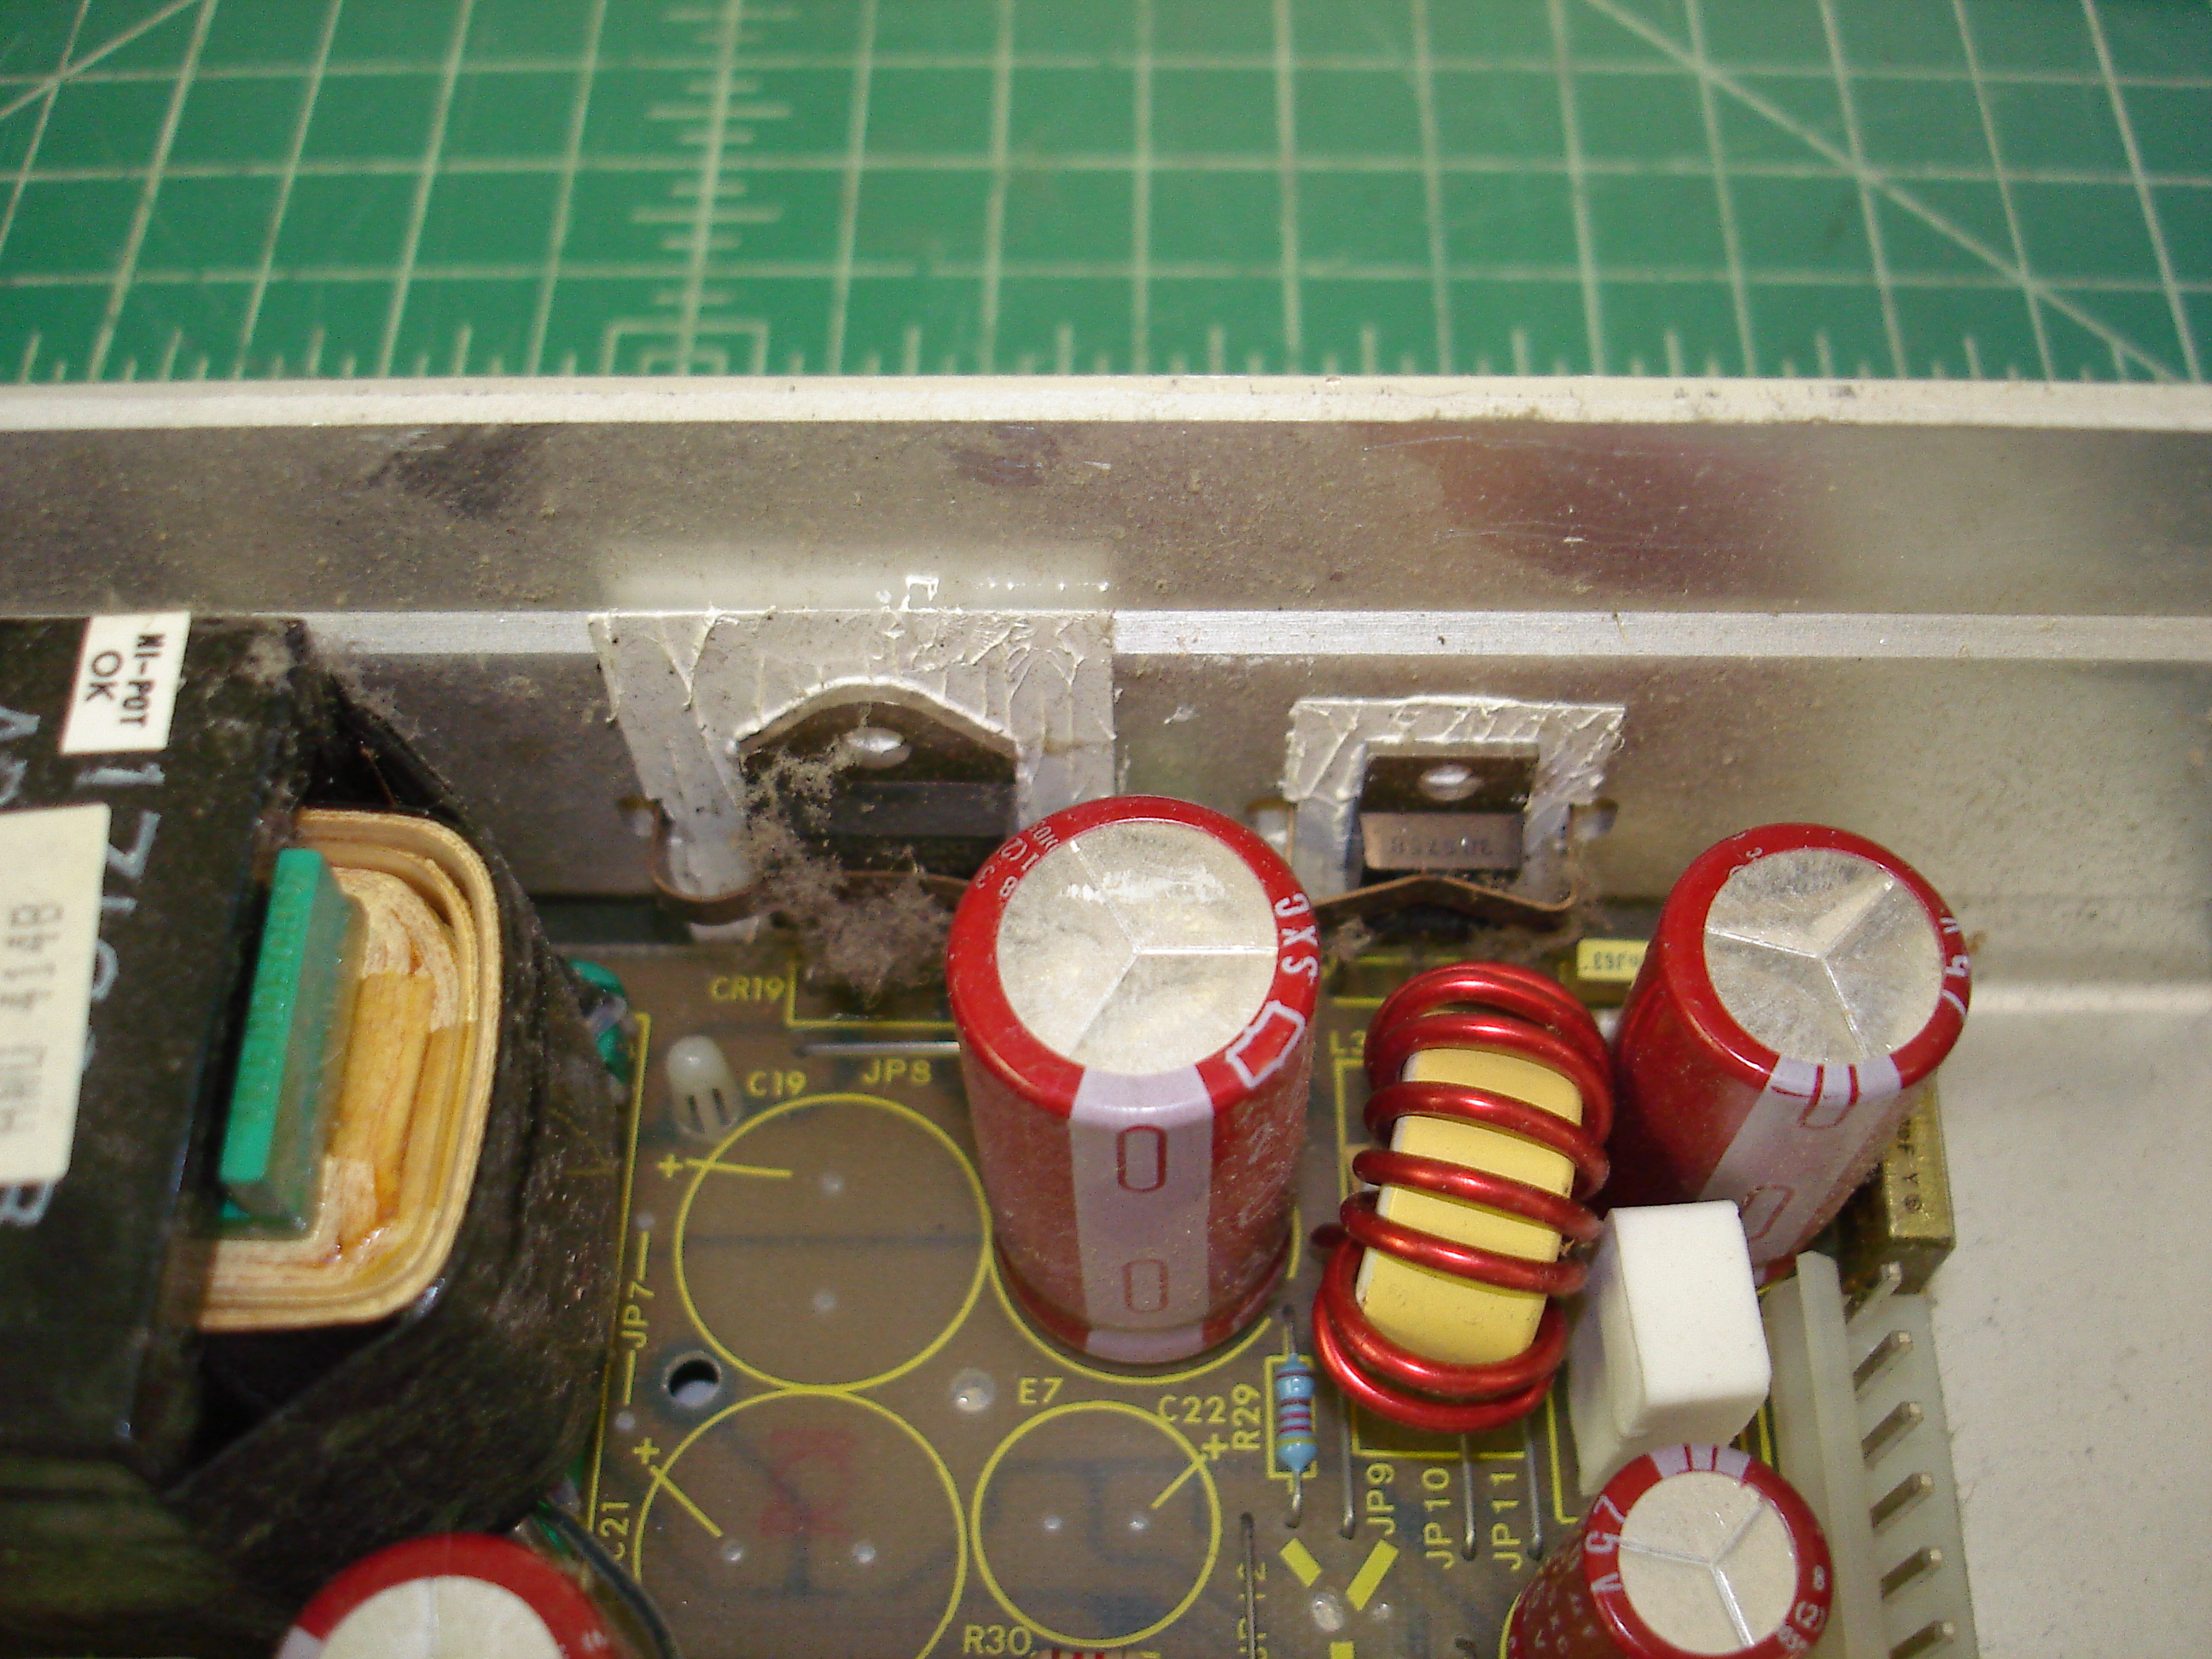
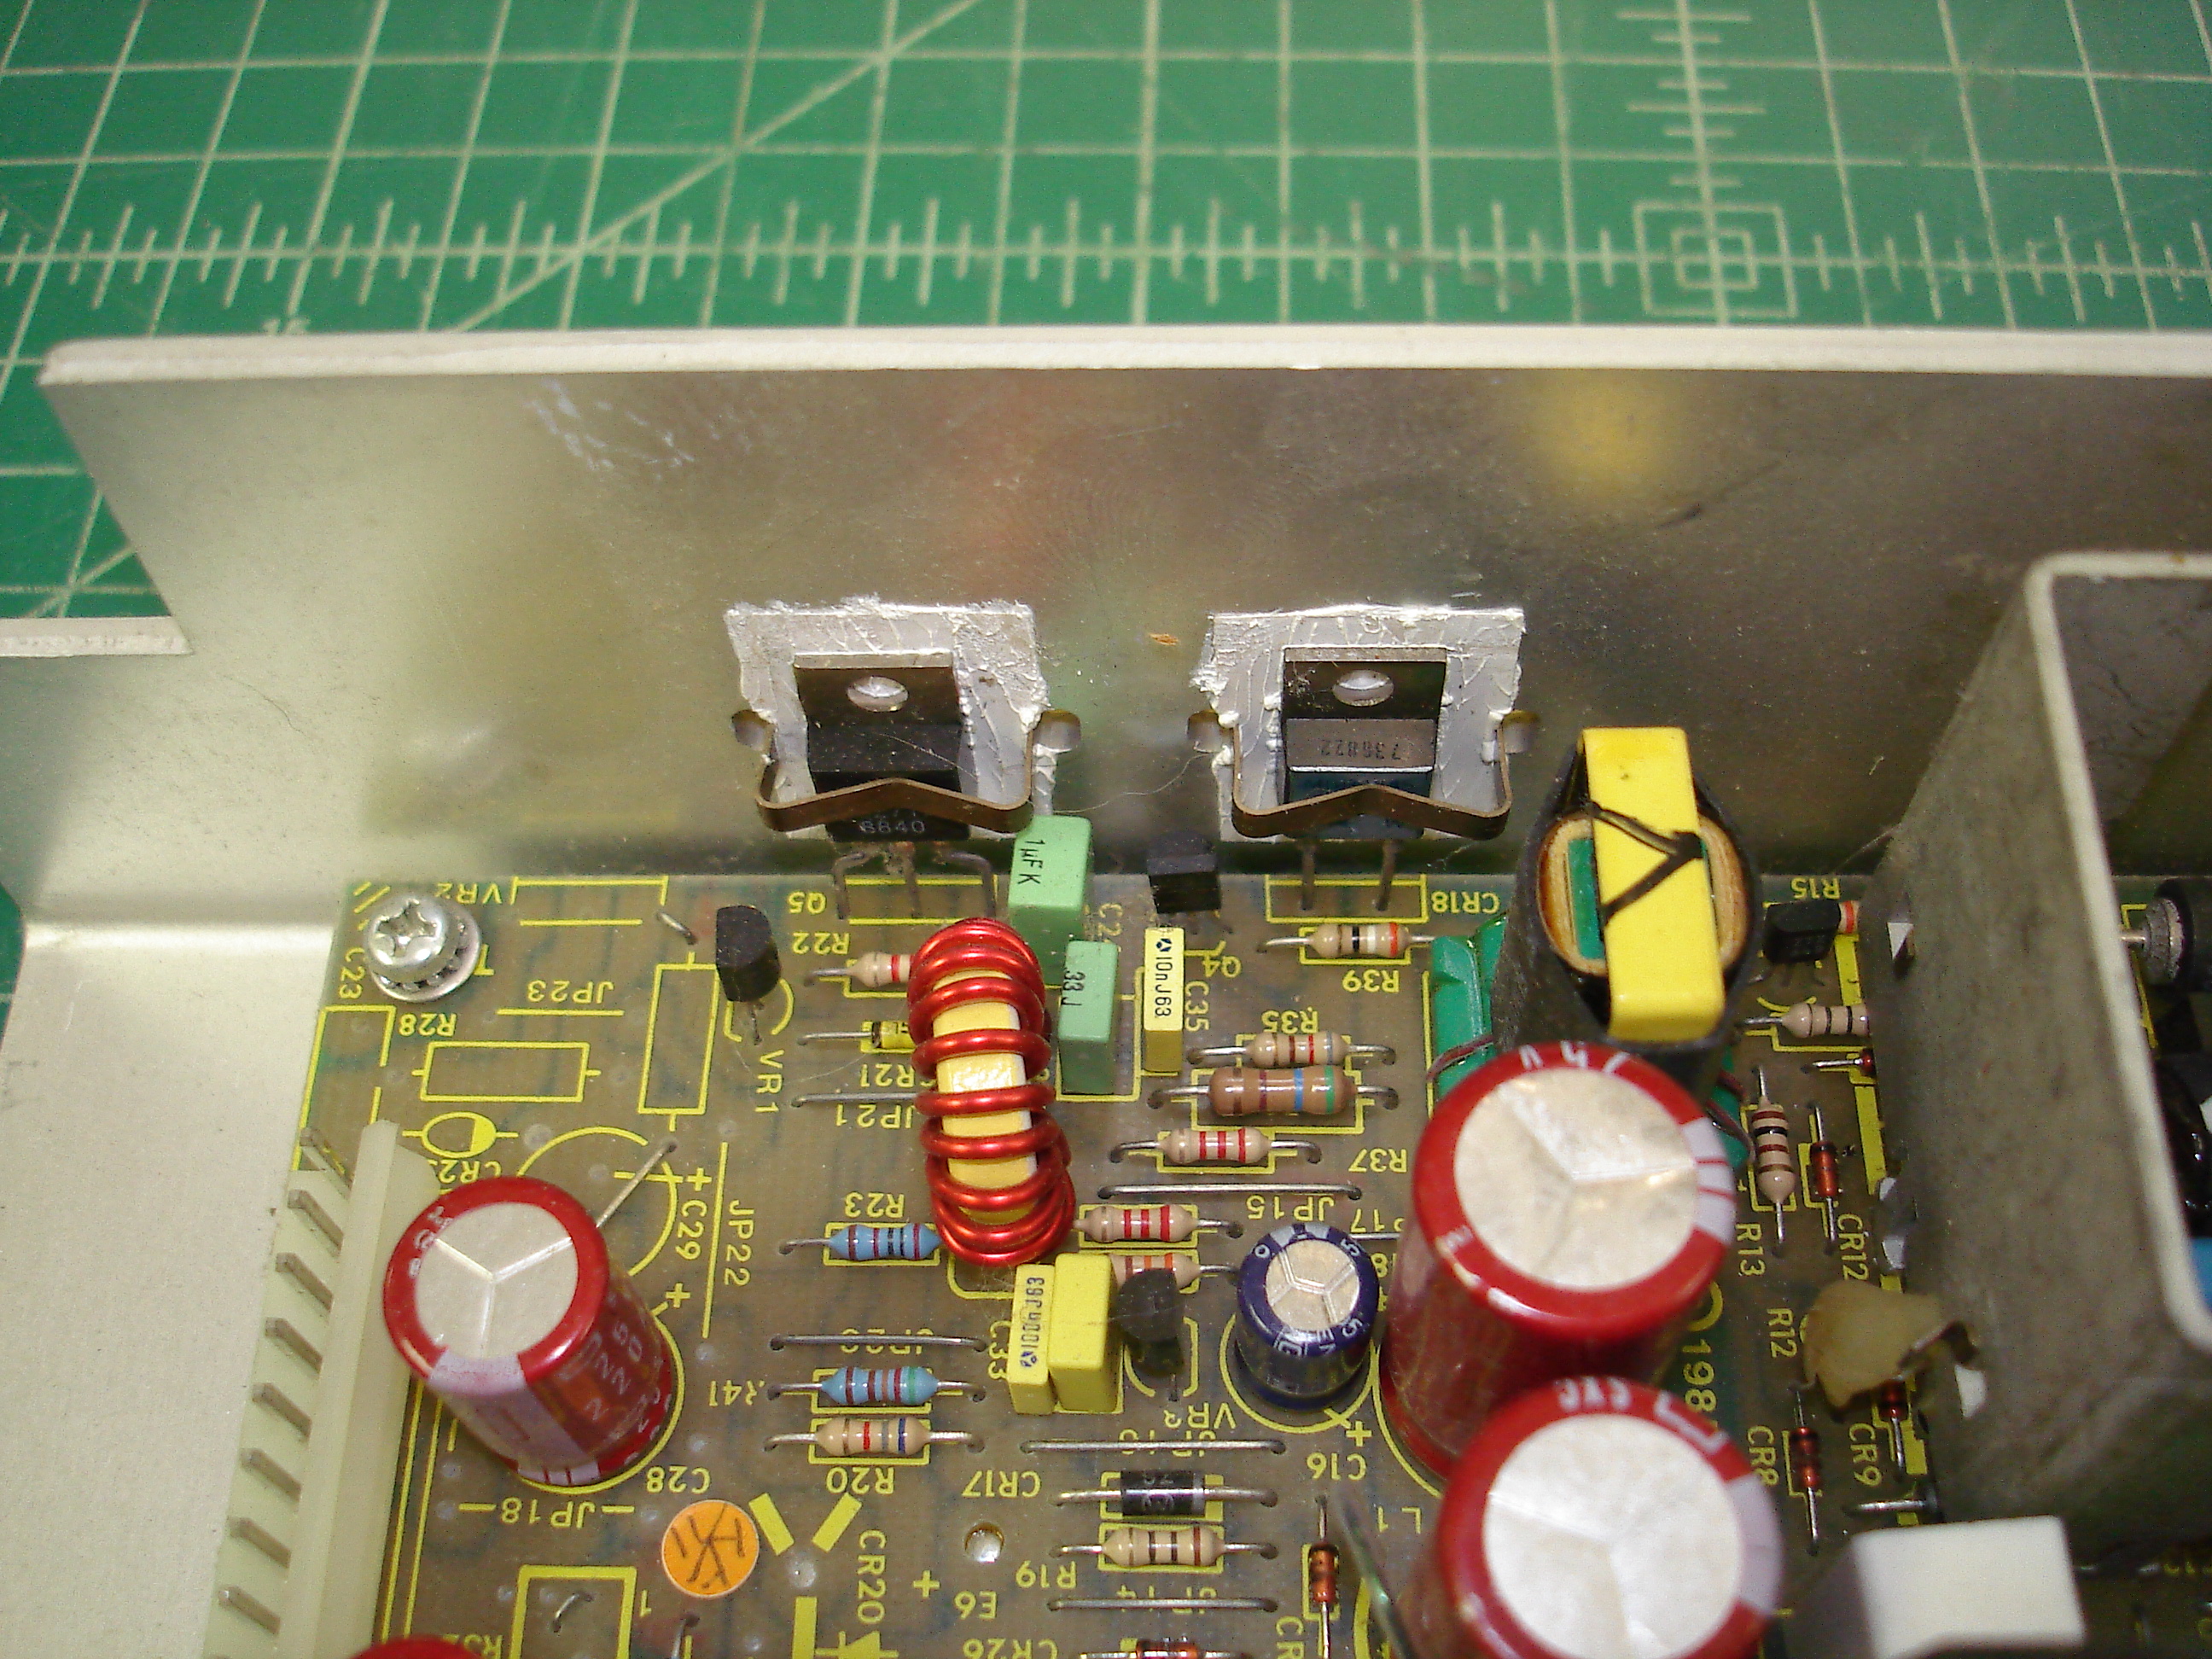
The little metal clips seen around the power devices are what holds them in place. These are spring clips, and hook the edge of the aluminum chassis through holes on either side of the power devices. There’s tape on the back of the holes, which can be left in place when removing the clips. Grasp them with needle nose pliers, and pull away from the power device body while pressing down slightly to free the hook from the aluminum chassis. Once the hook is clear, pull away from the chassis. Reassembly is the reverse, just hook one side before forcing the other into position.
Since the supply is a pain to disassemble, and since the board had to come out anyway, it received a full recap. Maintaining this sort of power supply vs. replacing with a modern equivalent is something of a toss-up: it’s +5 V and +12 V only, but it did work and was original to the shoebox. Here’s the recapped and cleaned supply:
Electrolytics were replaced with modern long-life high temperature low ESR capacitors. The RIFA safety capacitors were replaced with Vishay/Cera-Mite 25YD47-R ceramic safety capacitors. These are especially handy to keep around as they are dual rated for X1 and Y2 service. We stock a number of Vishay’s dual rated safety capacitors to make RIFA replacements easier.
After soldering, the board was washed and dried. New heatsink compound was applied to the power devices. Whoever applied the original heatsink compound appeared to have used a trowel. Be aware that there are plastic insulators under the power components, likely completely hidden in the heatsink compound!
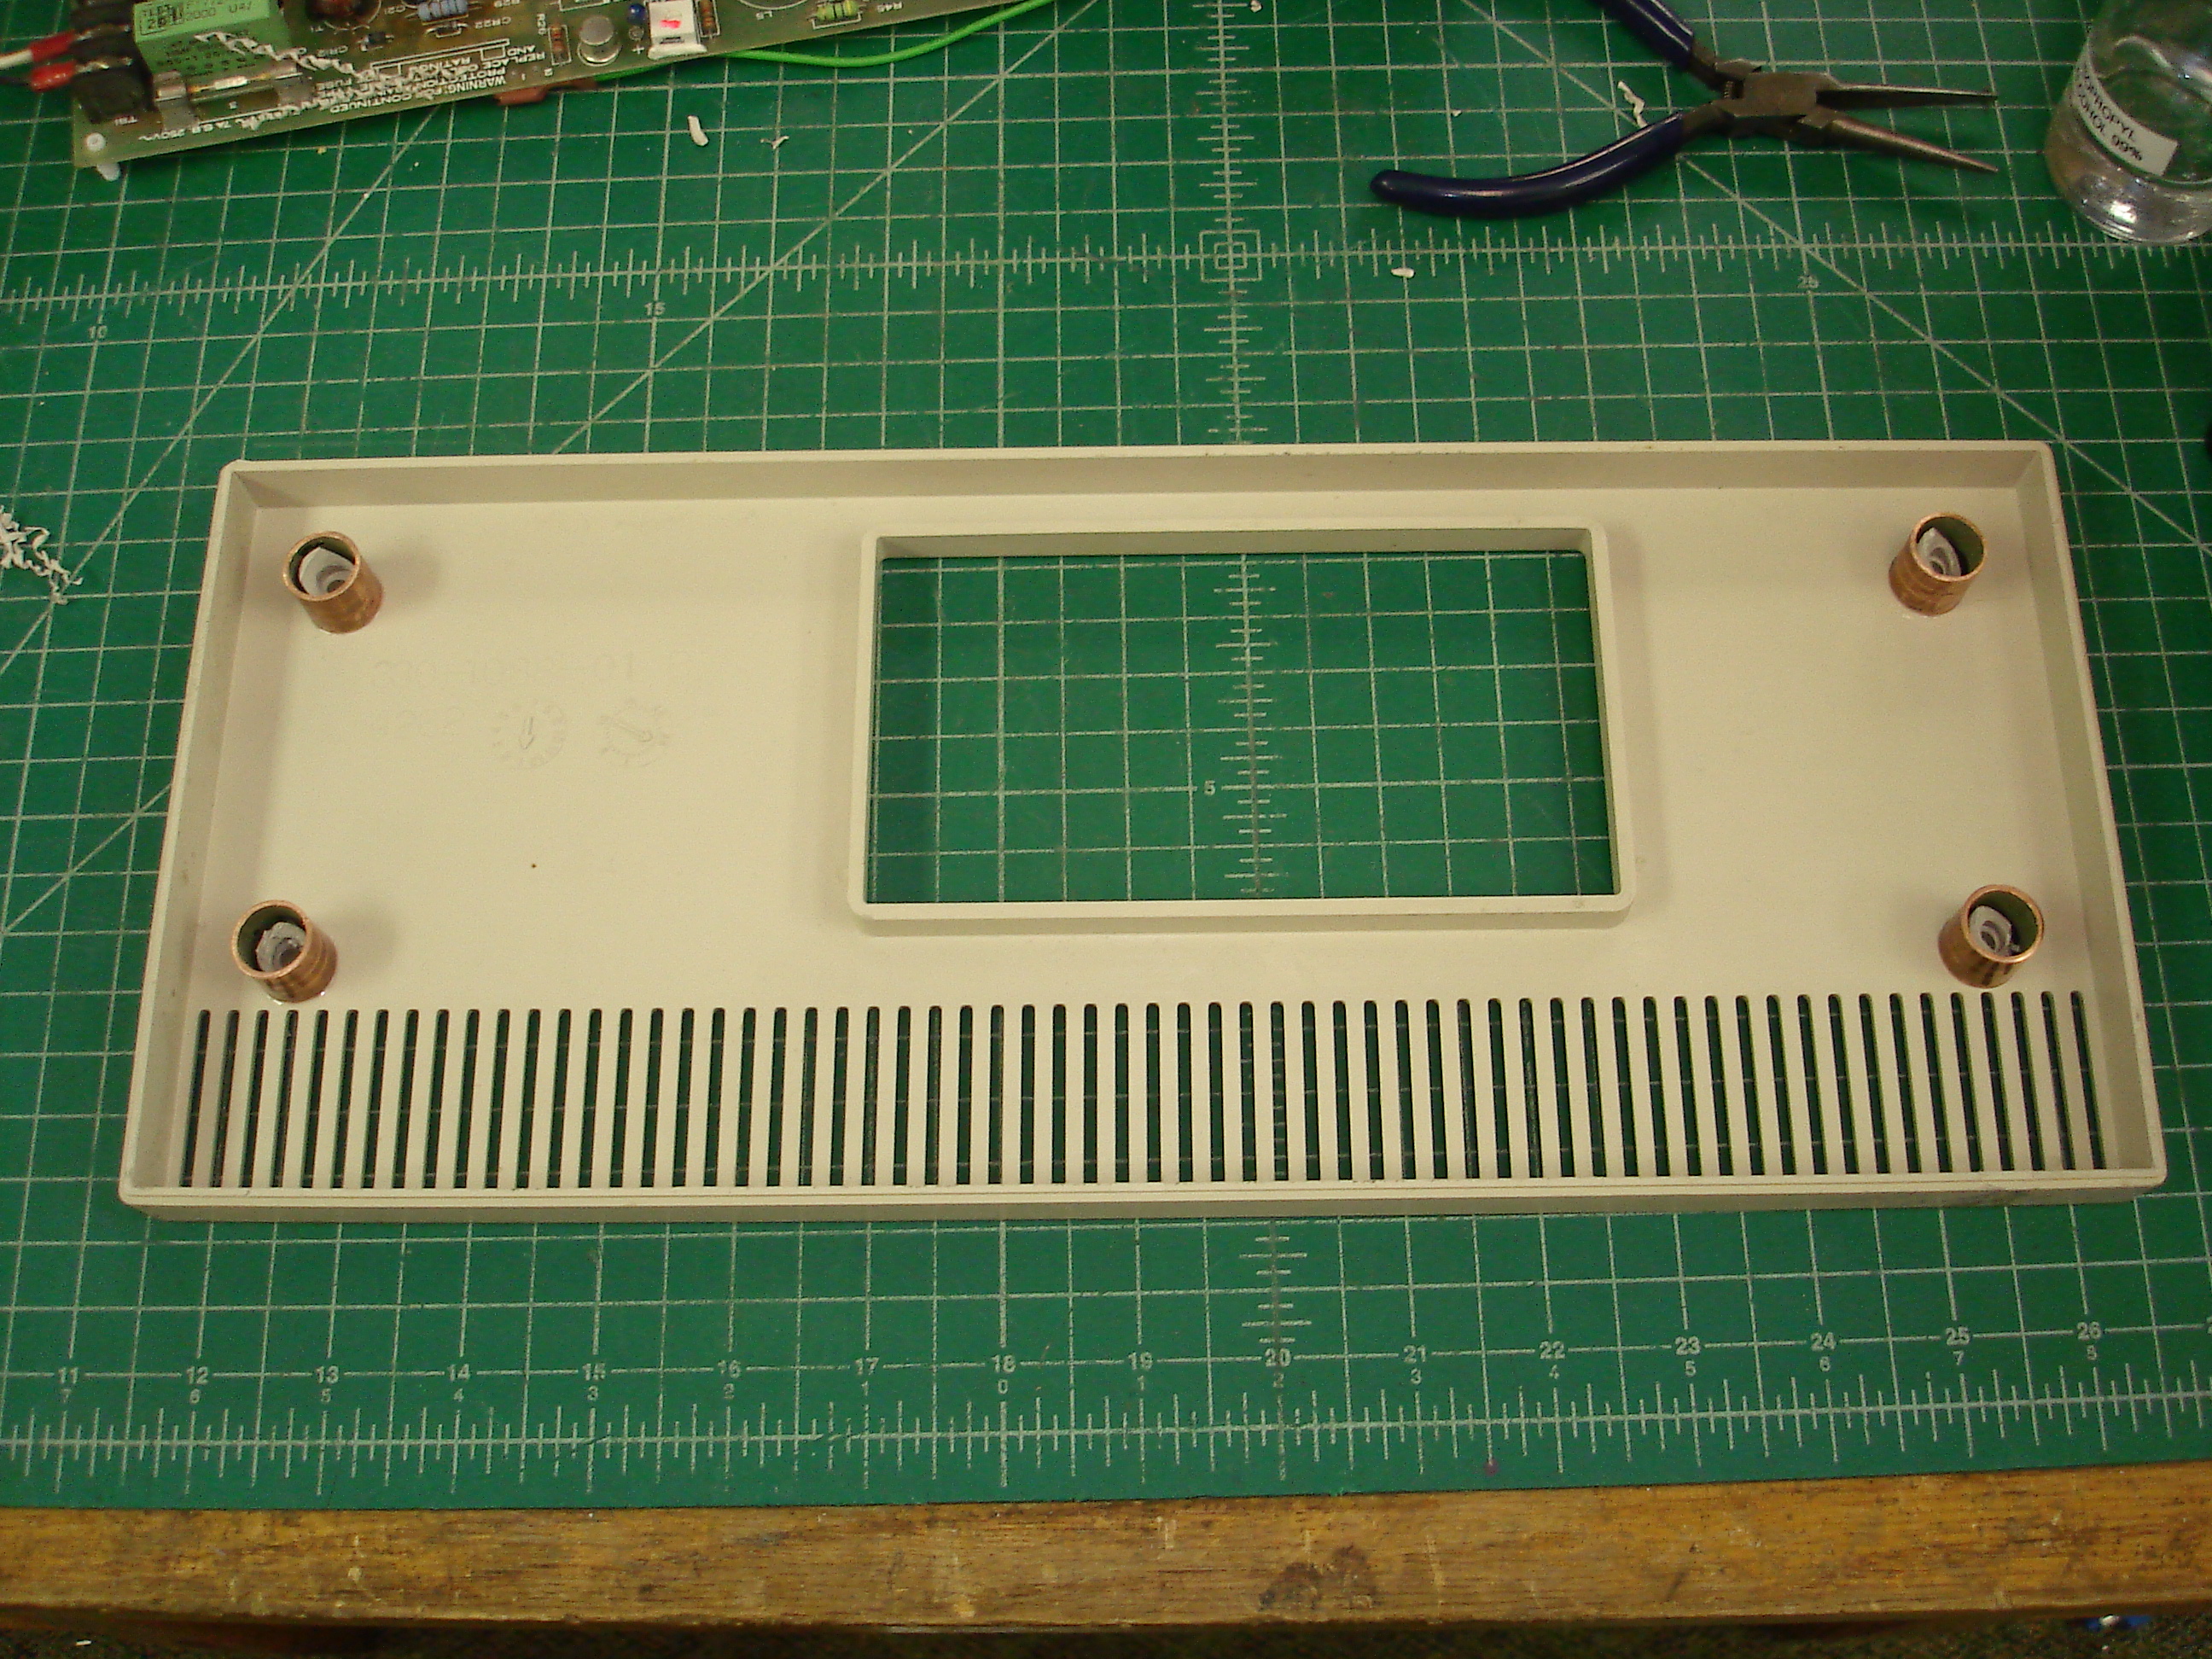
Plastic Bezel Repair
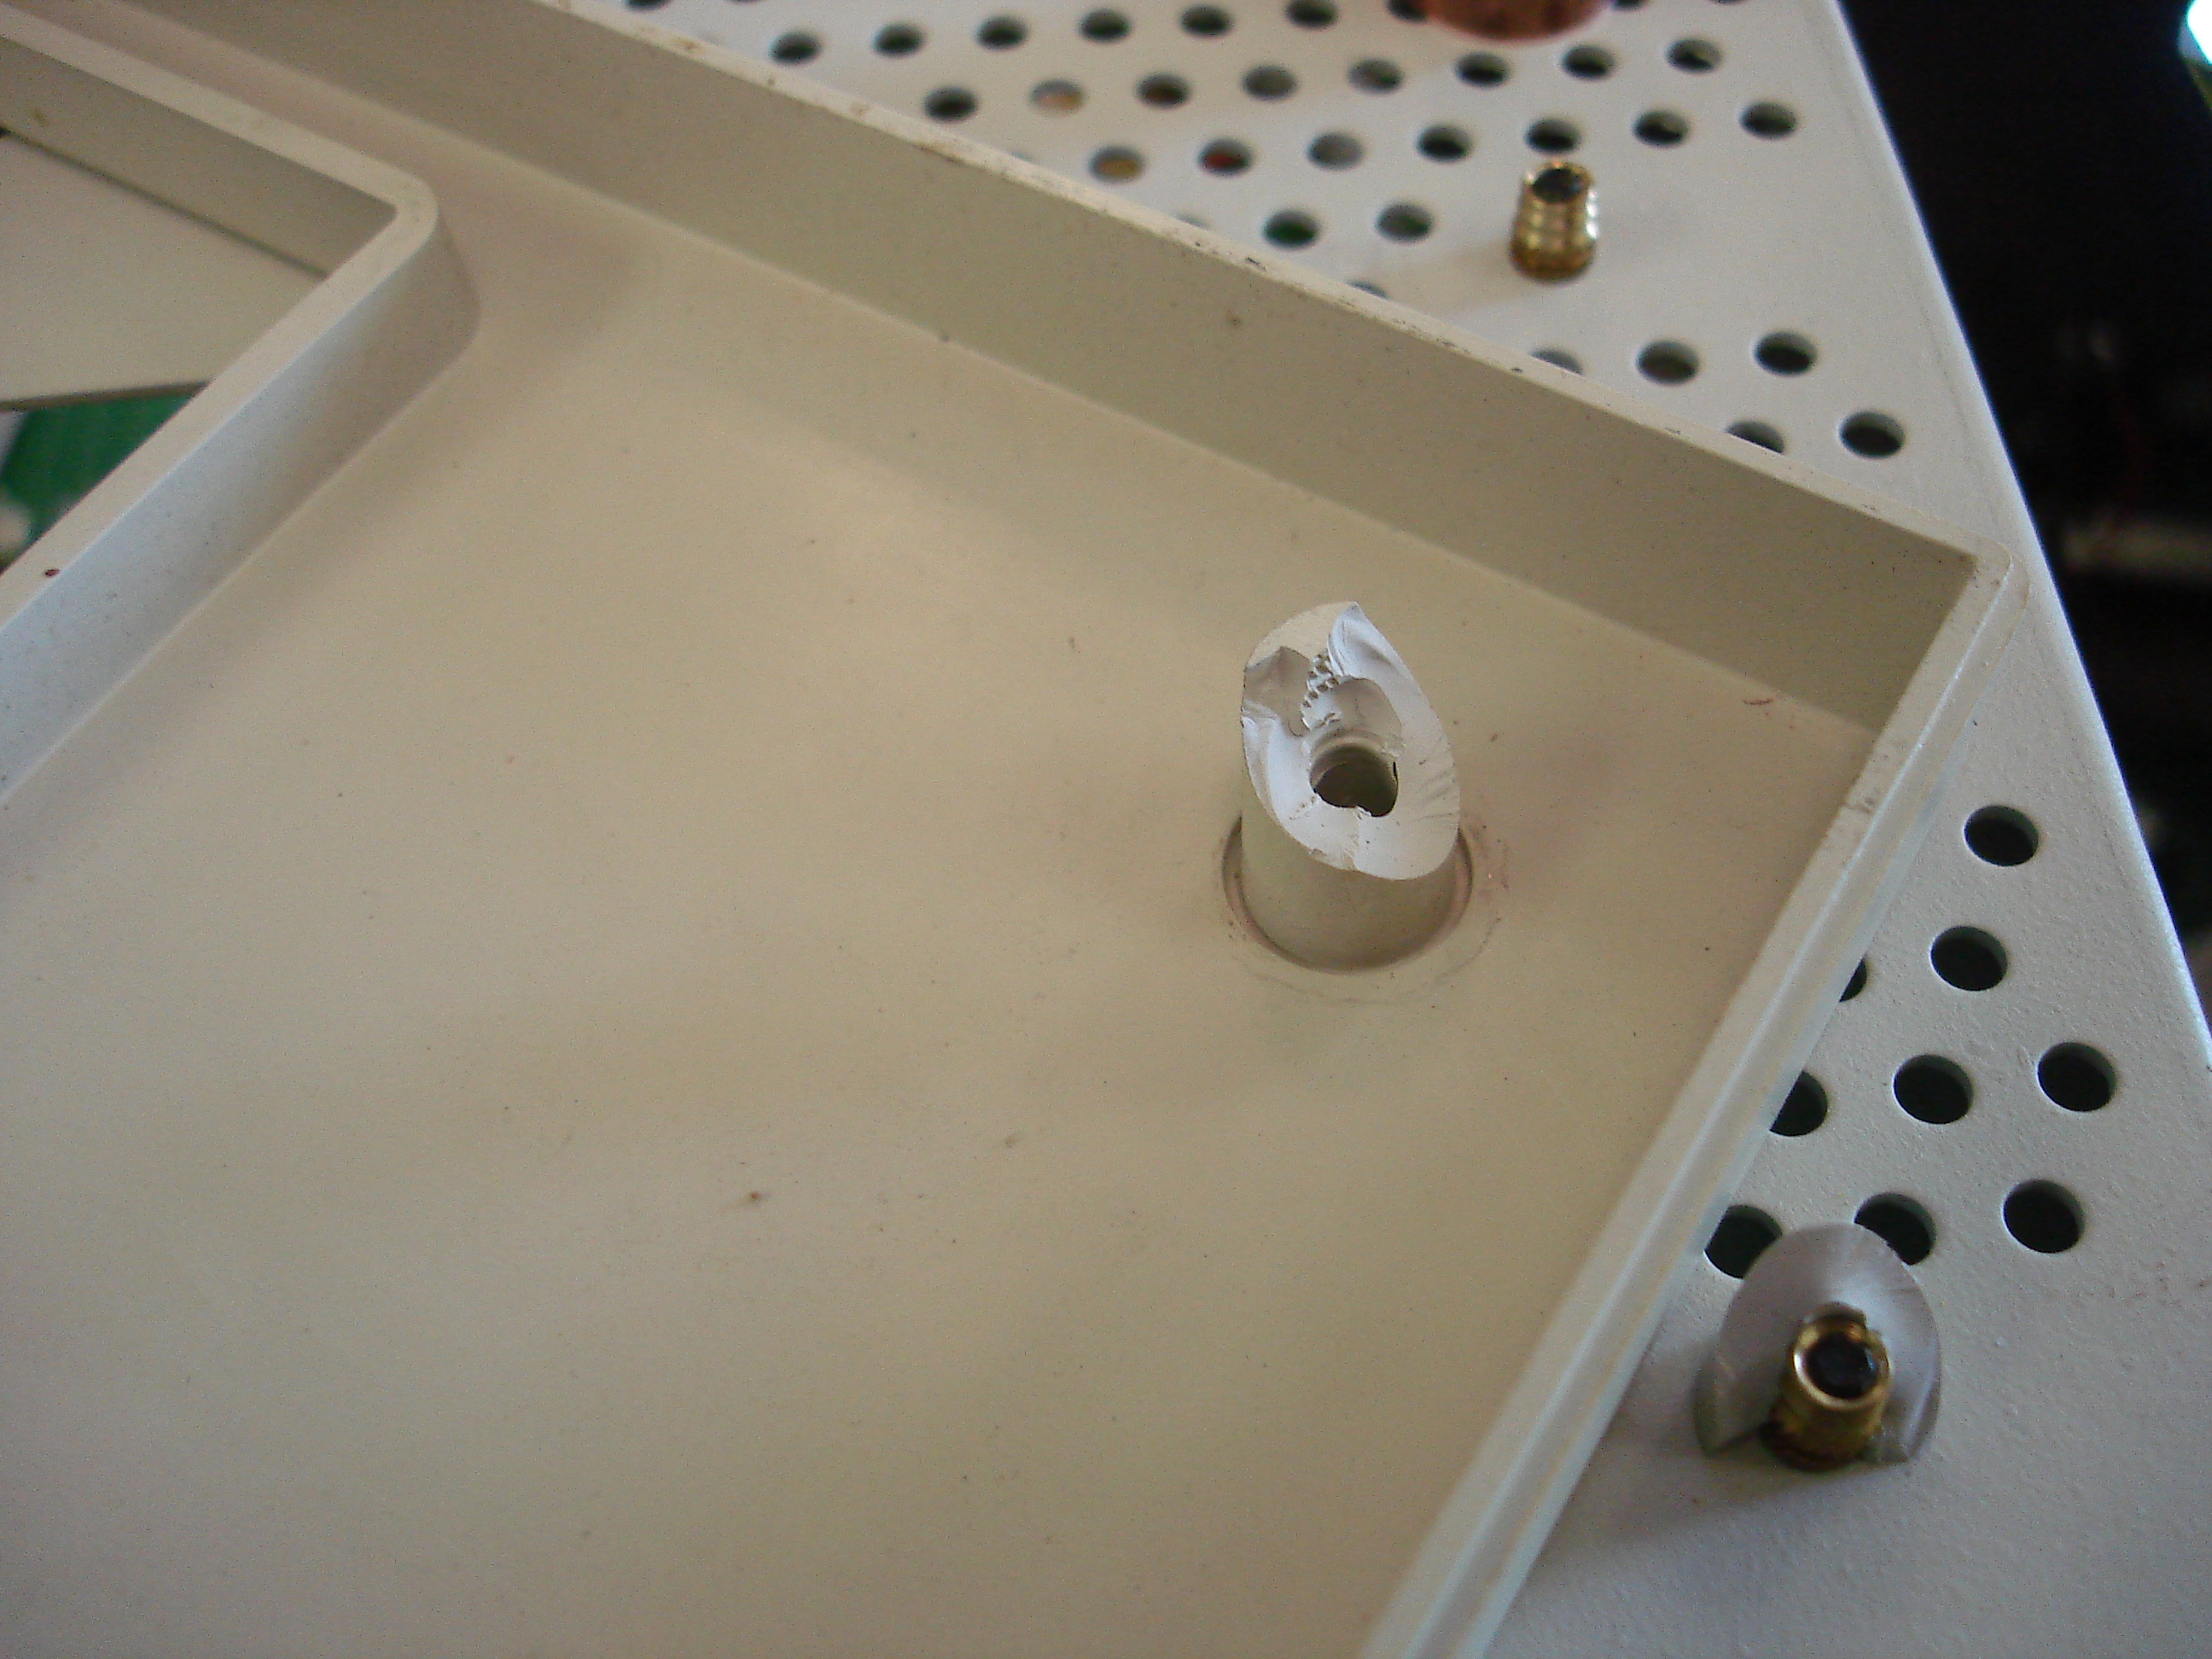
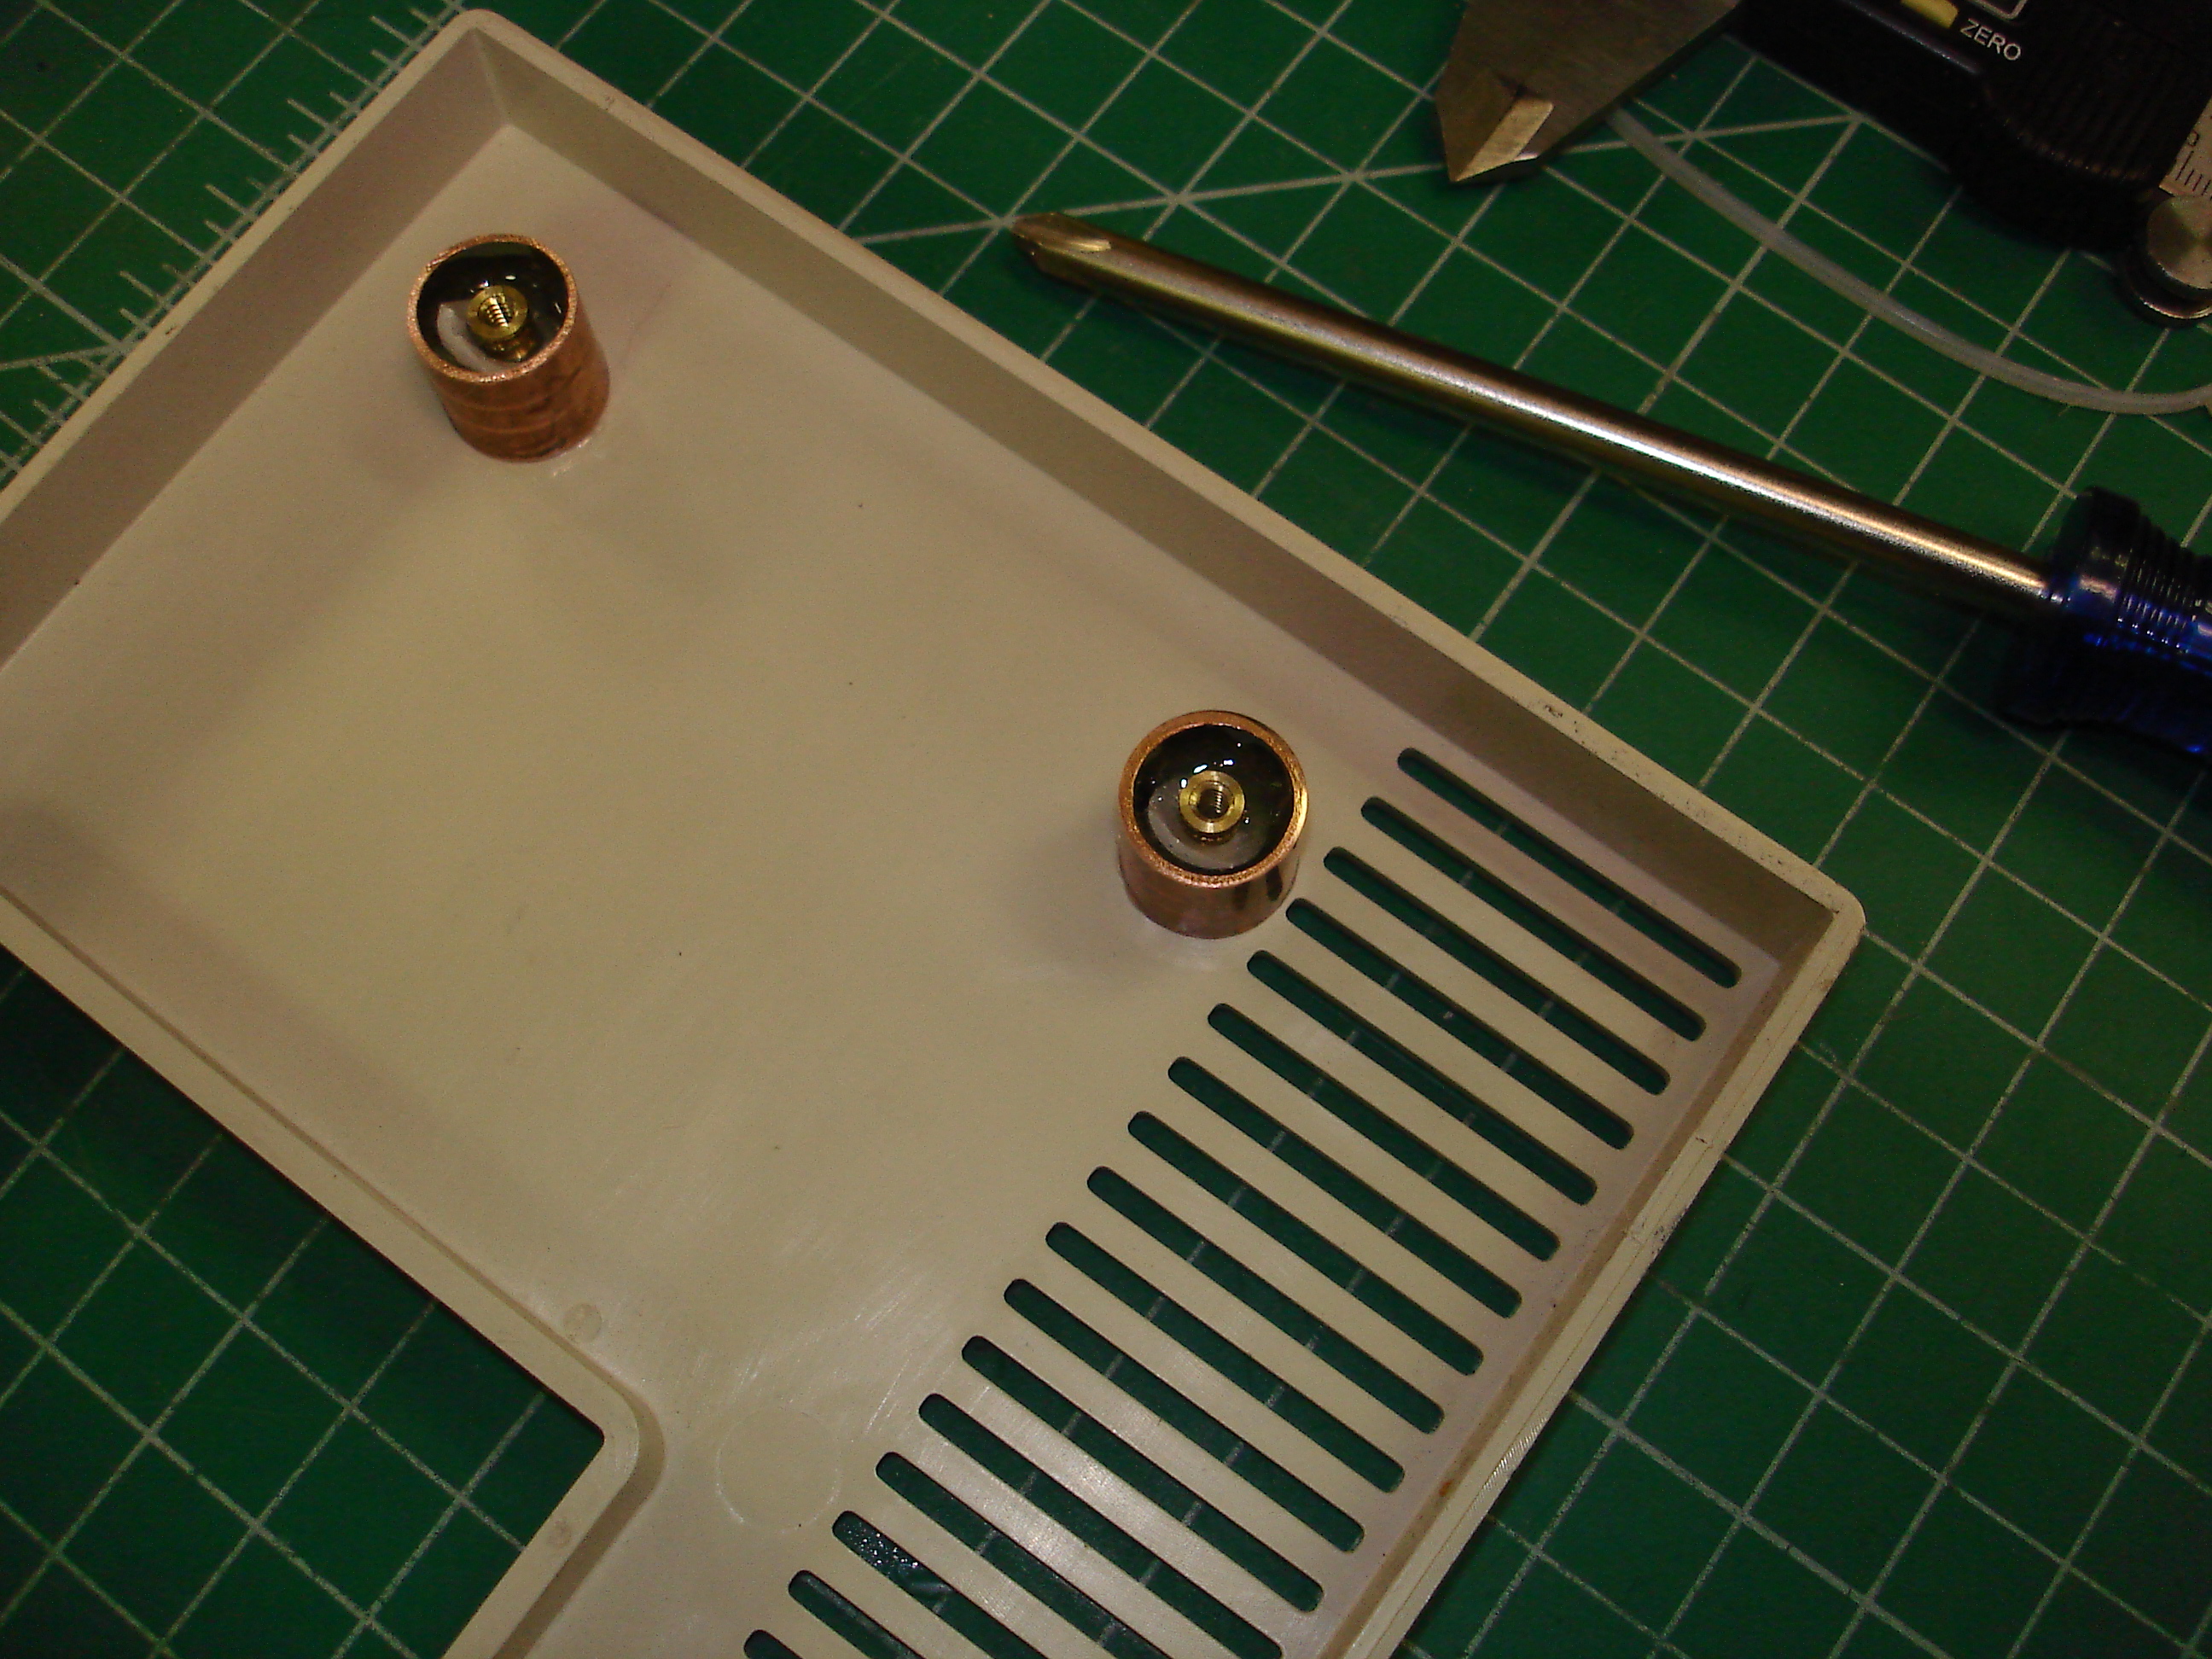
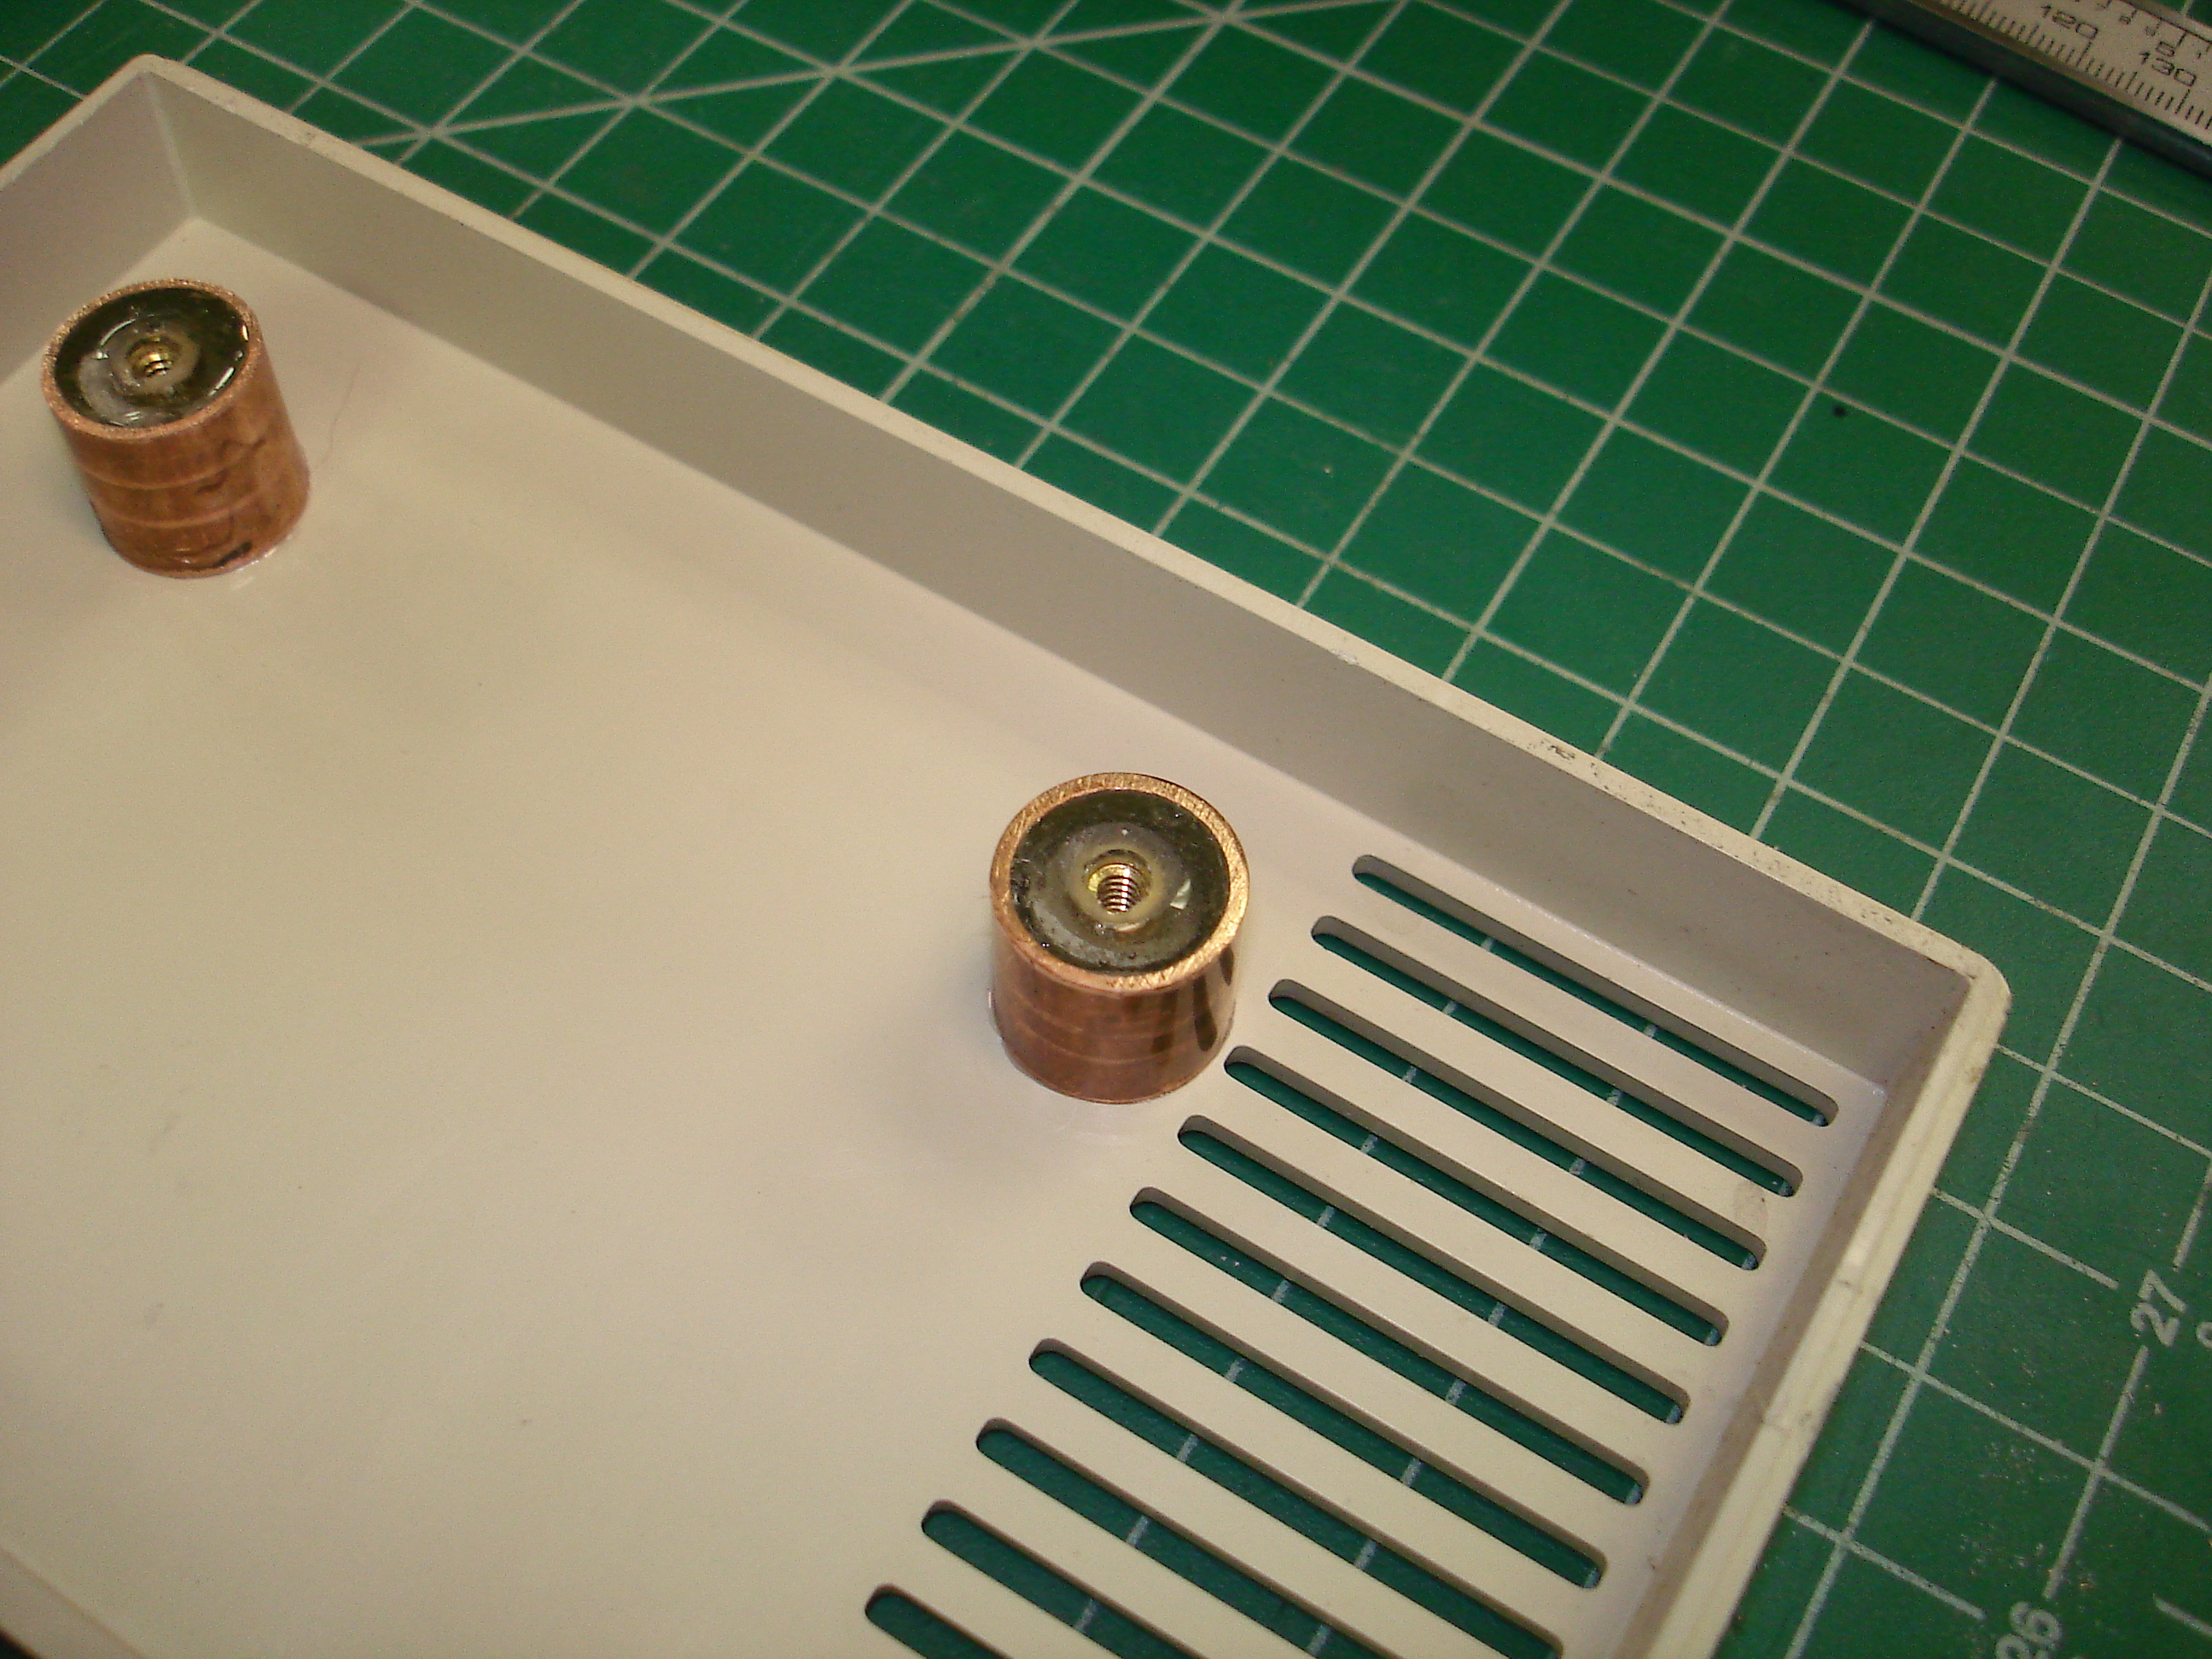
Doug did a good job packing the shoebox for shipment, but the plastic front bezel did sustain damage in shipping. All four of the mounting bosses had exploded. The knurled inserts had completely pulled out of them. They looked like this:
To repair this kind of damage, I usually place an oversize bit of metal tubing around the broken boss and fill the entire thing with epoxy. This provides a strong bond for a part that is clearly a structural weak point. For this repair, 1/2 inch copper water line was a close enough fit, and I had a bit of scrap laying around the shop:
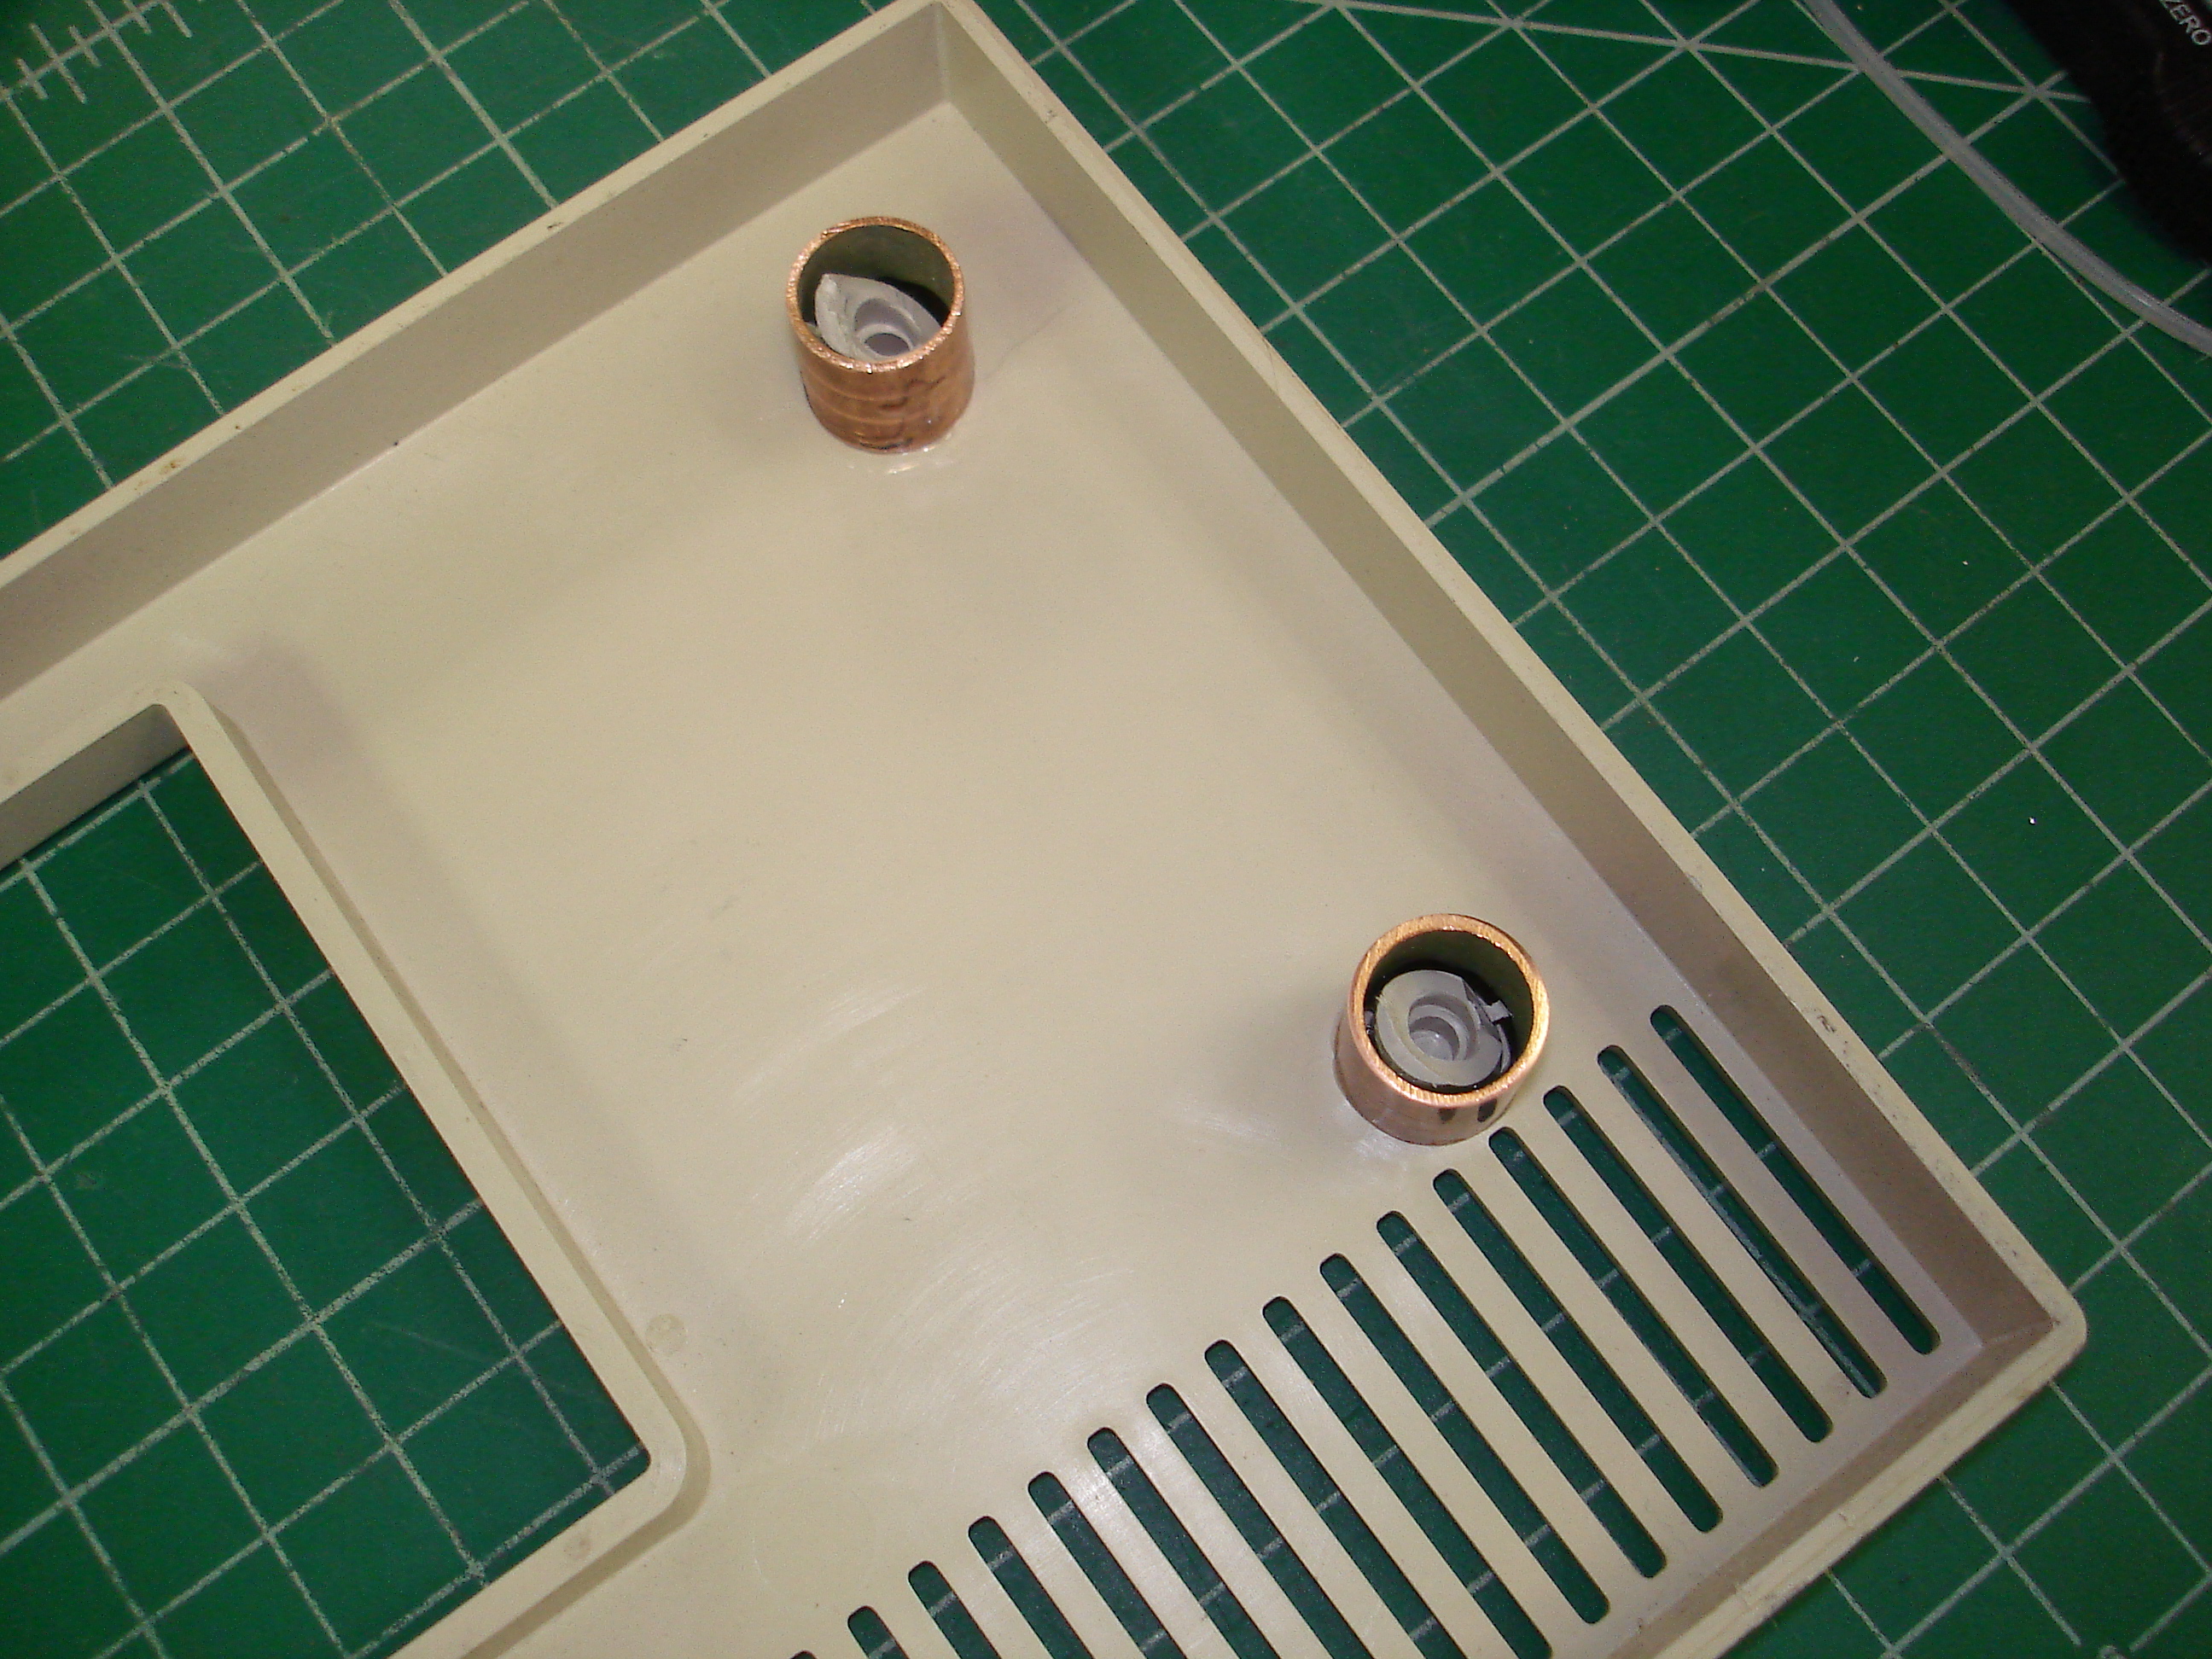
As shown above, the copper tubing has been cut to size and glued to the plastic bezel. At this point, the tubing was just glued at the edge, to seal it to the bezel. The tops of the shattered bosses were trimmed down, and the holes in the middle drilled out somewhat. The required length ended up being 0.600 inch. To cut the tubing to length, I scribed a line around it using the cheap digital calipers I keep on the repair bench, and cut it with a rotary tubing cutter. This provides a fairly square precision cut. The tubing was then hand-filed to bring it just under 0.600 inch.
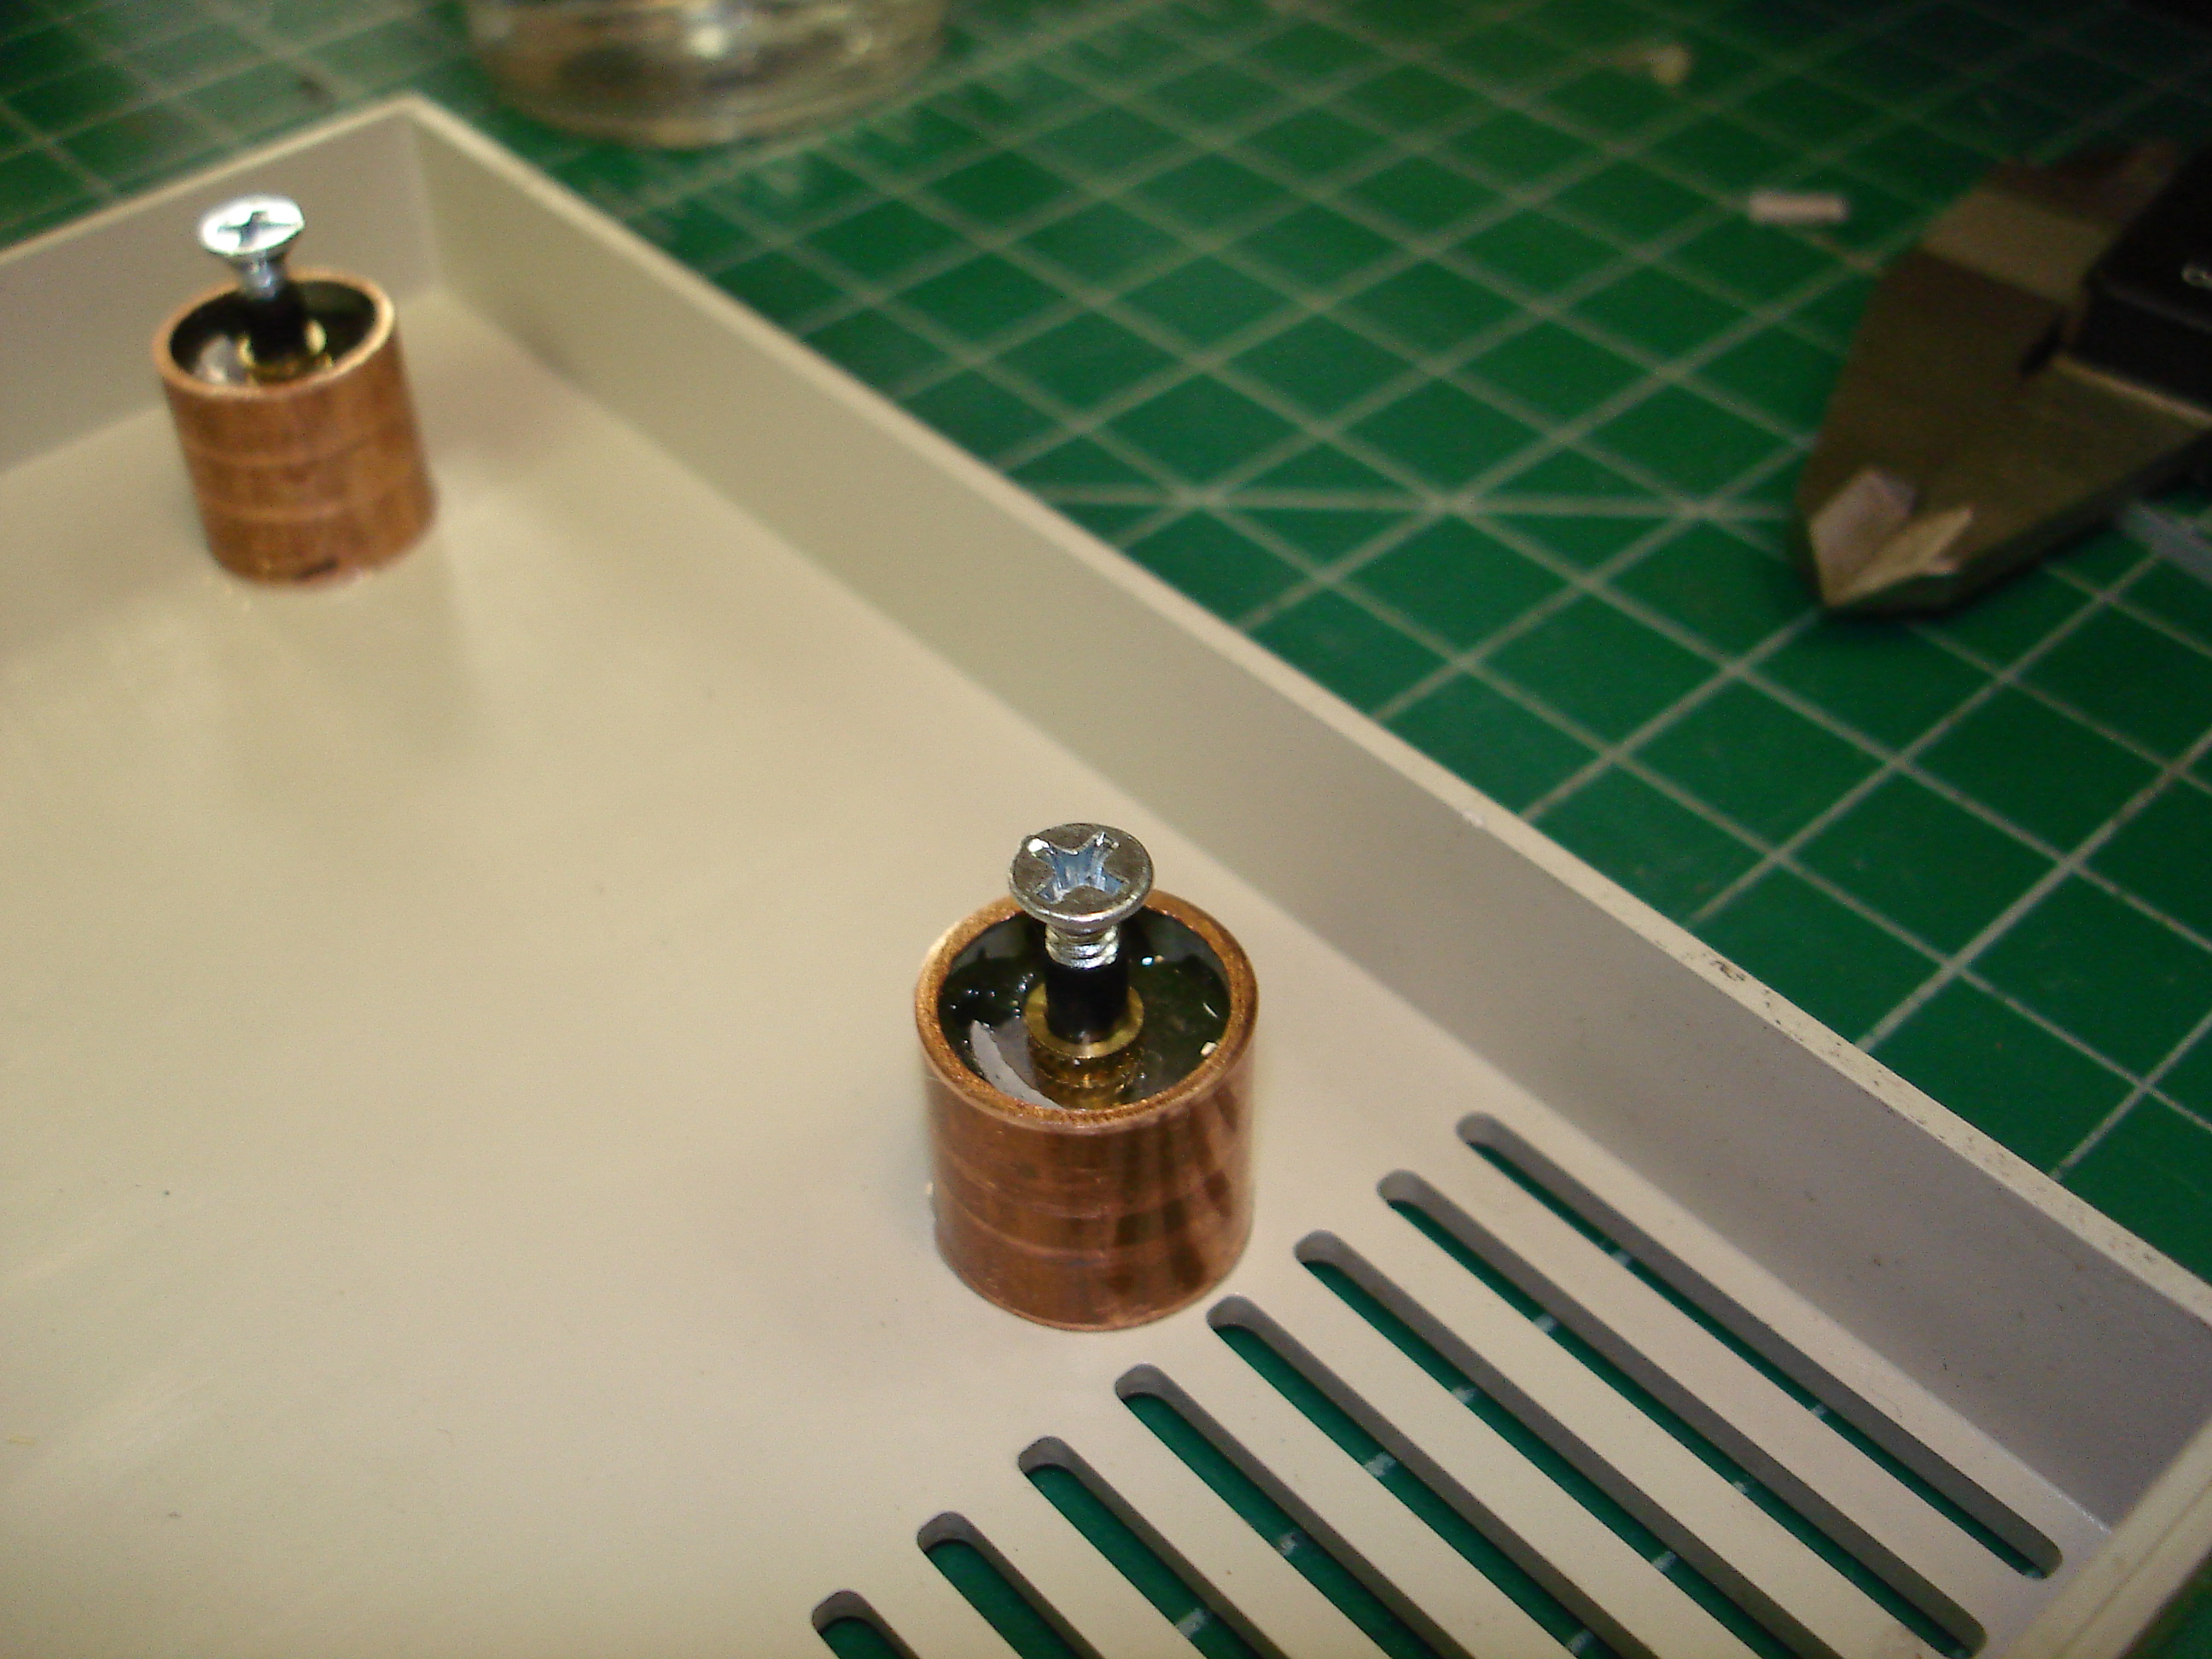
I reused the knurled inserts in this repair. The plan was to space them deeper into the bezel space than originally installed, putting the top edge completely under the epoxy fill. I did this in two steps so that the tubing would not overflow with epoxy, making a mess of the bezel. Before epoxy was poured in, the ends of the knurled inserts were sealed with Polygun adhesive, to prevent epoxy wicking into the threads:

The threaded inserts were then mounted to the metal cover with a #6 washer between them and the cover, which would result in the insert being set further into the bezel than they were originally. The tubing pieces were then filled about half way with five-minute epoxy, and the cover placed over the bezel and weighted down:
The astute reader will note that the right side transformer is from a MITS Altair 8800B!
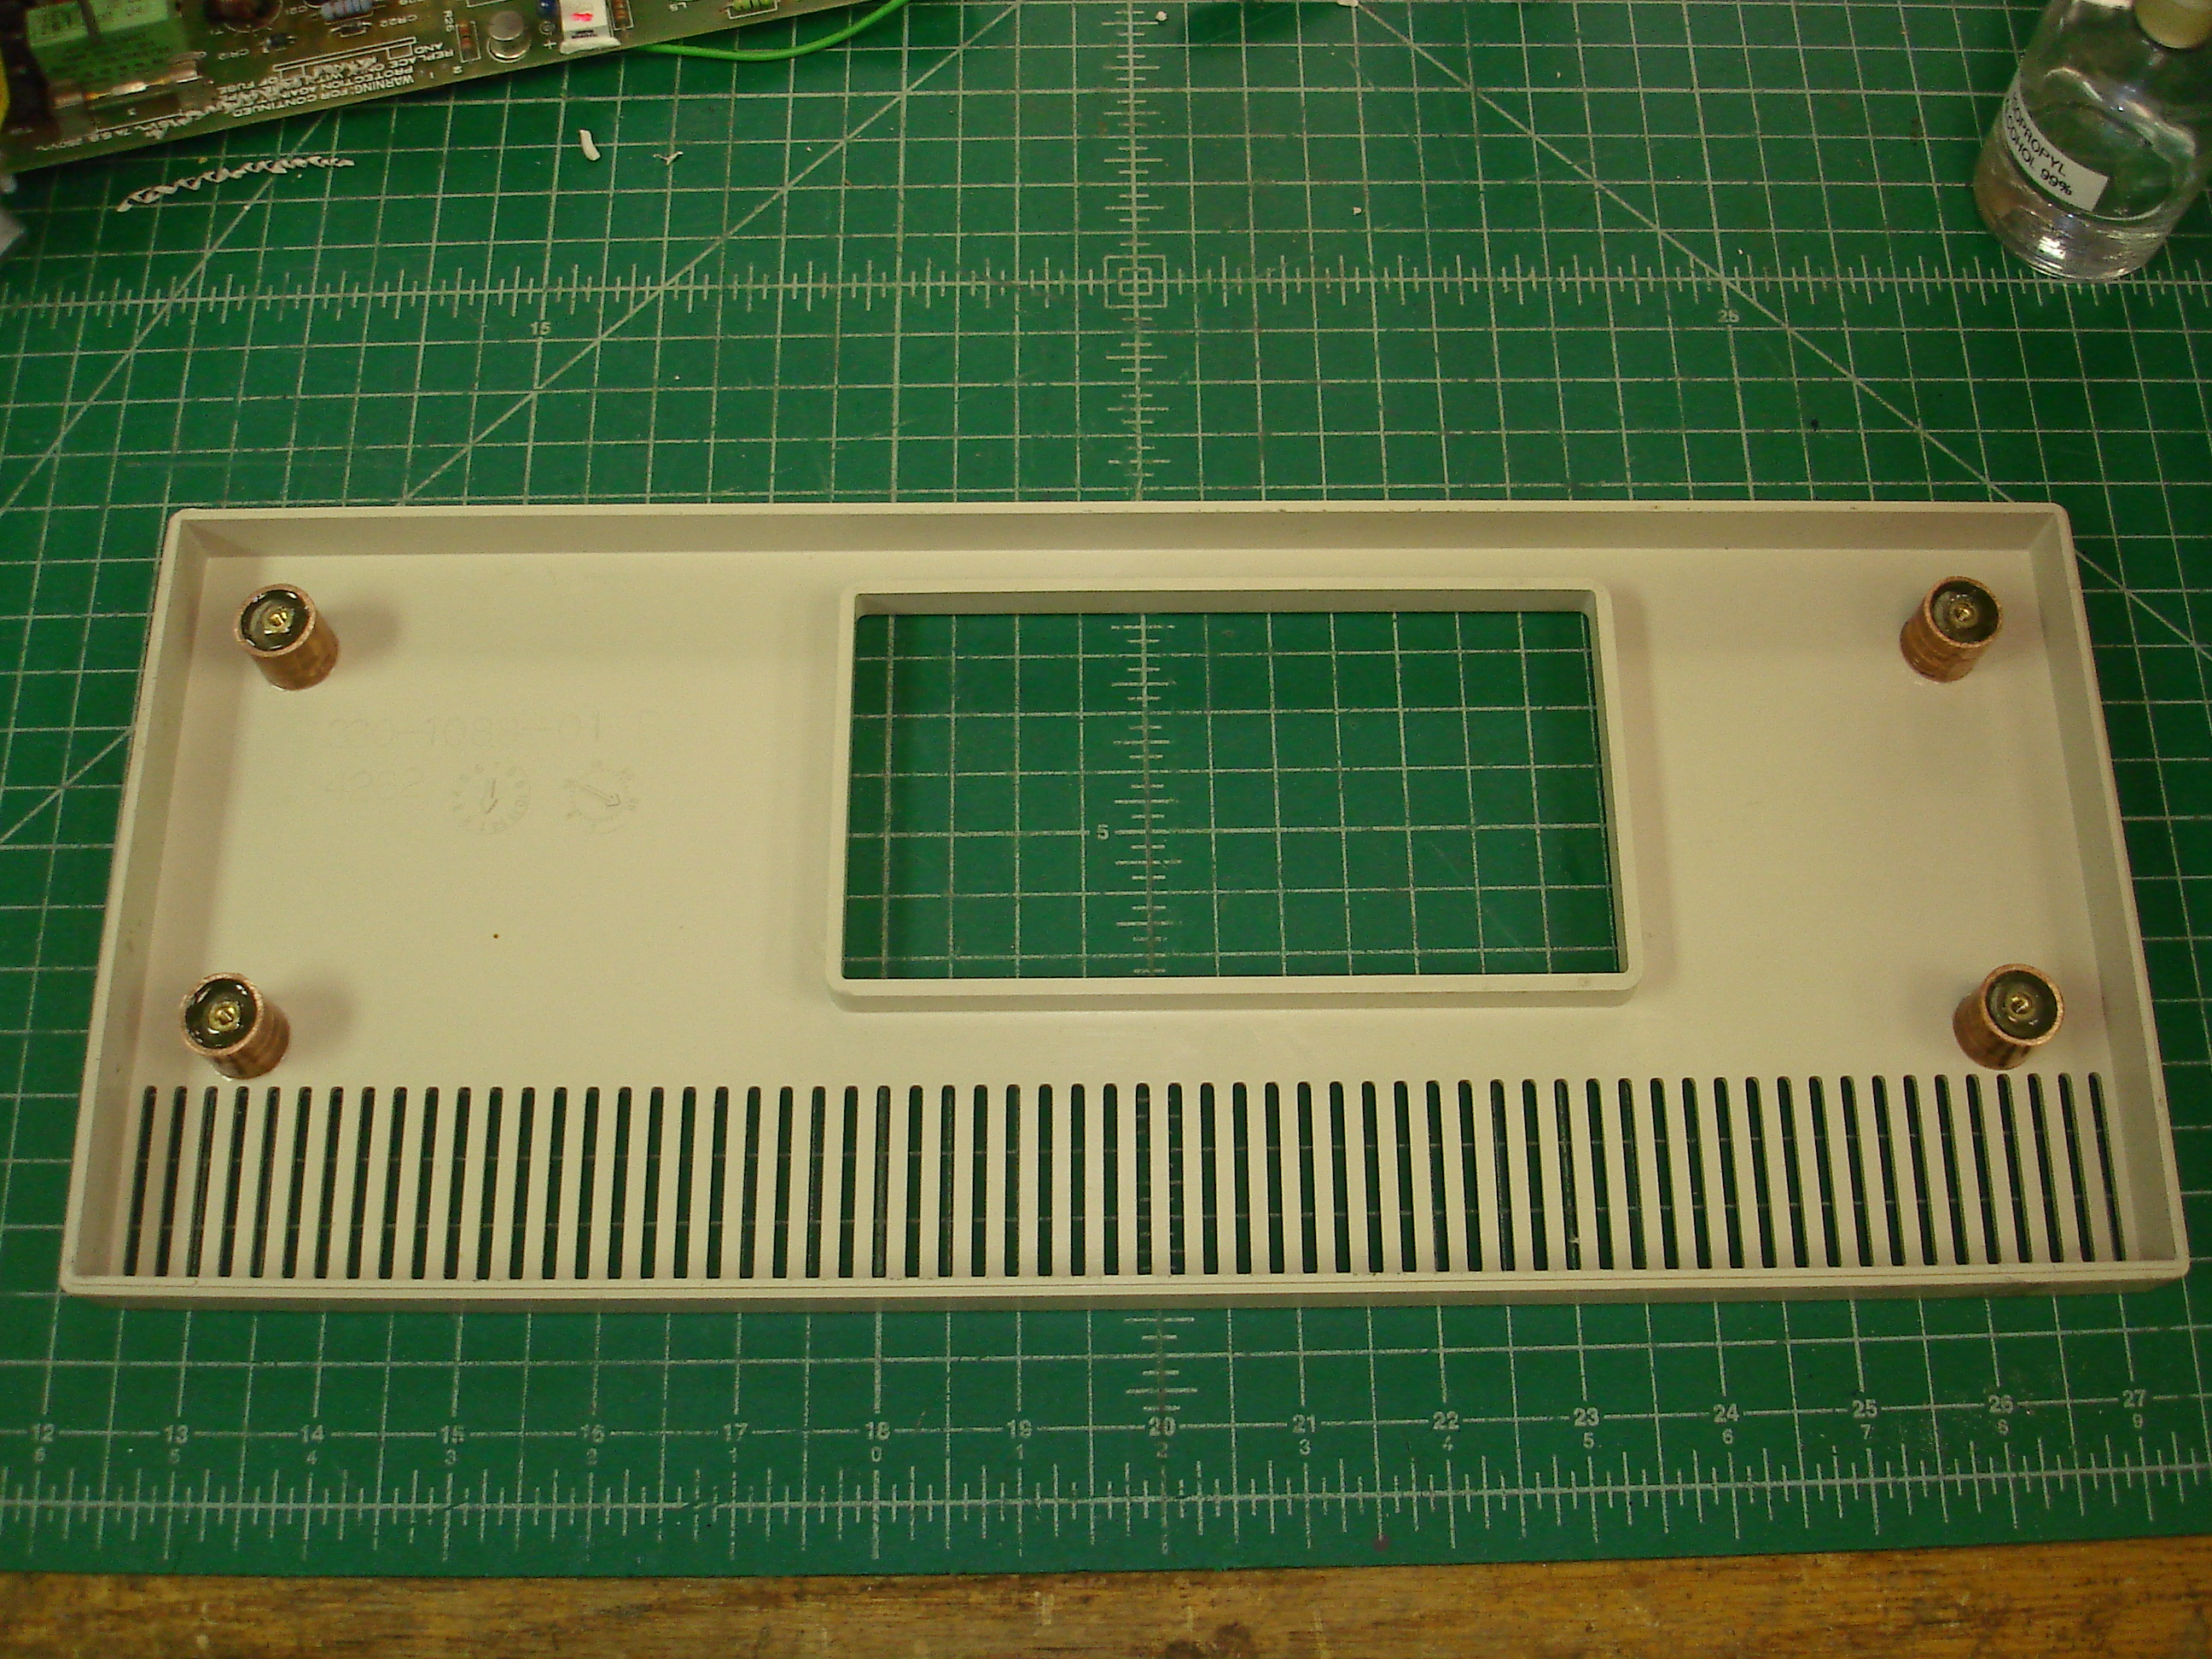
The epoxy was left to cure for several hours: it’s five-minute, but strength increases with cure time. After curing, the screws were backed out from the metal cover and it was separated from the bezel. This is what the repair looked like at half fill:
The next step in the repair required filling the tubing almost to the top. This would’ve plugged the knurled inserts, so black vinyl electrical tape was wrapped around some #6-32 machine screws, which were threaded into the inserts. Epoxy doesn’t stick to electrical tape, and this would allow easy removal of the screws, while also preventing epoxy wicking into the threads:
The tubing was then filled with epoxy. I made sure to dab the epoxy onto the screws some distance above the top of the tubing. This protruding bit of epoxy would be hand filed flat after curing and removal of the screws:
The epoxy was allowed to cure over the weekend to improve strength. After curing, the bezel was reattached to the metal cover using the original screws. So far, it’s holding up!
Installing a Hard Disk
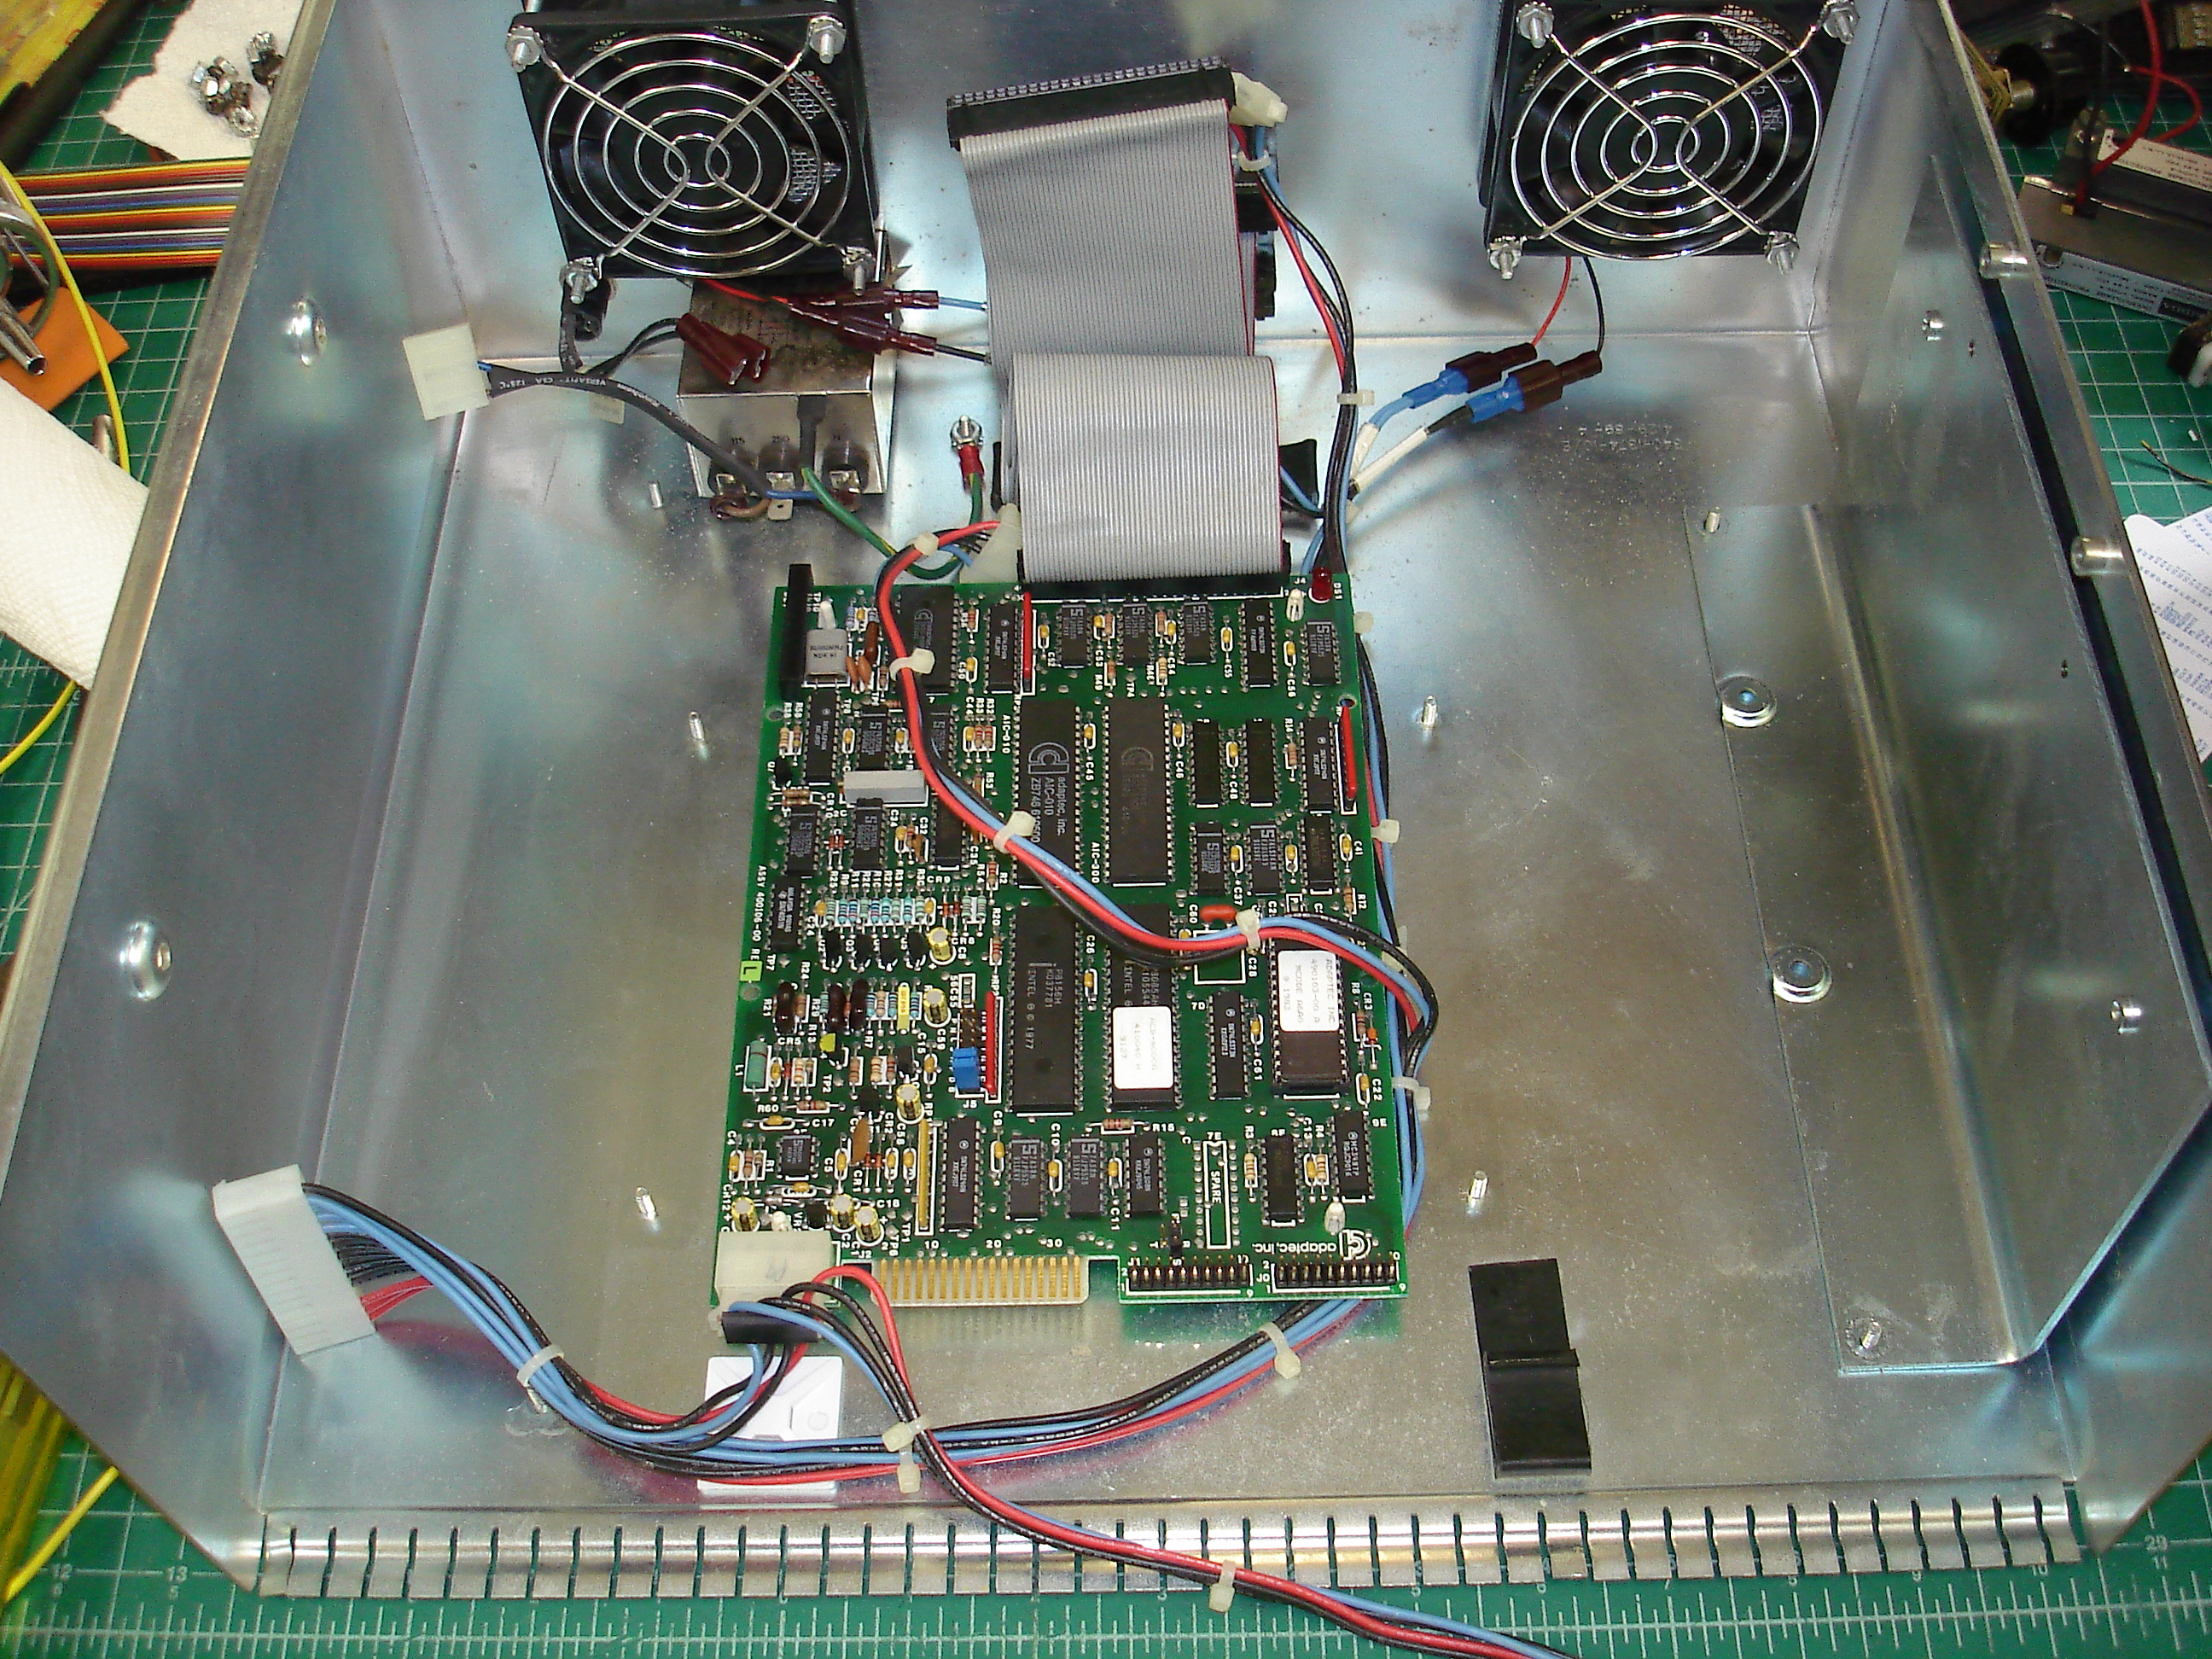
While it’s certainly possible to mount any SCSI hard disk in the shoebox, I decided to mount my Adaptec ACB-4000 MFM to SCSI adapter and use a MFM hard disk. I had the ACB-4000 on hand, and had tested it with the drive it was originally paired with. SunOS supports the ACB-4000 and includes commands to format and verify the MFM drive, which is good because few other things talk to it! The ACB-4000 does not support the SCSI IDENTIFY command, so it doesn’t work with most modern operating systems. There appears to be NetBSD support for it, which is turned on for some of the releases targeting old Sun hardware, but that support does not appear to include formatting and verification.
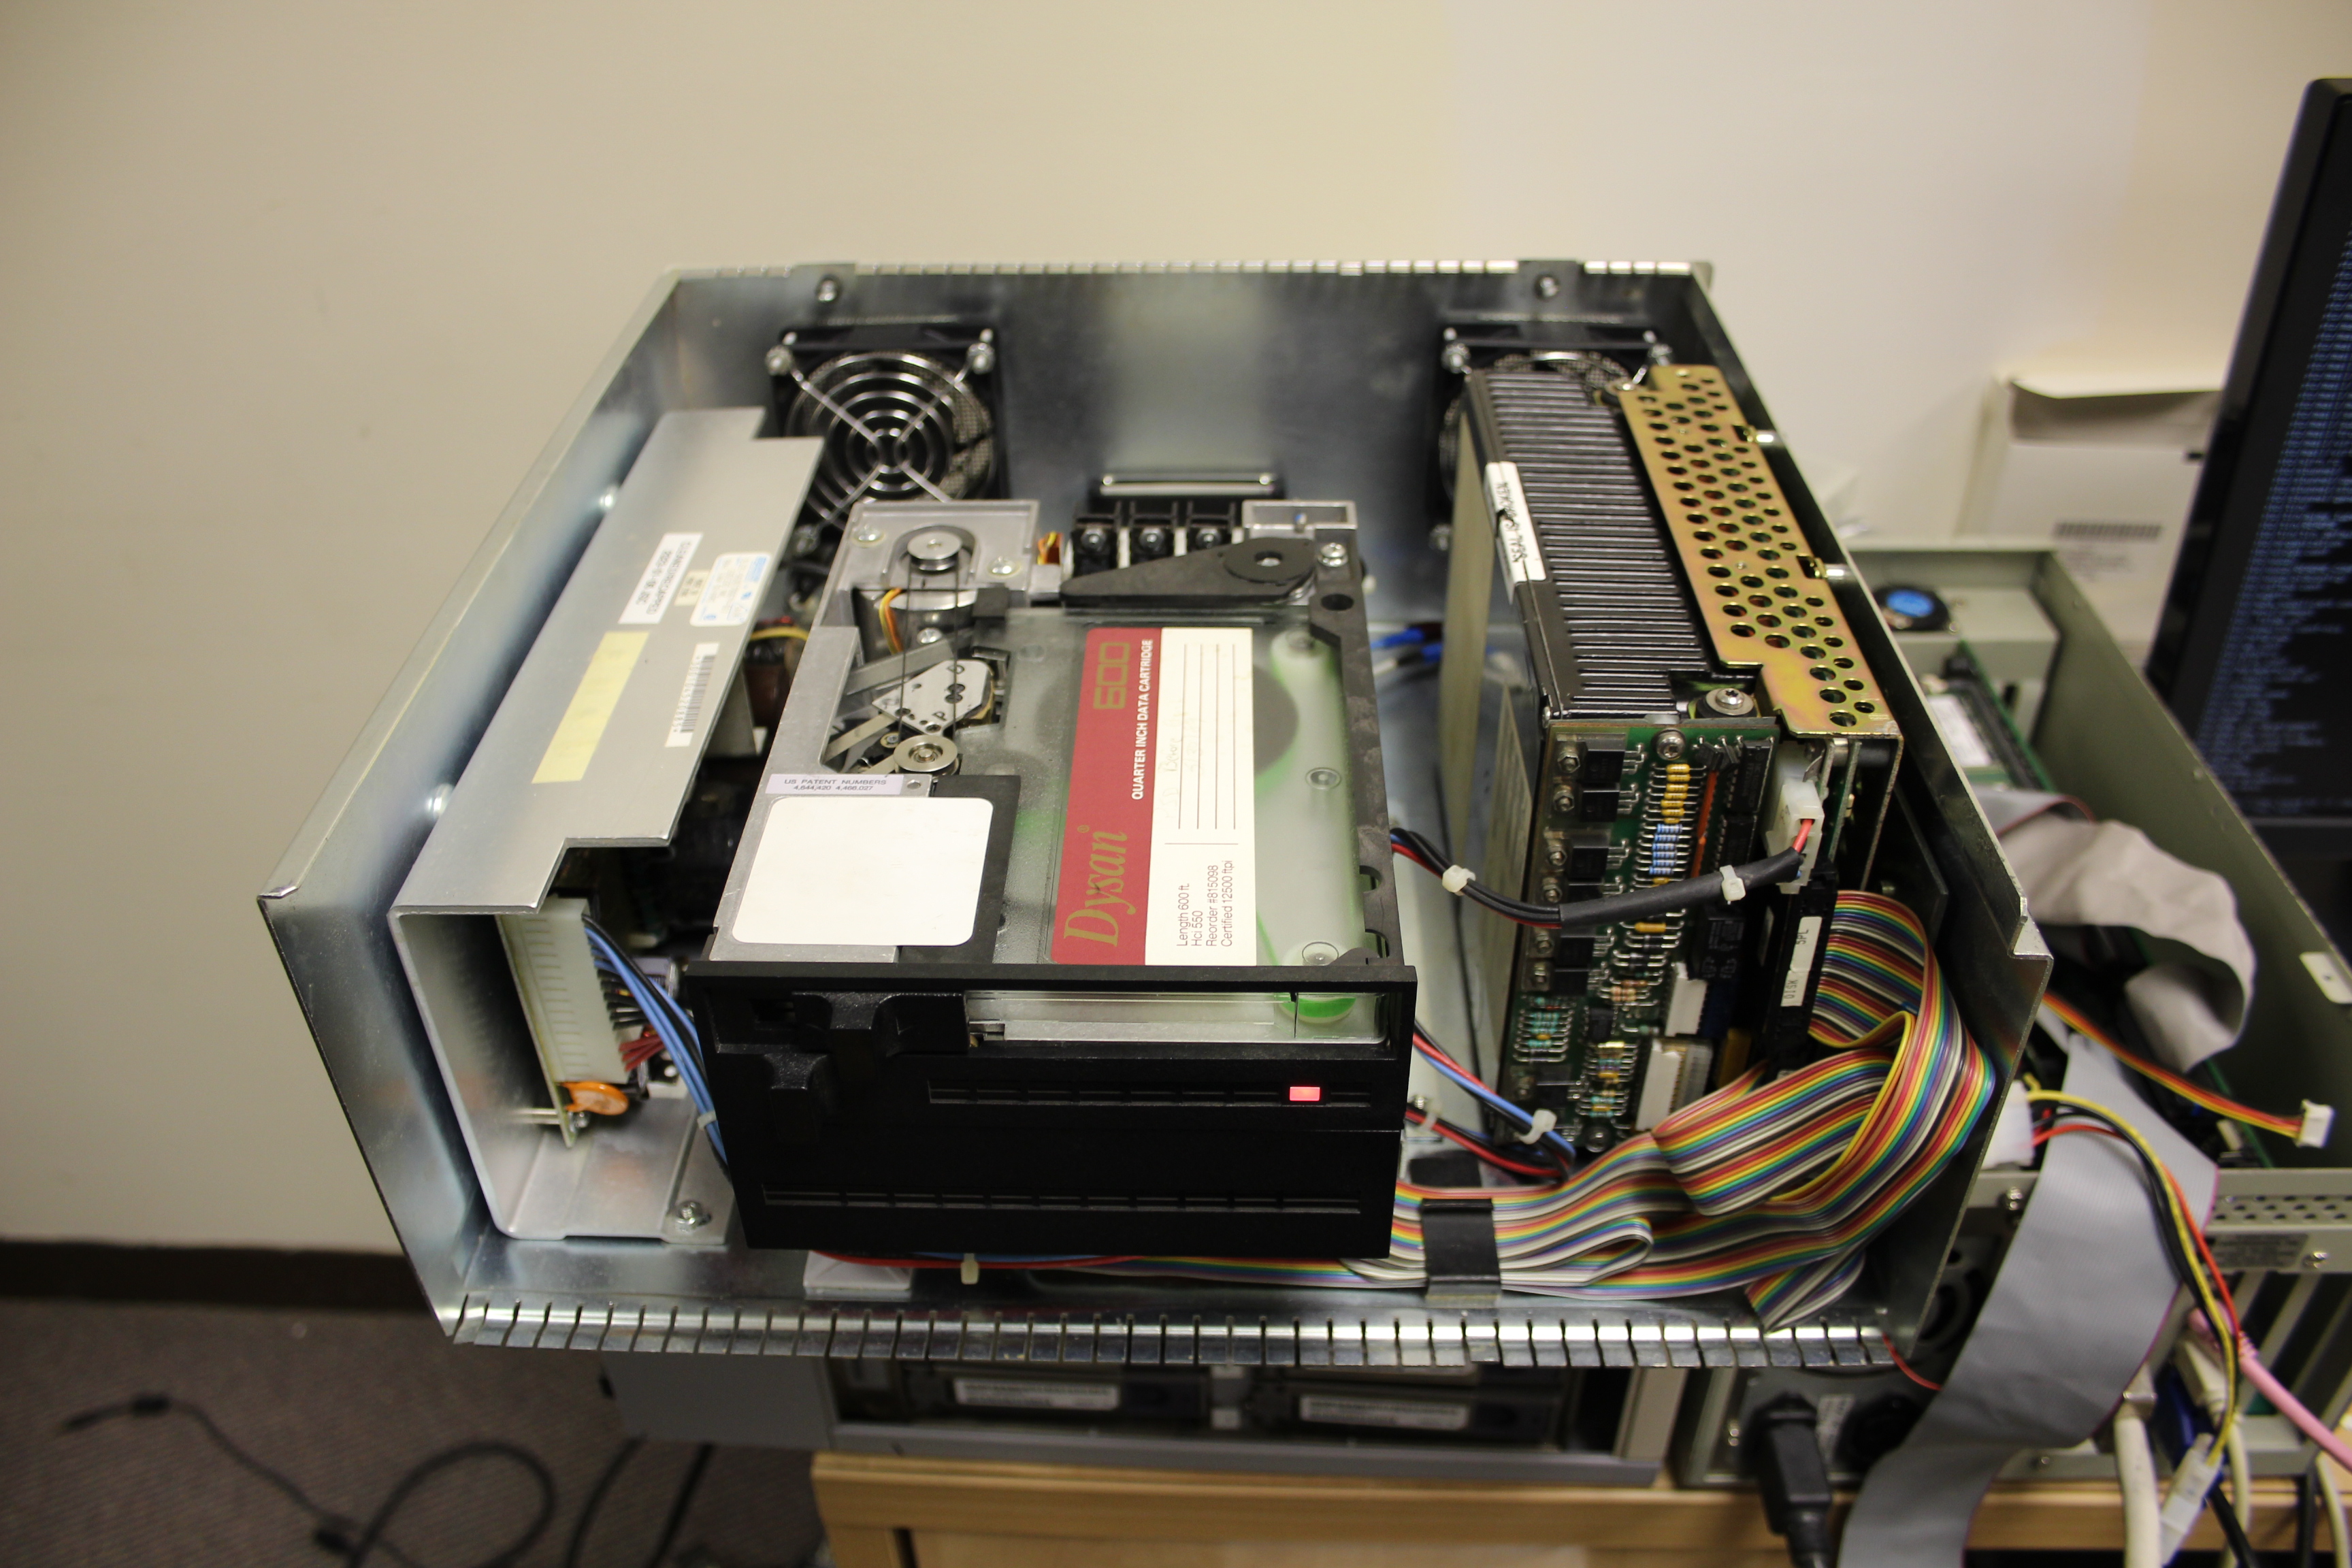
The ACB-4000 mounts in the bottom of the shoebox on plastic standoffs:
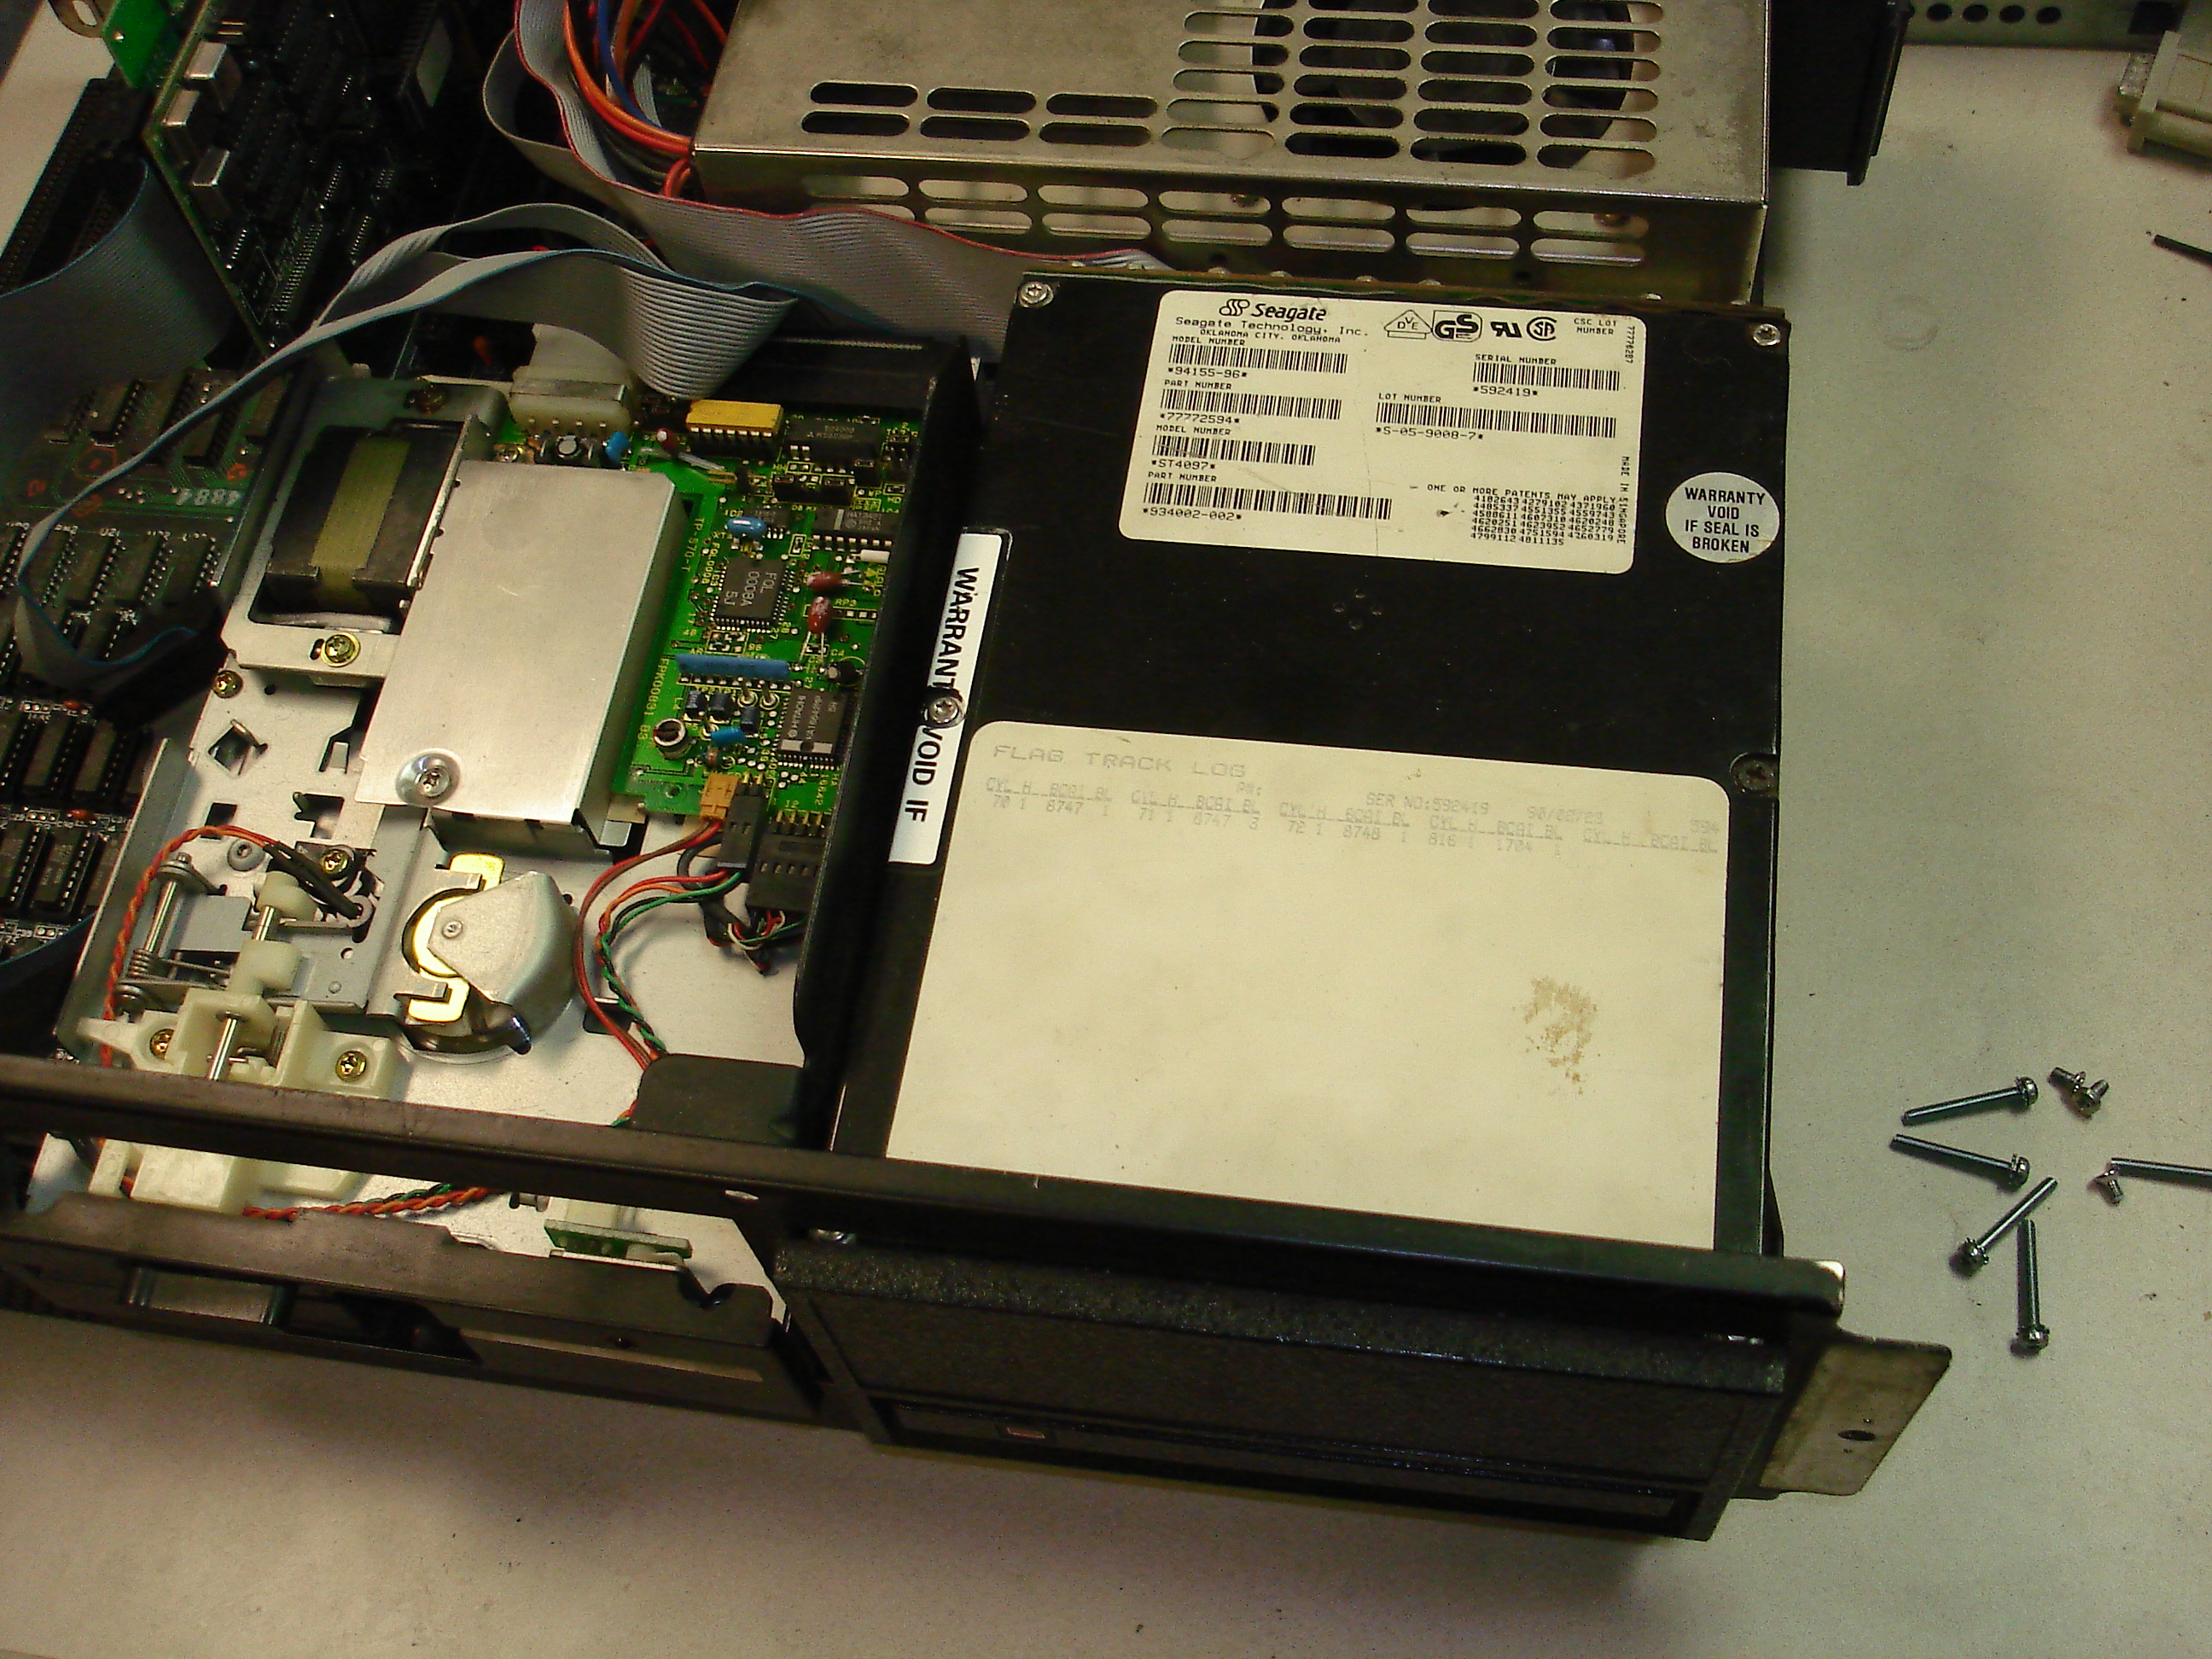
I had several options for hard disks, but decided to use a Seagate ST4097 WREN II drive. This is an 80 MB drive (95 MB unformatted), voice coil actuated, and had been very reliable. Until now, this drive has lived in my IBM 5160 PC/XT:
The drive is not original to my XT, but it has been in there since the late 90s. Originally, it came from an IBM 5170 PC/AT that had been used as a LANtastic server for the Hinton, WV public library, probably hosting the card catalog. It was a secondary drive in the machine – the primary was a Computer Memories, INC MFM drive, which was of course dead by the time I’d gotten the AT. The CMI drives were notoriously unreliable, even when they were current tech.
Anyhow, the ST4097 had been in the XT for a long time, but had been unplugged for the last 10 or so years. This was the first machine I’d installed an XT-IDE controller in, and the MFM drive had not really been used since! The drive was quiet for a full height 5.25” drive (the ground button needed cleaned back in the 90s – I almost junked the drive due to the ear-splitting screech it produced until cleaning) and had almost no defects other than the factory defects. Here’s the manufacturer label and defect list:
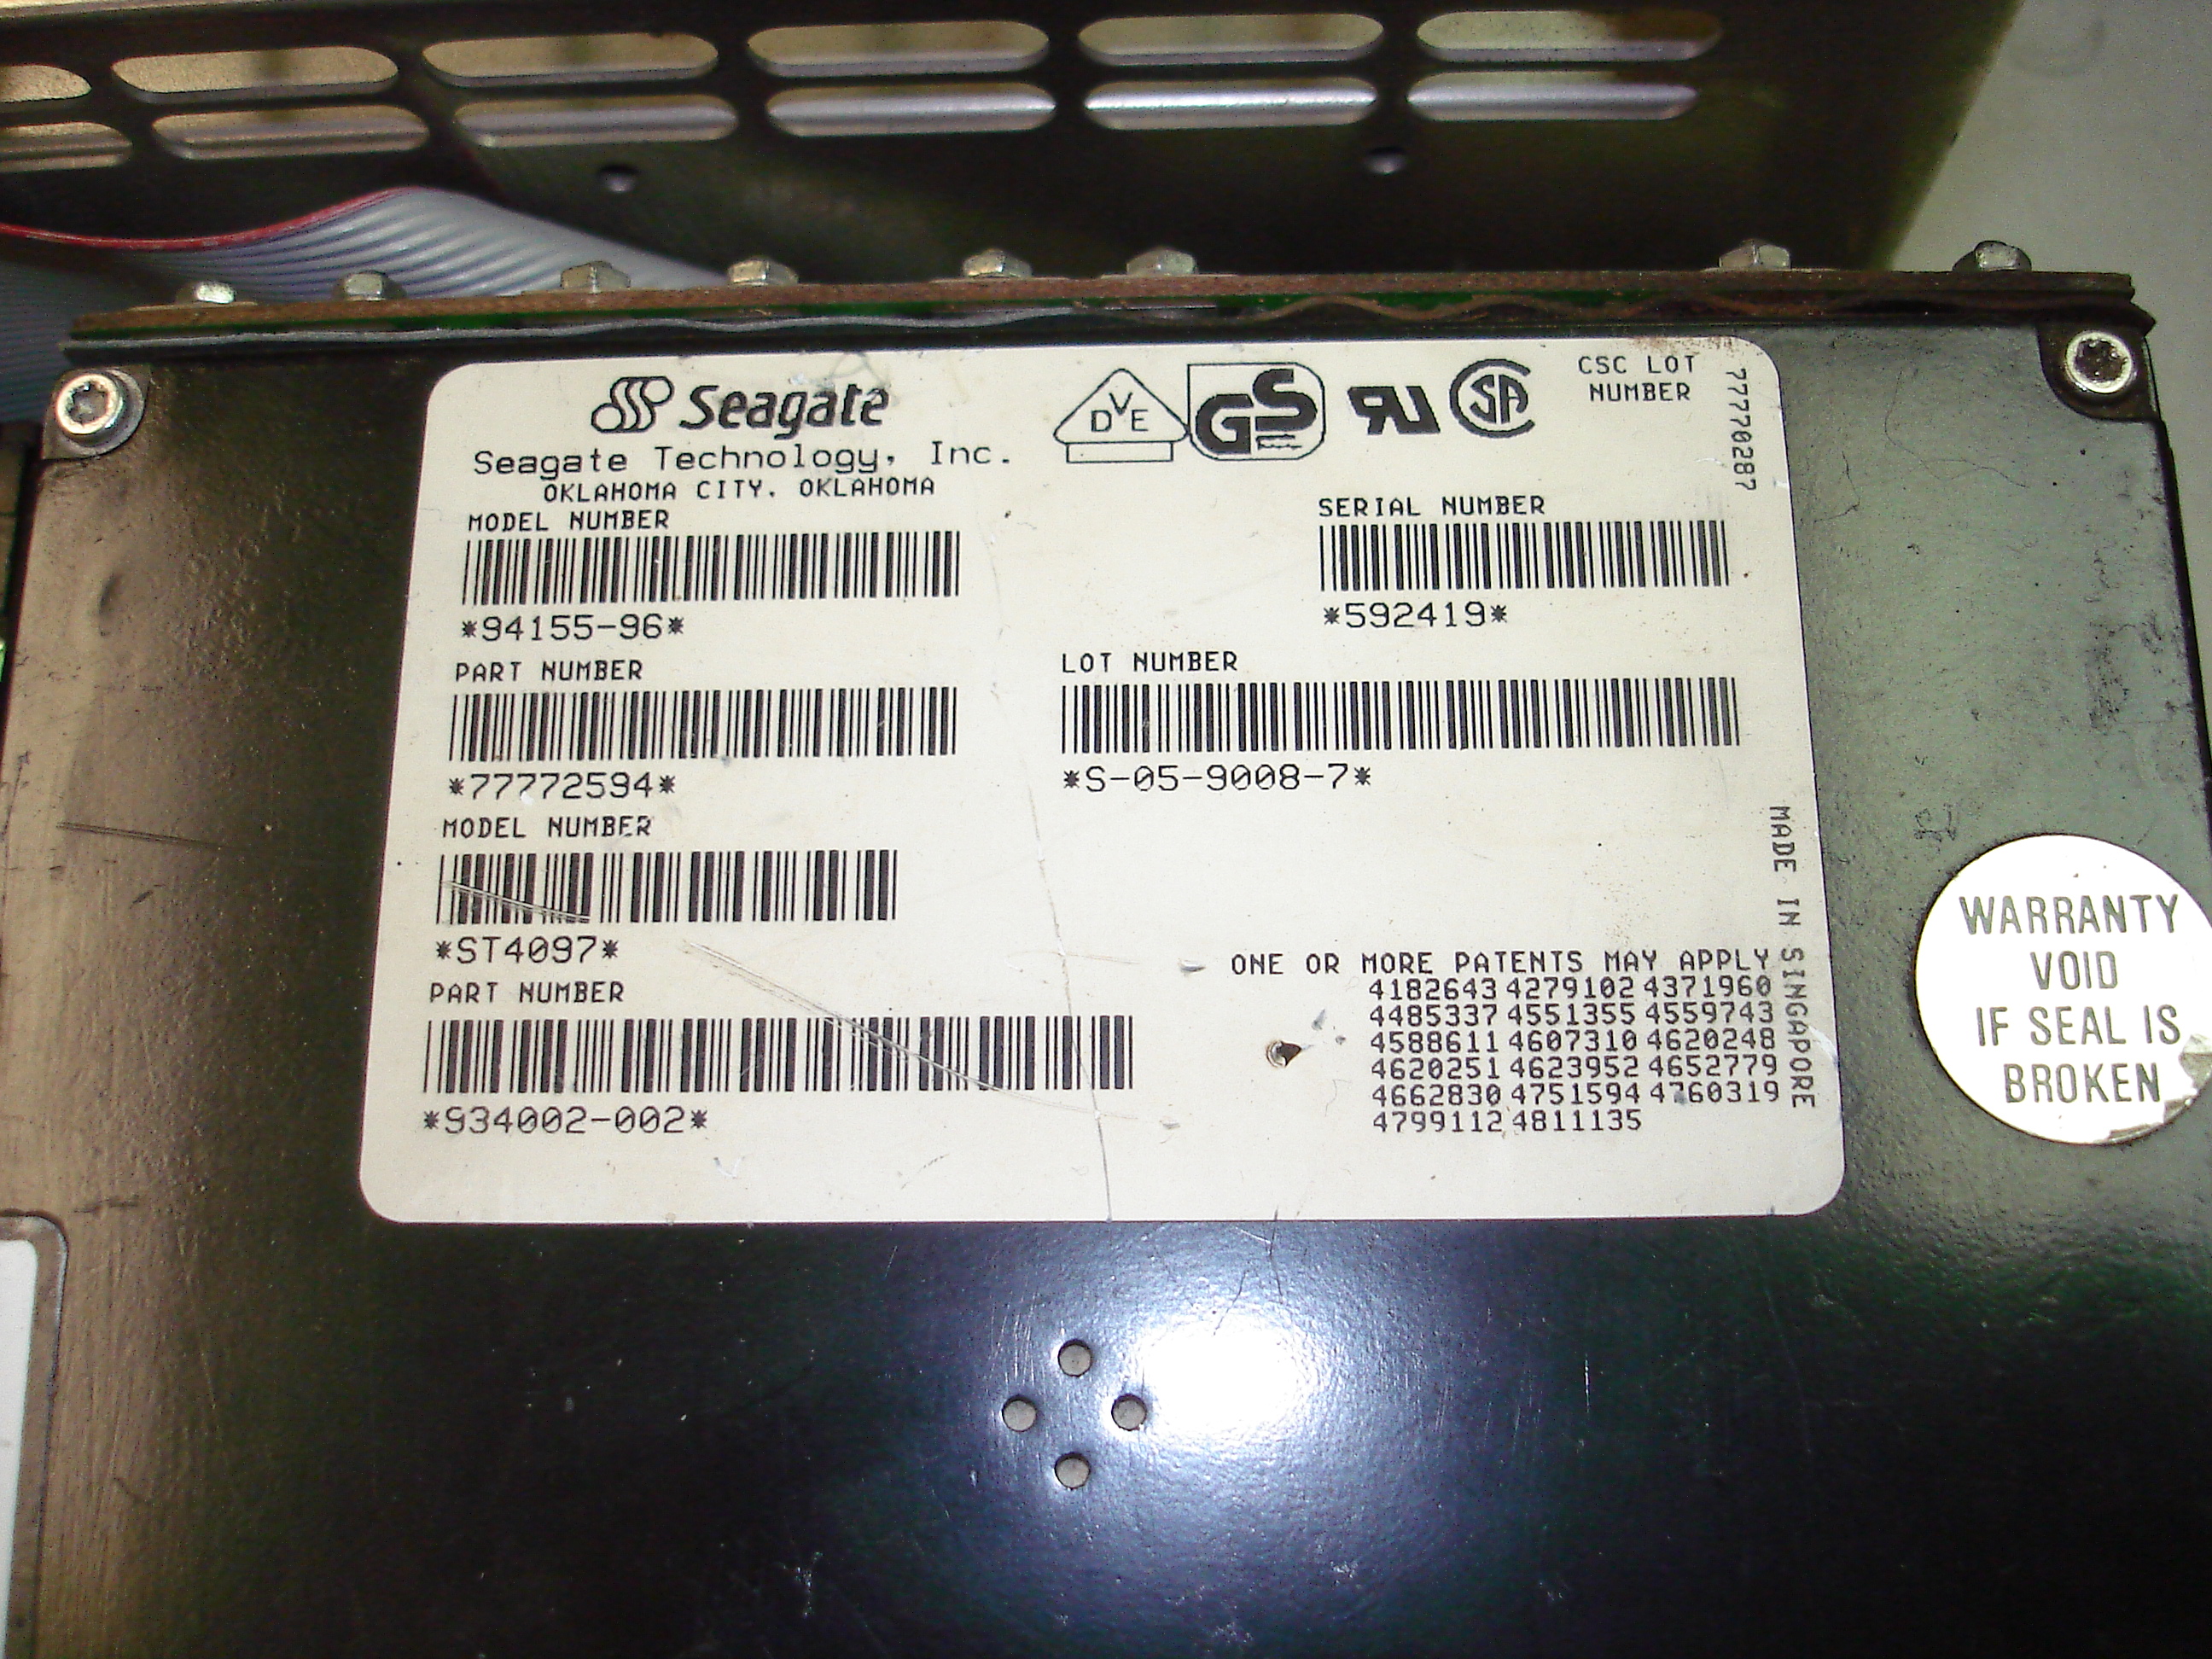
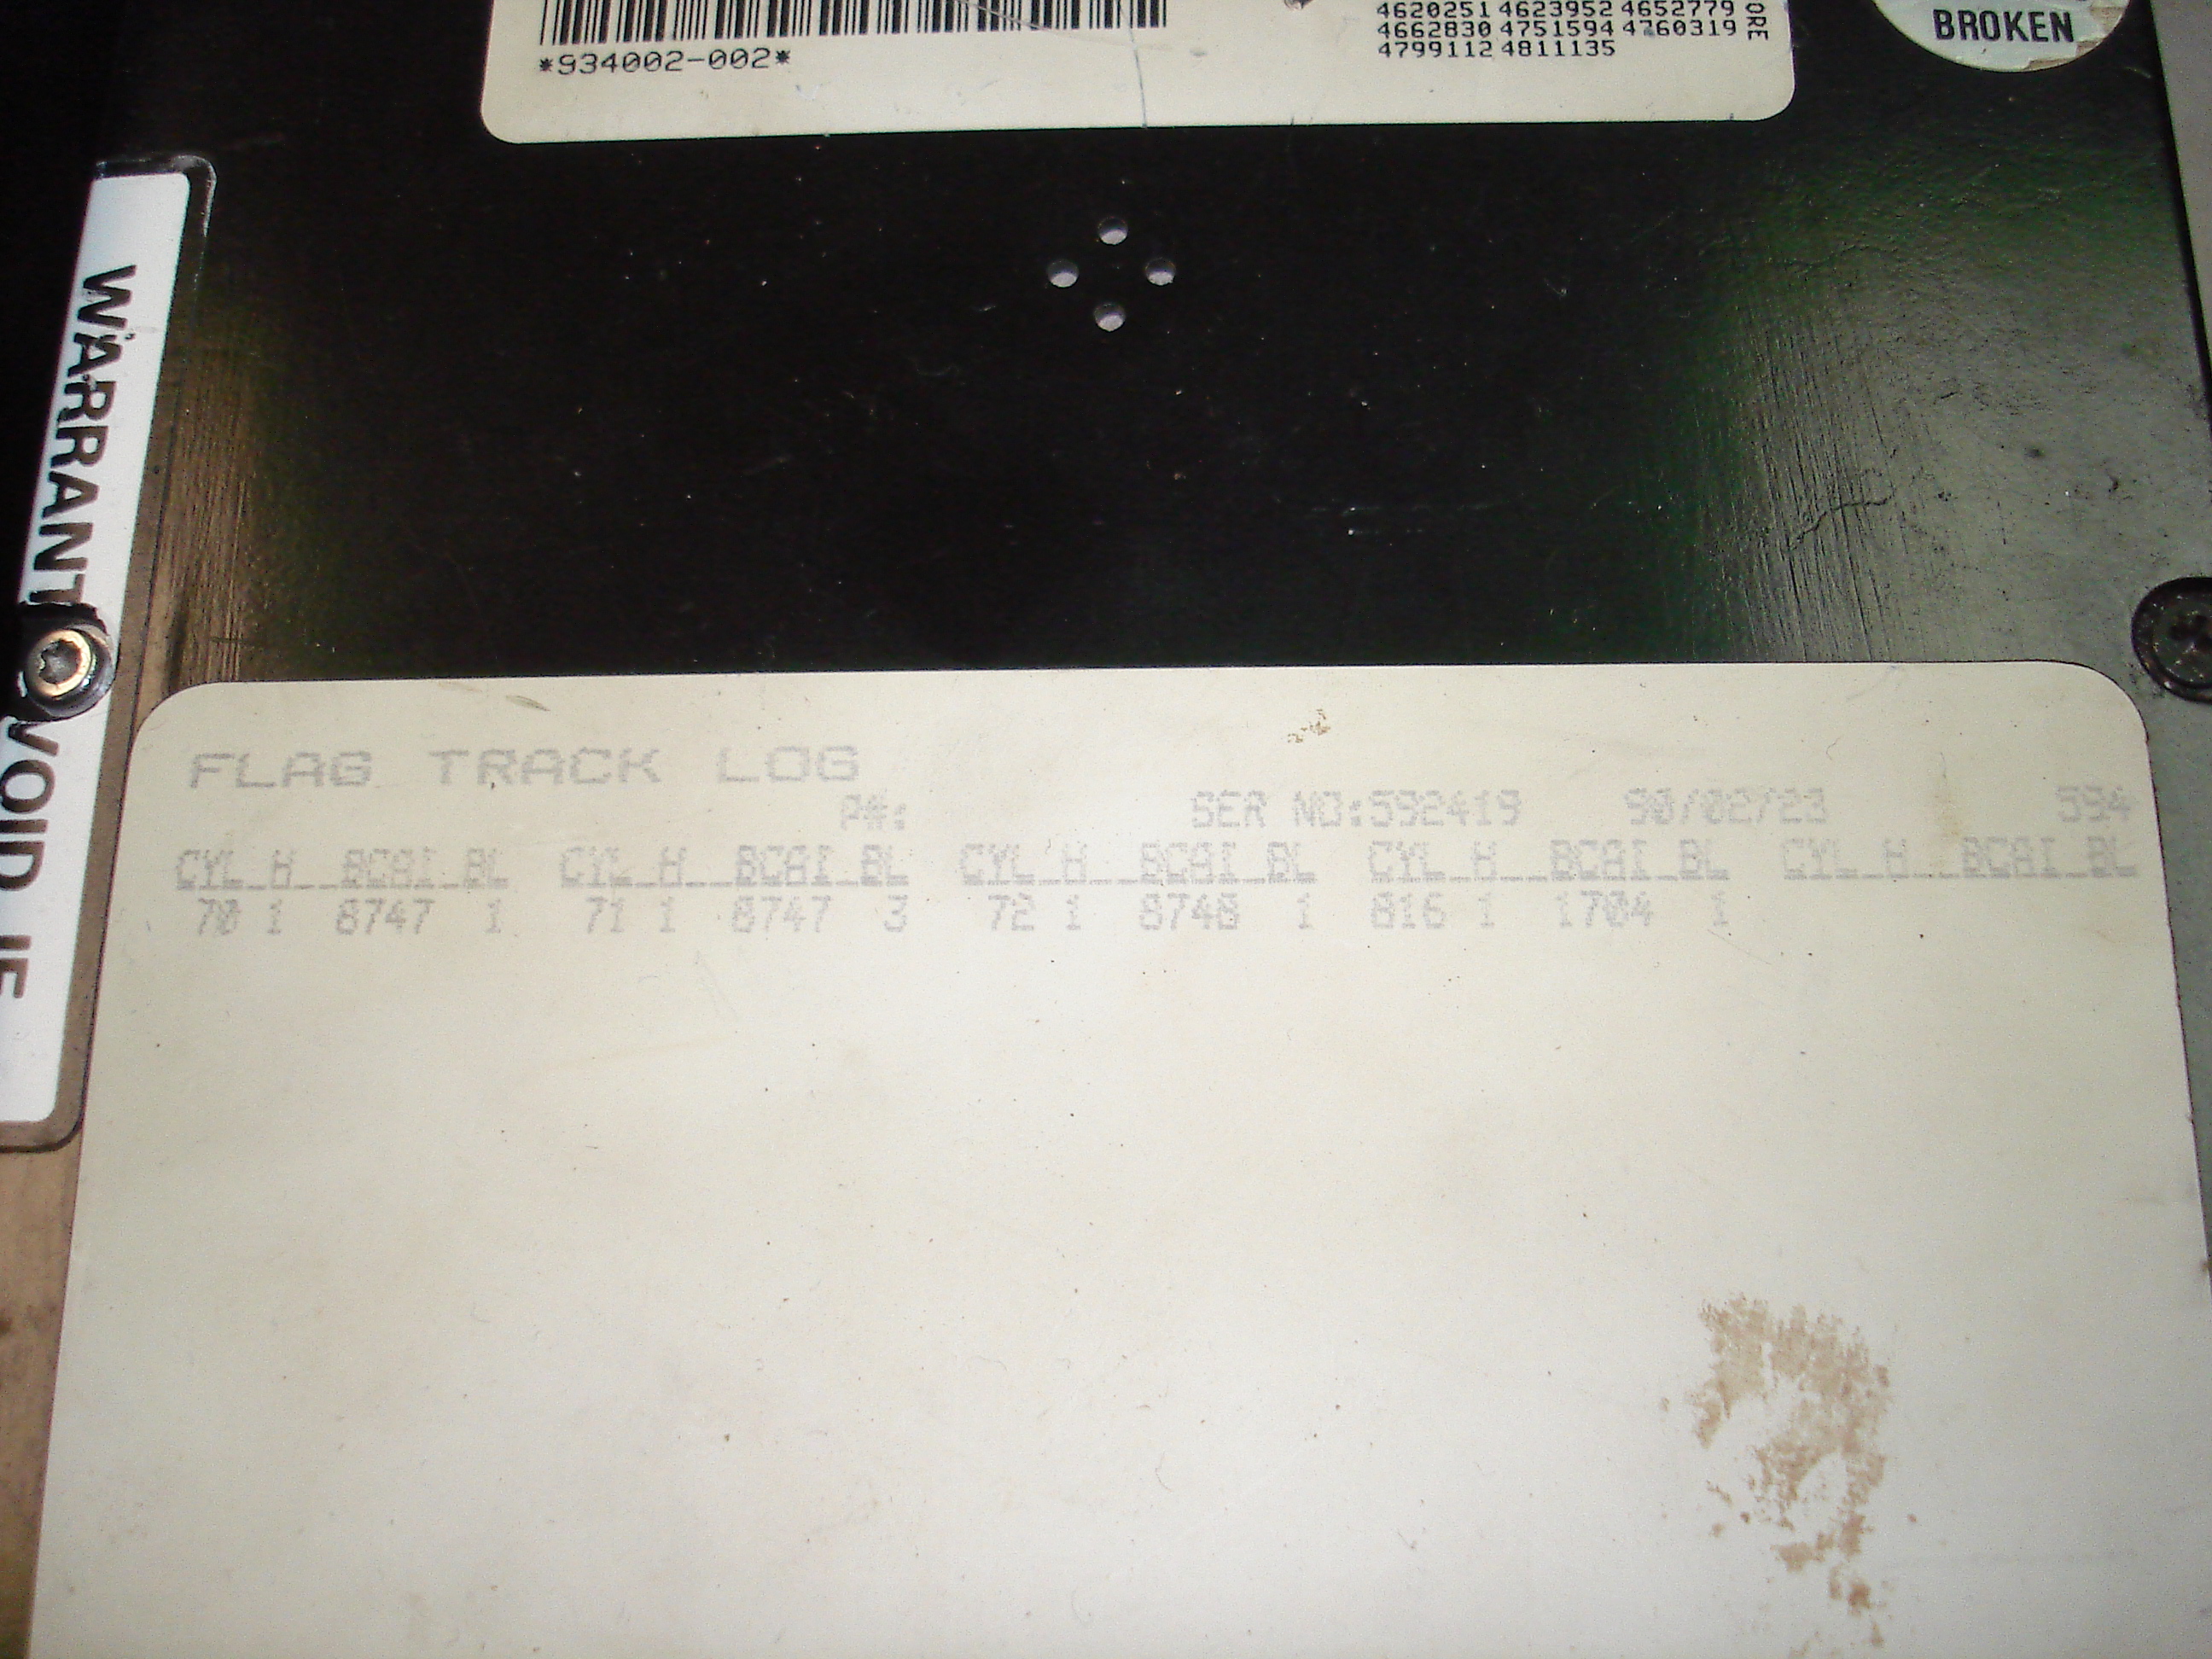
The ST4097 and ACB-4000 were installed in the shoebox, then connected to a SPARC system running SunOS 4.1.4 and formatted, verified, and labeled. The SunOS format program asked for manufacturer defect information in bytes-from-index format, which is essentially what BCAI (Byte Count After Index) means on the Seagate label. Length of defect was a bit confusing, though, since format stated it wanted the length in bits, but the Seagate label used BL which is ambiguous – Block Length? Bit Length? Byte Length? Even the CSC Hard Drive Bible didn’t provide a clear answer!
In the end, I typed the number in the BL column into format. This seemed to be fine, as the numerous passes of compare mode verification I ran on the drive did not turn up any defects that were near the manufacturer’s listed defects. A handful of additional defects were found, noted, and entered into the defect list, since the ACB-4000 (or SunOS’s drivers for it) did not seem to do automatic sector sparing. Oddly, the defect analysis program tripped over the same defects even after they were added to the defect list and the drive was reformatted. Not sure why that happens, but it seems that format really did lock out the defective blocks. The drive was tested with several loads and dumps of effectively random information to try and ensure it was fit for service.
Do note that the front bezel of the ST4097 had to be removed for installation in the shoebox. The drive did physically fit with it, but the rear nut securing the hard disk bracket was almost impossible to tighten.
Finding a Tape Drive
Finding a tape drive turned out to be a little difficult. The shoebox is intended to be used with an Emulex MT-02 (PDF manual link) and a QIC cartridge drive. The MT-02 is a QIC to SCSI controller, and interfaces QIC drives to the SCSI bus much like the ACB-4000 does with MFM drives. I found an Emulex MT-02, thanks to Alan Perry on the sun-rescue mailing list, but had to resort to a popular online auction site for the drive. I chose an Archive 5945 as I’ve got the same drive in my Sun 3/160 and have had good luck with the rubber rollers being OK.
The tape drive I purchased ended up having a goopy roller, but someone had already repaired it with a piece of what appears to be hard silicone rubber tubing. This repair is holding up, so I’ve left it in place, and we’ll see how long it lasts. The drive required the usual cleaning and lubrication: the roller’s bearings sounded terrible at first, but quieted down quickly with new oil.
It was not apparent from the auction listing pictures, but this drive came with an Emulex MT-02 mounted in the bottom! The drive was cabled to the controller, and the controller worked, so I left it in place. The MT-02 can also be mounted under the bracket that the QIC drive itself attaches to, in the shoebox, allowing for QIC drives that don’t have an integral MT-02 mounting area. Here’s the drive installed in the shoebox, alongside the ST4097 hard disk:

The drive is actually in use in the above picture. The shoebox has been plugged into the PICMG utility PC in the shop, and Linux is dumping some random test data to the QIC cartridge using mt and tar. The QIC cartridge has a new band installed, this one is still using a green Plastiband. This seems to work well enough, this is my usual test cartridge and had the green band installed two or three years ago.
SCSI Cable Issues
During the repair and testing process, I fought an embarrassing amount of time with a bad SCSI cable. The bad cable turned out to be the ribbon in the shoebox itself, the one with two DD50 IDCs. When plugged between the CPU board and operating system drive on the SPARC system I’d been testing with, I would get intermittent boot failures, which got worse and progressed to no-boot pretty quickly. I eventually disconnected the shoebox drives (only the ACB-4000 and ST4097 were installed at the time) from the ribbon, leaving the ribbon cable in the chain, and the problem persisted.
Unfortunately, the problem turned out to be one or both of the DD50 IDCs on the ribbon. I tried crimping them onto new ribbon cable, with no improvement. These are still available new, but cost around $25 USD each. I made up the replacement cable myself, using our small arbor press, but it ended up costing around $55 USD total. It can be seen installed in the running shoebox:
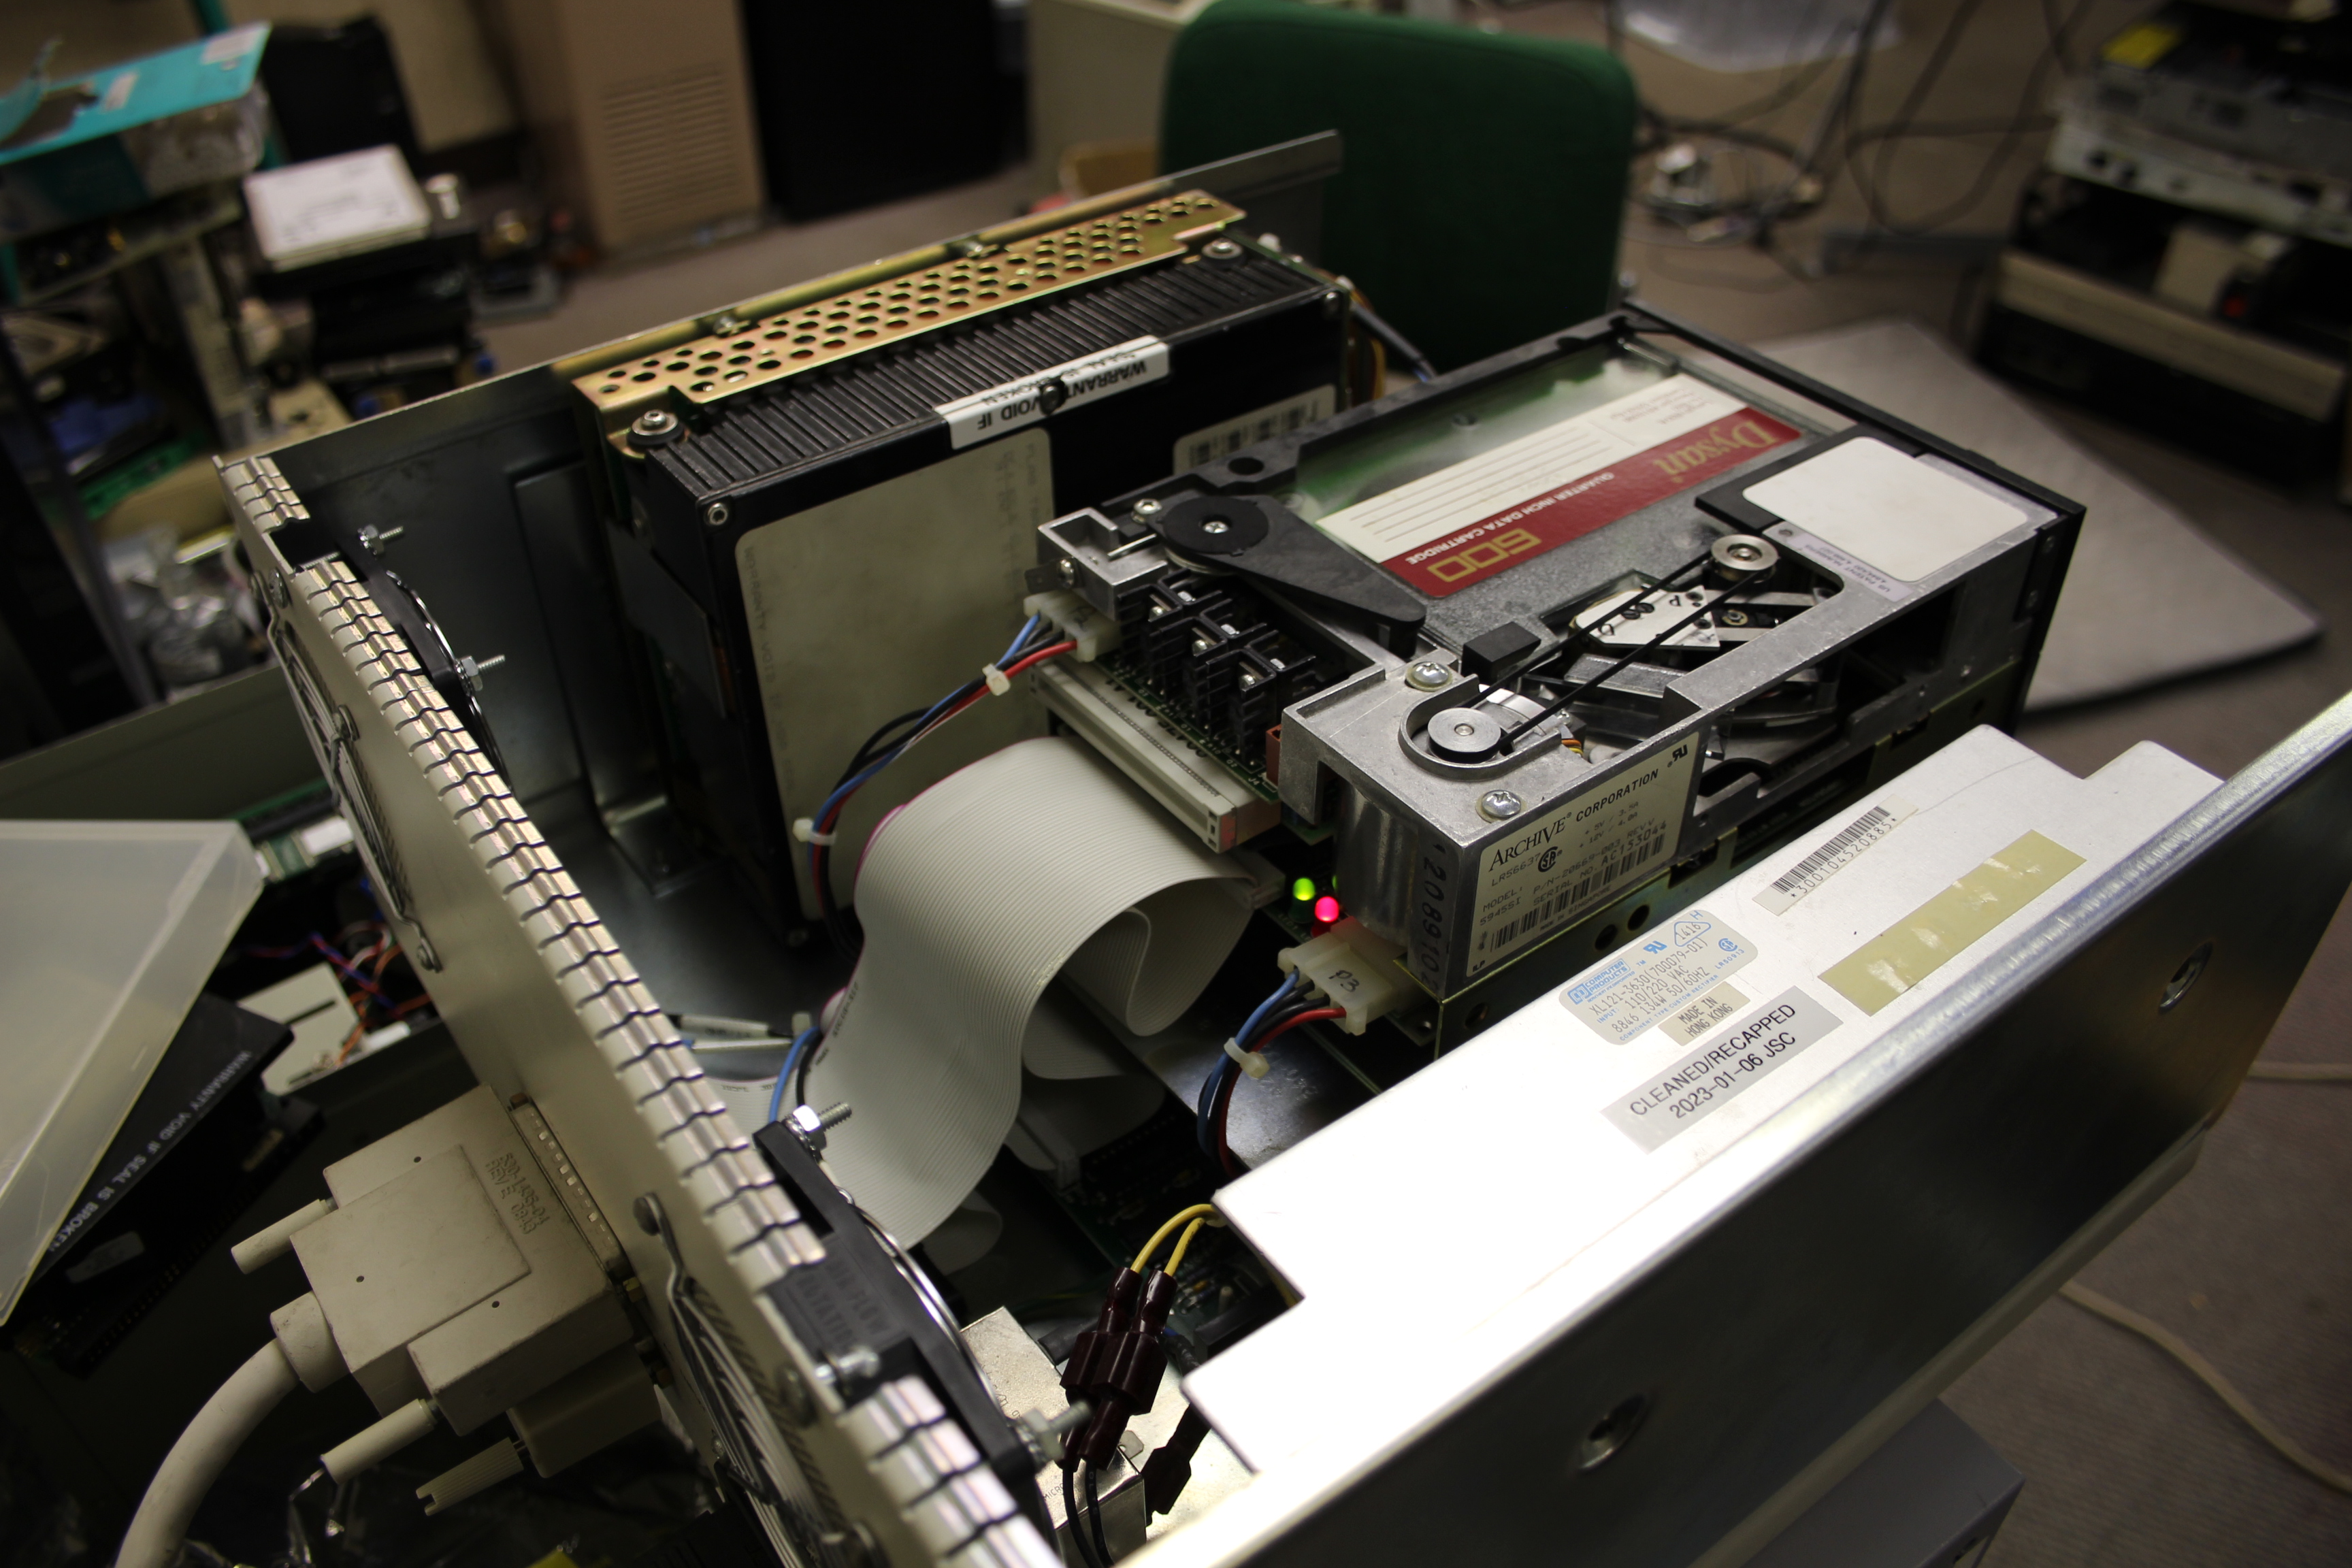
I copied the spacing from the original cable. Do note there’s a DD50 SCSI terminator on the SCSI OUT connector: I removed terminating resistors from the ACB-4000 and MT-02 so that the shoebox can be connected in the middle of other external SCSI chains without opening it up. The MT-02 is particularly difficult to remove termination resistor from, since it installs under the QIC drive.
Conclusion
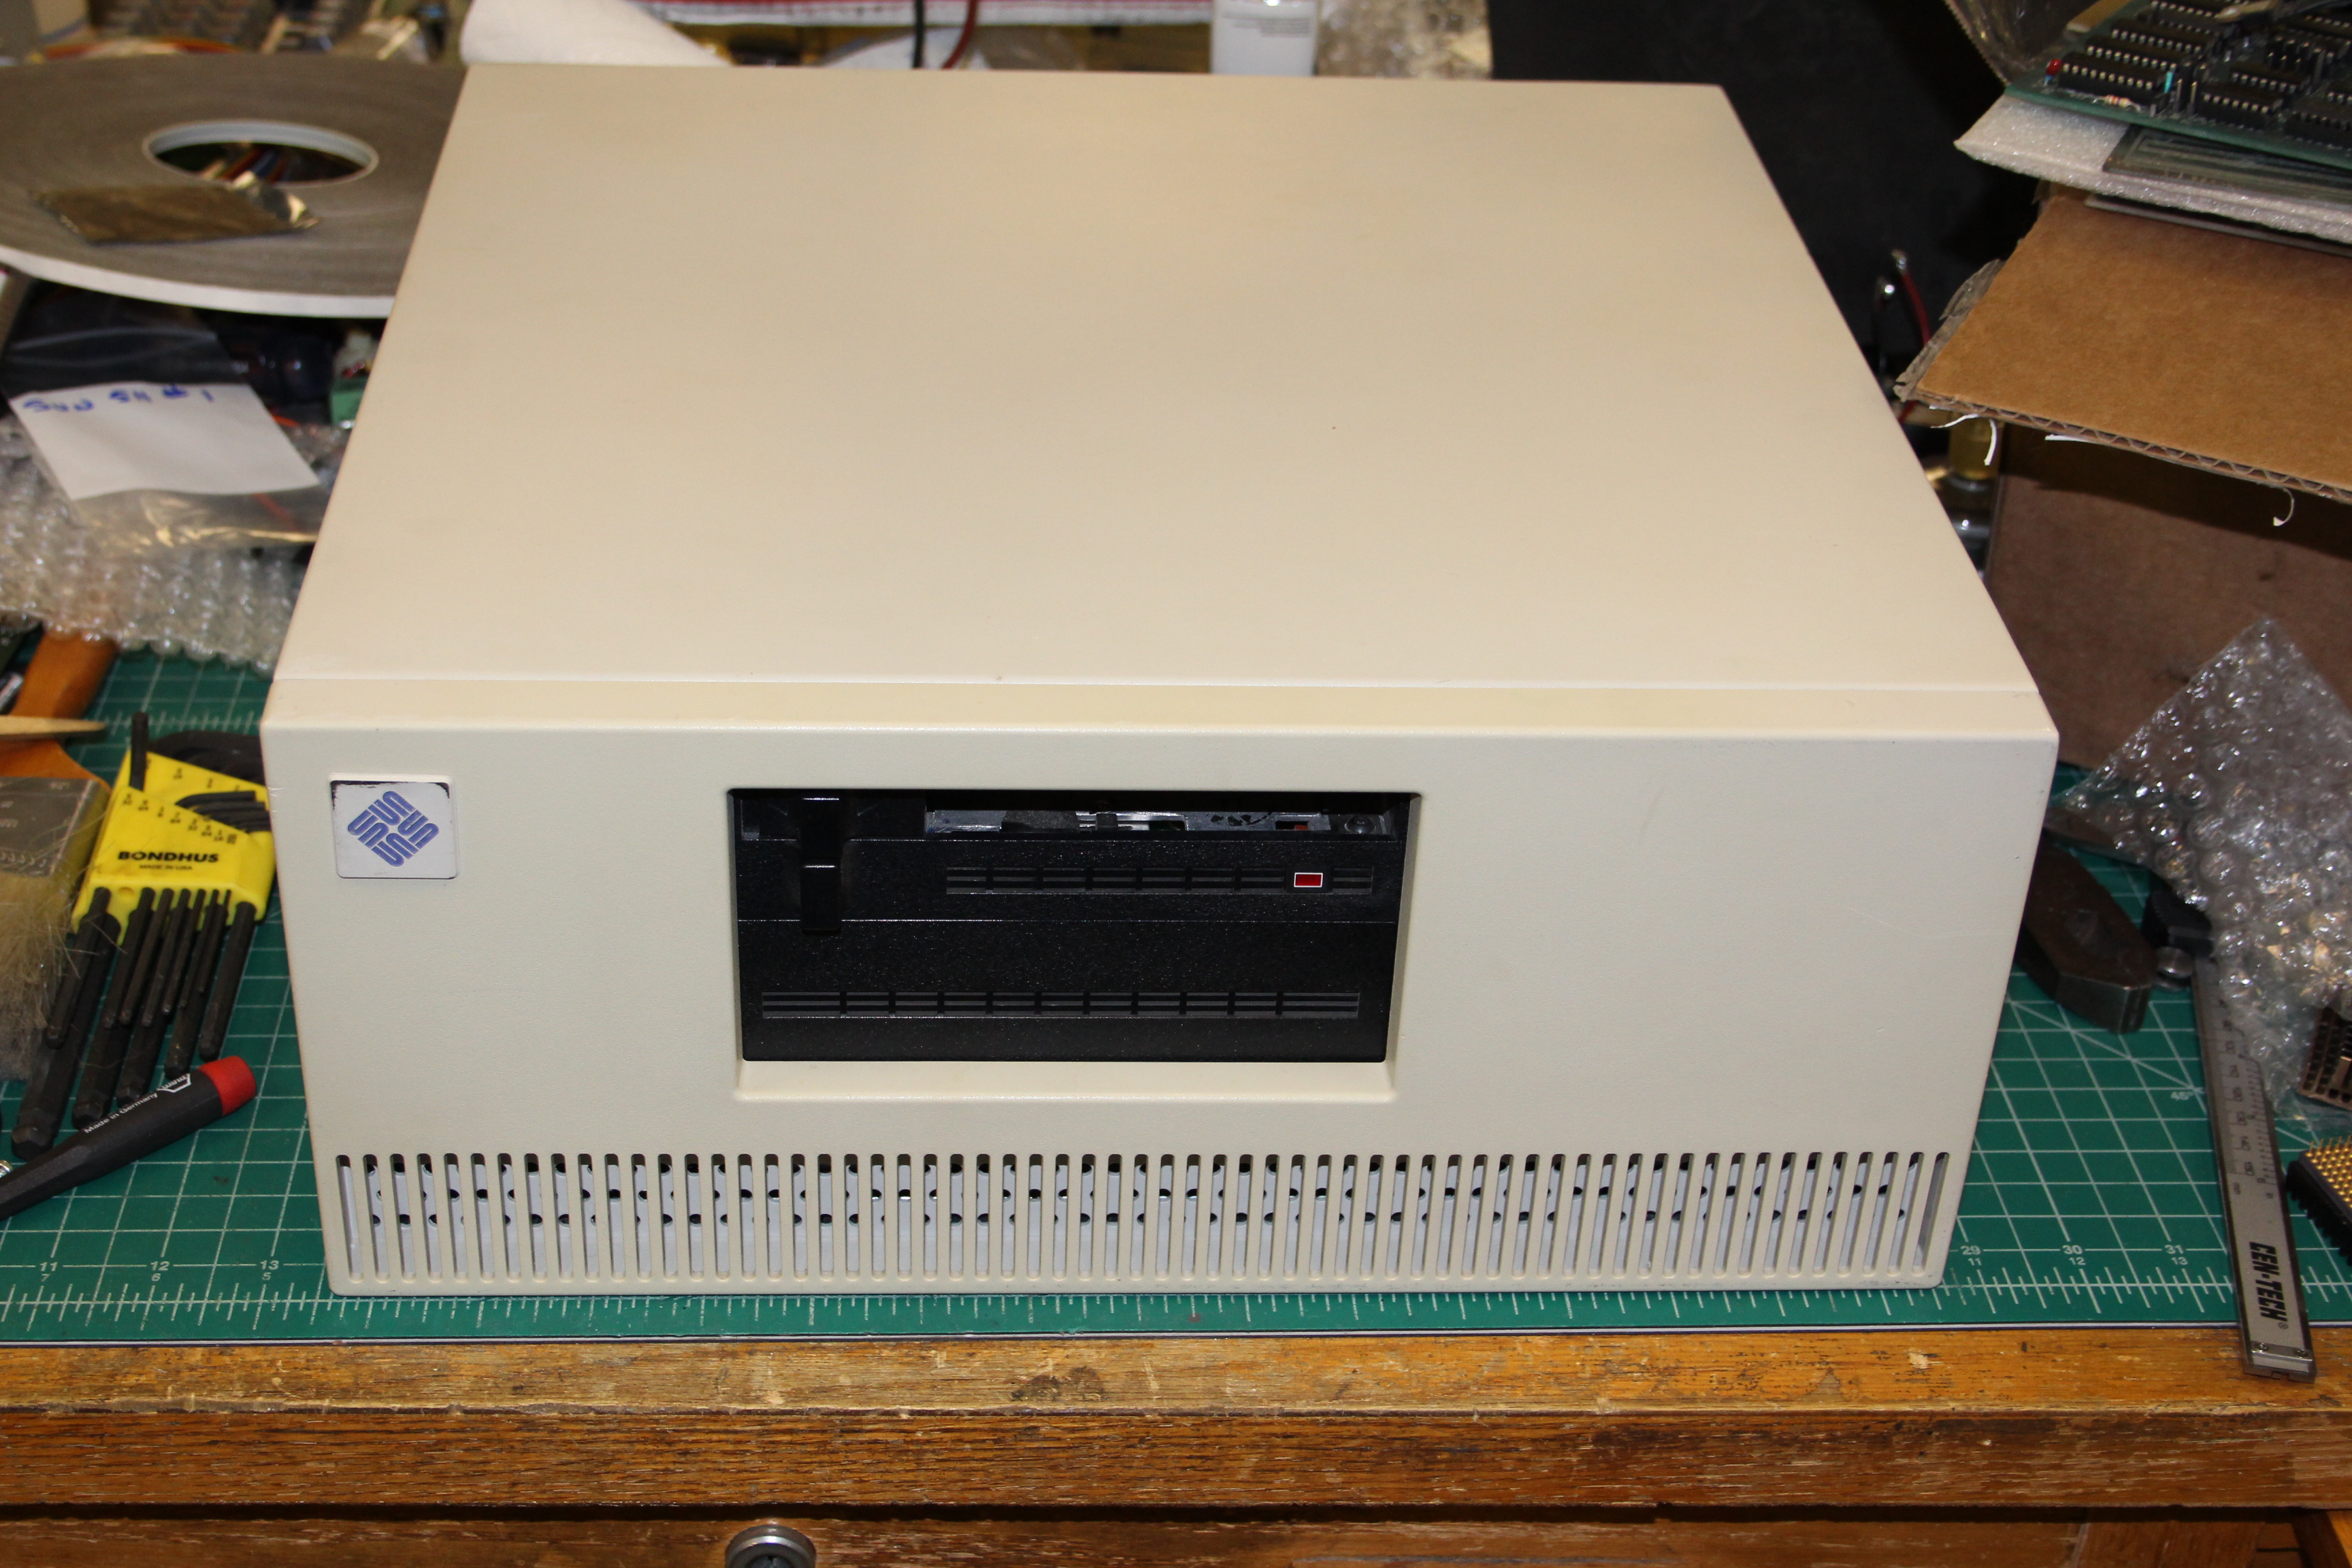
That’s probably the most expensive, labor-intensive way to get a Sun 511 shoebox going, short of recreating one from new-made parts! The final task for this project was to close the box up and stick the Sun logo back with new double-sided tape:
This shoebox will probably live with my Sun 3/50 system. Since the ST4097 is only 80 MB in capacity, I may use it in a “dataless” network setup, which involves putting SunOS’s root and swap on local disk, but using NFS for user data, nonessential programs, etc. The Sun 3/50 was designed with diskless operation in mind, but dataless operation is supposed to be much faster, especially given the Sun 3/50’s hardware limitations.
shoeboxes of data