Topic: Cleaning up an ECL monitor for Sun3 systems
Date: 2022 DEC 31
Since getting my Sun 3/50 system, I’ve been looking for a Sun 19” ECL monitor to go with it. The 3/50’s previous owner had put me in contact with a fellow who did have a 19” monochrome Sun monitor, but it turned out to be a grayscale monitor with an interface closer to VGA – definitely not ECL.
In mid-2022, I was contacted by another vintage Sun hacker concerning a storage locker full of Sun3 equipment in California. I was not able to work out a deal with the seller, but yet another hobbyist in California was able to make a deal some months later. Through the efforts of several other hobbyists, an ECL monitor and two Sun type 3 keyboards were ferried across the continent, and I was able to pick them up in December. Finally, an ECL monitor for my Sun 3/50!

Both the ECL monitor and first type 3 keyboard mostly worked. The keyboard has a few keys that stick, notably the ENTER key. The ECL monitor had a few issues, the most obvious being vertical banding on the left side of the raster:

It’s a little hard to see in the above poorly focused image, but it was much more noticeable in person. Sark said this was almost certainly a failing capacitor in the cathode supply circuit, and was a very common problem. If the boards were going to have to come out for one capacitor, they were going to get a full recap.
Deflection Board
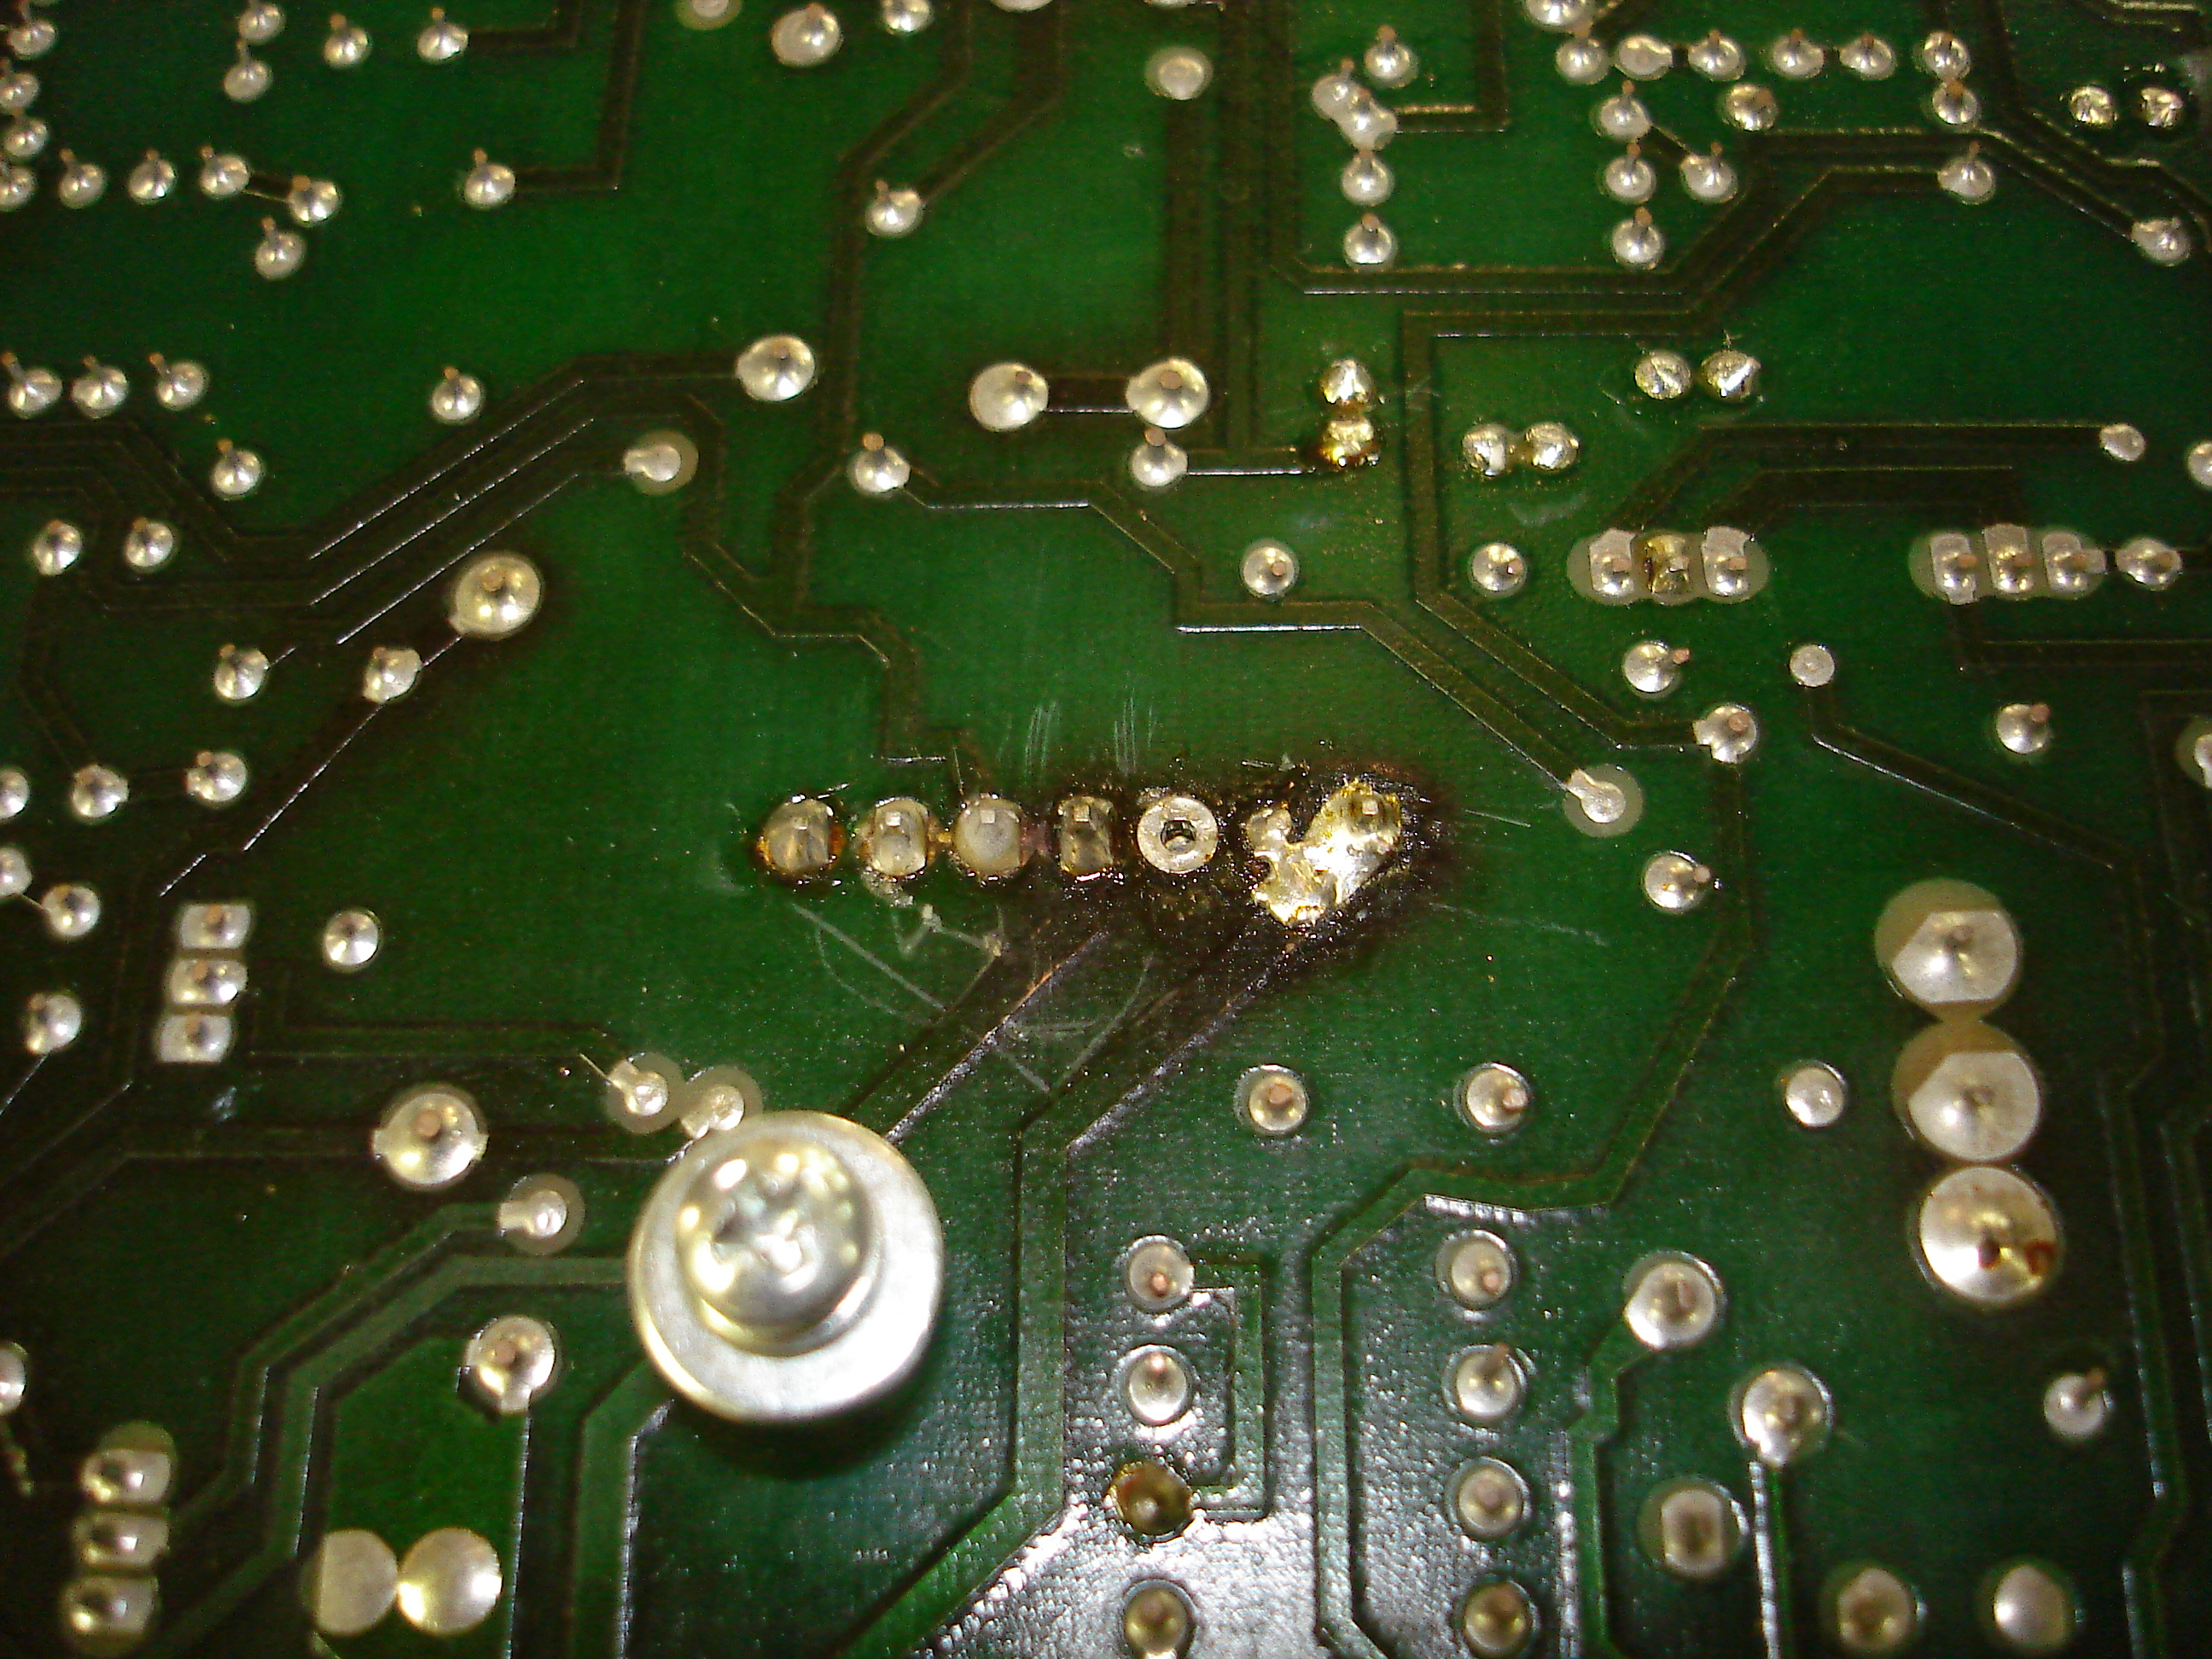
The failing capacitor was present on the deflection board, the most complicated of the boards in the monitor. This board actually drives the CRT. When removing the board, back the screws out only part of the way: the screws mount into keyhole cutouts, and leaving the screws threaded into the deflection board makes it much easier to manage the washers! Someone had this monitor open in the past, there was a replaced connector on the deflection board:
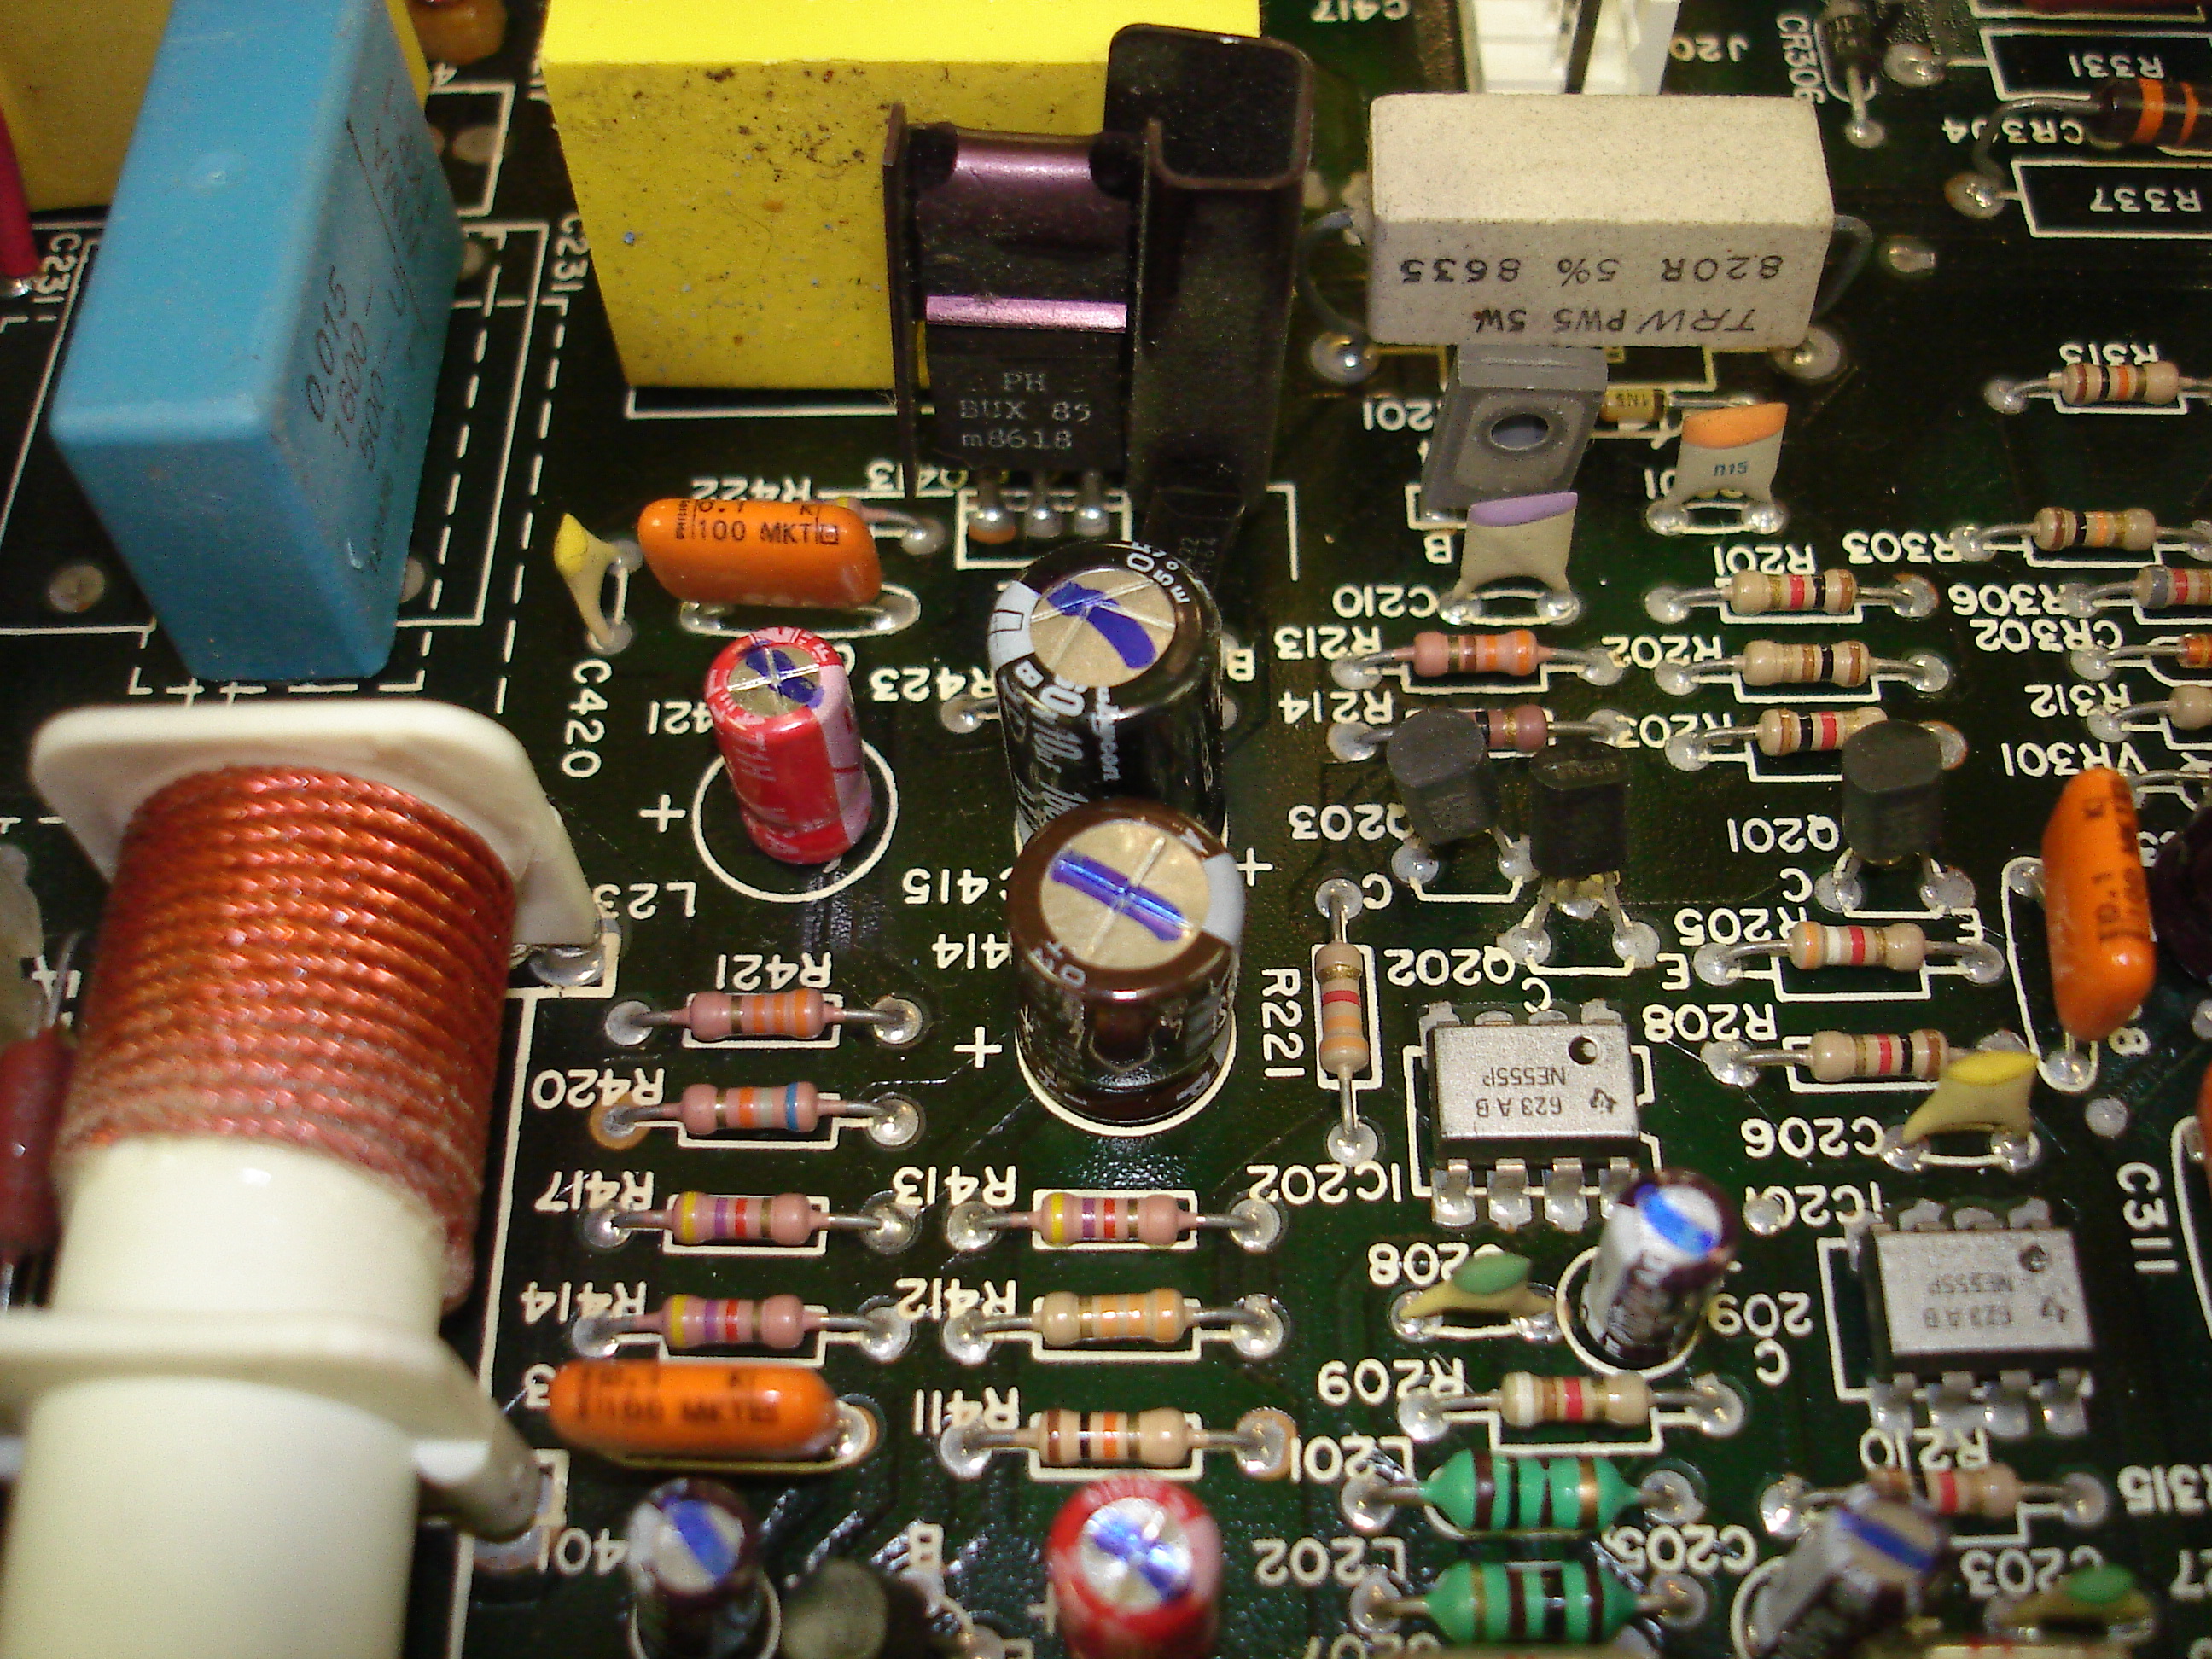
Not the cleanest job ever, but functional. All electrolytics were replaced with new components, I don’t find any value in testing cheap parts that are 30+ years old. Here’s the board with all capacitor replacement done:
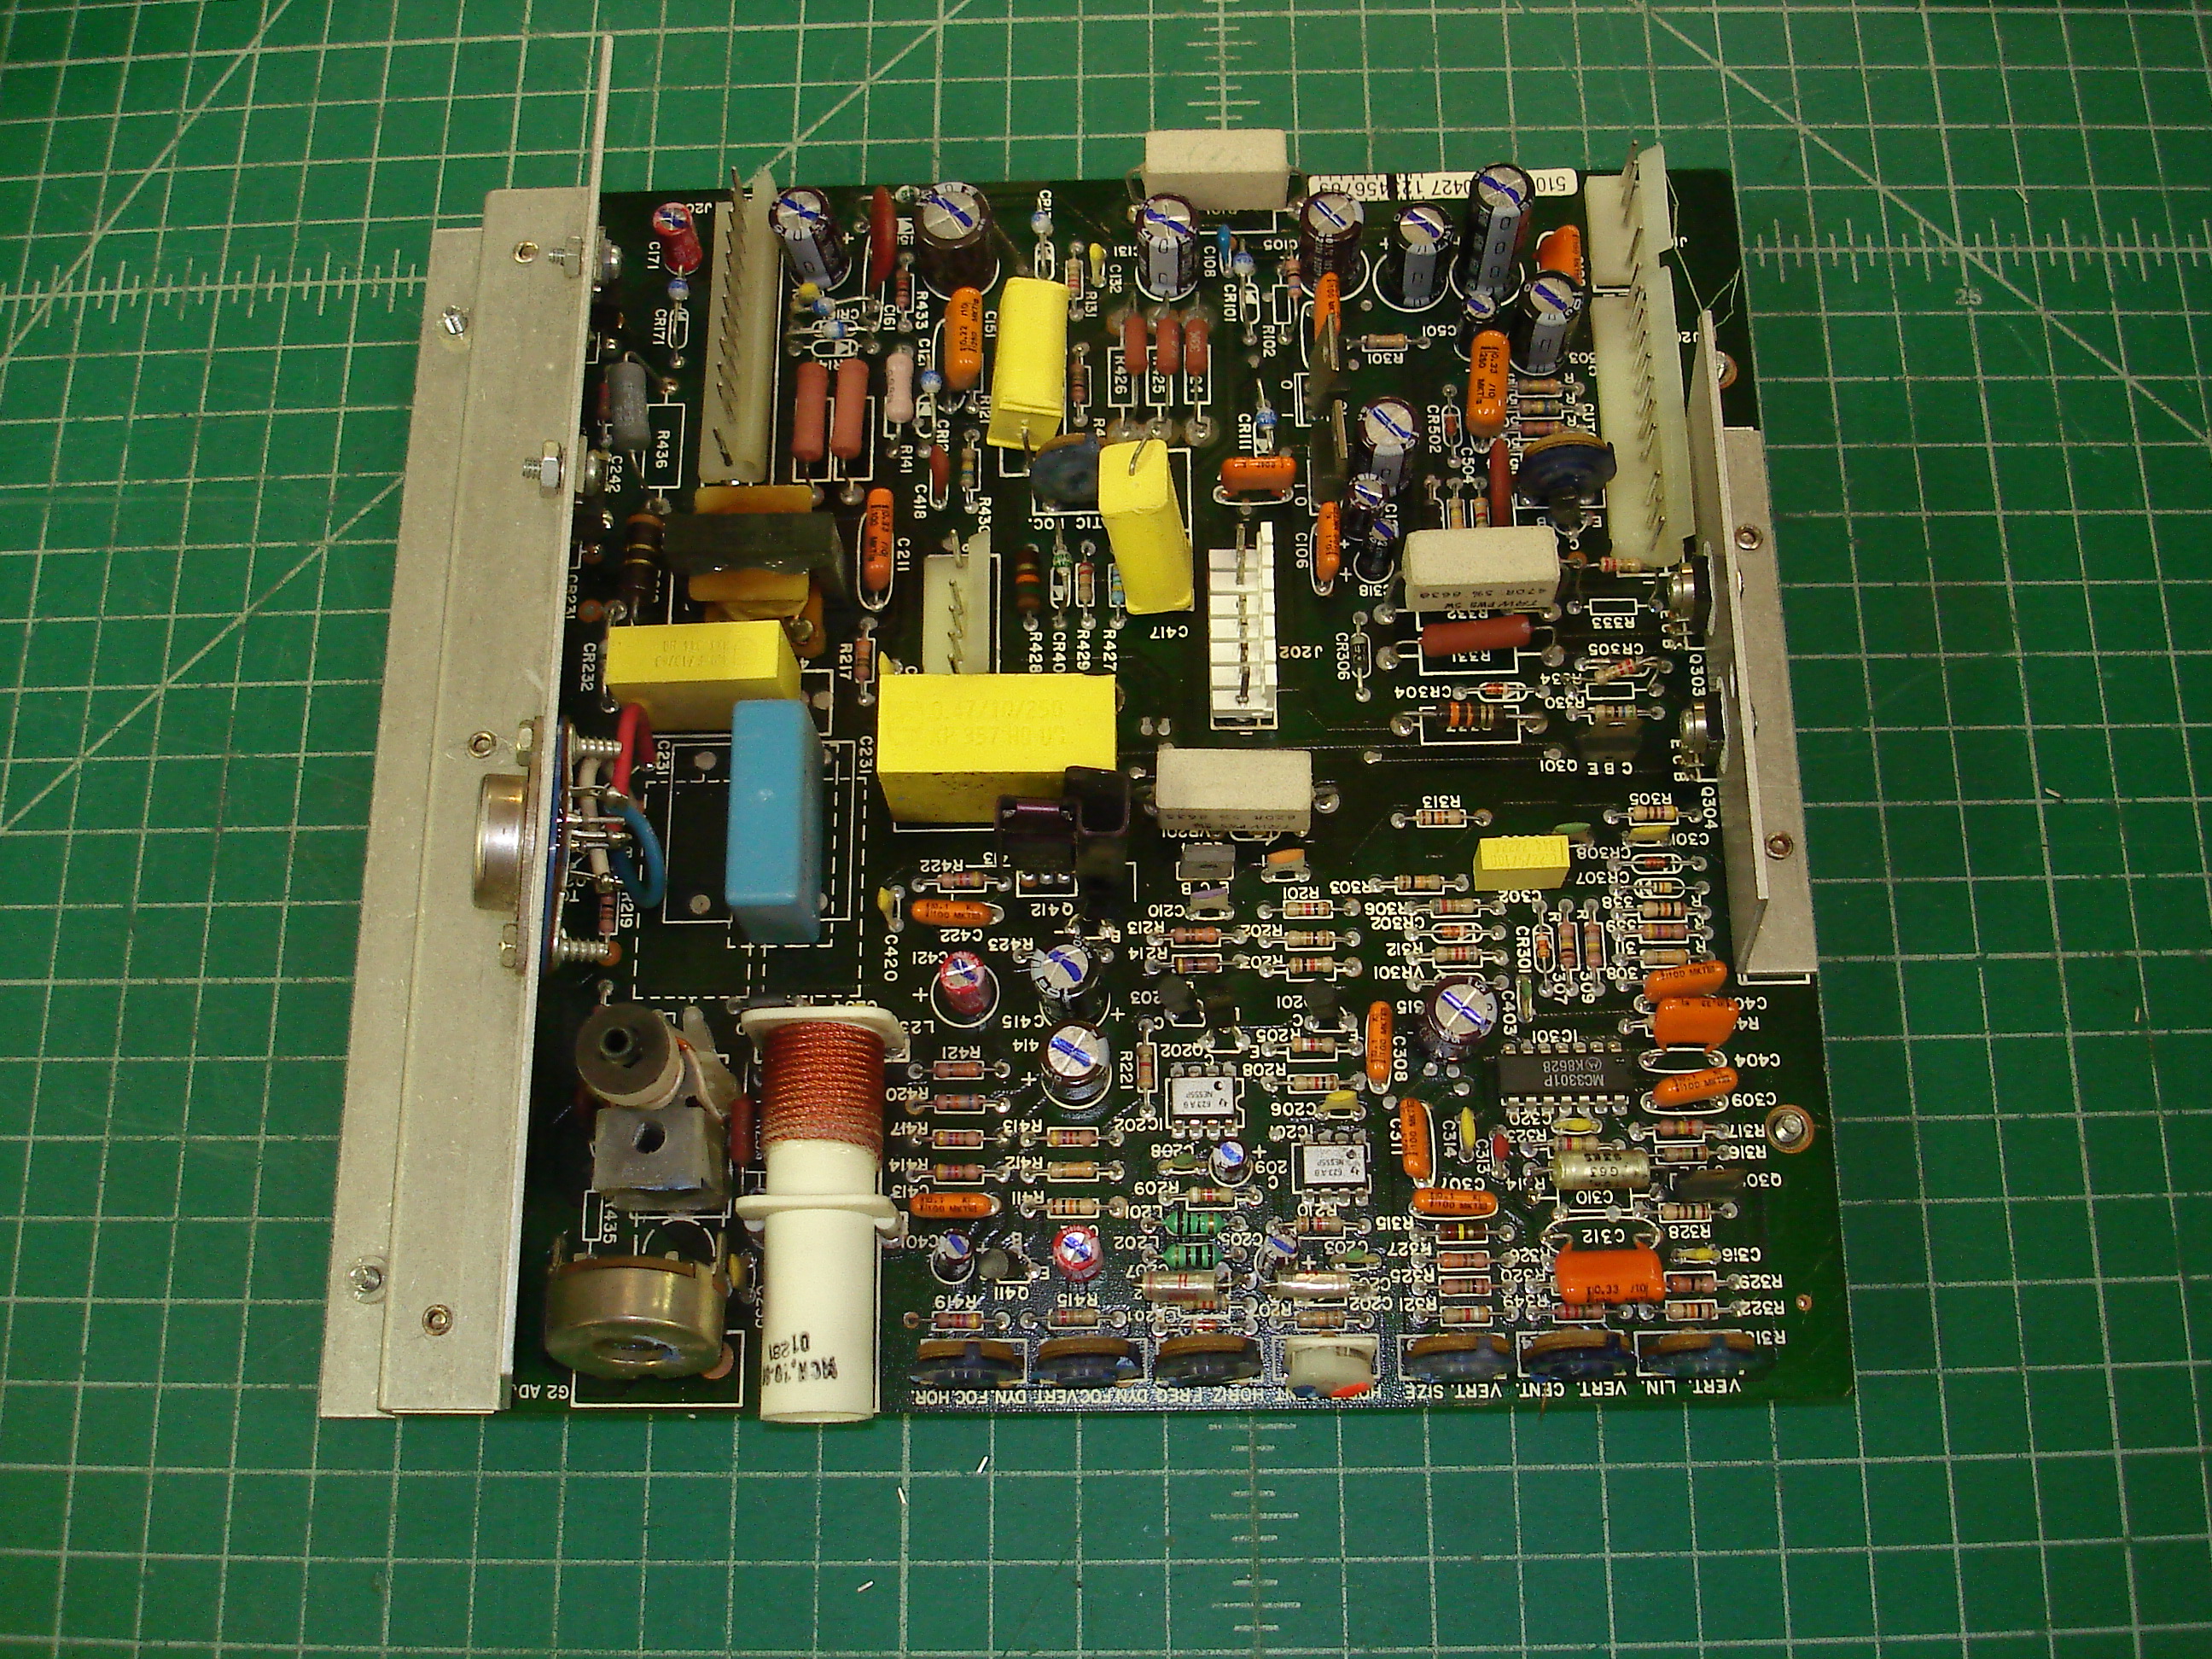
Not a hard job, and all of the capacitors are common parts. We had most of them in stock, but a few higher voltage values had to be ordered. The replaced connector can be seen in the middle of this image as the lighter segmented one.
The following shows where the failed capacitor was:
The black capacitor near the middle of the image (vent stamp looks like a K) is the replacement for the failed capacitor. It is 10 uF 160 V and the original was bulged slightly. There was some evidence of leakage under it. Several other capacitors on this board showed signs of slight leakage, so it’s a good thing the whole monitor was recapped!
Power Supply
Next up, the B+ power supply was recapped. This is the main power supply for the system, mounted on the left side of the chassis, looking from the CRT face end. The PSU also mounts in keyholes, like the deflection board. All of the electrolytics were replaced, except for the two line-side capacitors, as I’ve had almost no failures from these capacitors in the many supplies we’ve repaired. The power board, after recap:
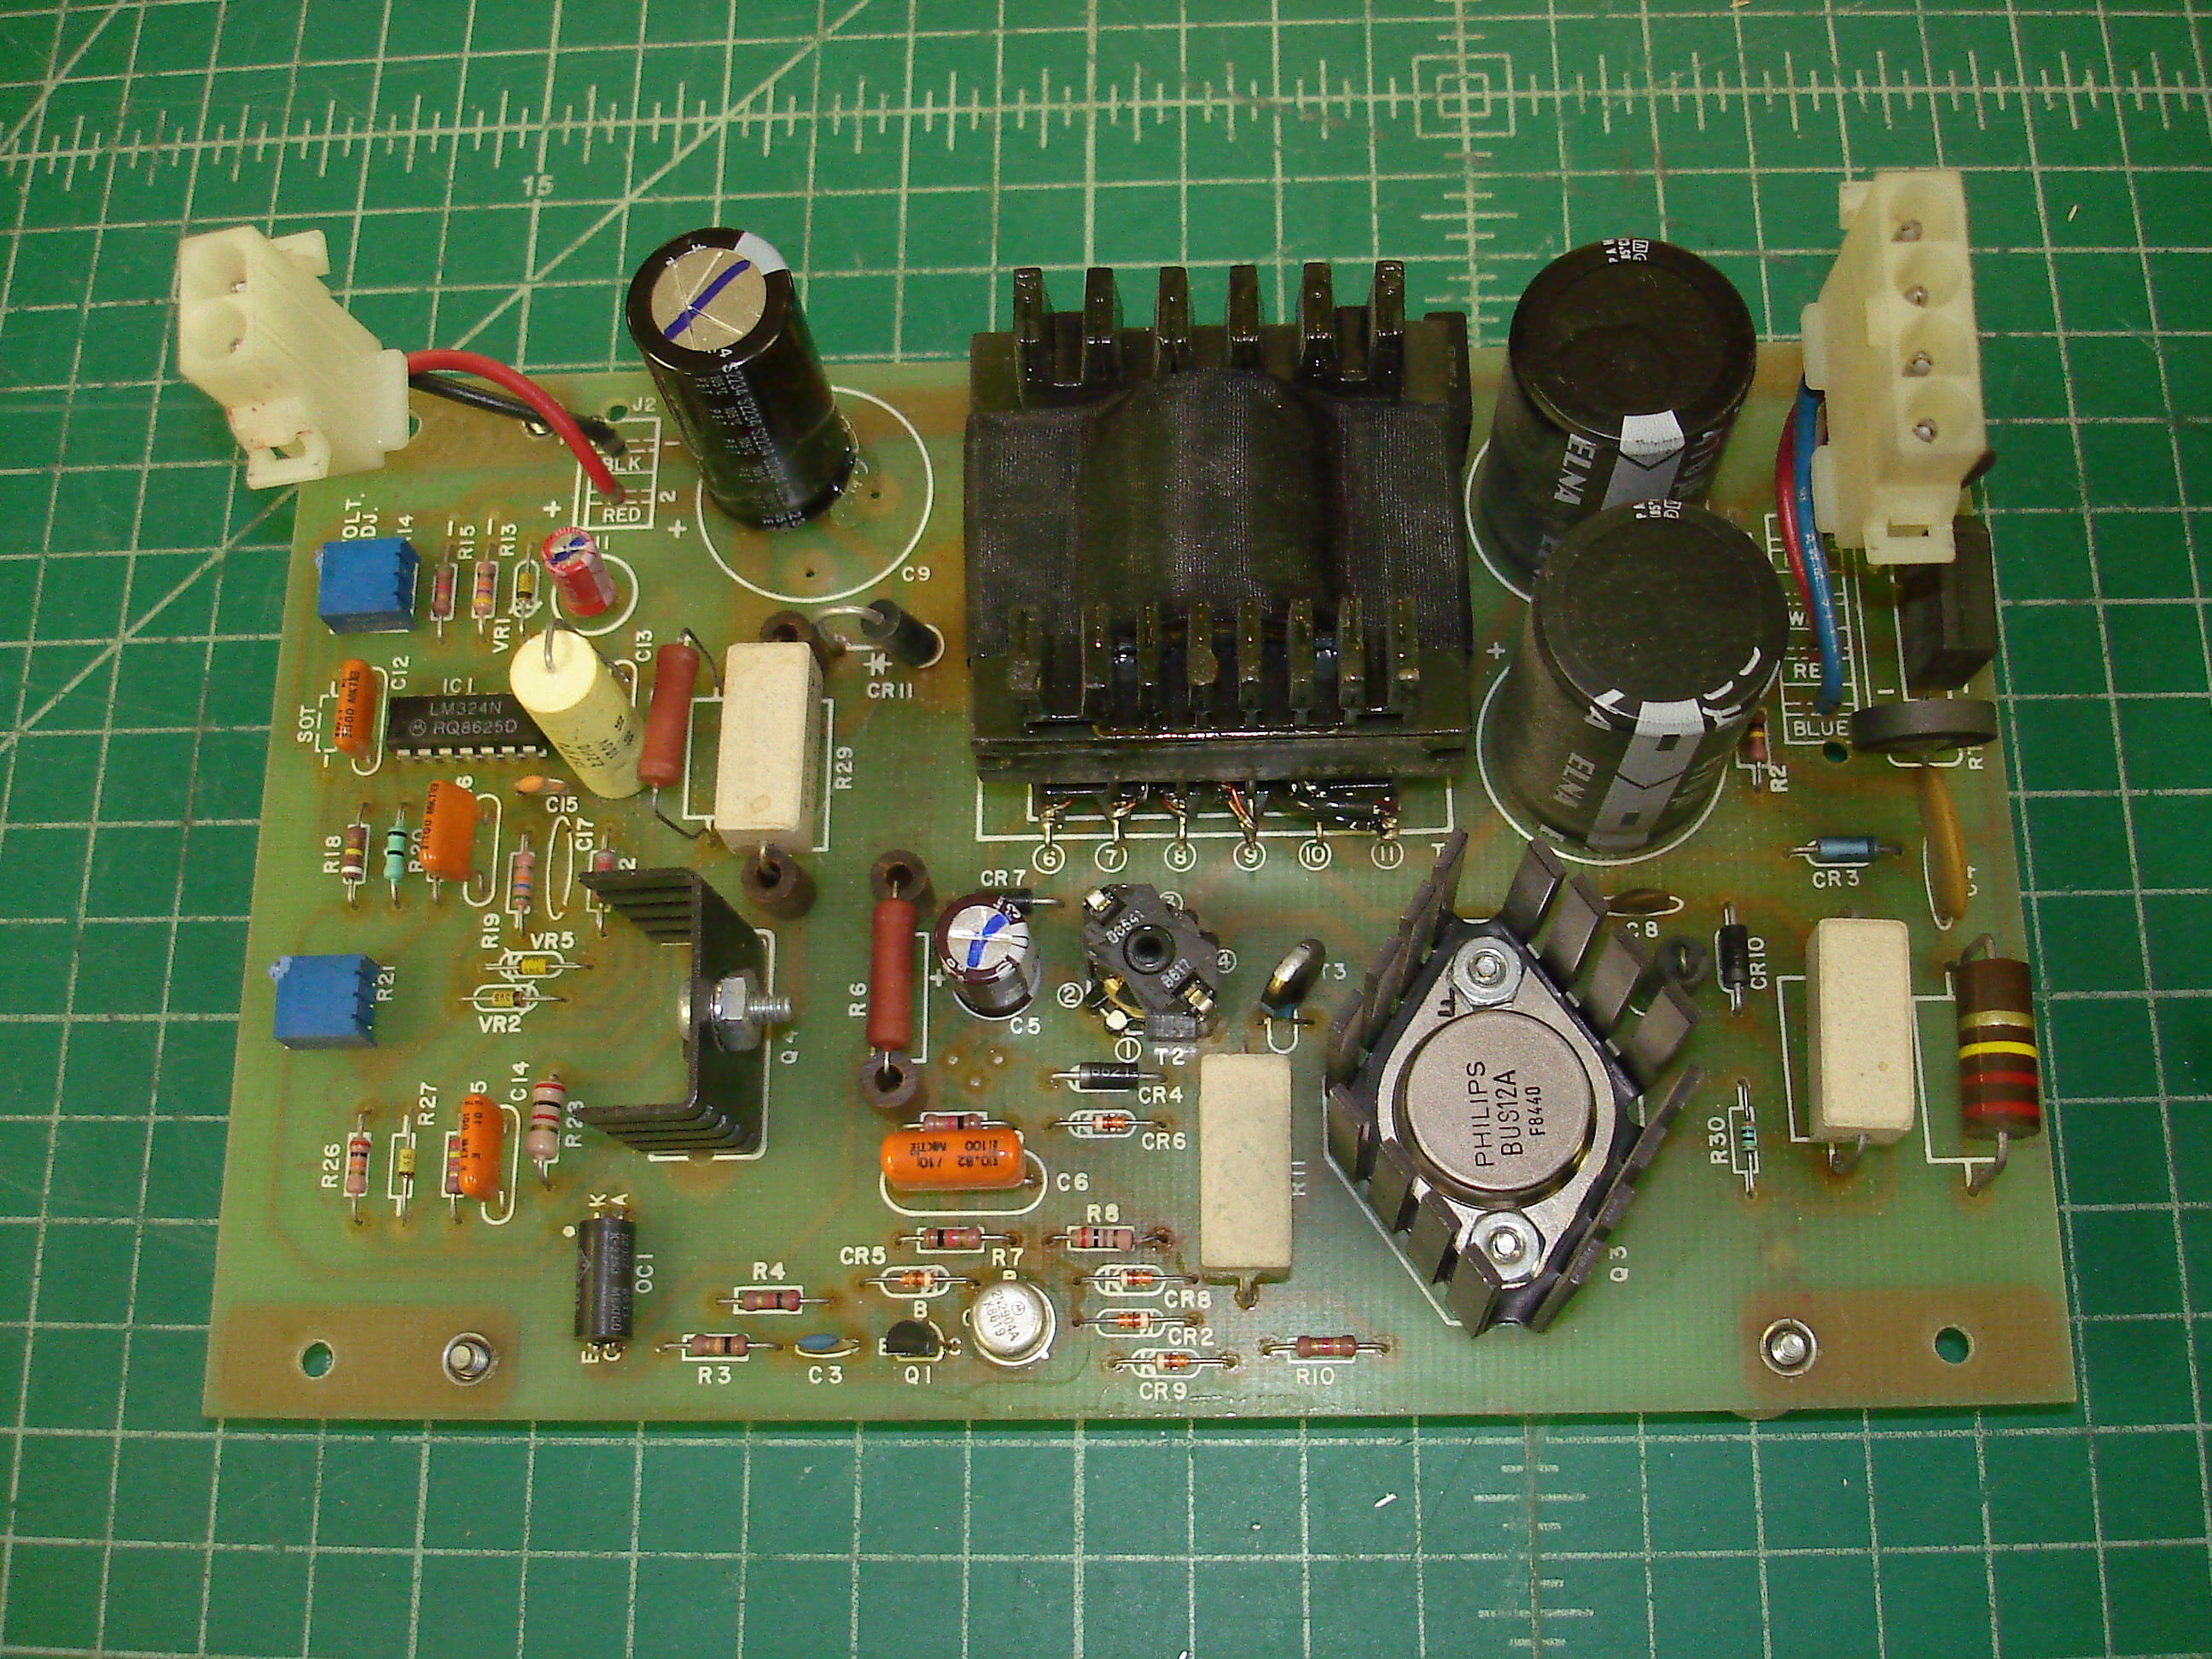
The bulk capacitor on the secondary side is a “closest fit” part – the original was a four-leg 2200 uF 63 V part, but it was replaced with a more standard two-pin capacitor. The pin spacing was not perfect, but good enough, and the new capacitor fits with plenty of clearance. A bit of Polygun adhesive was applied since the new capacitor did have some wobble to it.
I also found an electrolytic capacitor that I’m pretty sure was meant to be film:

The yellow axial capacitor near the middle of the above image replaced a 2.2 uF 100V aluminum electrolytic. The electrolytic looked like a replacement, as there was still flux on the board under it (all other flux had been removed). There was no polarity mark on the board, and the silkscreen designator was the same shape seen under the orange radial capacitors on the board. I replaced it with the 2.2 uF yellow film capacitor shown as I have a very large quantity of them on hand.
Note that there was also a 4.7 nF RIFA capacitor hiding near the transformer and primary side filter capacitors!
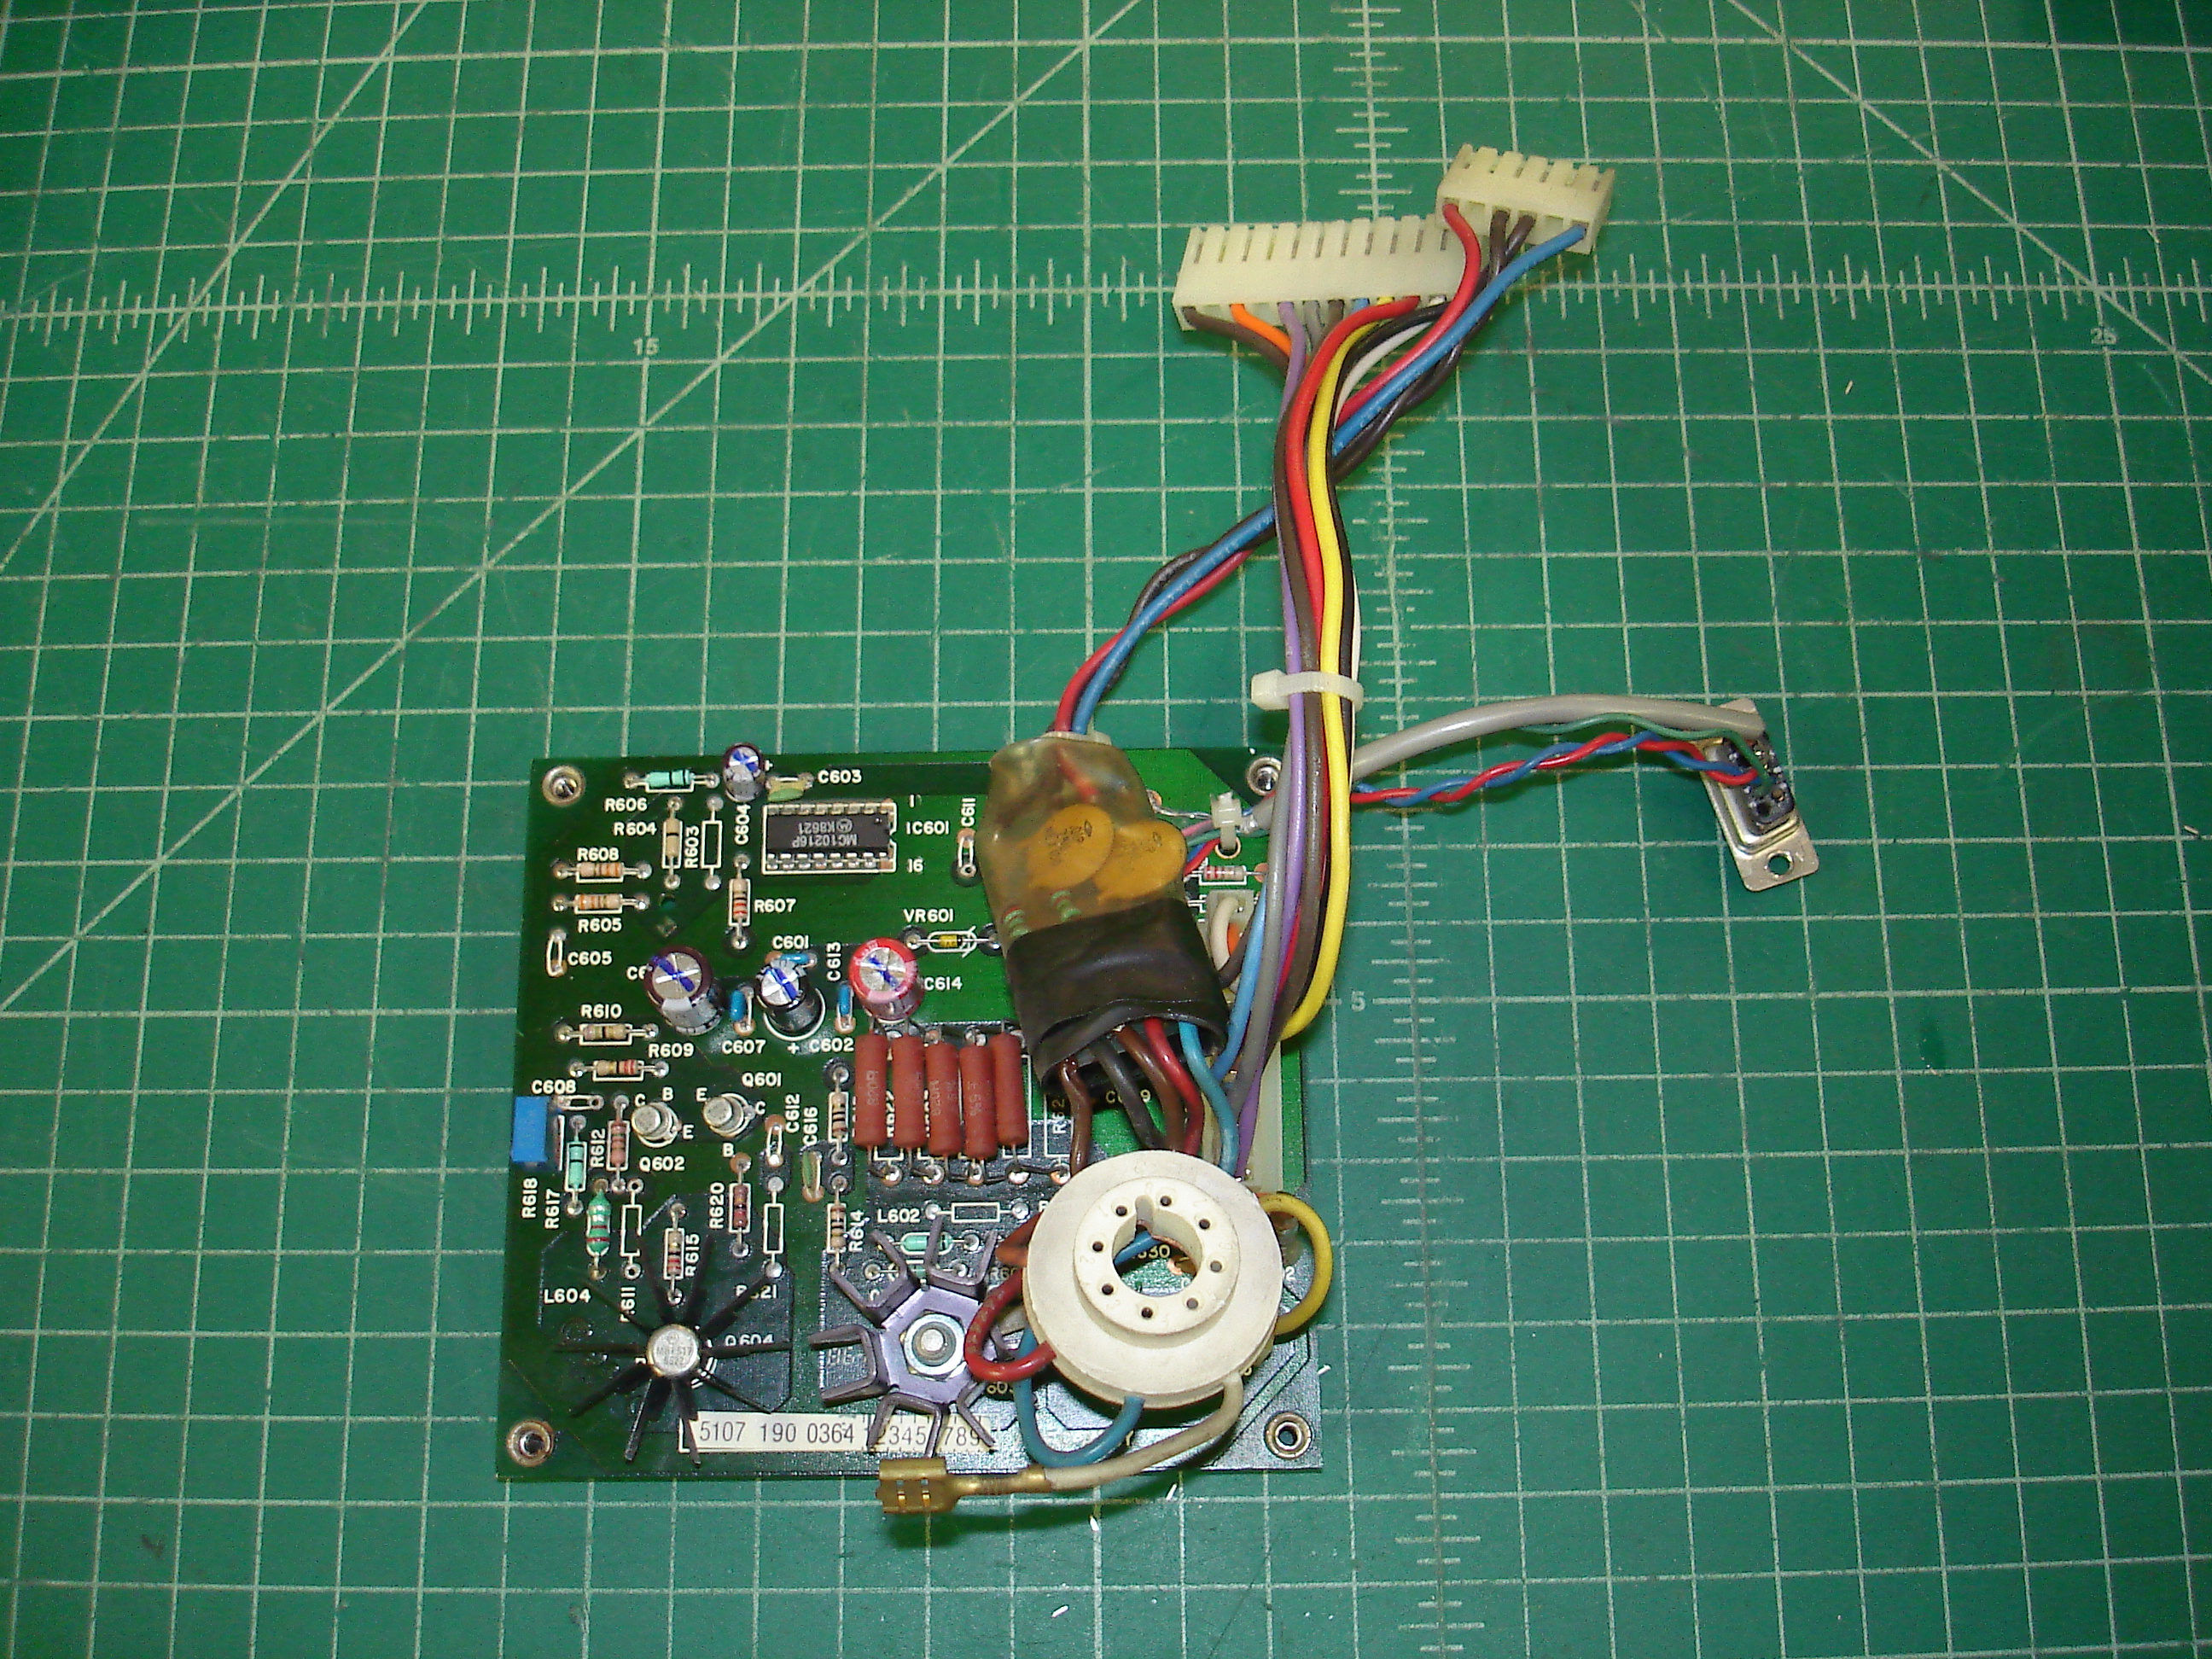
Video Board
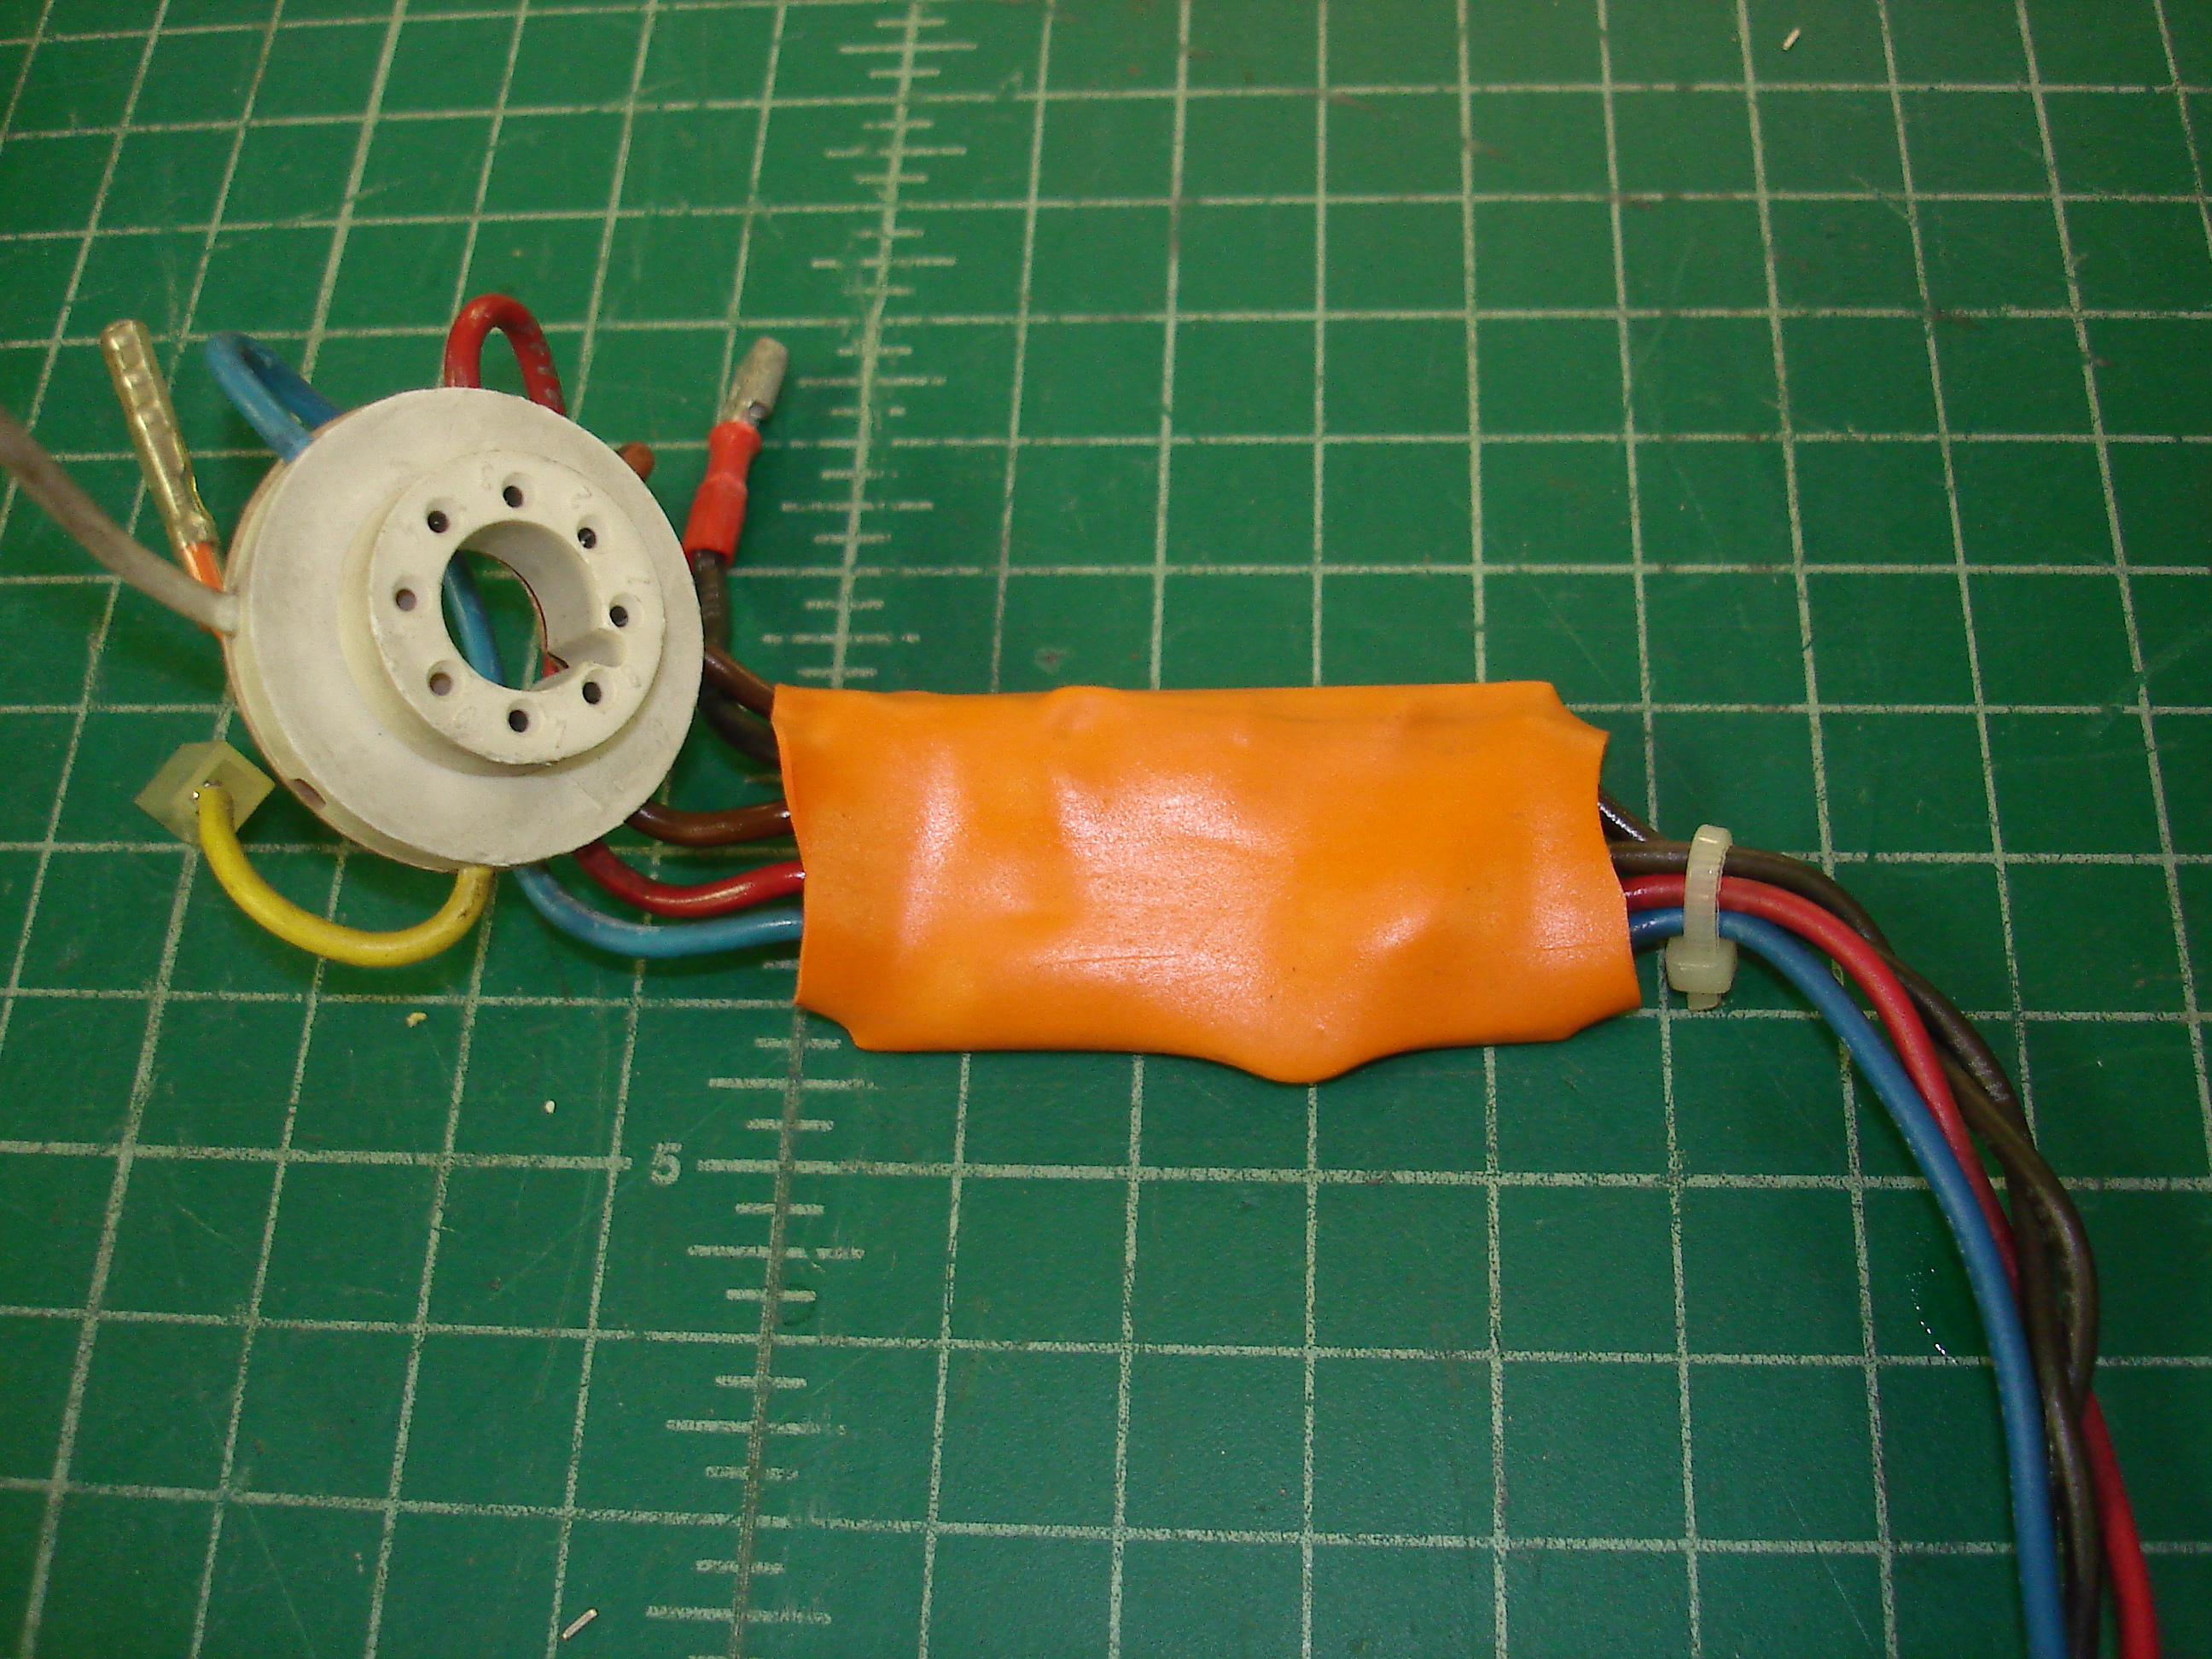
The video board provides the translation from ECL levels to what the deflection board wants to see, and also got a recap. It mounts with regular holes, not keyholes, so you’ll have to fully remove the mounting screws. I unplugged the neck connector rather than unplugging the harness from the video board. This board also showed signs of previous repair:
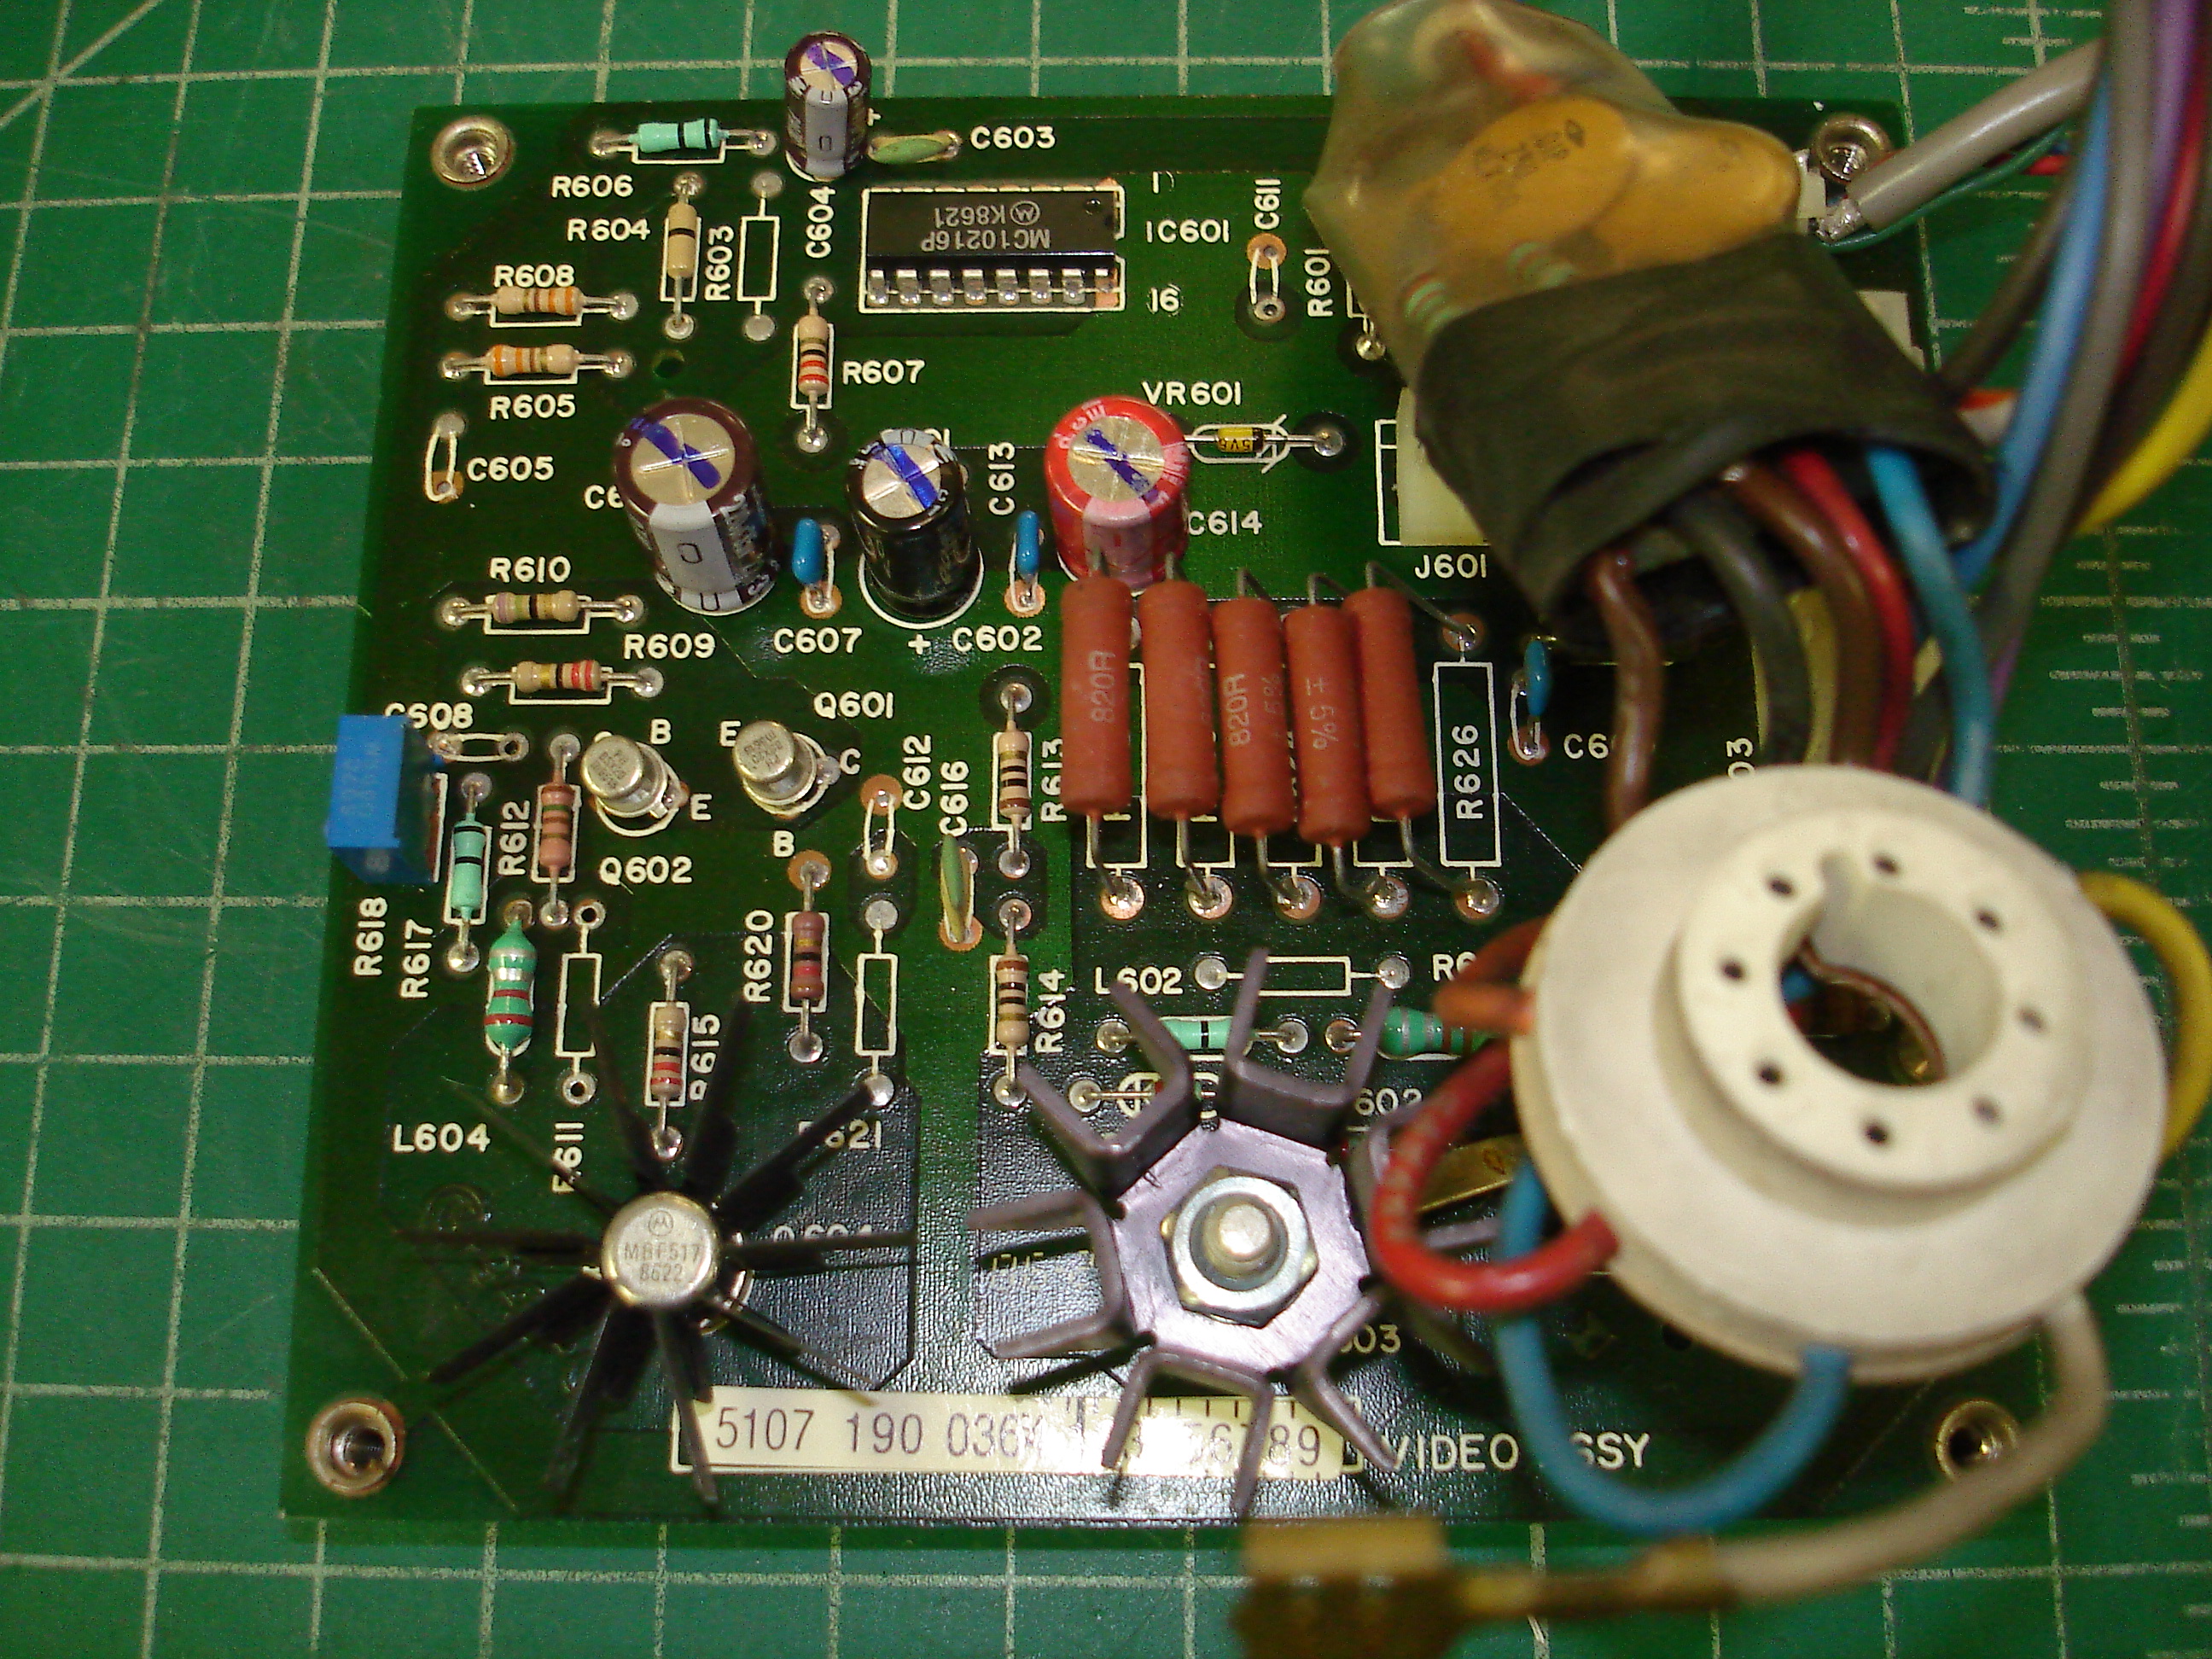
The board in the harness to the CRT neck socket is taped up with some (now gooey) black tape. The video board was another easy recap, with only four capacitors on it, but a broken wire was found in the taped-up board on the neck harness:
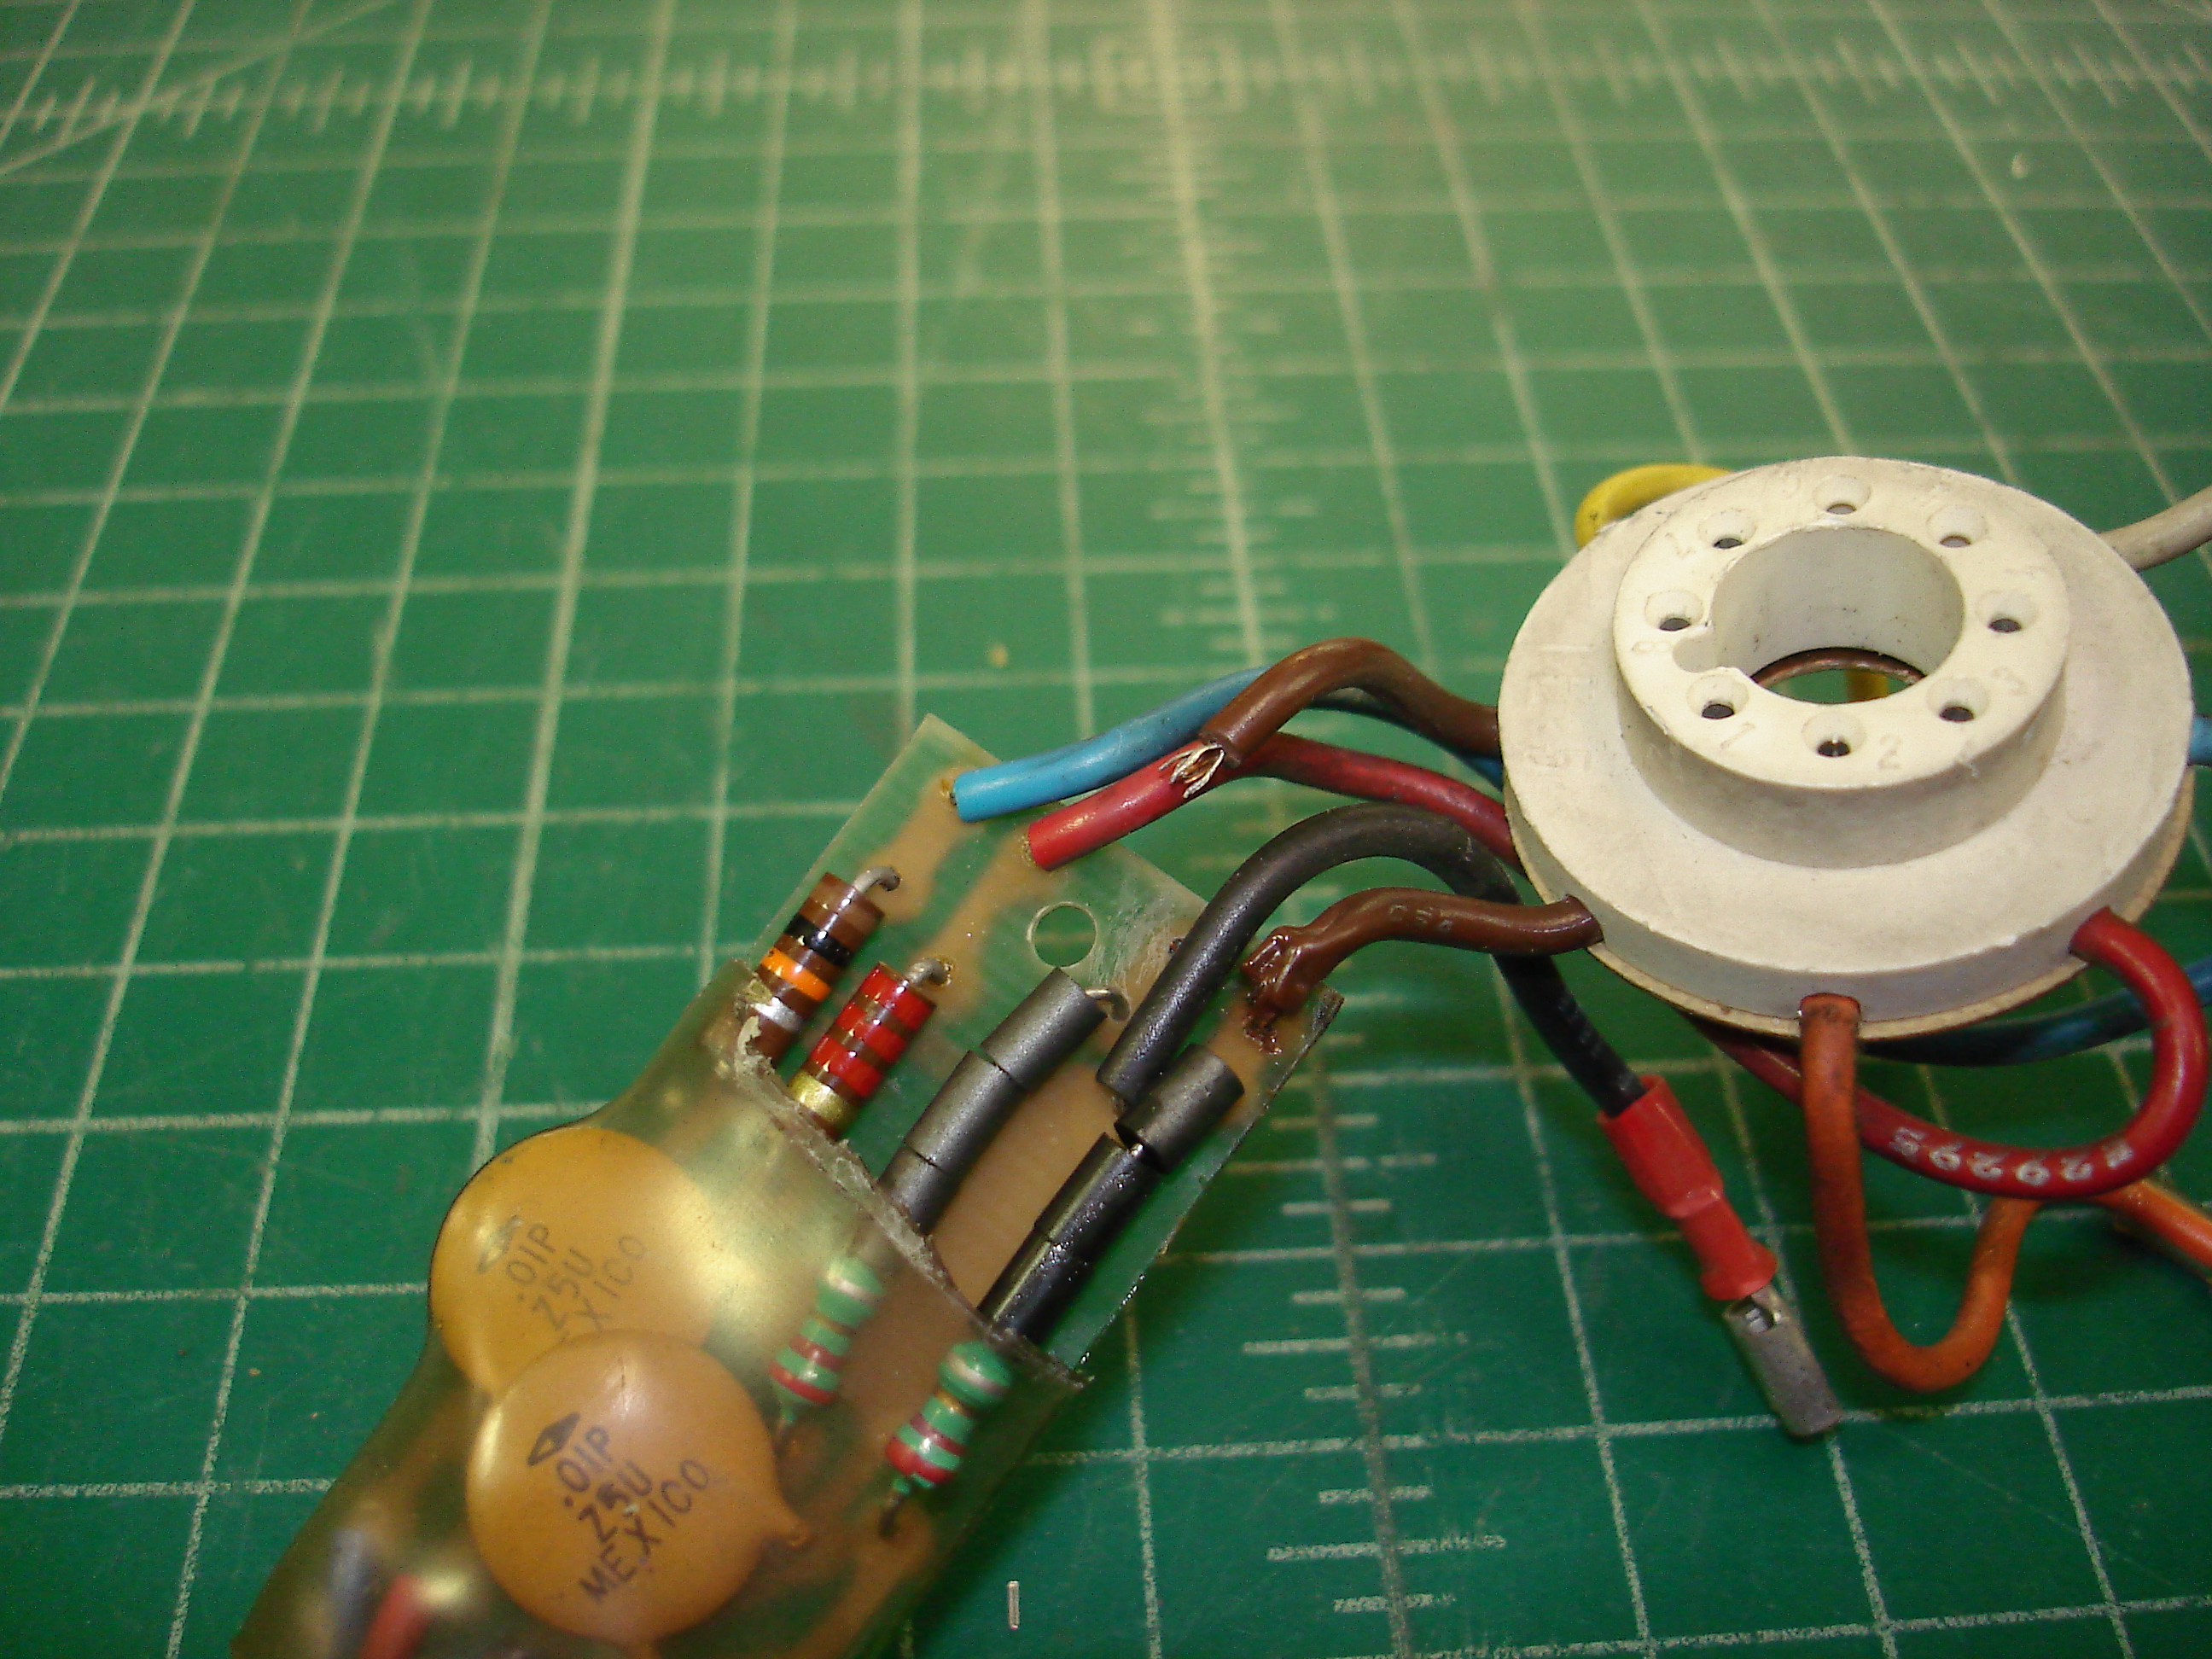
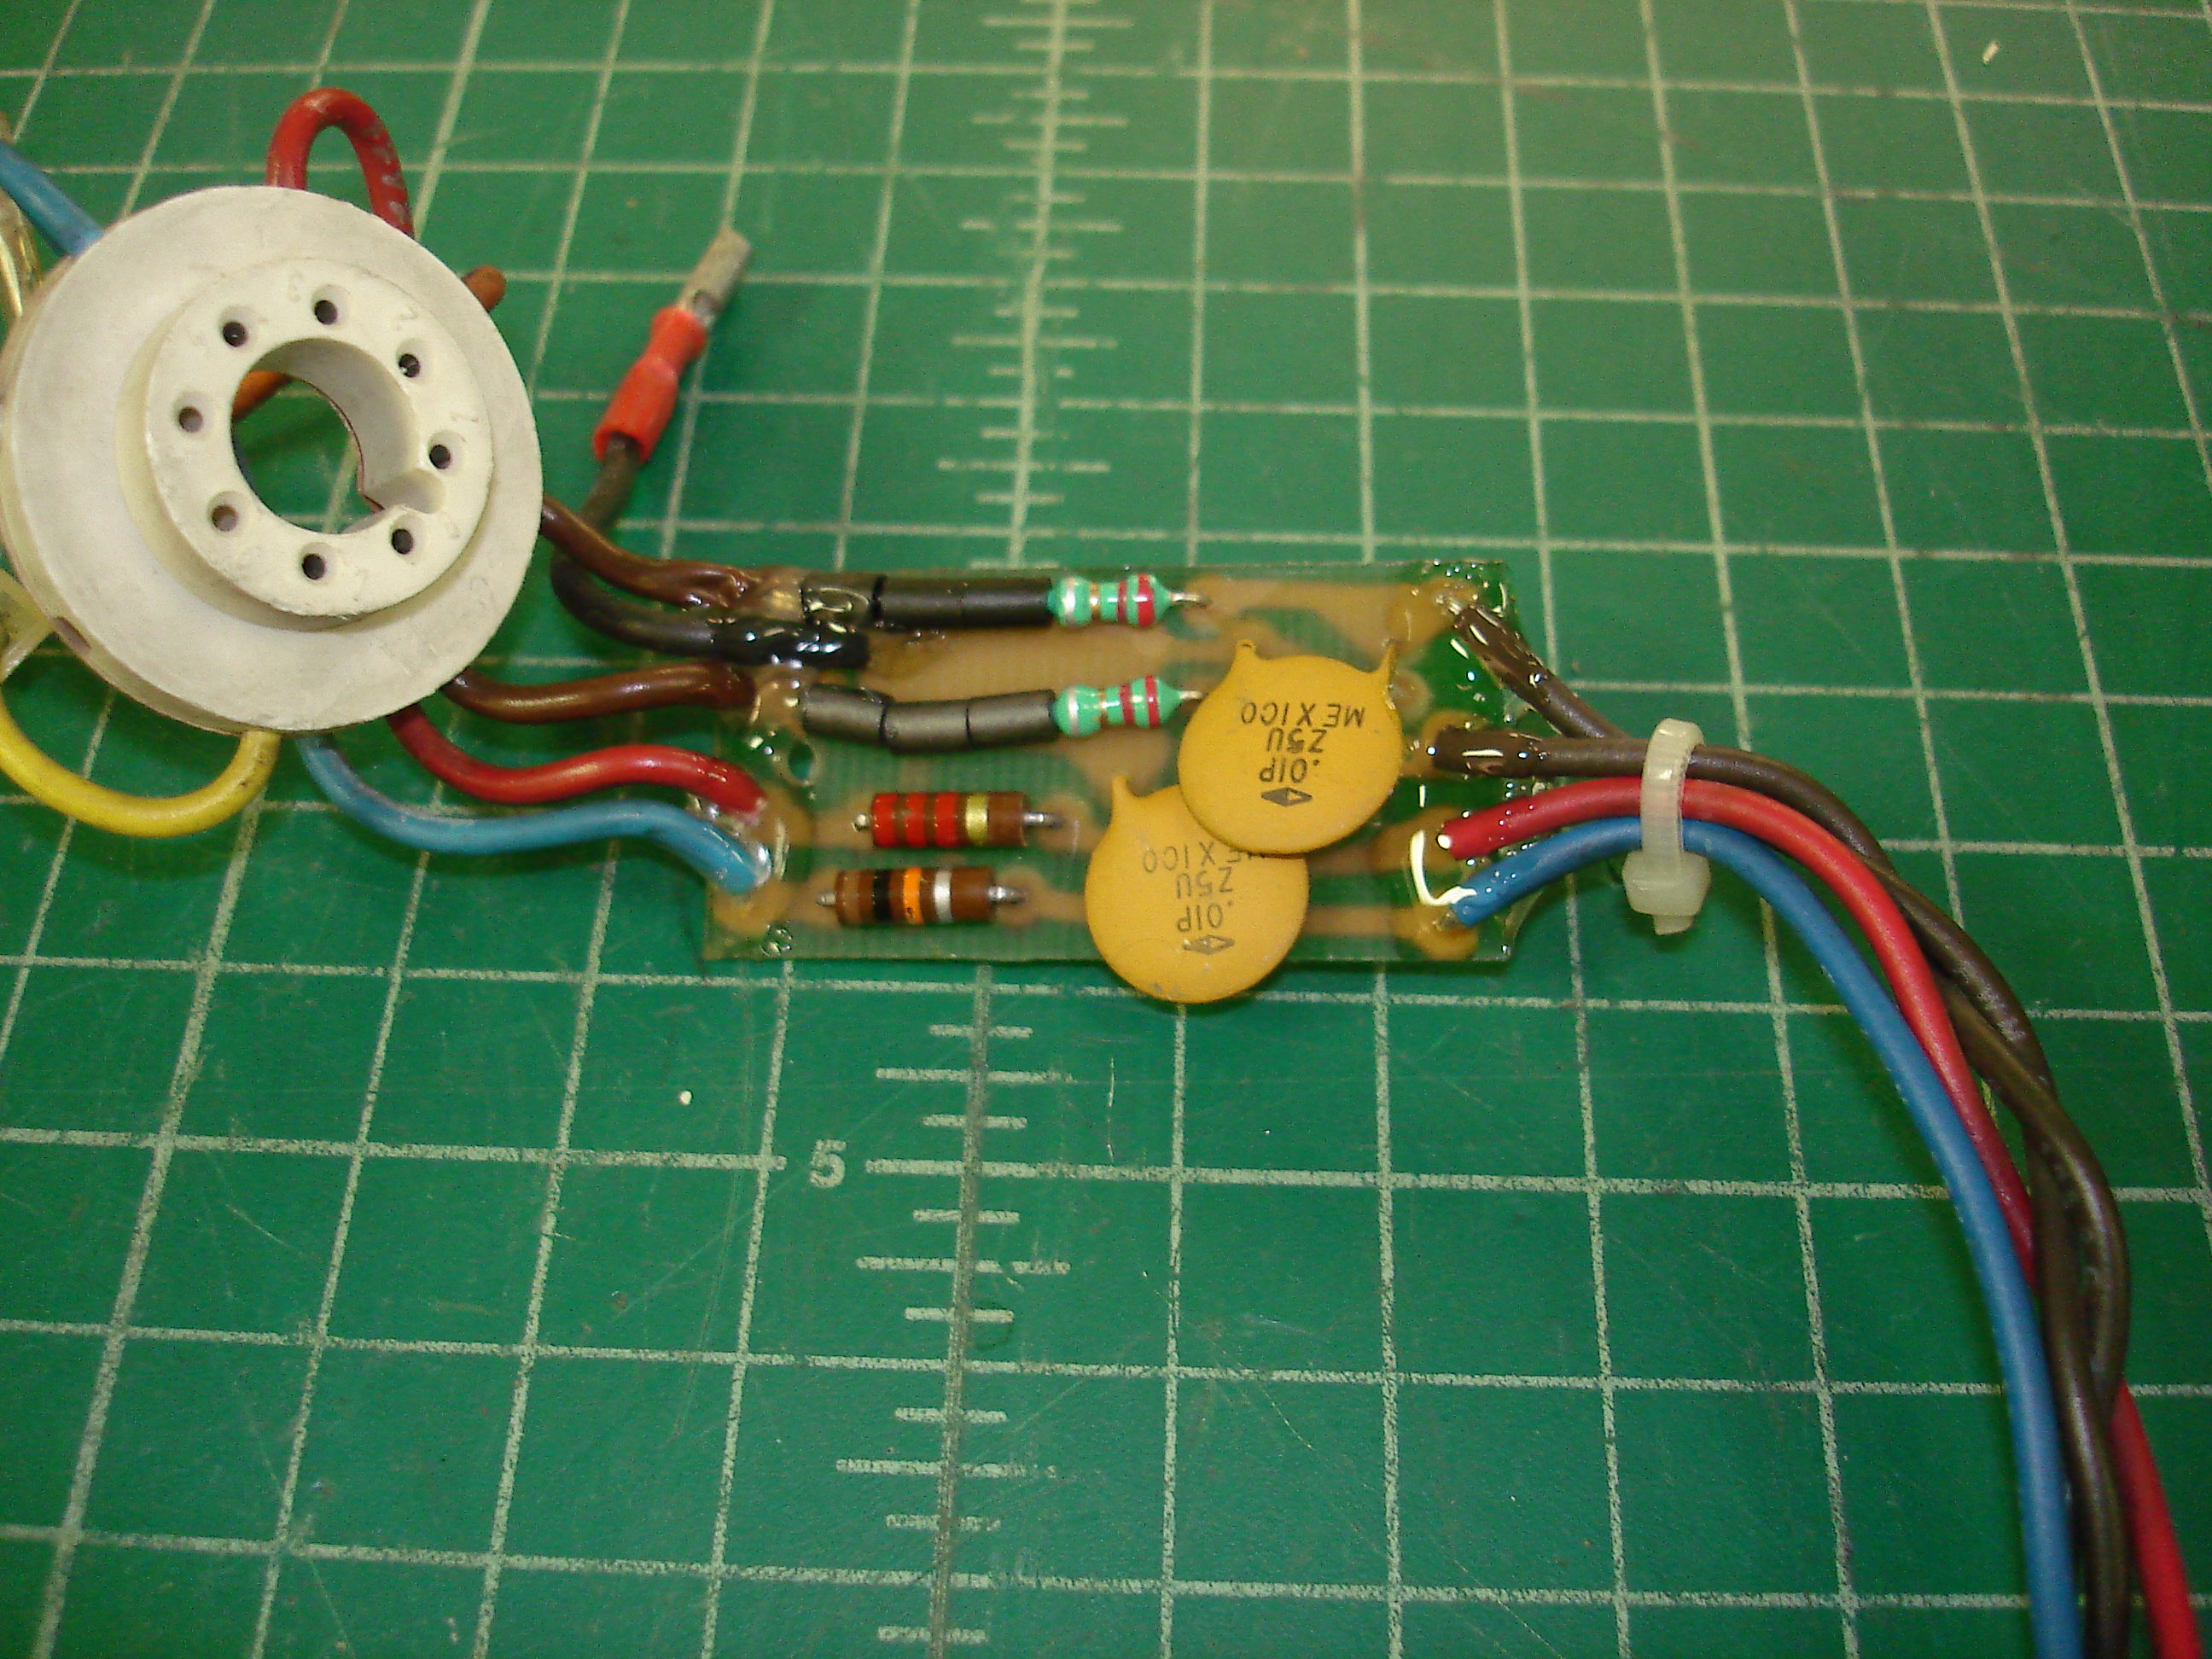
This wire probably let go during disassembly, since the CRT was working when received. The old clear heat shrink was removed, and the broken wire was resoldered. All wires to this little circuit board got some Polygun adhesive for strain relief, and the whole thing was insulated with some large orange heat shrink:
With this final repair, the monitor chassis was cleaned out, everything reinstalled, and tested.
Final Test
Recapping the monitor corrected the vertical bands and improved the monitor’s focus with no other adjustments:

The horizontal line visible in the above picture is just the camera capturing rescan in low light. The monitor looks great, but will probably get some focus adjustment once SunOS is running a graphical environment on this system. The monitor is currently cabled to the Sun 3/50 with a DE9 cable intended for RS-232 use. This seems to be fine, but I’ll make up a custom short cable for use with the Sun 3/50 at some point.
For now, the system waits a little longer for repairs on a Sun SCSI shoebox enclosure that’ll get paired with the 3/50. Another writeup to follow!
monochrome monitors repaired