Topic: Altair 8800 rev 0 repair and testing
Date: 2022 NOV 02
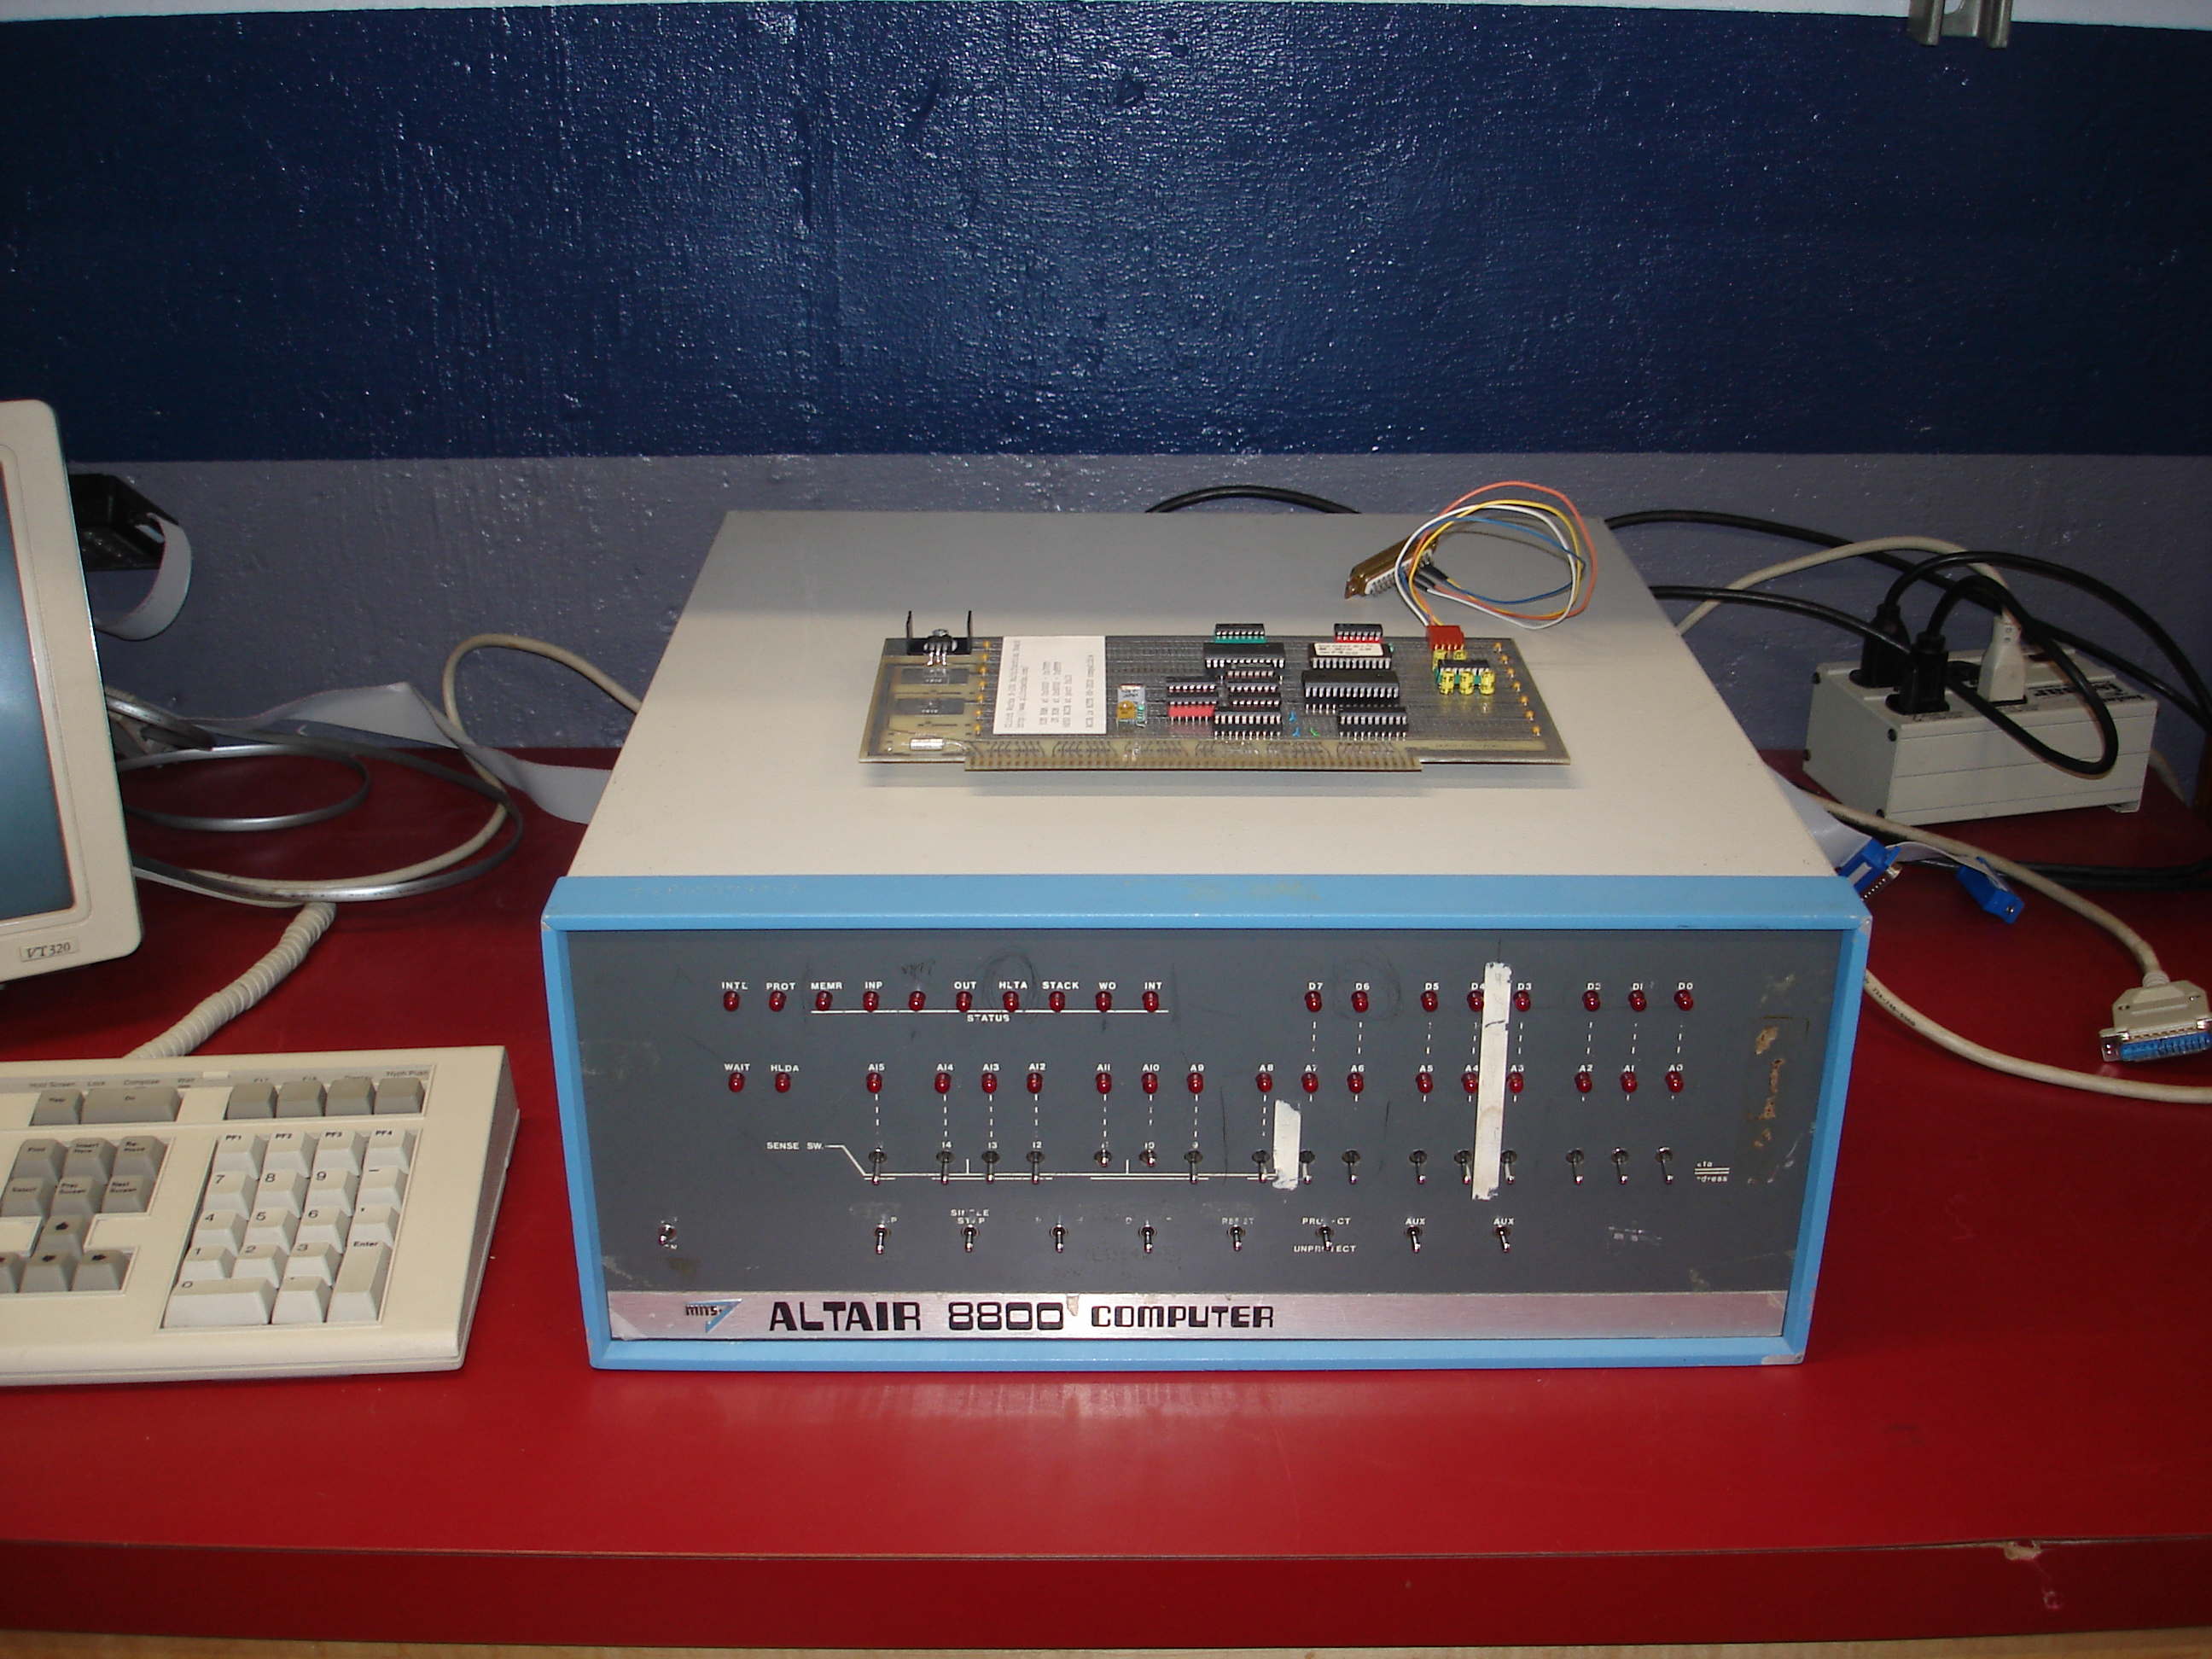
In November 2019, I repaired a first for me: a completely unexpanded revision 0 Altair 8800! This machine was assembled from the basic kit, which included the front panel, 8080 CPU board, 1K static RAM board, and a 4-slot backplane with only two S-100 card sockets. It was never expanded further, which is extremely uncommon. Here’s a look at the machine, buttoned up, after repairs were completed:
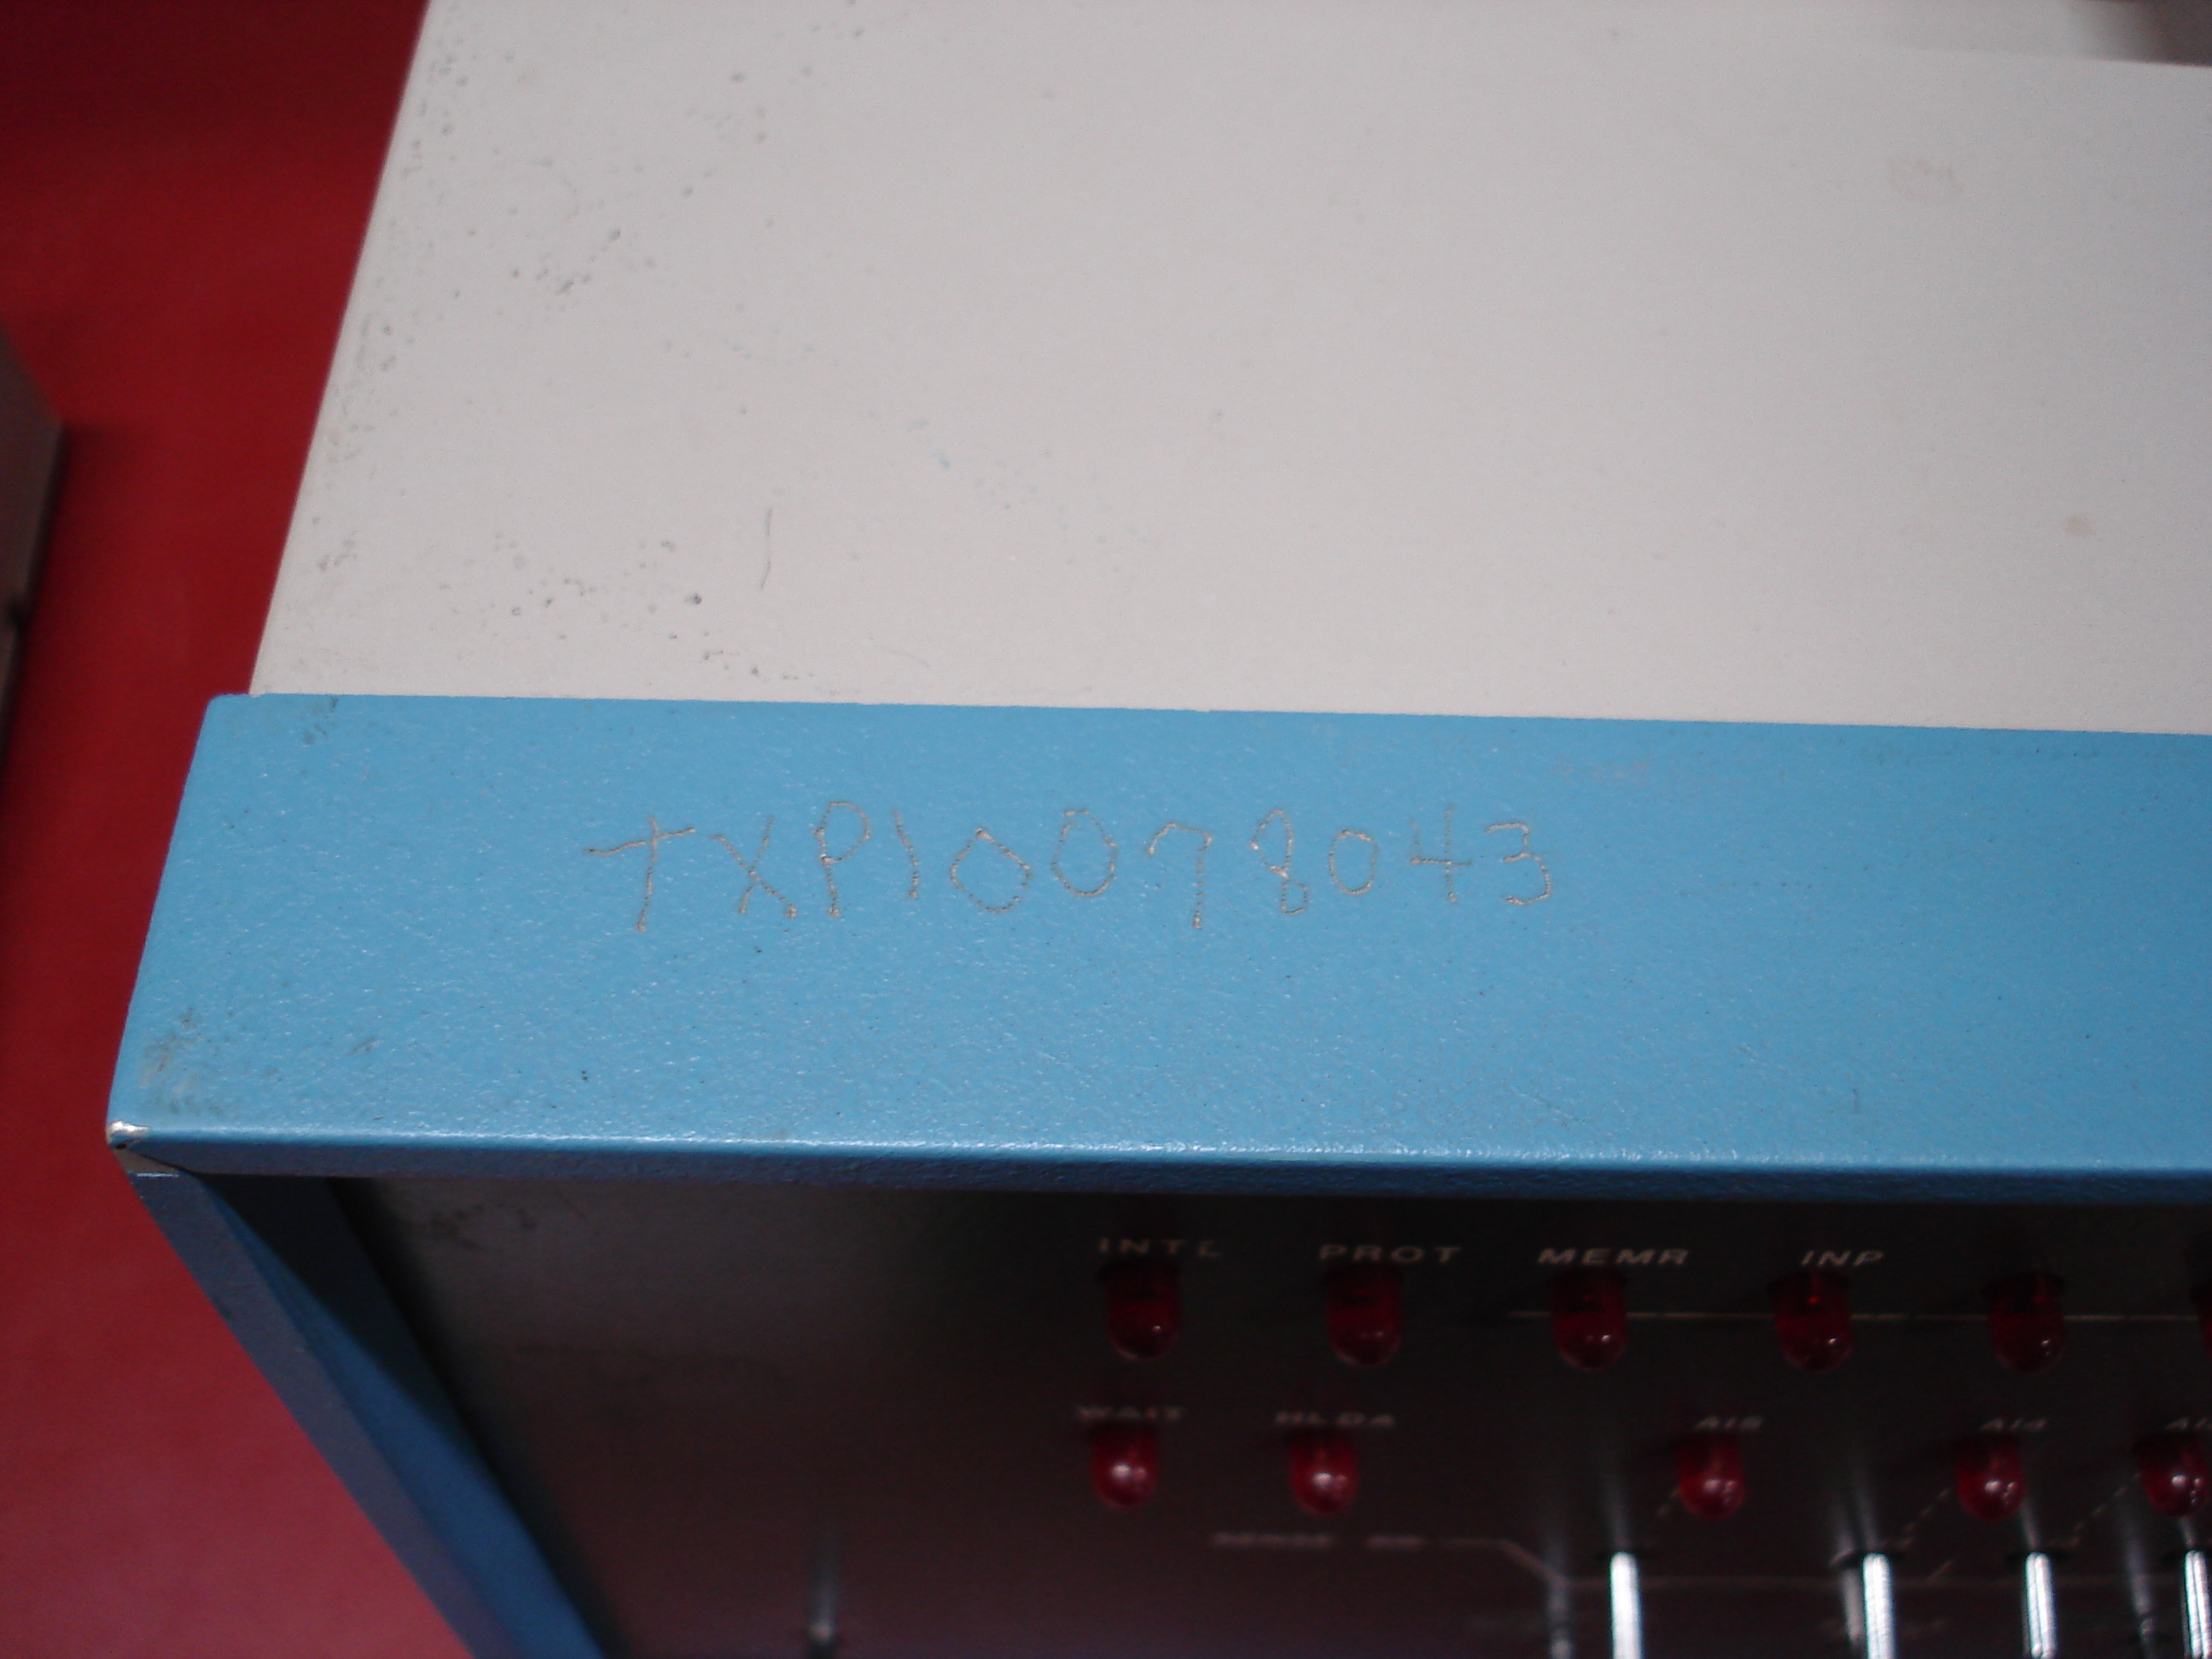
So, why would anyone leave a system like this? It’s not very useful without I/O devices! My guess is that this Altair 8800 was used as a microprocessor trainer. It carried asset tags from a Dallas, TX area technical college. There’s an asset number engraved on it:
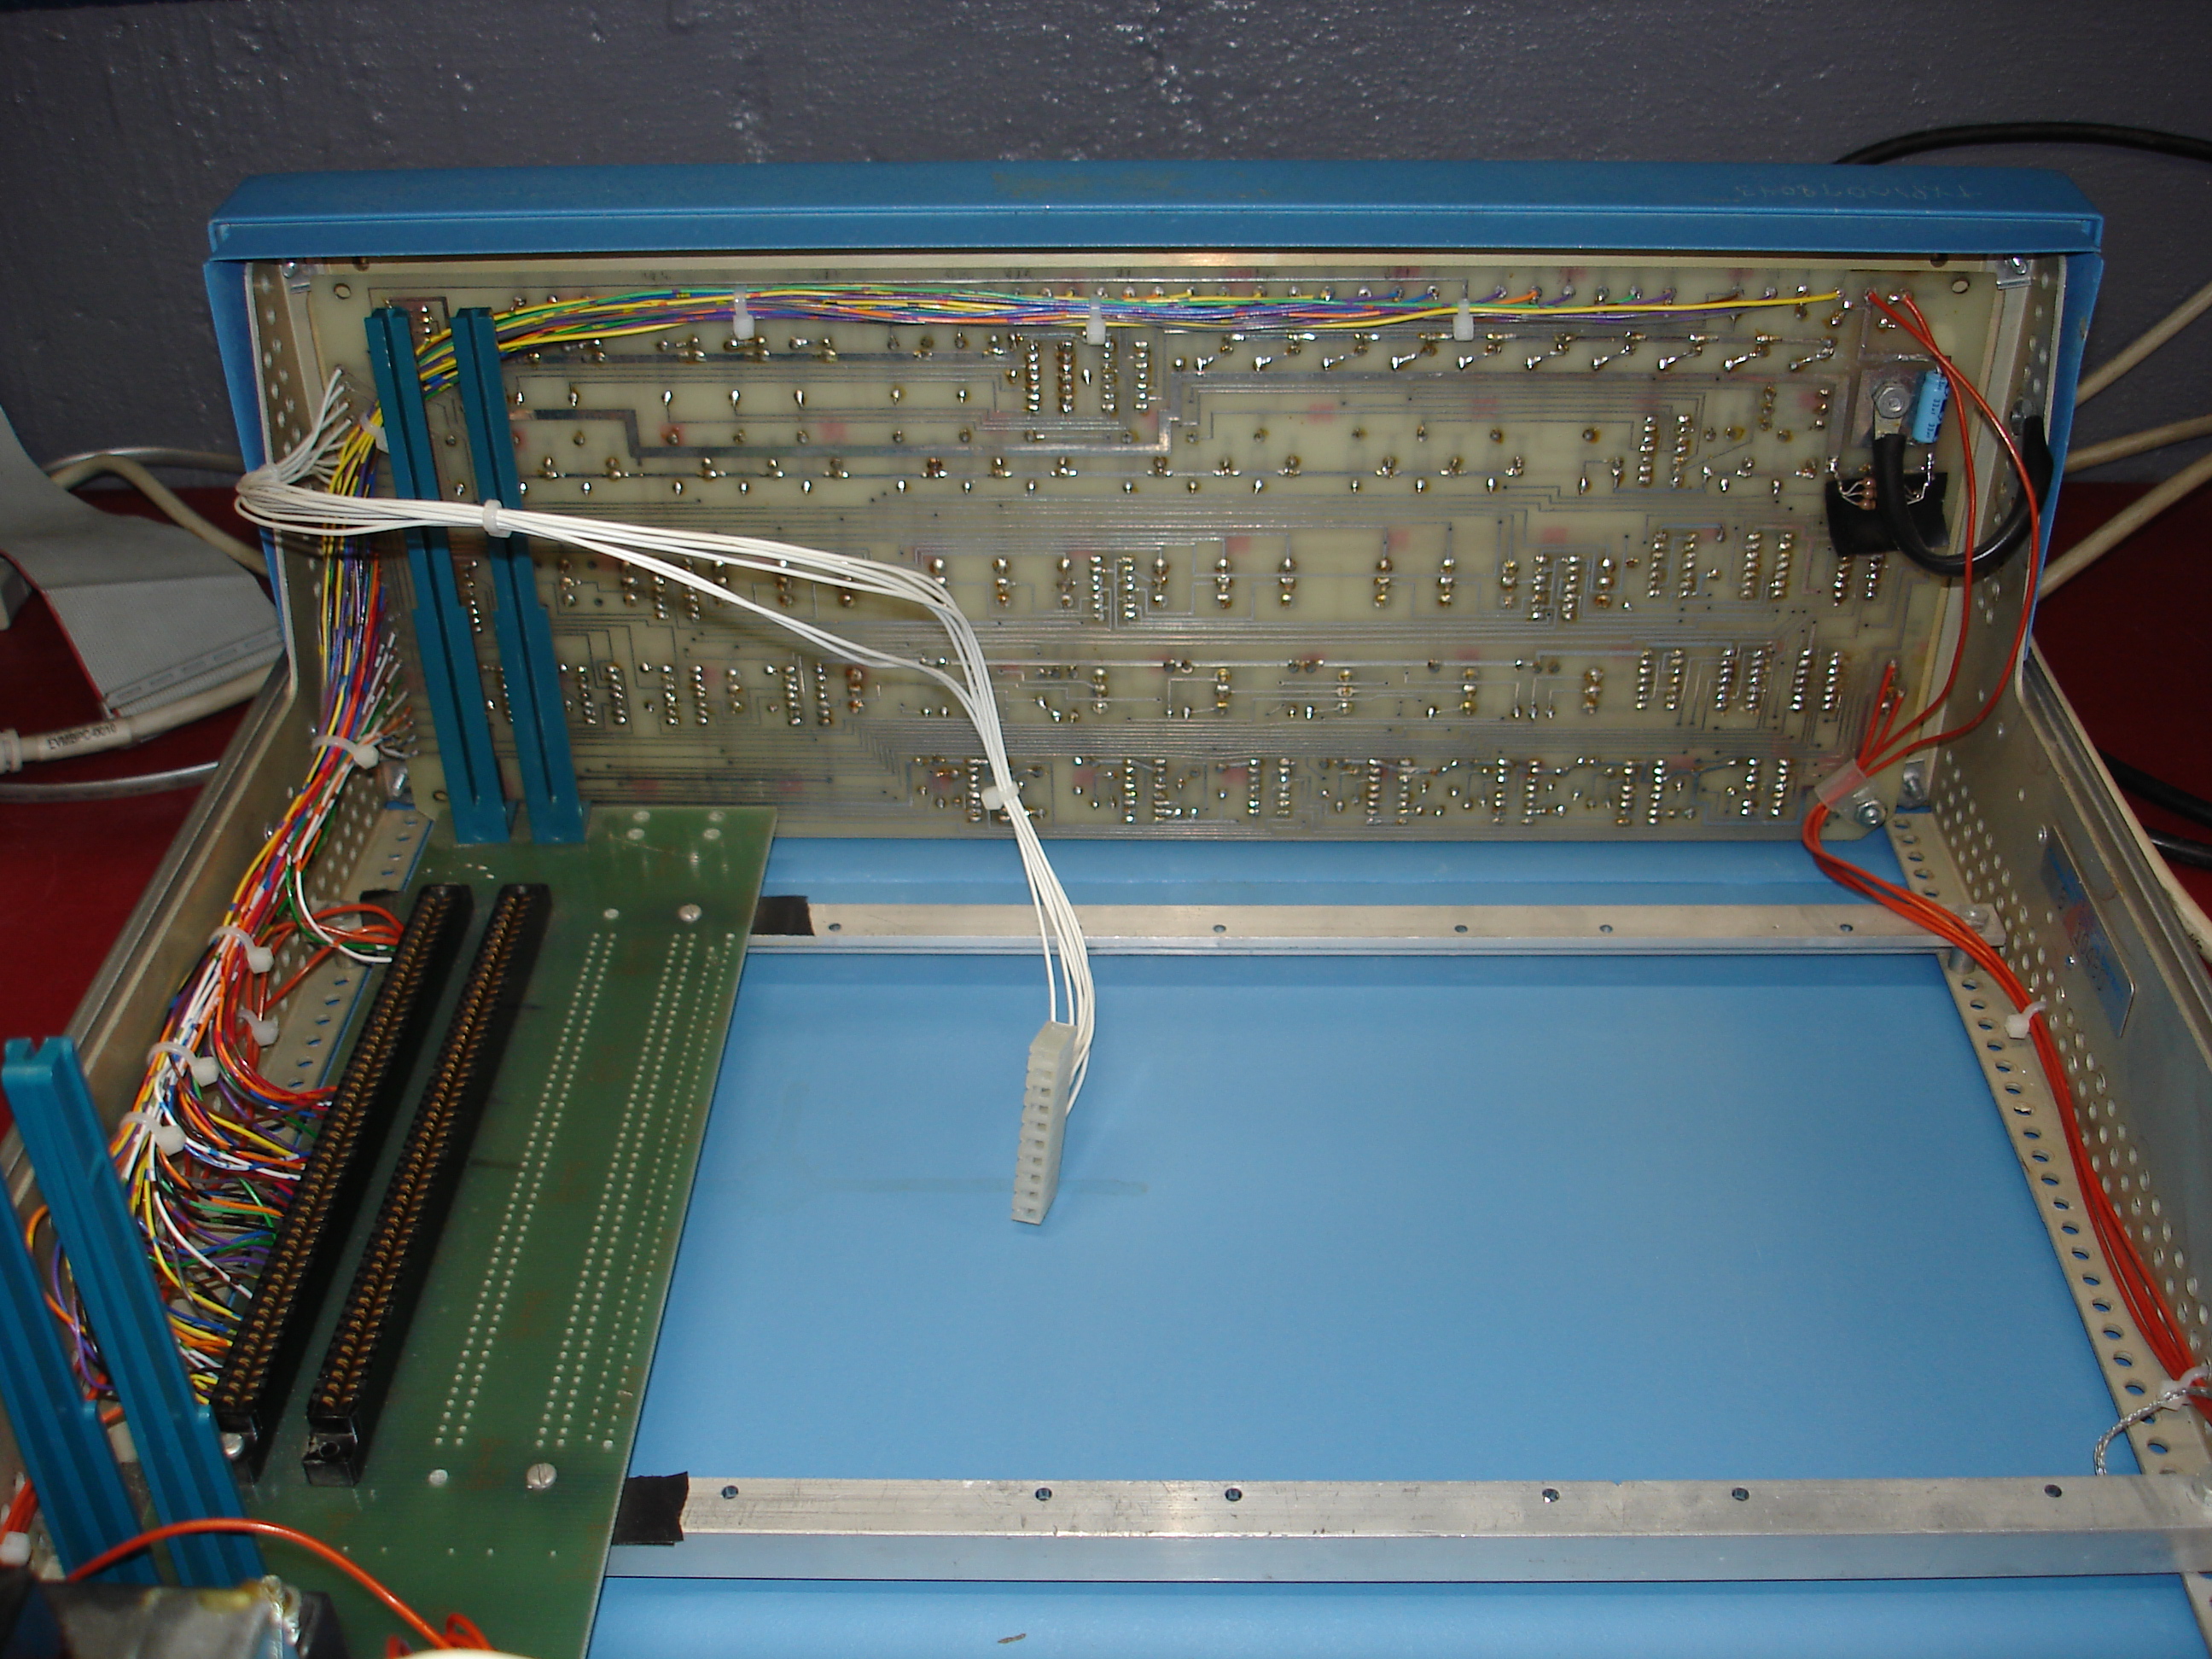
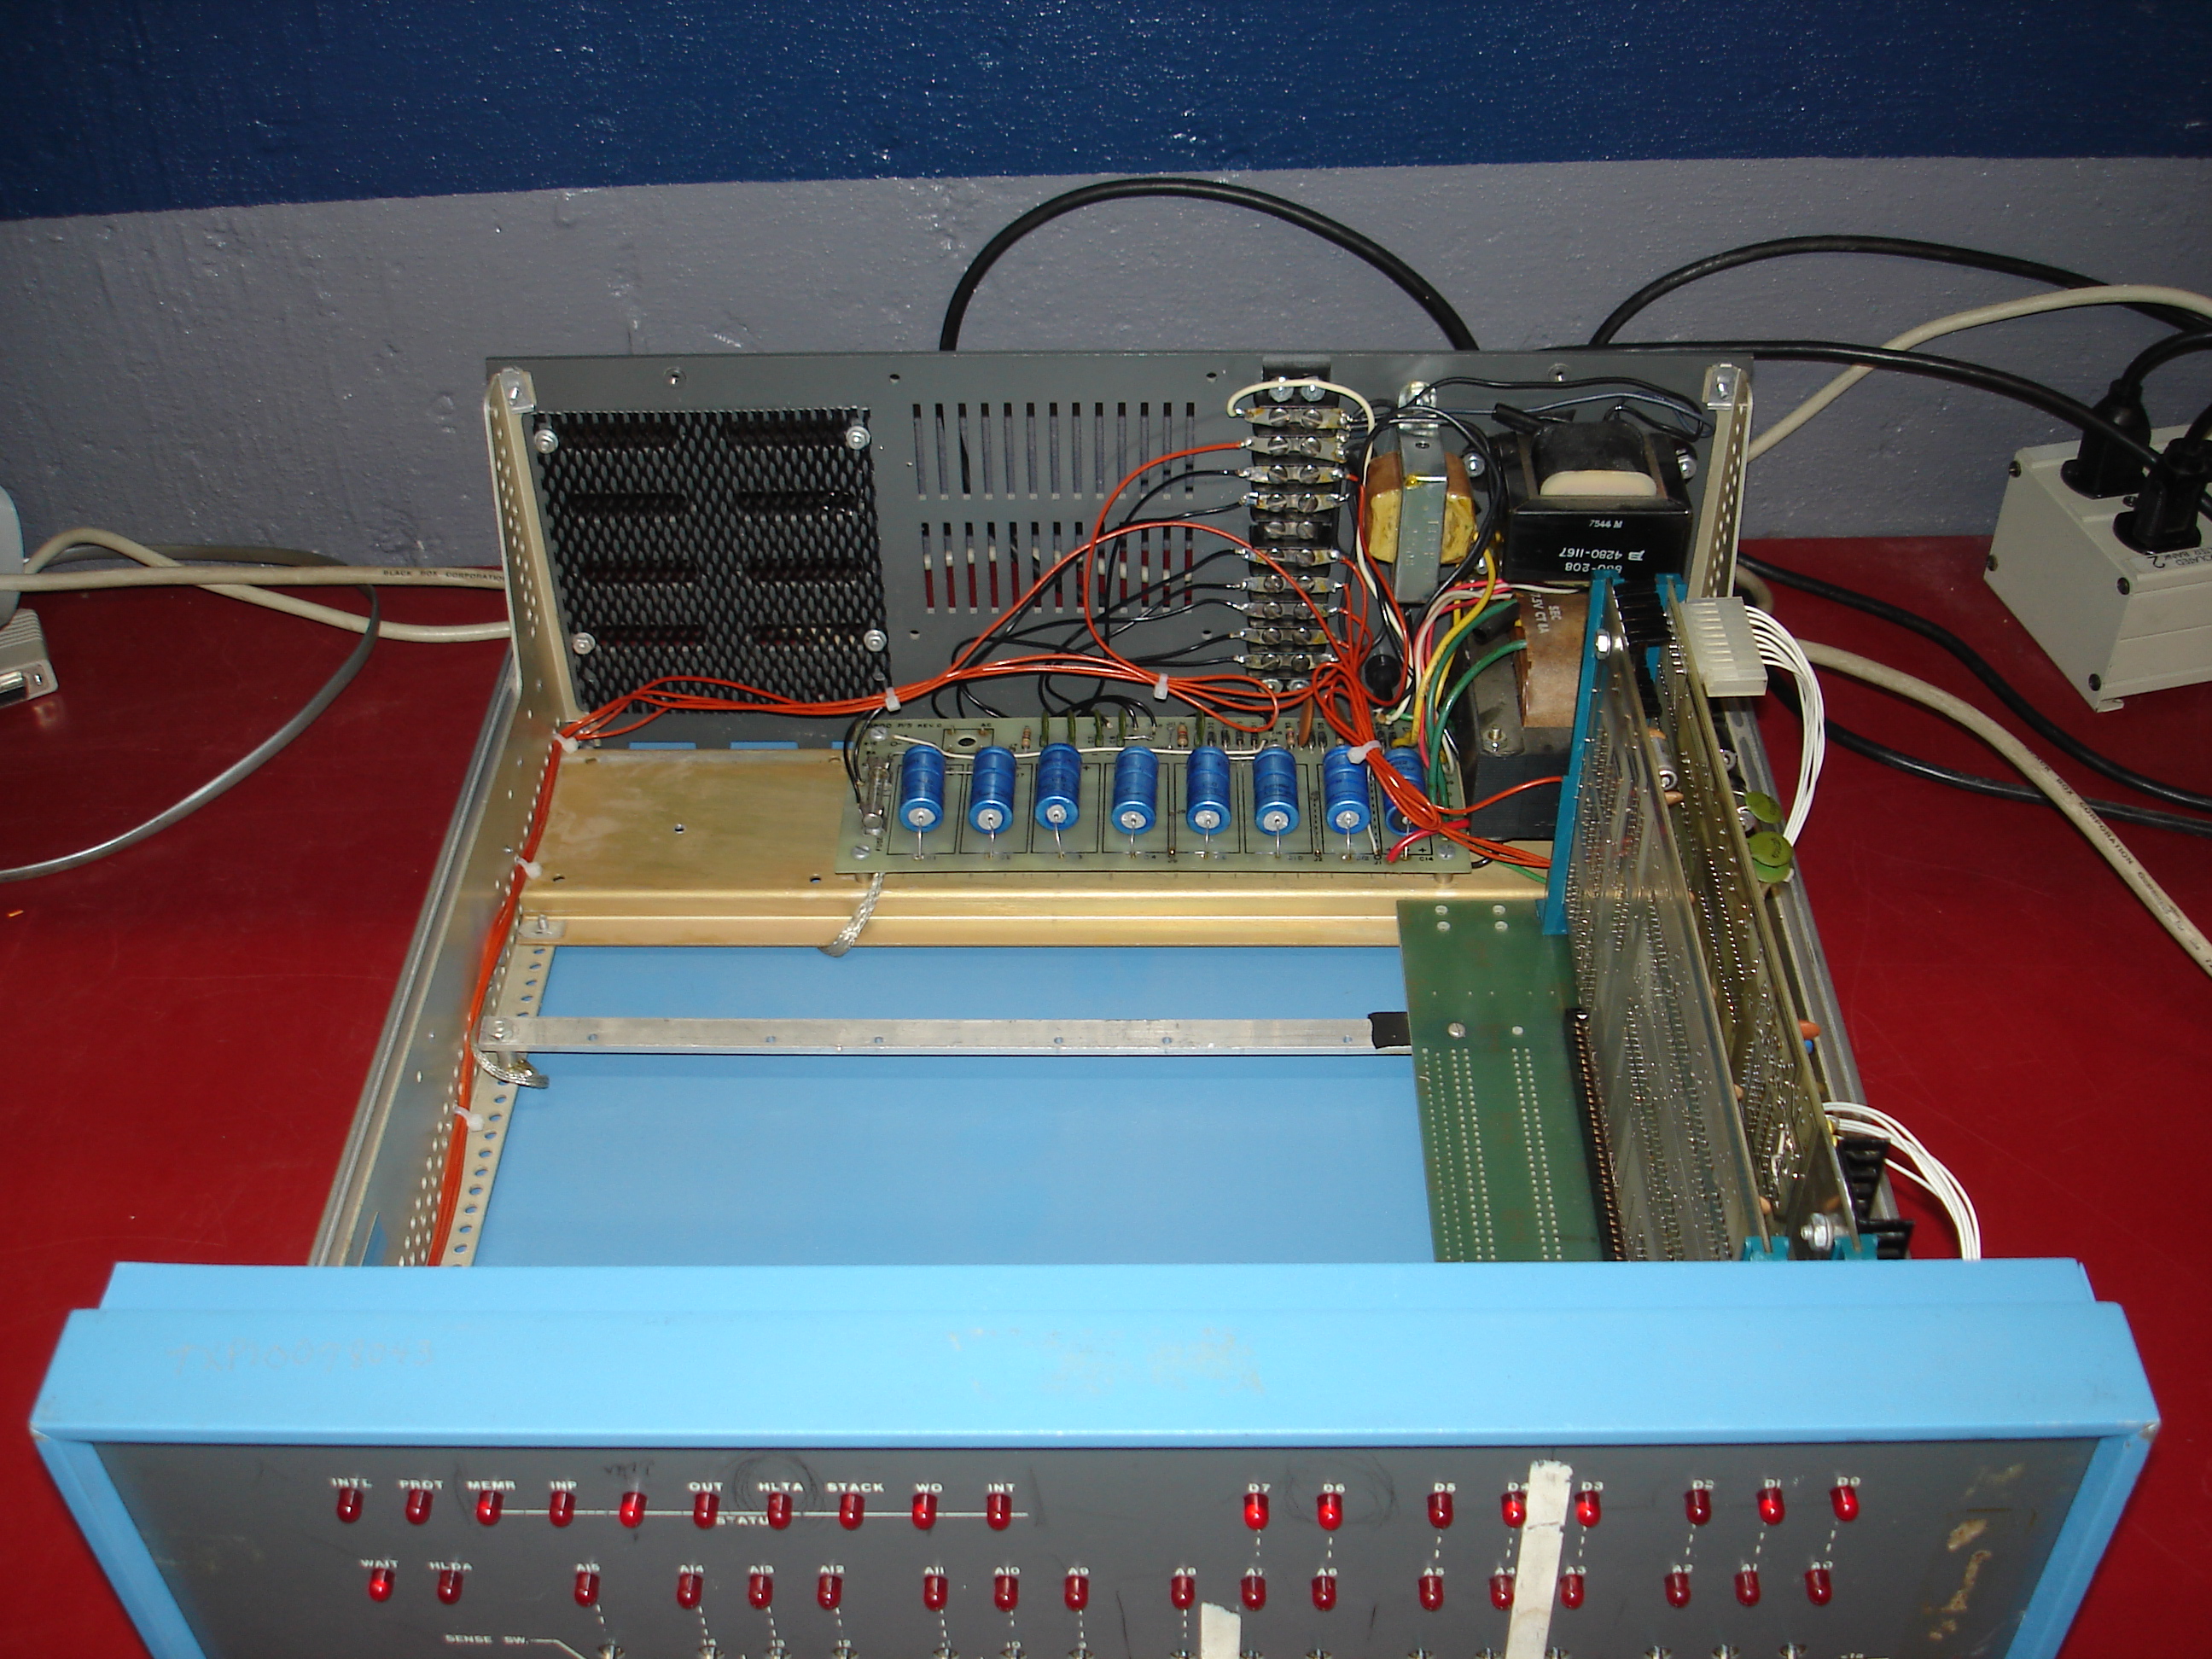
Here’s a look at the back of the Altair:
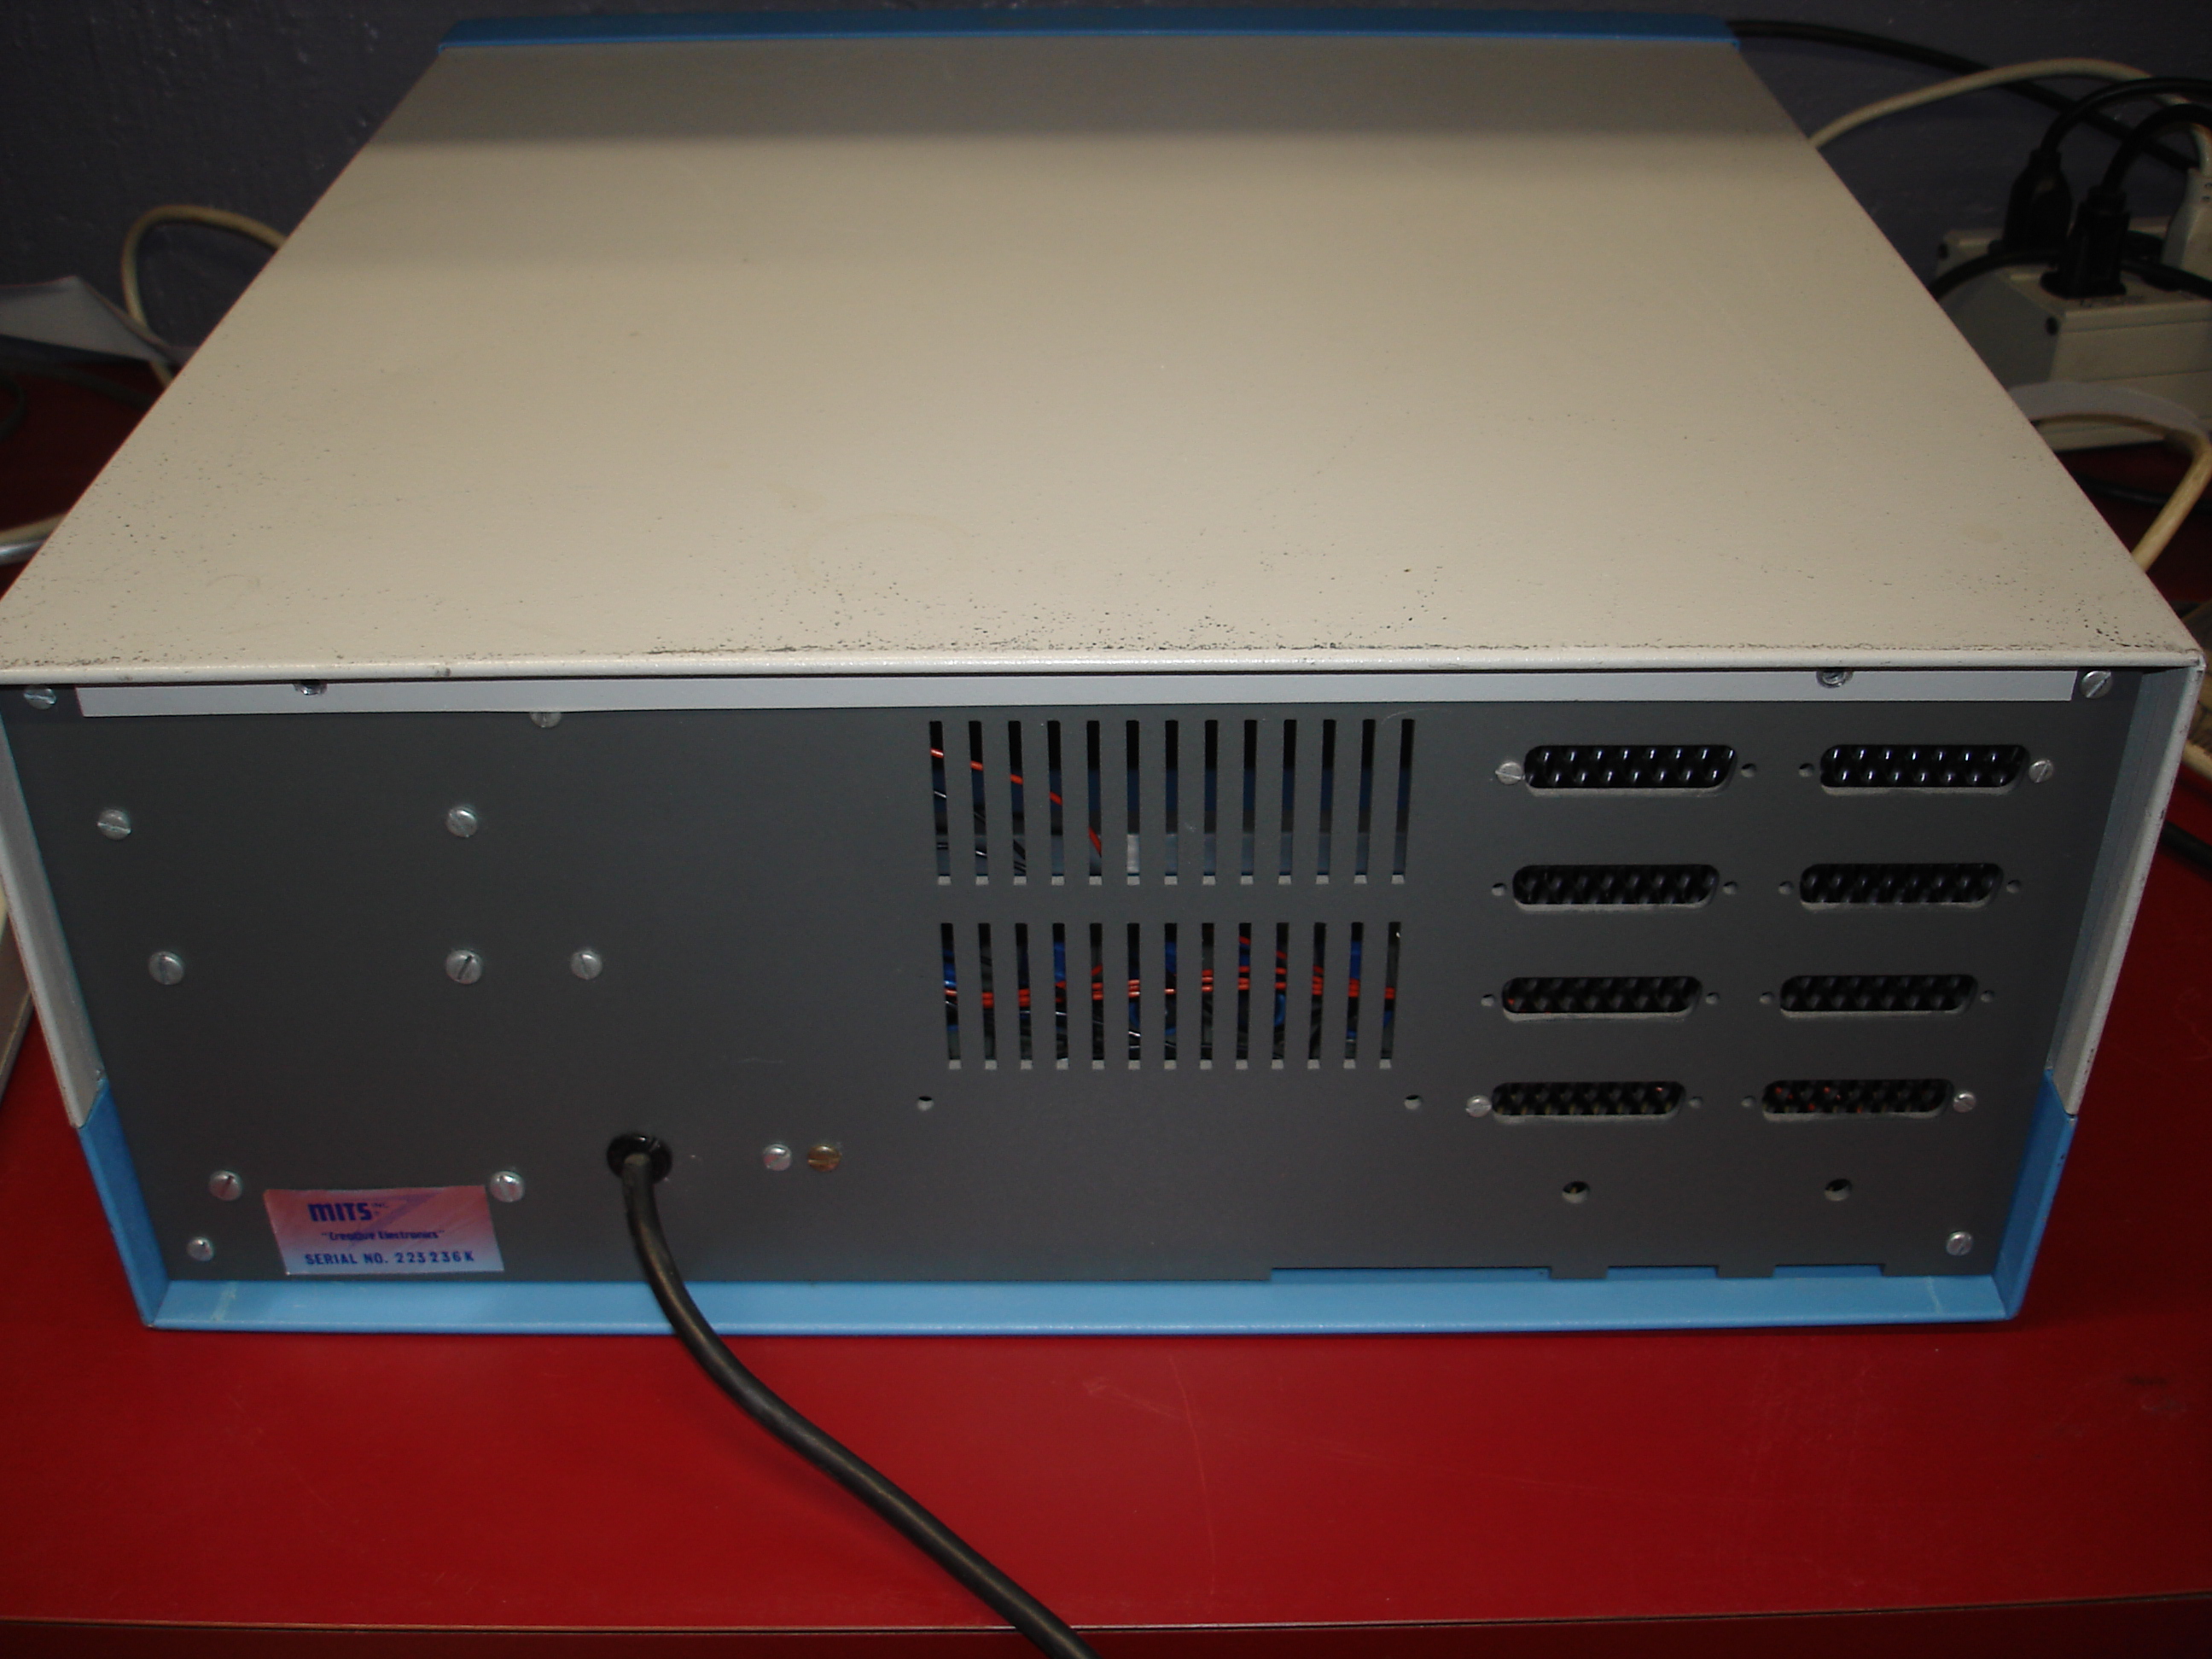
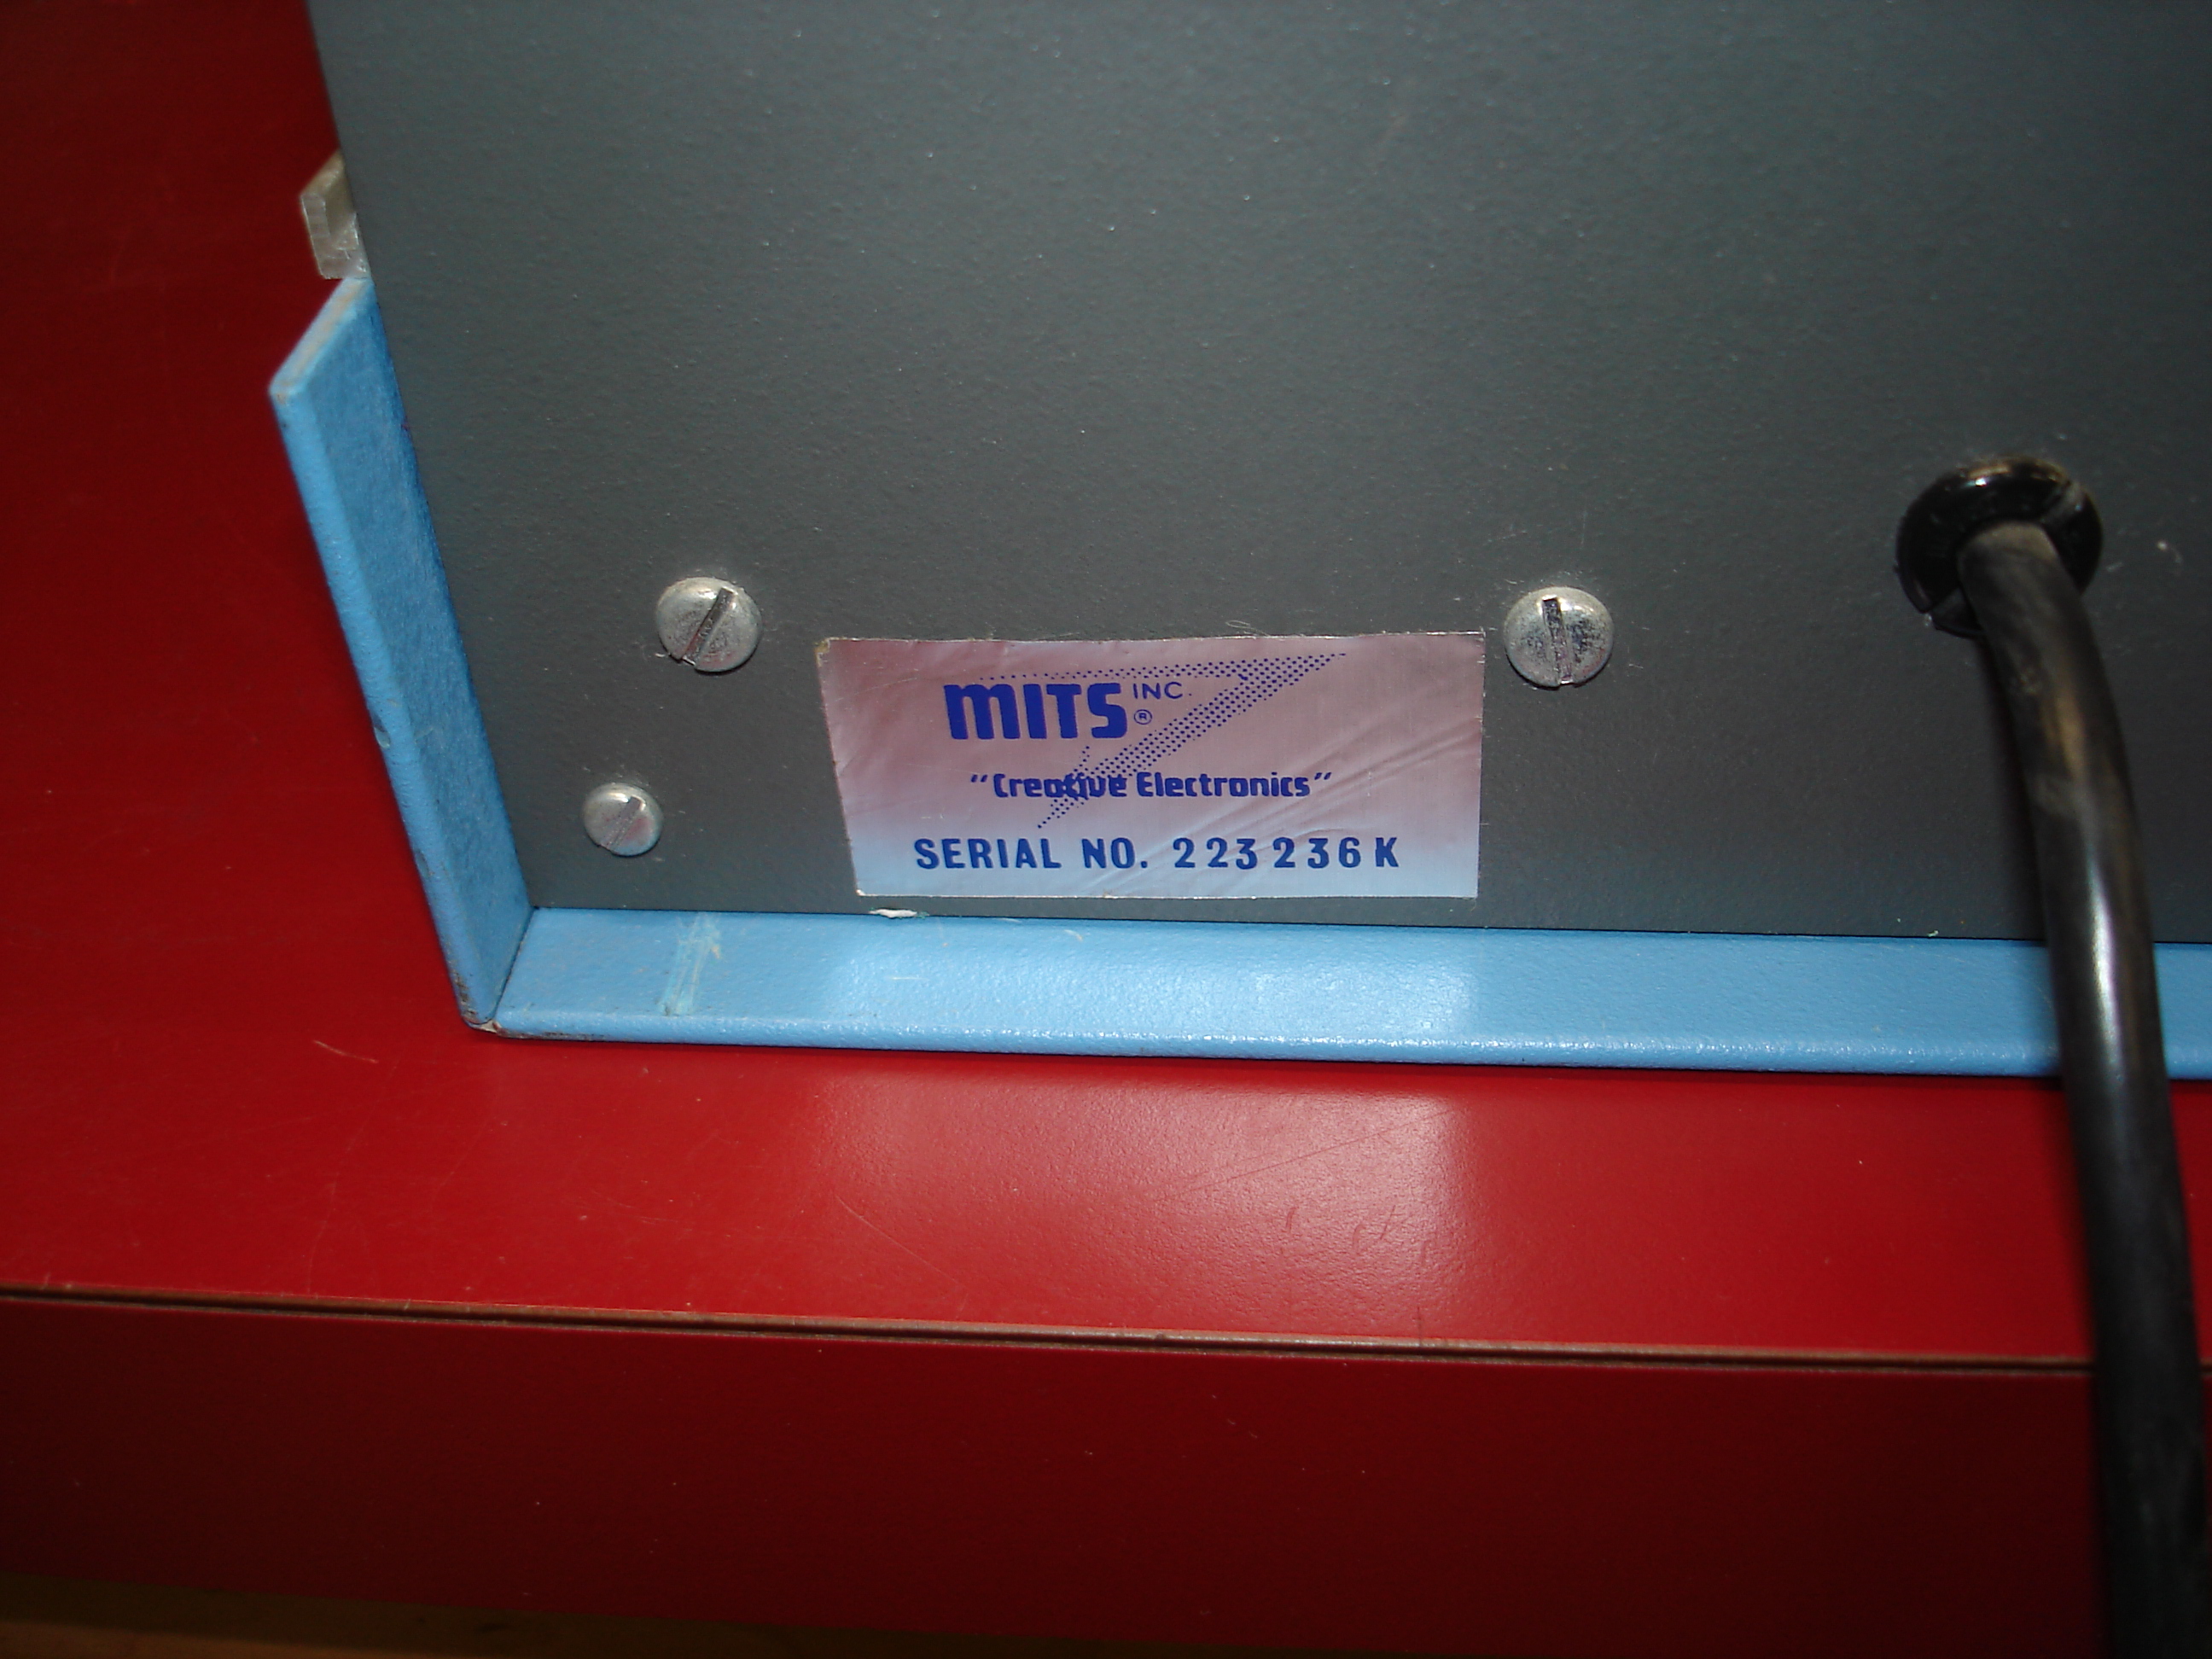
Here we can see the factory provided screen over the ports! Truly never expanded. The serial number is 223236K, meaning this was a kit-built machine. From the build I’d guess that this machine was near the end of the revision 0 era, and getting close to the Altair 8800A.
Repairs
First thing with all Altairs: power supply repairs. All Altairs I have worked on required new axial capacitors in the power supply section. The large can-sized electrolytics found in the Altair 8800B and systems with the B-style improved power supply can usually be reformed, but the smaller axial capacitors are usually dried out and should be replaced. Remember, the only thing worse than blowing up a machine by just flipping the switch is not repairing the supply and having it blow up the boards later on, after it “tested fine” for a while!
In this case, there was no question that the capacitors were bad:
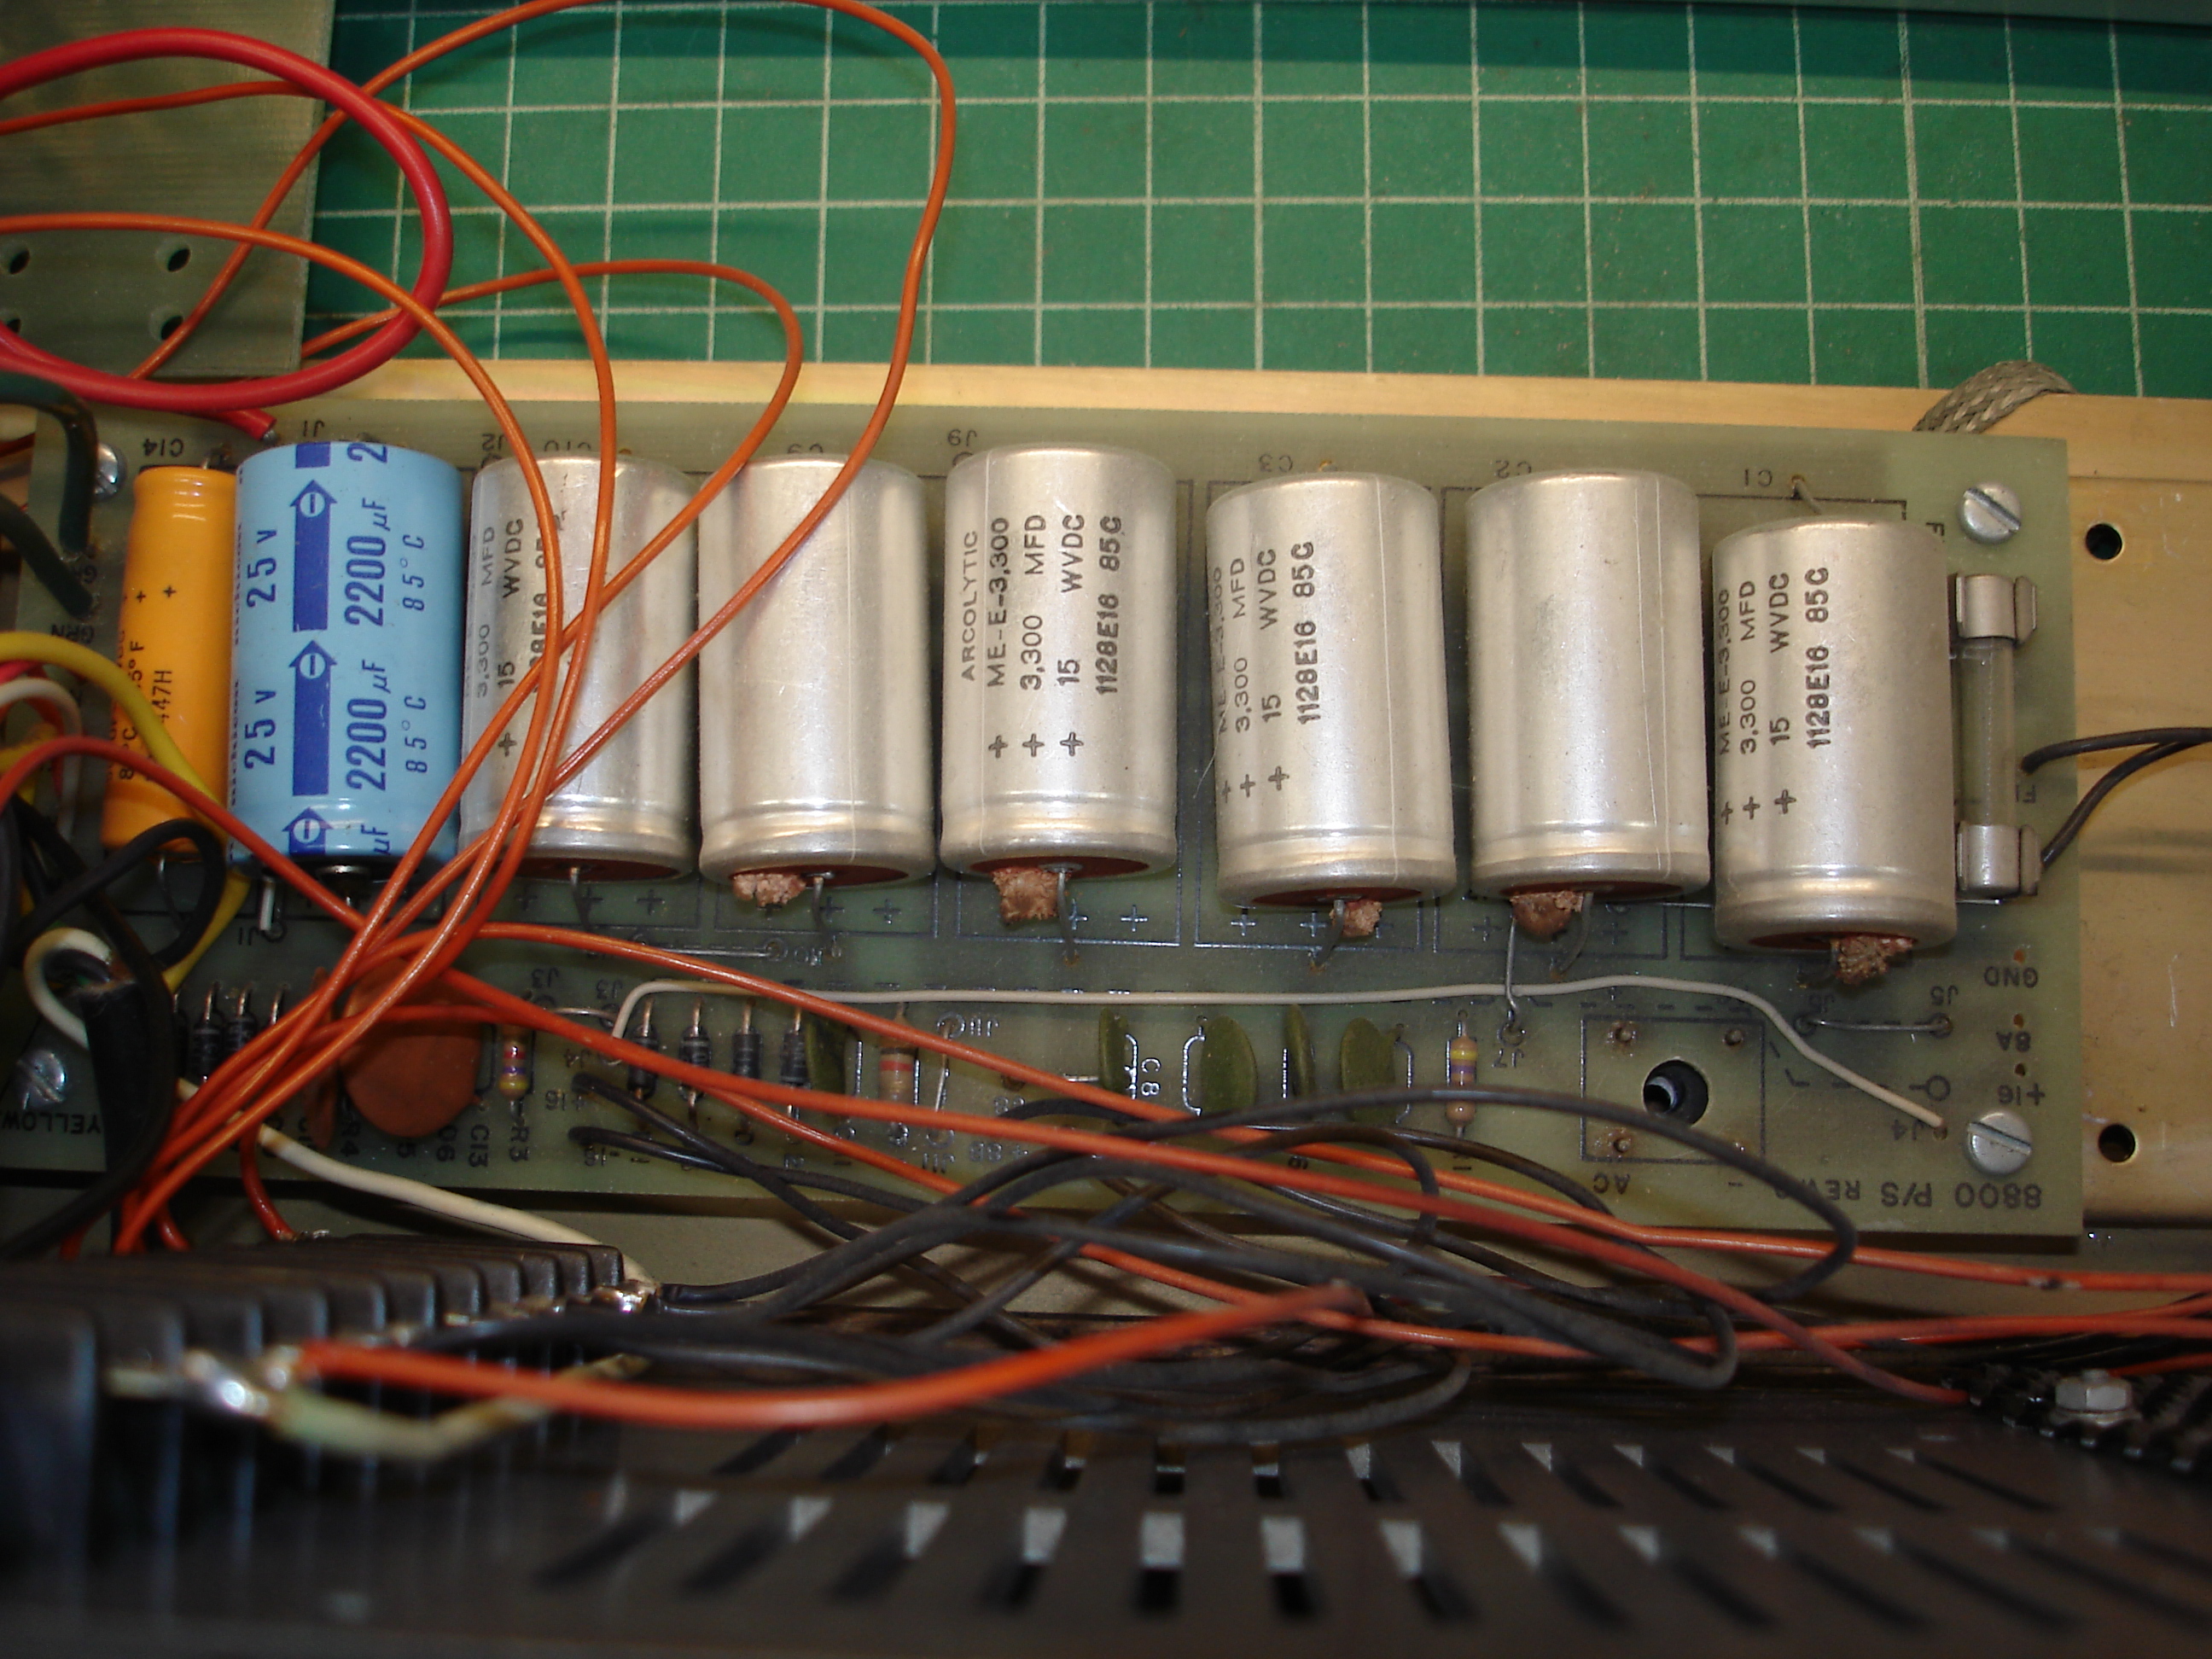
Crusty! I suspect someone had tried to turn it on before selling it to its previous owner. The popcorn-looking stuff poking out from the positive ends of the capacitors is what happens when these old electrolytics start venting their stuffing. This often doesn’t happen immediately. Time for some new ones, and general PSU wiring cleanup:
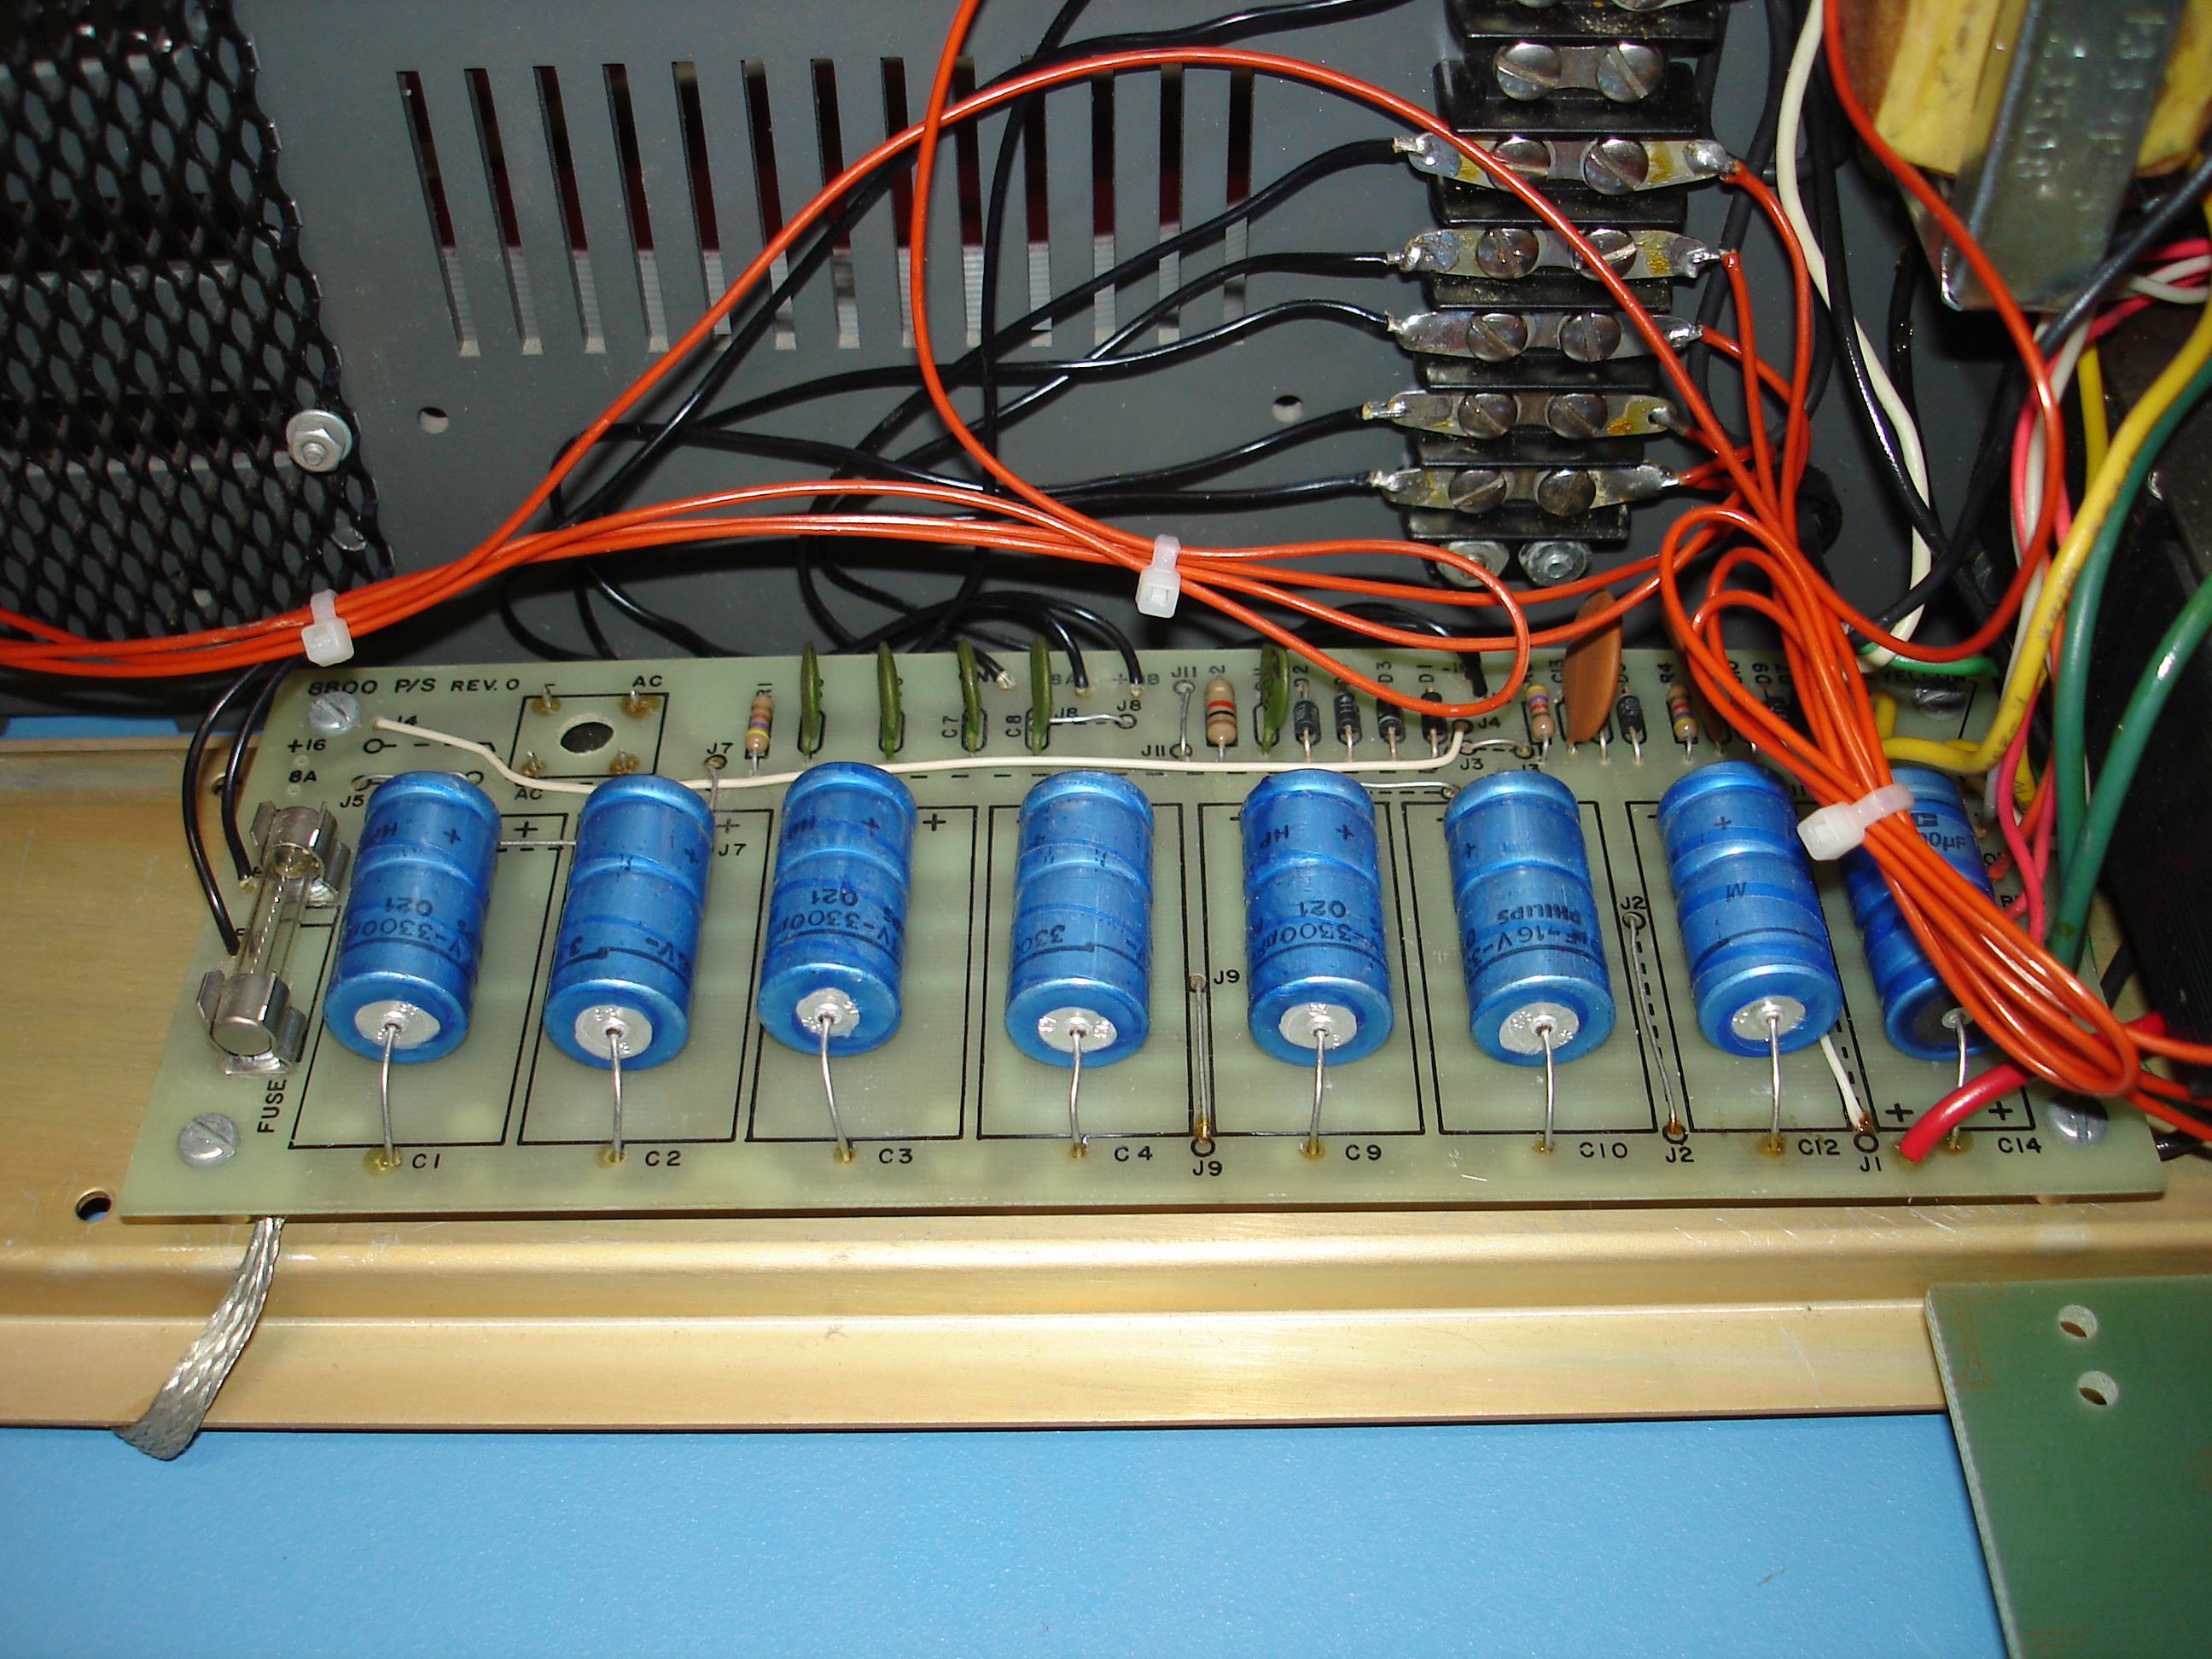
Much better. These capacitors are actually NOS (new old stock), and were reformed prior to installing. The insulating oxide layer in electrolytics will break down, just sitting on a shelf. Usually we use brand-new CDE/Illinois Capacitor axial parts, but this rebuild got NOS Philips LL (long life) caps since it’s sort of special, being completely unexpanded.
Next up was front panel wiring. We pretty much refuse to warranty an Altair 8800 repair job without front panel rewiring, as there’s always issues. The original white wire MITS provided was low quality stuff, and does not age well, especially if the front panel requires repairs and has to come in/out of the machine a few times. We use 25-pair solid core telephone cable, which provides 50 unique color combinations:
51 wires are required, so the last one ends up being just yellow, in this case. The data cable to the CPU board was made up using new high strand count 24 AWG wire. This cable gets a lot more flexing during the life of a machine, and using all white does make it look more like the original. I have a printout form made up for documenting the S-100 signals to wire color pairings, which goes with the machine. This makes for much easier troubleshooting.
Kit-built Altair 8800s are a real mixed bag, when it comes to assembly quality. Fortunately, this one was very well built, probably due to being owned by a technical college. The CPU and RAM boards required no repairs, other than cleaning. This is very rare for MITS boards, but it does look like someone had repaired these boards a few times over their lives. The repairs were also good quality, and did not require redo. Here’s the CPU board:

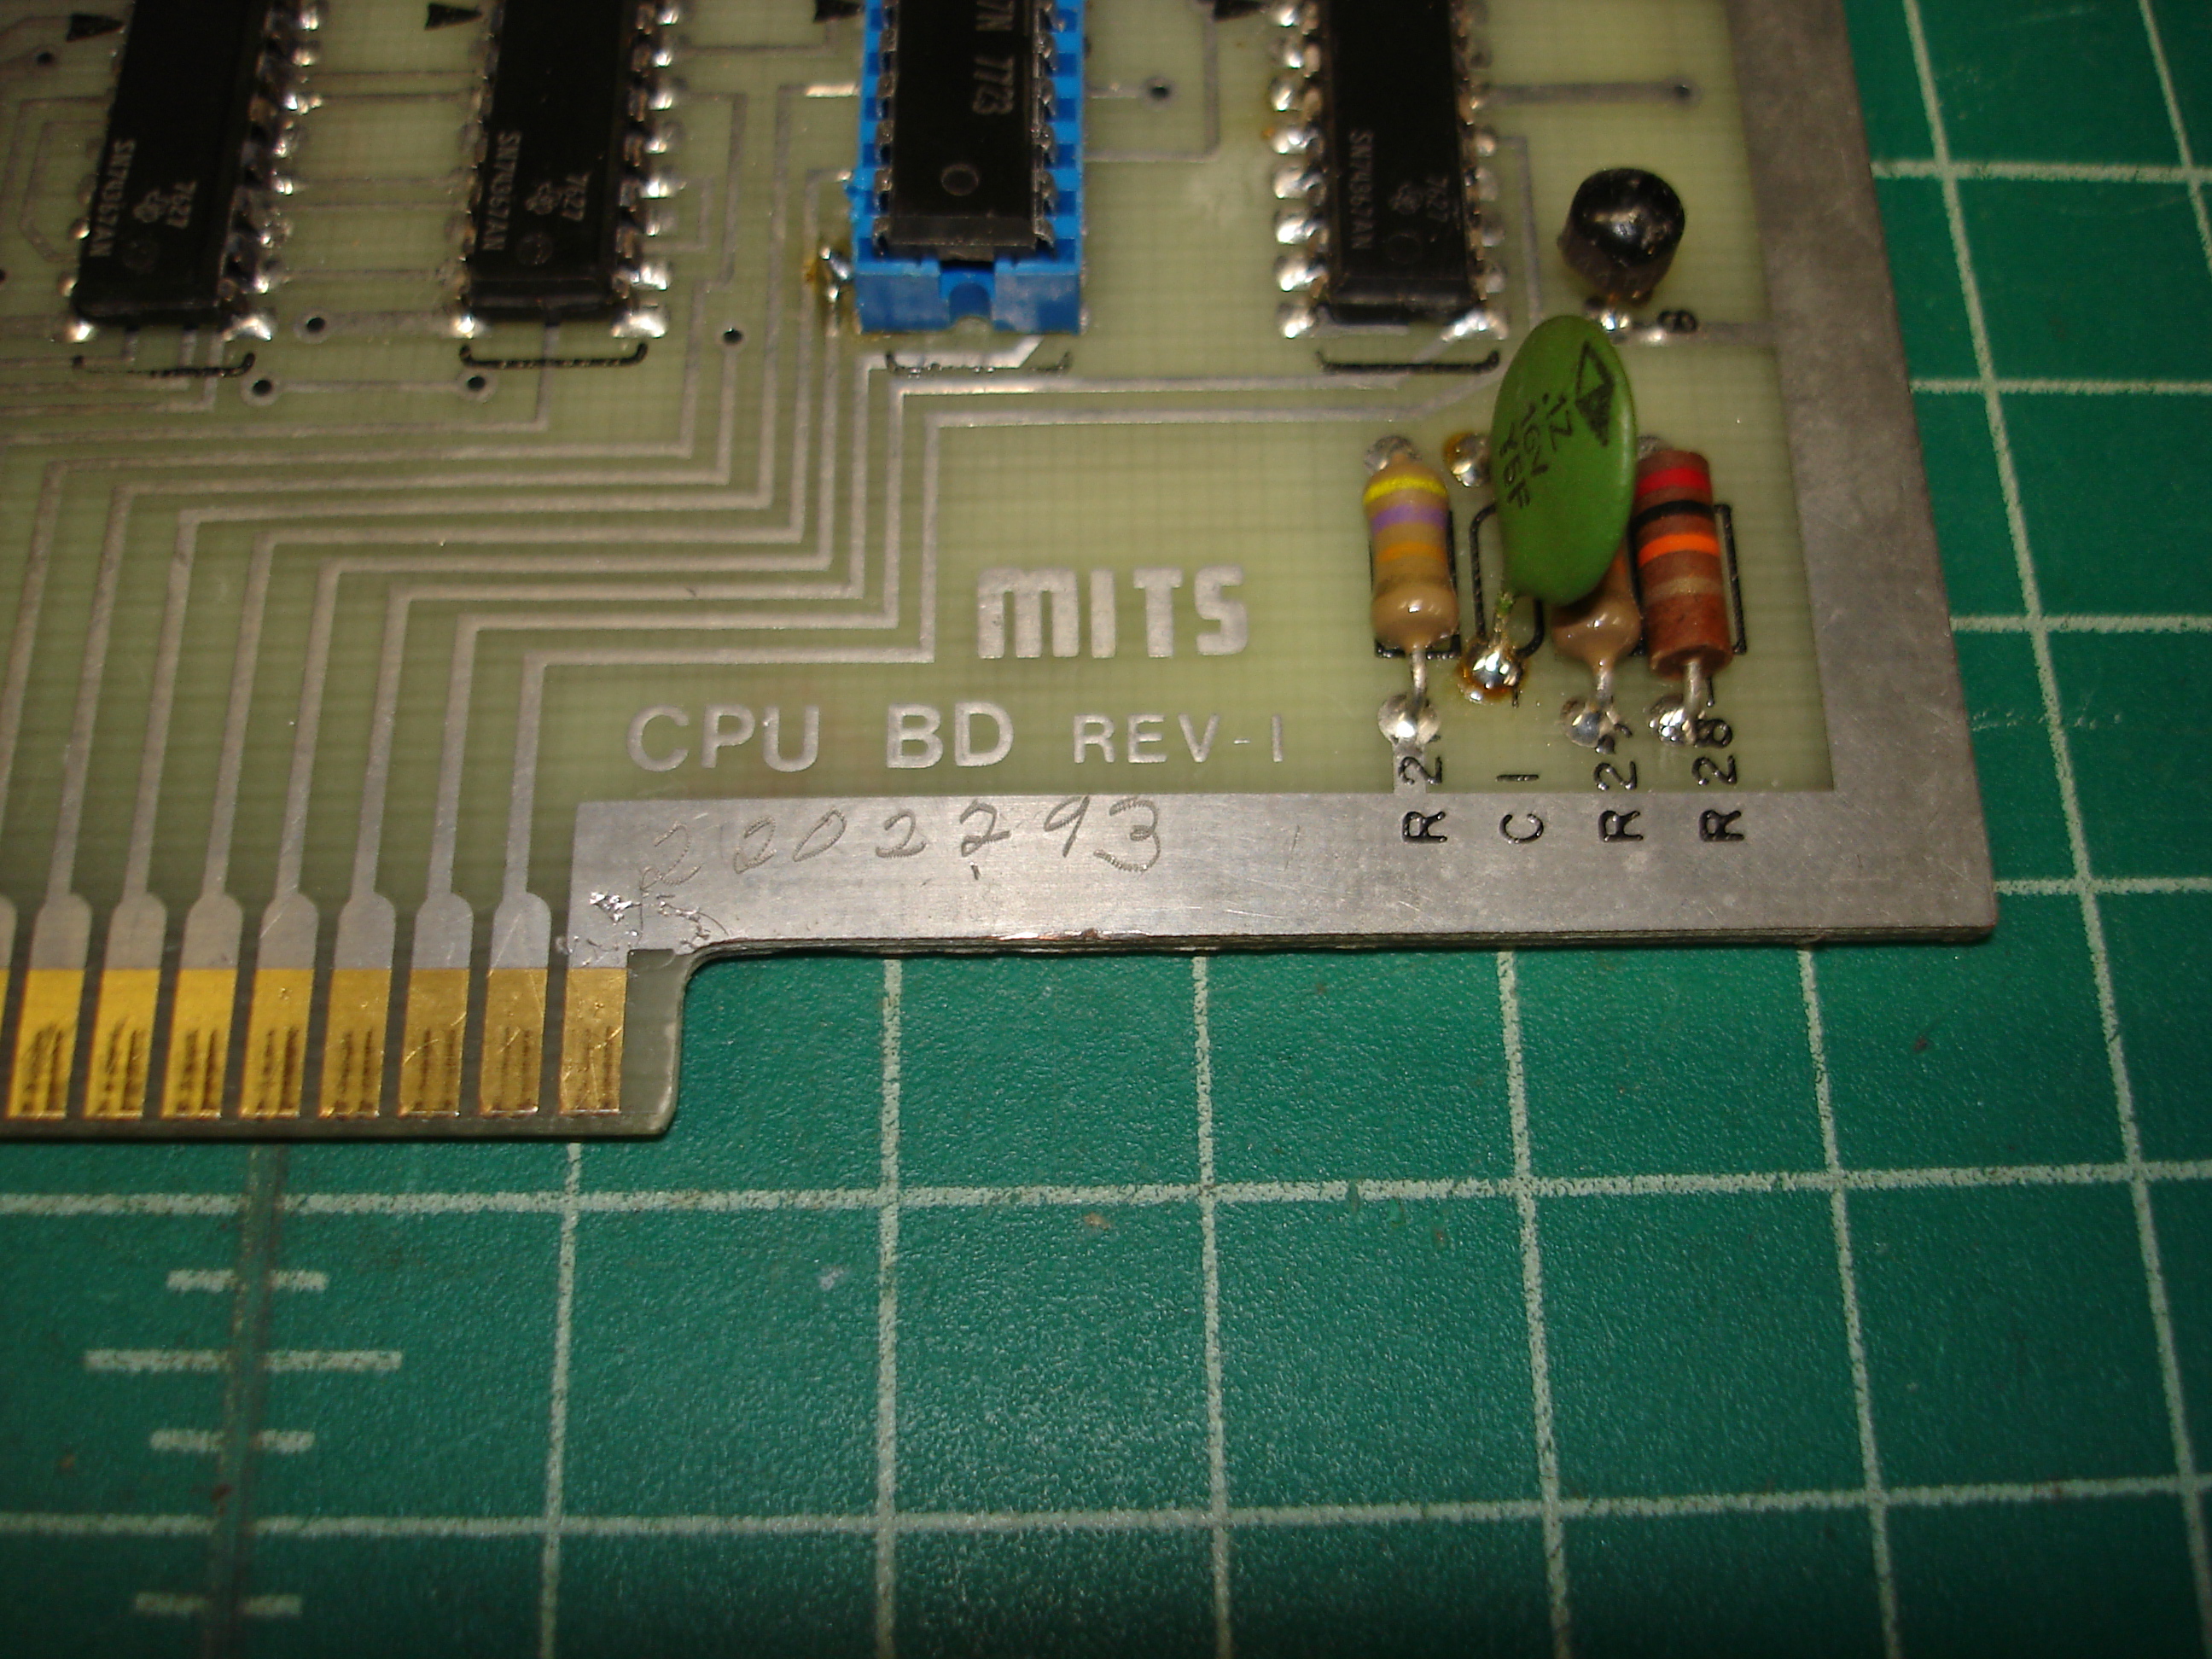
This CPU board is an early revision 1 board, before MITS added solder mask. This points toward late revision 0 era, before the 8800A transition. The CPU board was assembled nicely, and retains the original clock generator circuit. The original white ceramic Intel 8080A looks nice!
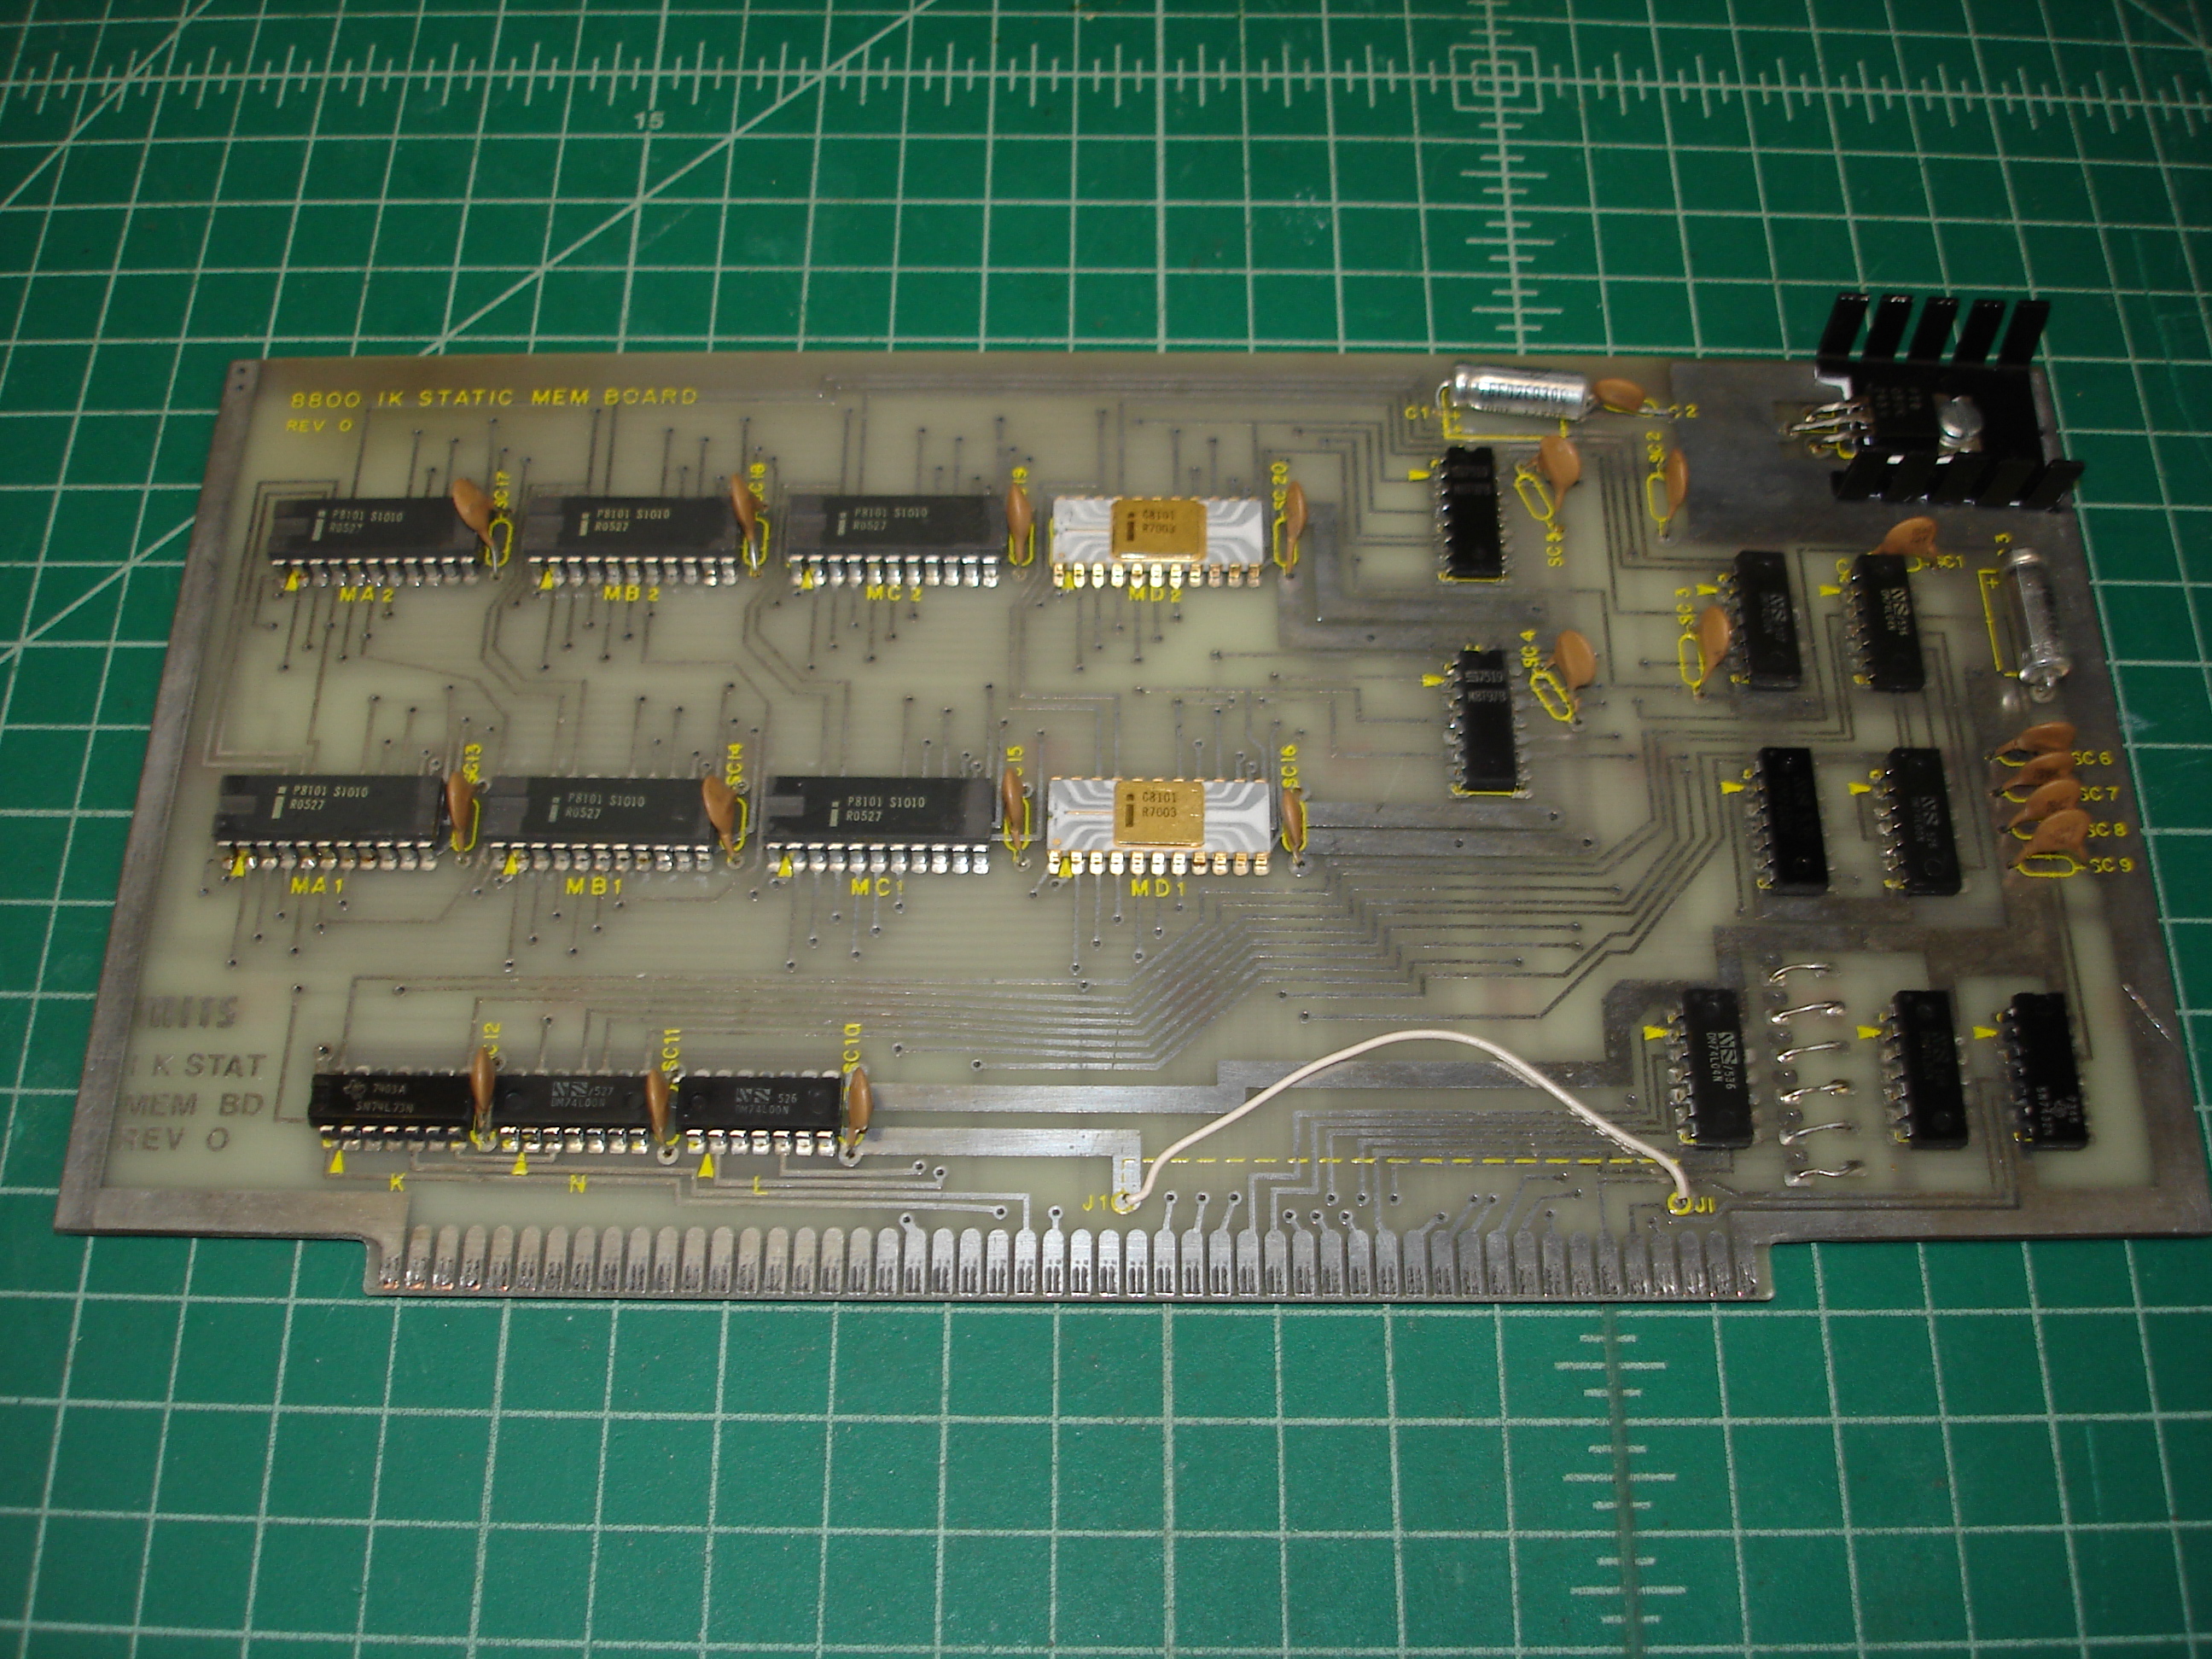
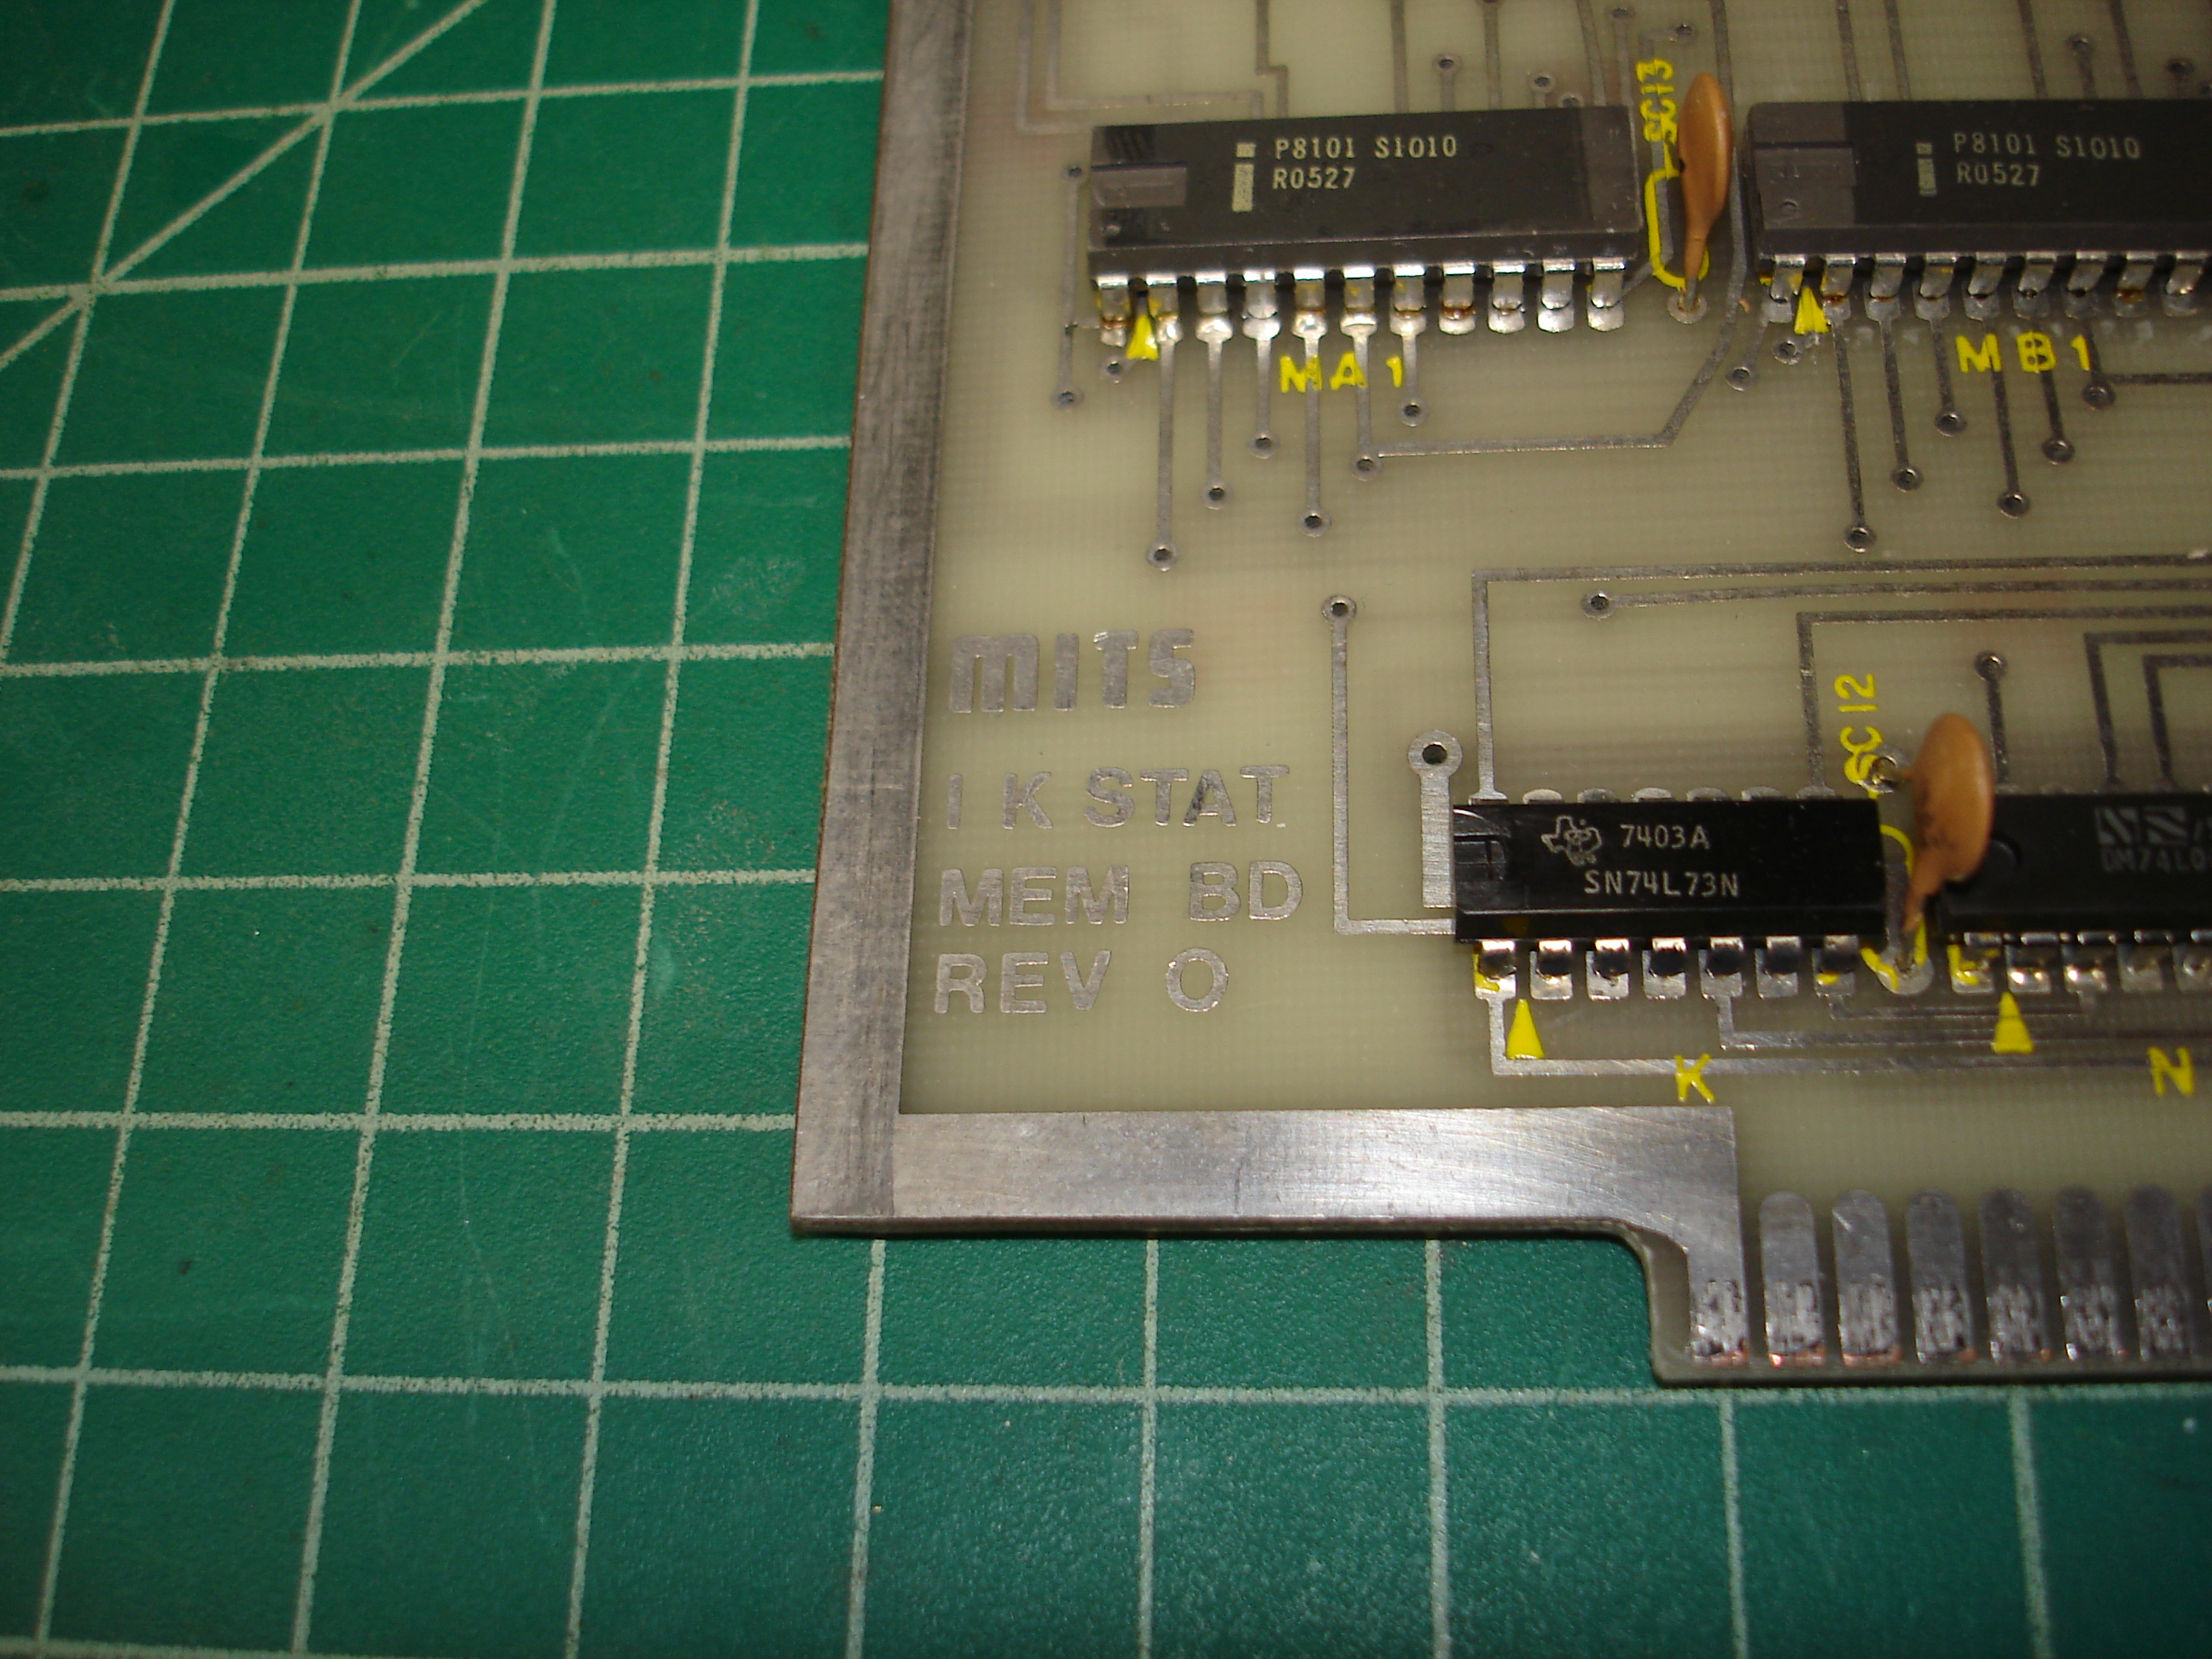
Above is the Altair’s only memory: a 1K static RAM board using Intel 2101 style chips. The white ceramic/gray trace Intel C8101s are likely the pair MITS provided with the original kit! This board has been expanded to the full 1K. All of the static RAMs have been soldered directly, without sockets, which was a pretty bold move for an expensive chip!
Running and Expansion
With repairs completed and the power supply thoroughly load tested, the CPU and 1K static RAM boards were installed, and the system was brought up:
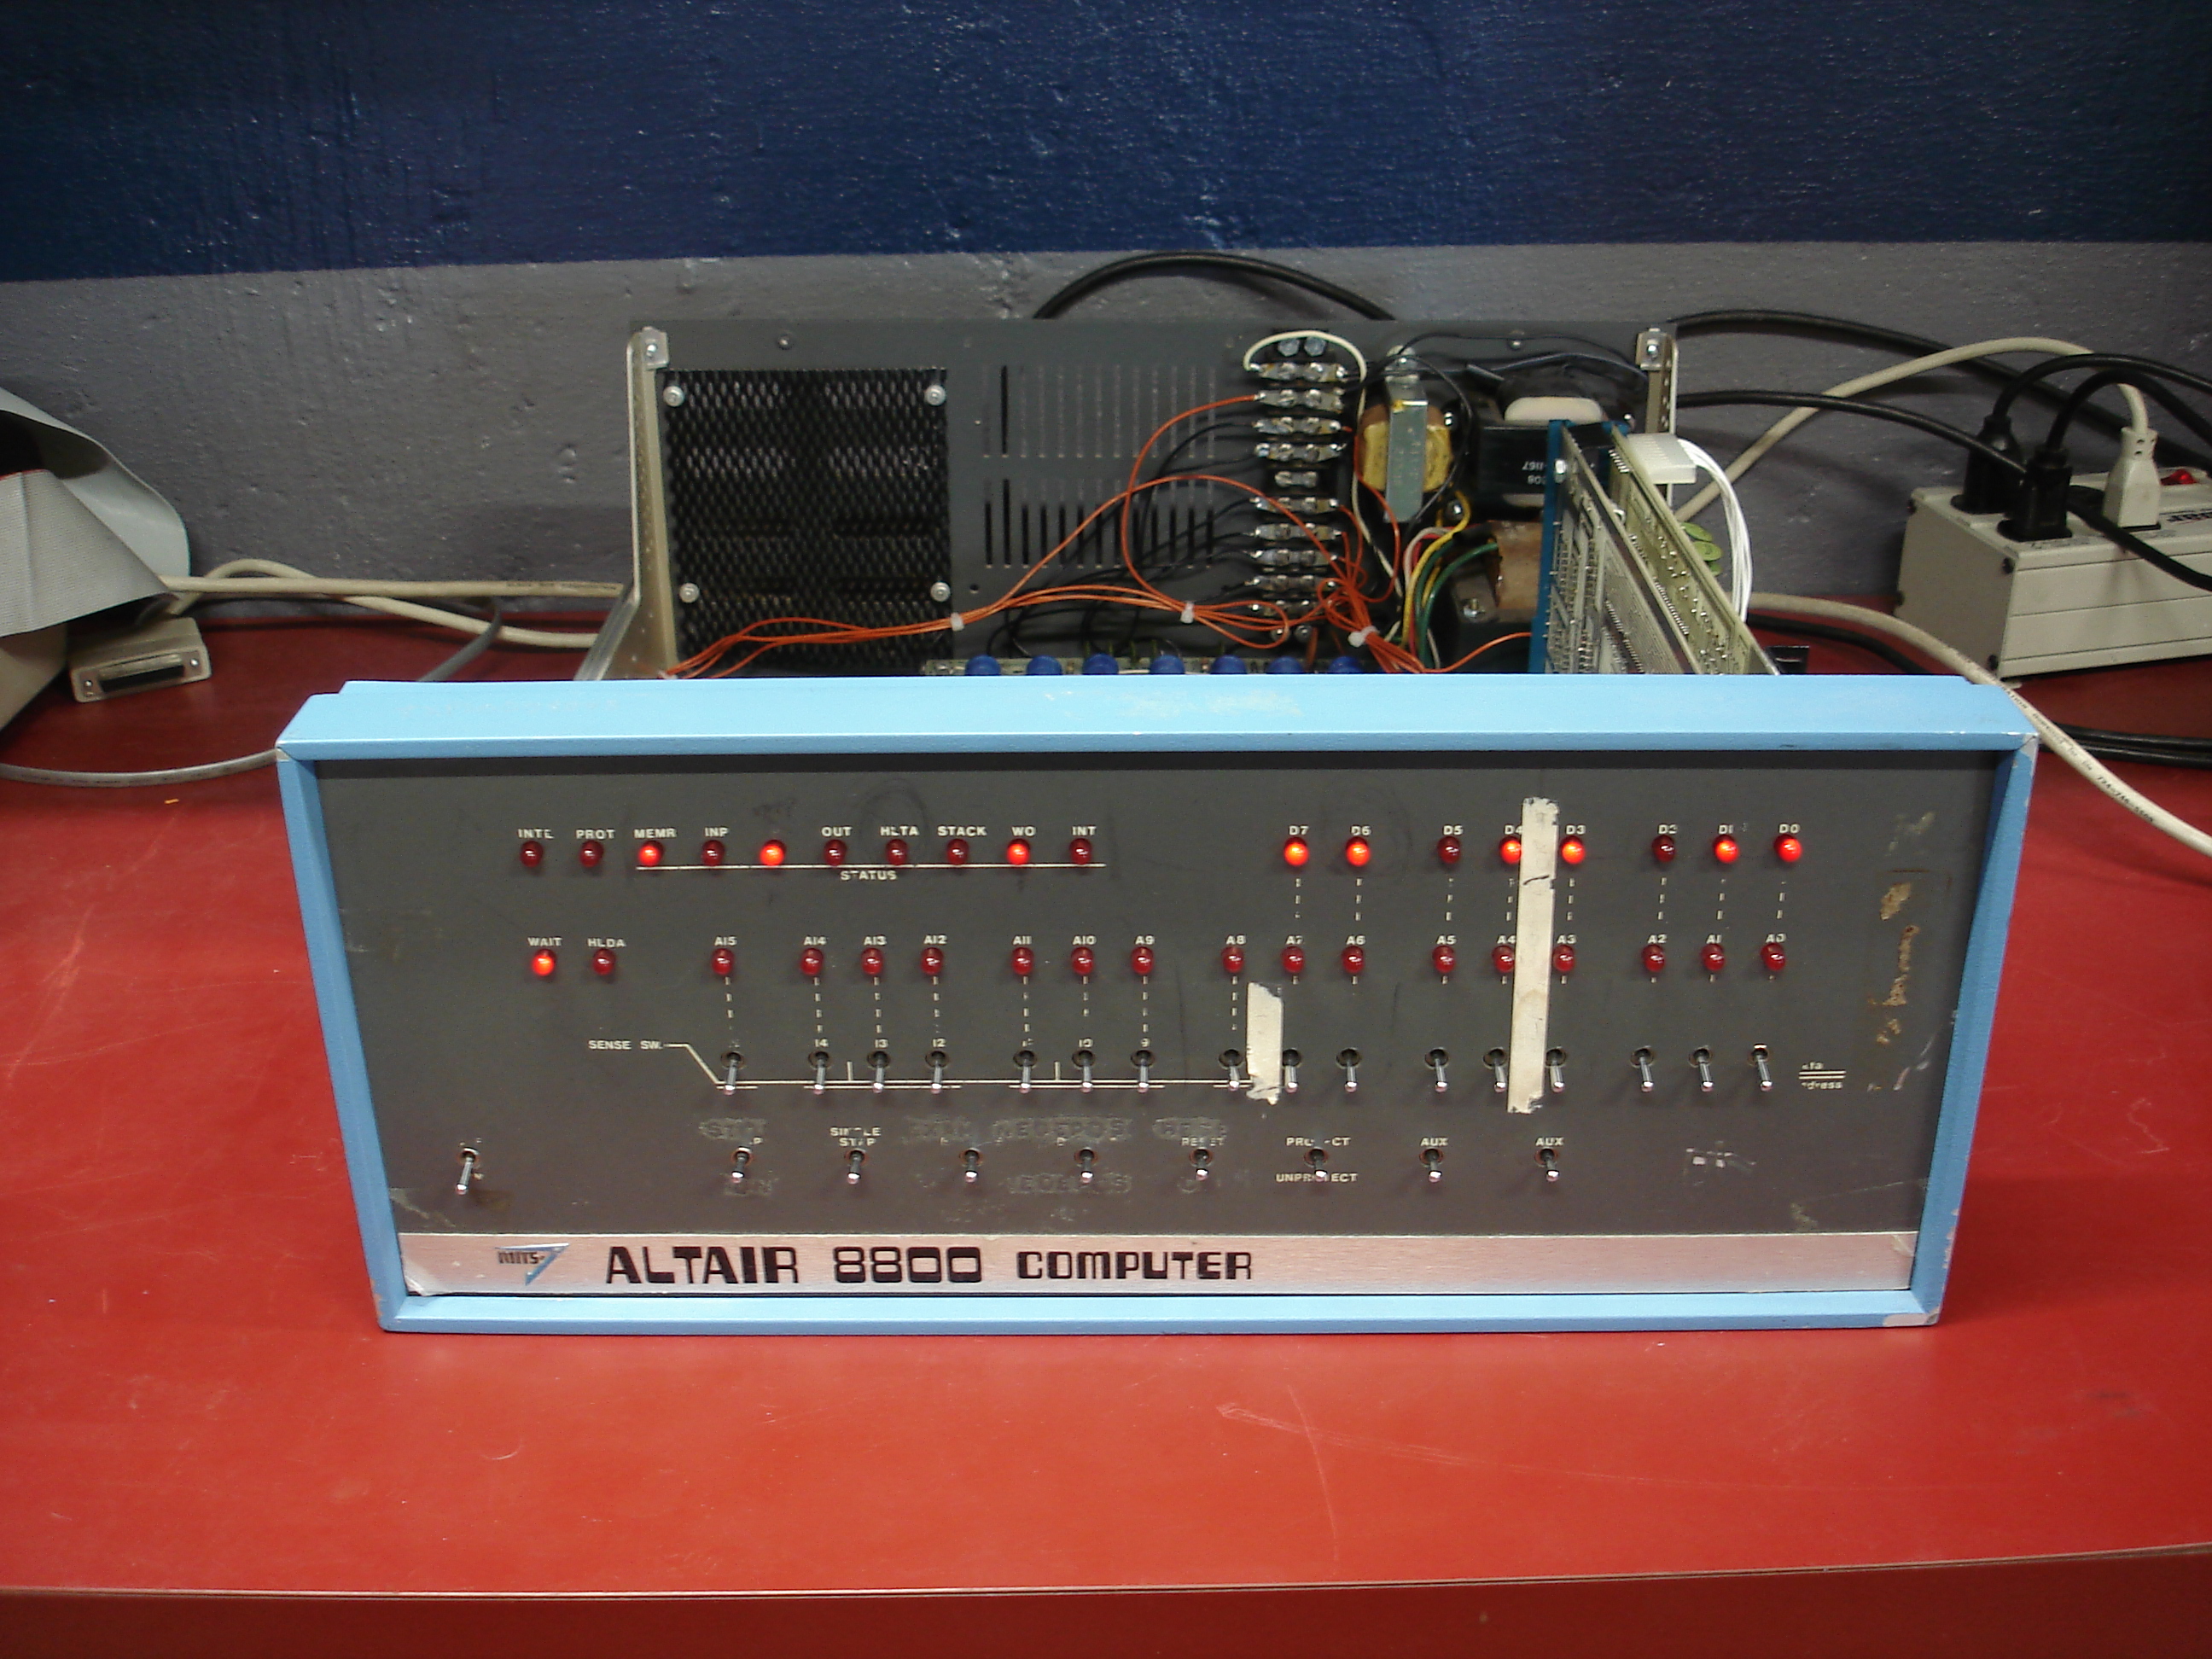
Success! The Altair, as shown above, was running a toggle-in test program to check the function of the front panel sense switches. The opcode for an IN instruction (0xDB in hex, or 333 in octal) can be seen on the data lights. Since the Altair 8800 lacks a front panel lamp register, I was having it store the result in RAM, and then examining that location after running the program.
This test shows the machine is basically working, but I like to perform more complete tests before sending a system on its way. This Altair only had two S-100 card slots populated, though! I did not want to solder more sockets in as it’s so incredibly rare to find one that’s never been expanded. I decided to wire wrap a board to help out:

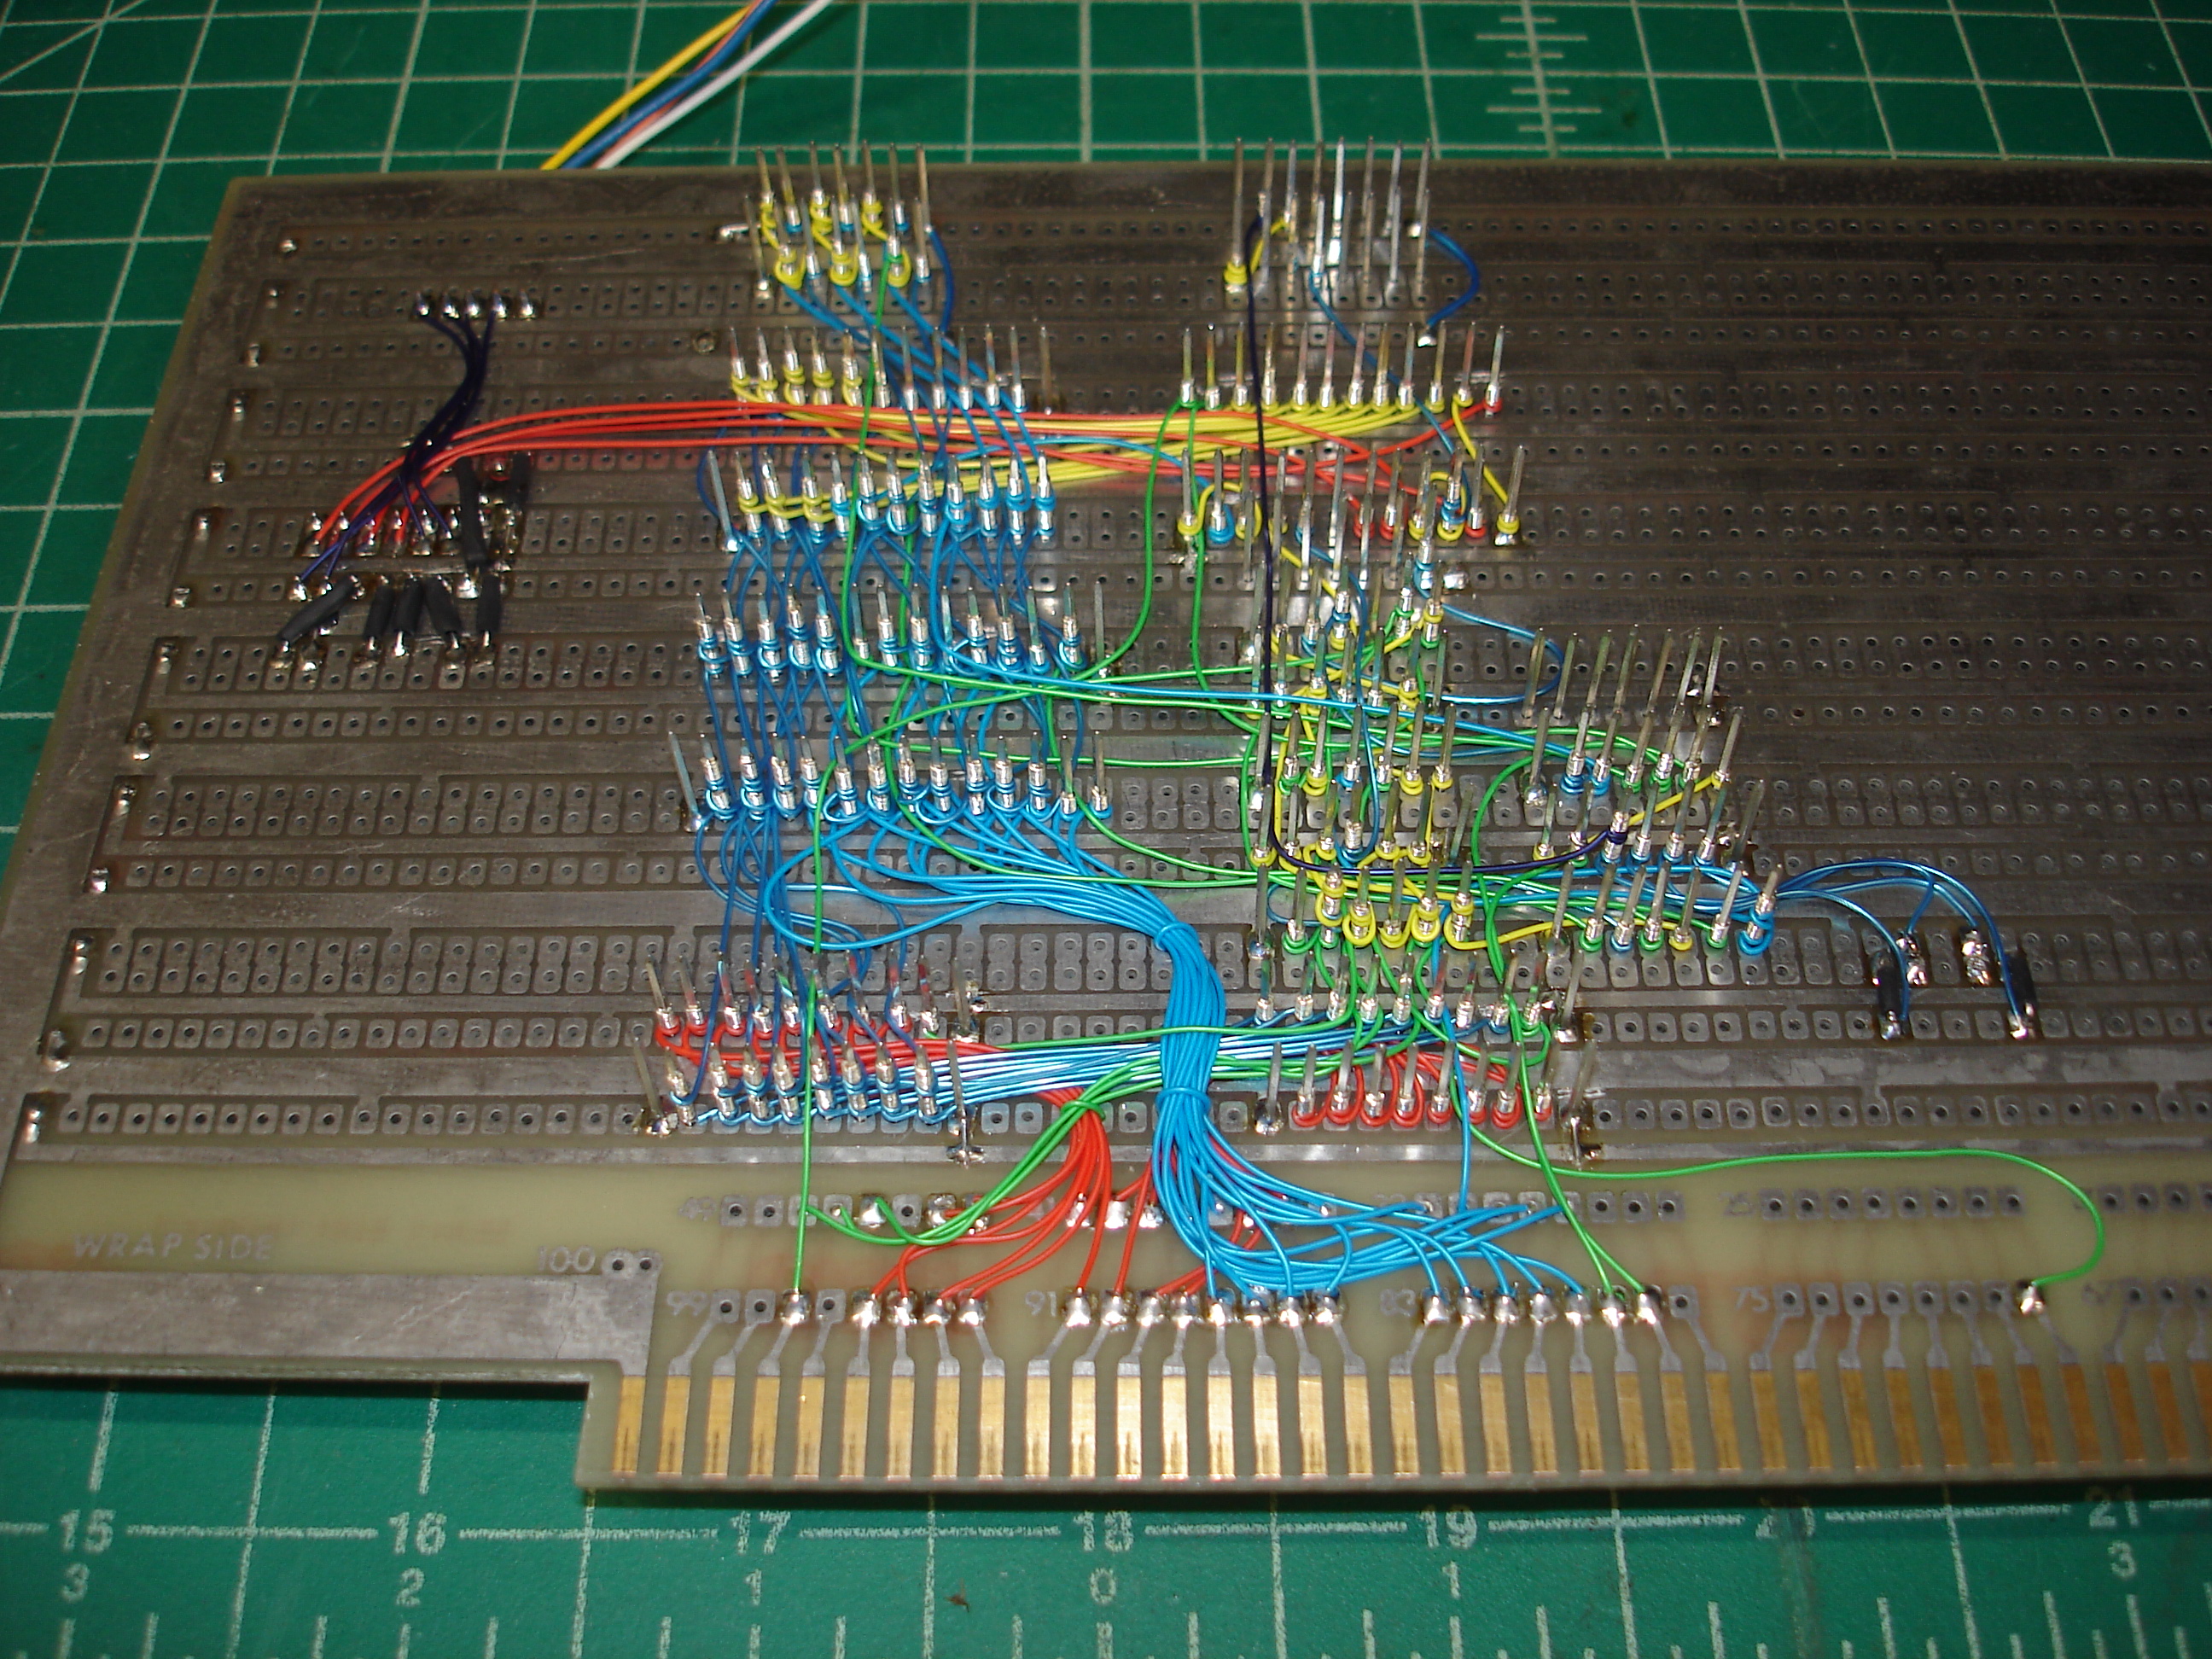
The multifunction test board was constructed on an old Seals Electronics S-100 prototyping board, and contains the following:
- 2K of ROM in a single 2716-type EPROM
- 32K of static RAM in a single 62256-type device
- MITS 88-2SIO compatible serial port using a Motorola 6850 ACIA
- MAX232 level shifting for the serial port
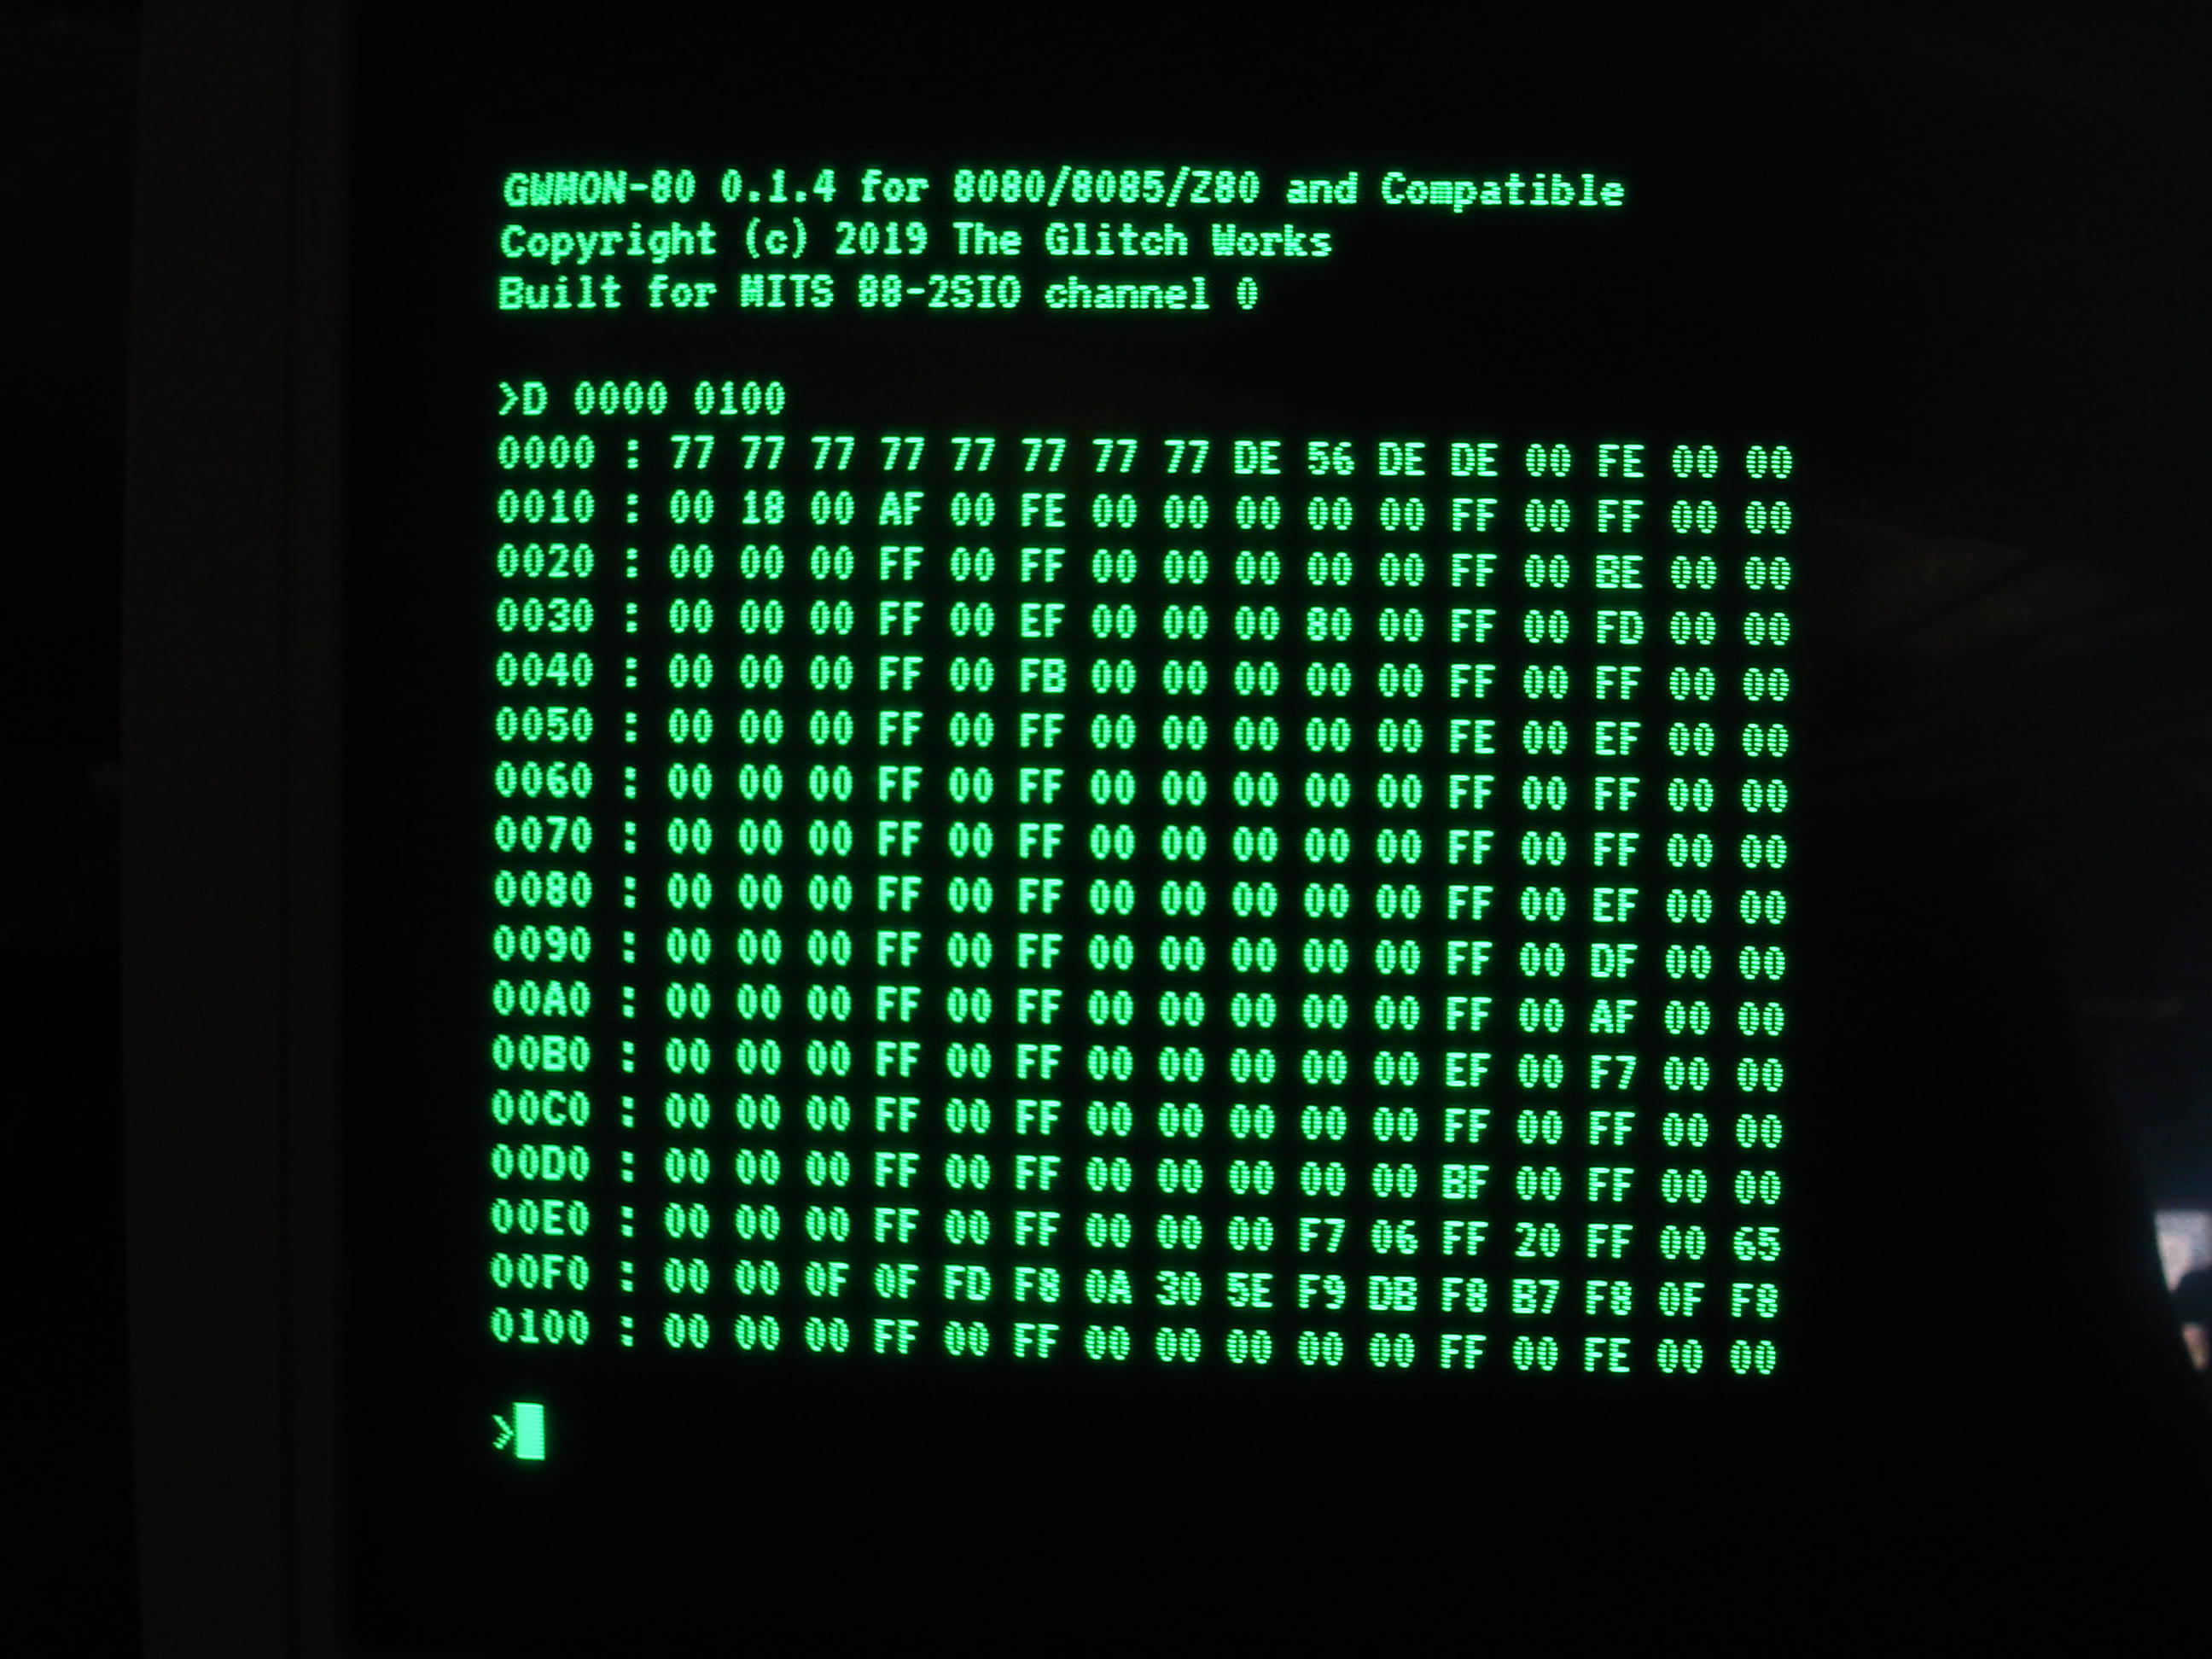
This single card replaces what would’ve been at least four cards, and more likely six or even ten cards, if using vintage boards! It allows this unexpanded Altair 8800 to act as a pretty well equipped machine. The EPROM contains GWMON-80, configured to use a serial channel compatible with the first port on a MITS 88-2SIO:
The tested and working multifunction board got a printed label, so folks encountering it in the future would know what it did:
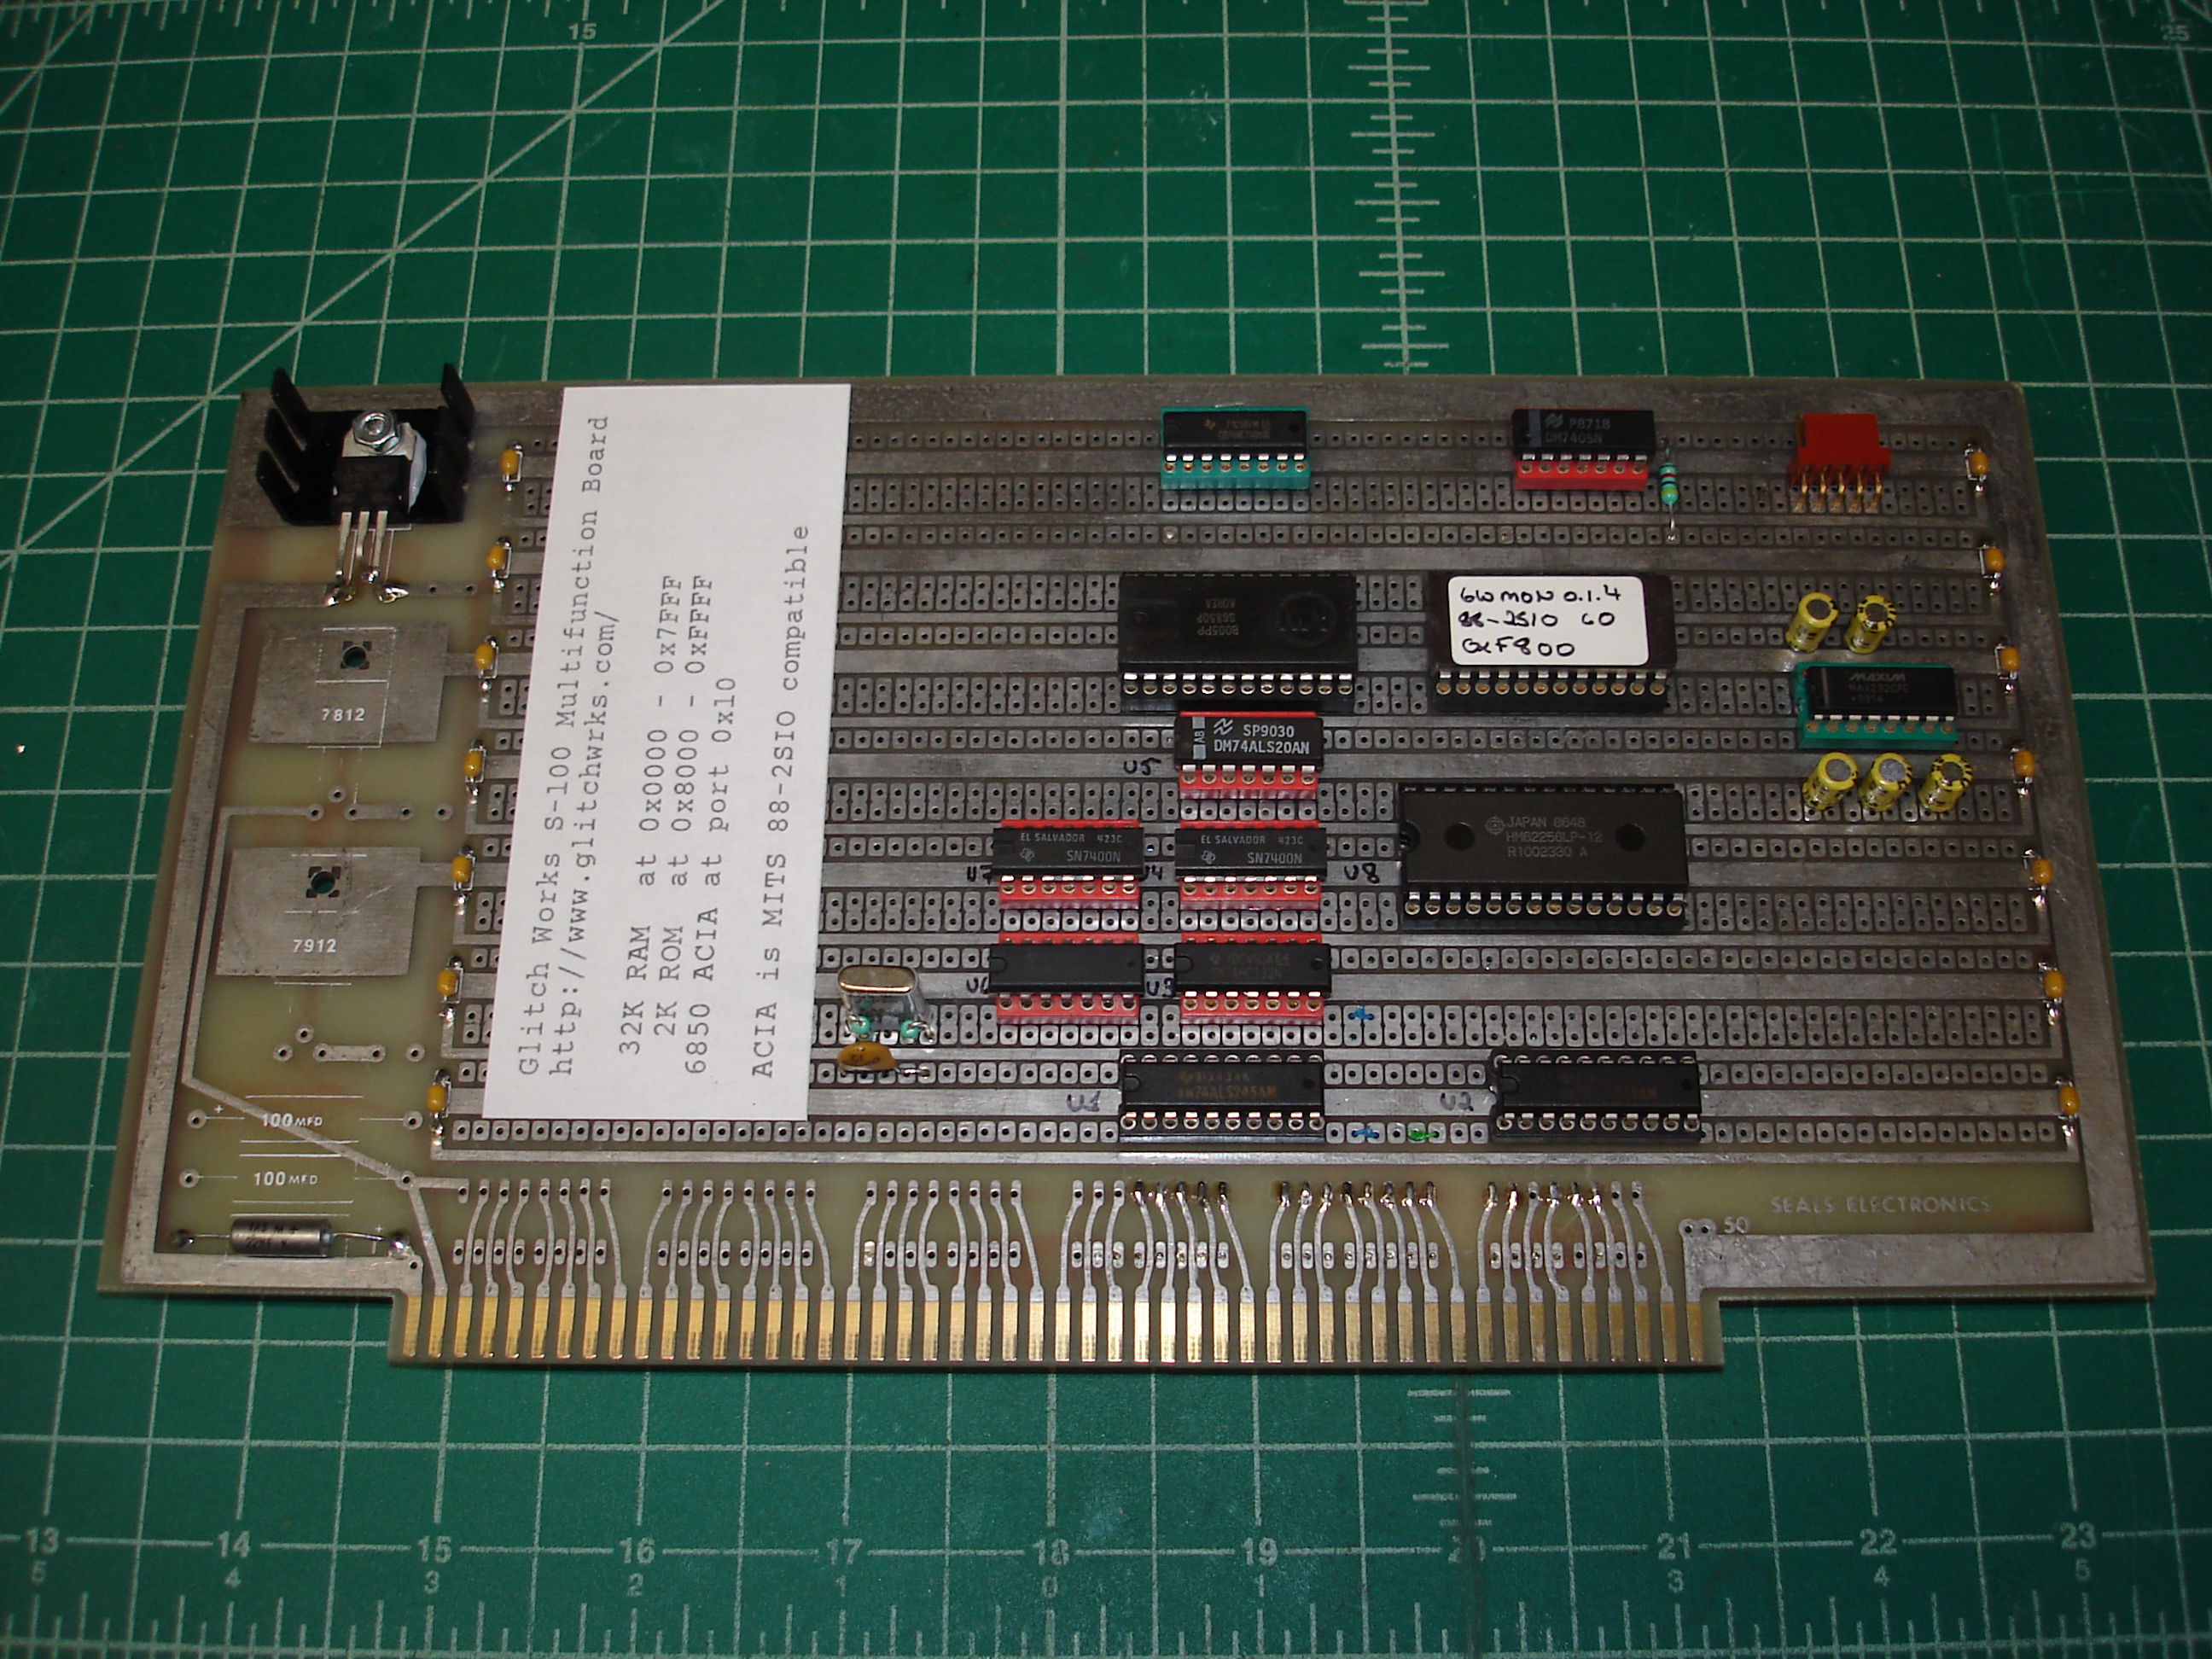
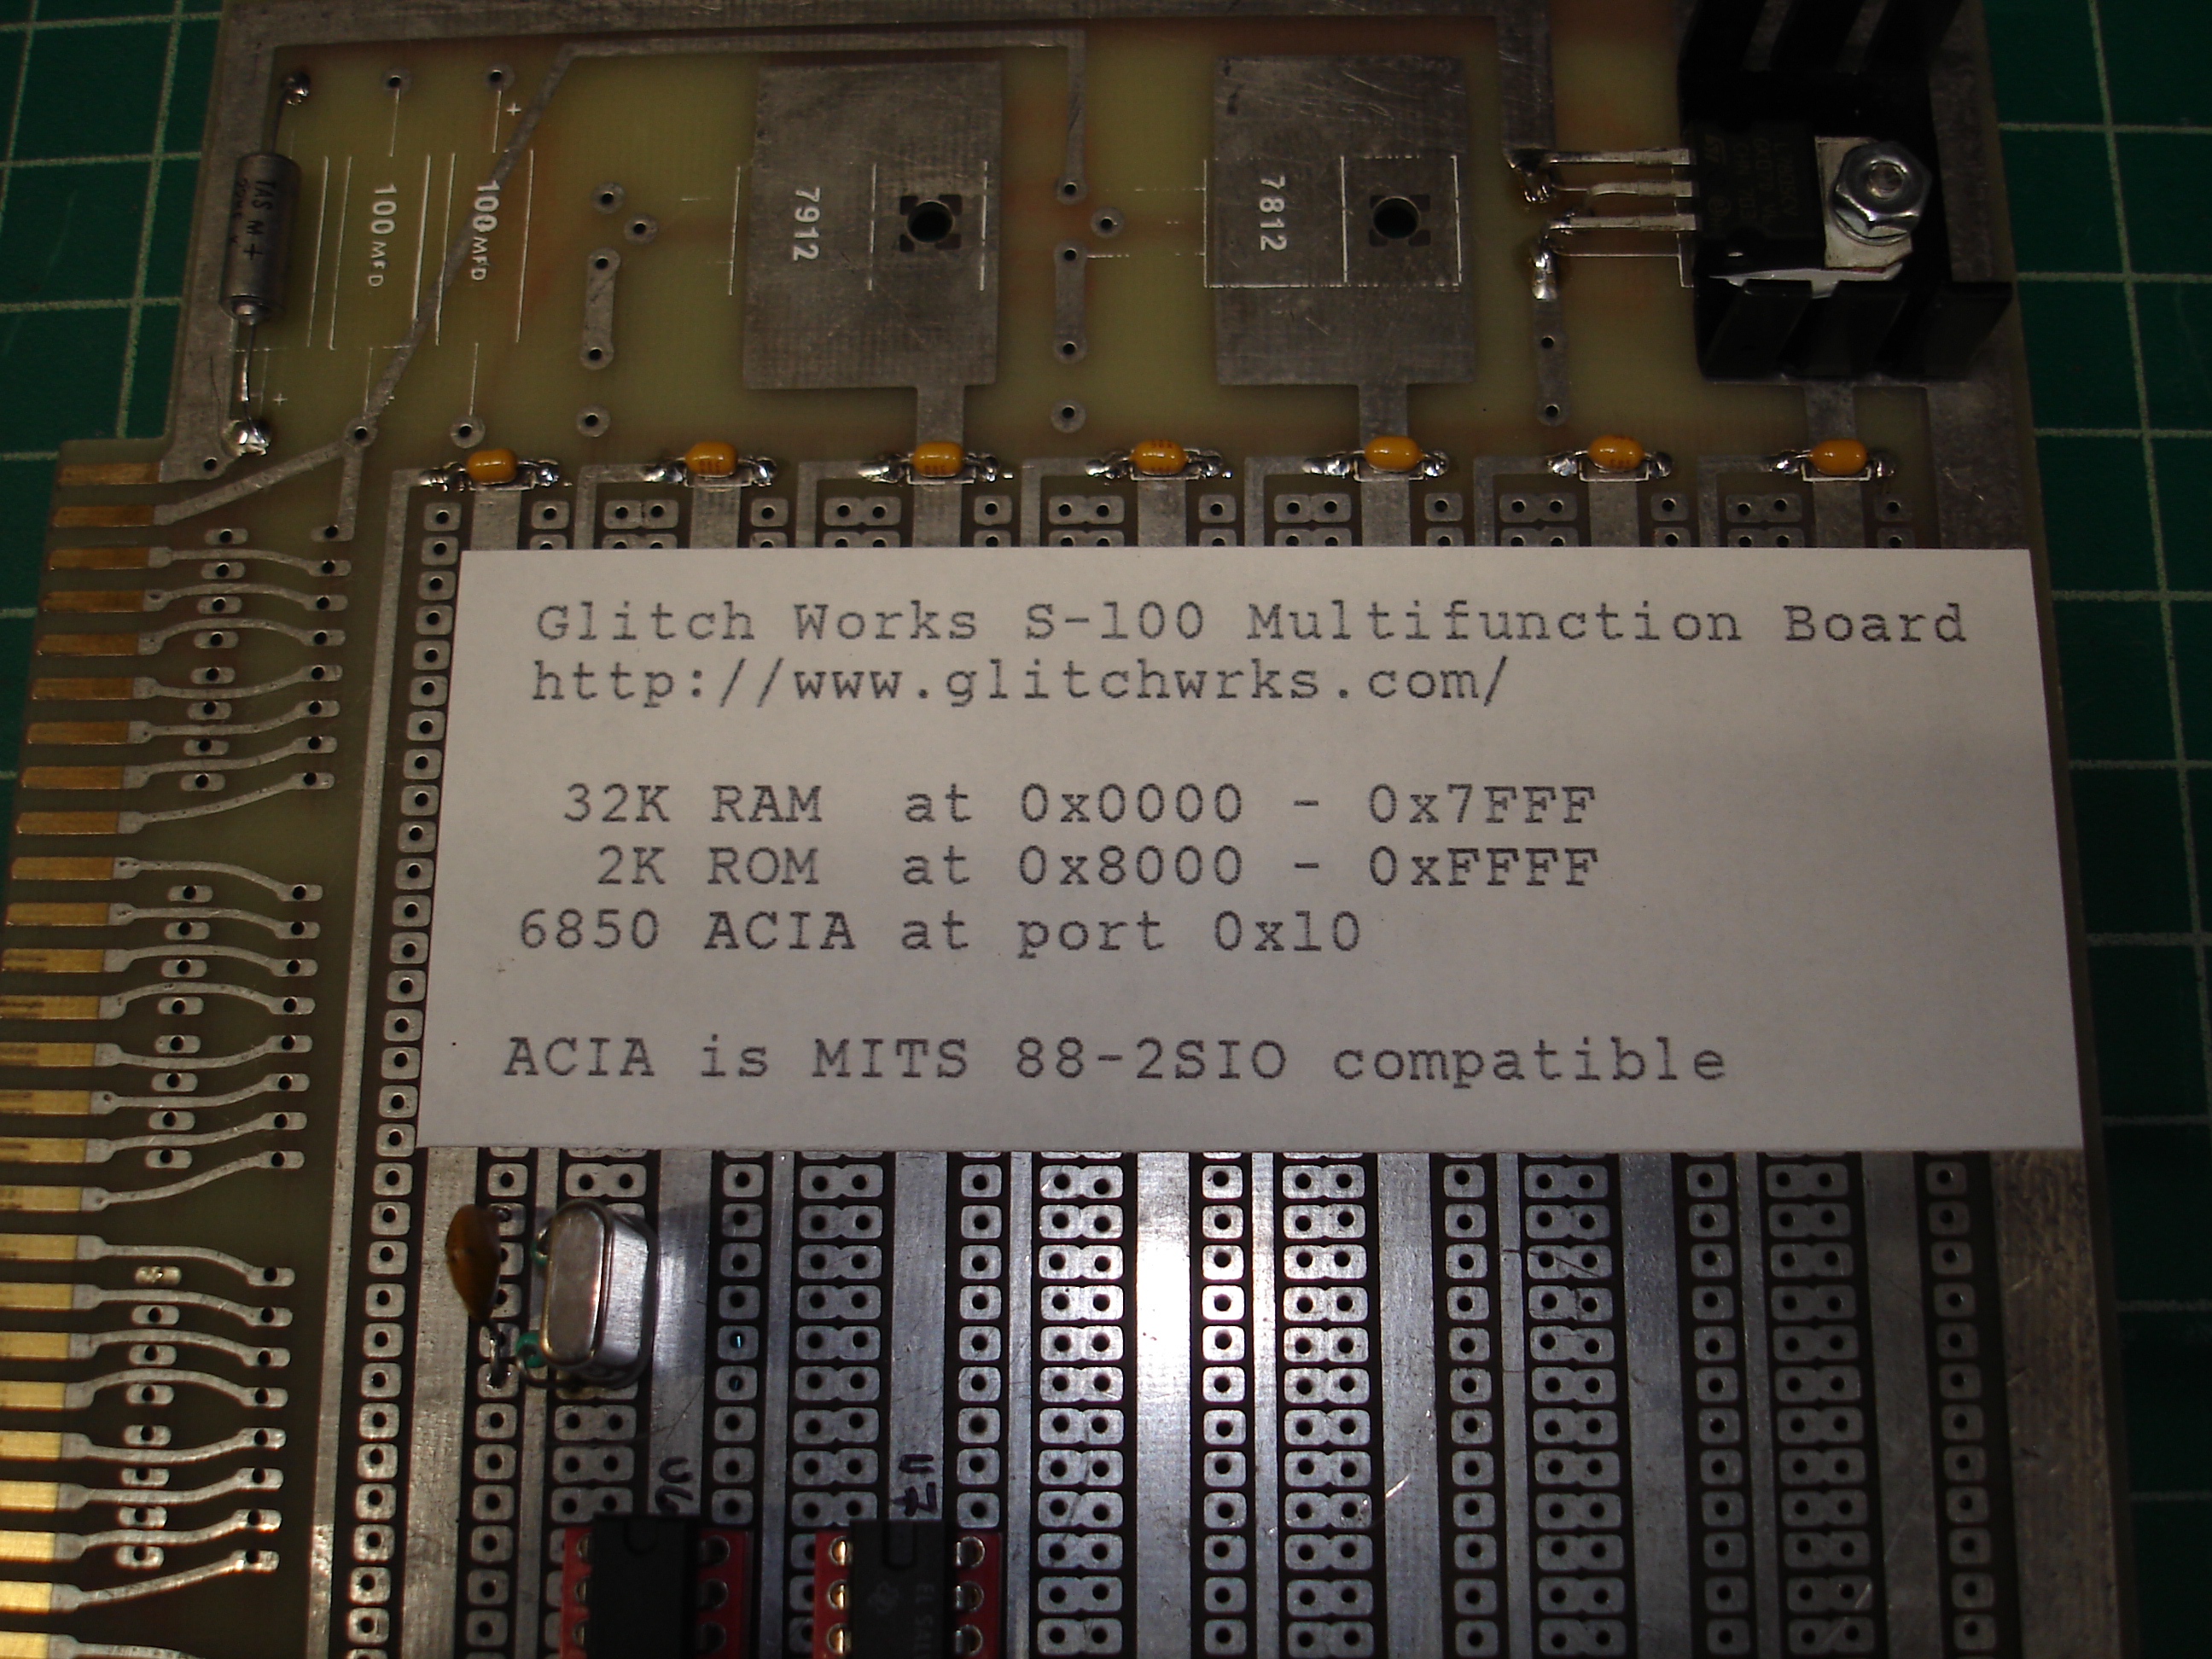
I’ve encountered too many nicely constructed S-100 protoboards with zero documentation, and been forced to either reverse-engineer them, or give up and recycle them for parts! Hopefully putting a label on it will make that less likely to happen.
Running MITS BASIC
With a serial port and expanded RAM, it’s possible to load MITS BASIC for the Altair:
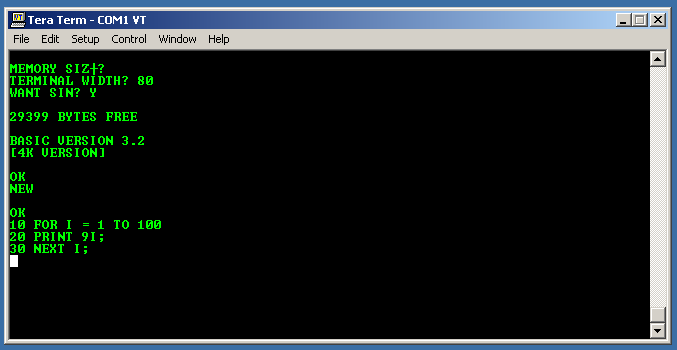
The above shows MITS 4K BASIC loaded and running on the Altair 8800, using the multifunction board. Bill Degnan has instructions for doing so on his site, under TIPS for Loading MITS 4K BASIC 3.2, along with links to the files. I used TeraTerm running under Windows XP as that’s what Bill used.
MITS 4K BASIC runs just fine:
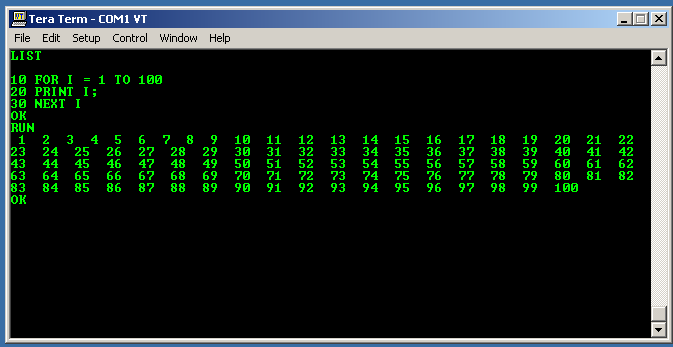
With that, the Altair 8800 was closed up and went on to its new home. Hopefully the machine gets used! I decided not to keep this system as I would’ve ended up expanding it, and I felt that a completely unexpanded, original Altair 8800 needed to stay like that.
S-100 slots added